Advertisement
Quick Links
DFIHB001 Durafit Sturdy Motorized Treadmill
Special tips:
1.
Before installation and operation, please read this operation manual carefully.
2.
It is important your treadmill receives regular maintenance to prolong its useful
life. Failing to regularly maintain your treadmill may void your warranty.
3.
Please save this manual for future reference.
Operating Instructions Manual
Advertisement

Related Manuals for Durafit DFIHB001


Summary of Contents for Durafit DFIHB001
- Page 1 DFIHB001 Durafit Sturdy Motorized Treadmill Operating Instructions Manual Special tips: Before installation and operation, please read this operation manual carefully. It is important your treadmill receives regular maintenance to prolong its useful life. Failing to regularly maintain your treadmill may void your warranty.
-
Page 2: Table Of Contents
Table of Contents …………………………………………………………………2 Brief Description ……………………………………………………………2 Main Technical Features ……………………………………………………………………3-4 Tips for safety …………………………………………………………………………4 Installation ……………………………………………………………… 4-6 Use and Operation …………………………………………………………………… 6-8 Maintenance ………………………………………………………… 8-9 Guides for malfunction ………………………………………………………………………… 9 Warranty ………………………………………………………… 9-10 Error and self-inspection ……………………………………………………………11-12 Installation Sketch - 1 -... -
Page 3: Brief Description
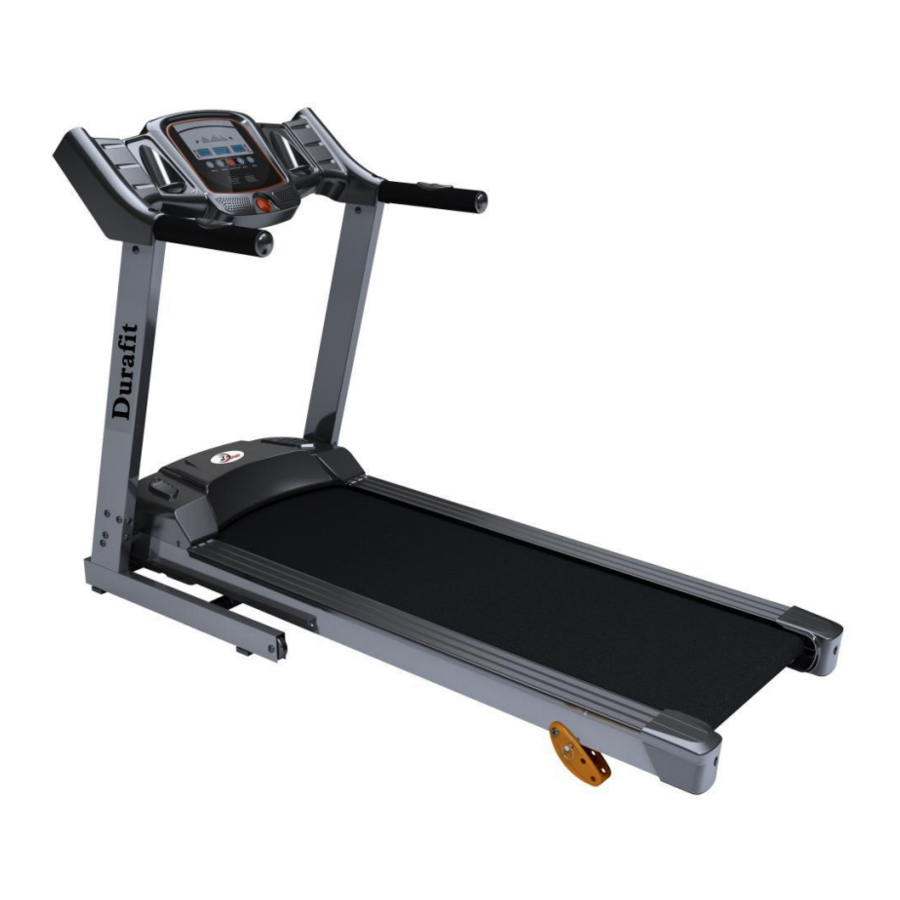
Safety key Footplate Running belt Power switch Running belt adjustor Diagram 1: DFIHB001 Durafit Sturdy Motorized Treadmill 2. Main Technical Features This treadmill is for home use Panel displays speed, time, distance, heart rate, calorie etc. Display mode: 3 LED... -
Page 4: Tips For Safety
1. Tips for Safety Insert the power plug into the socket directly. Current load should be less than 10A. Do not use an extension cord: do not attempt to disable the grounded plug by using improper adapters or in any way modify the cord set. Continuous Operating Time allowed is less than 90 minutes. -
Page 5: Installation
folding. 3.13 To be on the safer side and avoid any oversight, please consult your doctor at first before running, if you have one of the following diseases. a) Cardiopathy, hypertension, sugar diabetes, respiratory disease, smoking, and other chronic diseases, complication disease. If you are over 35 years old and heavier than common weight. - Page 6 (1)“PROG”(could be pressed continuously to your expected mode) Press the “PROG” key once again to enter “12 direct selected programs” there are 12 programs, “P1-P12”. 12 programmes BLUE = SPEED PROGRAM 1 PROGRAM 7 PROGRAM 2 PROGRAM 8 PROGRAM 3 PROGRAM 9 PROGRAM 4 PROGRAM 10...
- Page 7 (2)“speed down” Under running condition, press this key, speed can be speeded down to the exact speed you need, to the first decimal. (3)“speed up” Under running condition, press this key, speed can be speeded up to the exact speed you need, to the first decimal.
-
Page 8: Maintenance
5.3 Treadmill operating instructions 1. Insert power plug into the socket. Turn the switch on the Treadmill frame to “1” position. Place the safe key in the appropriate slot. After a few seconds, panel will show that the machine is ready. 2. - Page 9 6.3 Steps for Adjusting the Running Belt a) Increase the speed to be 5.6km/h. b) Turn the bolts at both right and left sides to be half a circuit or a circuit by the 8mm spanner. ( tighten or loosen based on belt grip – refer Diagrams 1 & 2) c) After adjustment, if running belt still skips, please repeat the steps above.
- Page 10 6.6 Cleaning a) Please power off and pull the plug cap out before cleaning. b) Wipe out the dust stuck on the surface and running board frequently. c) Please clean the surface of frame and running belt with a soft cloth dipped in soap, don’t use things like eradicator and naphtha.(After cleaning, please dry it before use) d) Please take the Motor Protection Cover off every two months and use vacuum dust-collector to suck the dust inside.
-
Page 11: Warranty
7. Troubleshooting Guidelines 7.1 Analyzing and eliminating minor issues Malfunction Reasons Solution Item. Treadmill can’t be started The safety key isn’t in Put the safe key in the right the right position position Turn the electrical switch to “1” The electrical switch is placed to “0”... -
Page 12: Error And Self-Inspection
c) Improper maintenance 9. Error and self-inspection 9.1 Error:Treadmill gives the following error code if anything wrong,please contact the professional service people soon if it happens. - 11 -... - Page 13 - 12 -...
- Page 14 - 13 -...
Need help?
Do you have a question about the DFIHB001 and is the answer not in the manual?
Questions and answers