Table of Contents
Advertisement
Quick Links
Advertisement
Table of Contents

Related Manuals for Drucker Diagnostics QBC 425740


Summary of Contents for Drucker Diagnostics QBC 425740
- Page 1 Capillary Centrifuge ® Operator’s/Service Manual...
- Page 2 Capillary Centrifuge ® Operator’s/Service Manual QBC, QBC Diagnostics, ParaLens, and ParaLens Advance are trademarks of Drucker Diagnostics. Copyright © 2016 by Drucker Diagnostics, and Vacutainer is a trademark of Becton, Dickinson, & Company. 4740-020-004 Rev J...
-
Page 3: Table Of Contents
Table of Contents Section 1 INTRODUCTION ...........................1 1.1 INTENDED USE ............................1 1.2 SUMMARY AND EXPLANATION ........................1 1.2.1 QBC Centrifugal Hematology Tests ......................1 1.2.2 QBC Malaria Test ..........................2 1.3 PRINCIPLES OF THE PROCEDURES ......................2 1.3.1 QBC Centrifugal Hematology Tests ......................2 1.3.2 QBC Malaria Test ..........................3 1.4 WARNINGS AND PRECAUTIONS ........................3 1.5 SYMBOL DEFINITIONS ..........................3 Section 2 SYSTEM DESCRIPTION ........................4... - Page 4 Table of Contents (continued) Section 6 CENTRIFUGATION PROCEDURES ....................15 6.1 MATERIALS PROVIDED ..........................15 6.2 MATERIALS REQUIRED BUT NOT PROVIDED ..................15 6.2.1 QBC Centrifugal Hematology Tests ....................15 6.2.2 QBC Malaria Test ..........................15 6.3 TEMPERATURE REQUIREMENTS ......................15 6.4 CENTRIFUGATION INSTRUCTIONS ......................16 6.4.1 Affixing Identification Labels .......................16 6.4.2 Loading and Balancing Rotor ......................16 6.4.3 Centrifugation Procedures ........................16 6.4.4 Testing Time ............................17...
-
Page 6: Section 1 Introduction
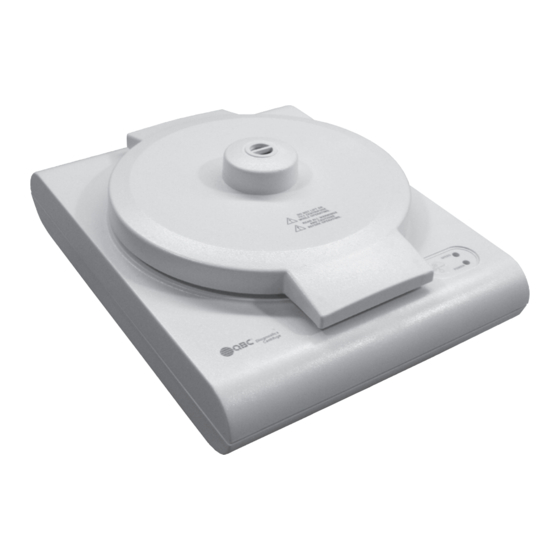
Section 1 INTRODUCTION 1.1 INTENDED USE The QBC Capillary Centrifuge (Figure 1-1) is an ultra-compact instrument, designed to spin down blood specimens for QBC centrifugal hematology tests or the QBC Malaria Test. Figure 1-1. QBC Capillary Centrifuge, Model 425740. 1.2 SUMMARY AND EXPLANATION 1.2.1 QBC Centrifugal Hematology Tests QBC centrifugal hematology tests are based on a high-precision glass capillary tube containing an... -
Page 7: Qbc Malaria Test
1.2.1 QBC Centrifugal Hematology Tests (continued) Coated reagents in the QBC blood tube enhance the visual separation between cell layers and provide differential staining so that tubes can be read by non-automatic and automatic QBC analyzers. 1.2.2 QBC Malaria Test The centrifugal test for detecting malaria parasites is based on a high precision glass capillary tube containing an equally precise plastic float. -
Page 8: Qbc Malaria Test
1.3.1 QBC Centrifugal Hematology Tests (continued) For technical assistance with QBC hematology tests contact: +1-866-265-1486 (toll free); +1-814-692-7661 Drucker Diagnostics 168 Bradford Drive, Port Matilda, PA 16870 U.S.A. 1.3.2 QBC Malaria Test The QBC Capillary Centrifuge is designed to spin up to 20 QBC Malaria Test tubes at the force-time requirements needed to cause the infected cells to concentrate in a narrow area of the tube for easy identification. -
Page 9: Section 2 System Description
Section 2 SYSTEM DESCRIPTION 2.1 COMPONENTS The QBC Capillary Centrifuge is shipped with an external plug-in power pack that supplies the required direct current (D.C.) voltage to power the motor, circuit board and other internal systems of the instrument. 2.2 CENTRIFUGE DESCRIPTION The QBC Capillary Centrifuge is a compact, low-profile unit measuring less than 13 centimeters (5.1 in.) high with cover down, and housed in a sturdy plastic case. -
Page 10: Power Pack
2.2 CENTRIFUGE DESCRIPTION (Continued) A green light emitting diode (LED) for “SPEED” and a yellow LED for “POWER” adjacent to the “ON/OFF” button provide visual indicators of power circuit status. Condition of each LED (On, Off, or Flashing) based on the status of power, lid latching, rotor speed, etc., is described in Sections 4.5 and 9.5. -
Page 11: Section 3 Installation And Set-Up
Select the appropriate line cord and discard the unused cord. 3.2 INSTALLATION AND SERVICE For first-time users of the QBC System, a representative of Drucker Diagnostics or your local QBC System distributor will normally install the required equipment; the installer will also train operating personnel in proper use of the equipment. -
Page 12: Connecting Power Unit
3.3 CONNECTING POWER UNIT Be sure the Power Pack is not plugged in. Connect the power pack output cable plug to the power input cable on the right side of the centrifuge (Figure 3-2). Using the appropriate line cord (Figure 3-3), connect the female plug to the receptacle in the side of the Power Pack and the male plug to a grounded AC power receptacle. -
Page 13: Rotor Assembly
3.4 PLACEMENT AND OPERATING EQUIPMENT (continued) WARNING IF THIS EQUIPMENT IS USED IN A MANNER INCONSISTENT WITH THE MANUFACTURER’S SPECIFICATIONS, THE PROTECTION AGAINST HAZARDS THIS DEVICE PROVIDES MAY BE IMPAIRED. Be sure to keep the operating area within the temperatures listed below. •... -
Page 14: Section 4 Centrifuge Operation
Section 4 CENTRIFUGE OPERATION 4.1 GENERAL PROCEDURES Before starting the QBC Capillary Centrifuge, be sure the rotor cover is installed and the lid is closed and latched. The centrifuge will not start unless the lid is latched. • To start the 5-min spin, press and release the ”ON/OFF”... -
Page 15: Qbc Malaria Test
4.2 BETWEEN-SPIN TIME DELAY (continued) 4.2.2 QBC Malaria Test • If room temperature is less than 33 ºC (< 91 ºF), wait 1 min between spins. • If room temperature is 33 - 35 ºC (91 - 95 ºF), wait 3 min between spins. •... -
Page 16: Emergency Unlatching Of Lid
4.3 TUBE LOADING AND BALANCING (continued) Before closing the lid, INSTALL THE ROTOR COVER. To secure the cover, turn the cover knob clockwise onto the motor shaft (Figure 4-4). Continue turning the knob until the cover is snug. DO NOT OVERTIGHTEN. CAUTION NEVER ATTEMPT TO CENTRIFUGE QBC TUBES UNLESS THE COVER... -
Page 17: Precautions And Hazards
4.6 PRECAUTIONS AND HAZARDS The QBC Capillary Centrifuge is intended for in vitro diagnostic tests. In order to obtain properly centrifuged specimens and to avoid damage or hazards, the basic operating precautions below should be observed. • For smooth operation and long service life, always place blood tubes on the rotor in a balanced array. •... -
Page 18: Section 5 Specimen Collection
Section 5 SPECIMEN COLLECTION 5.1 GENERAL The QBC Capillary Centrifuge is designed for the preparation of specimen tubes for QBC hematology and the QBC Malaria Test. Detailed directions on blood collection, preparation, and stability for each type of test are contained in the package insert supplied with QBC hematology tubes and the QBC Malaria Test. -
Page 19: Specimens For Qbc Malaria Test
5.4 SPECIMENS FOR QBC MALARIA TEST Collect capillary blood from the finger or foot, directly into the QBC Malaria Test tube; or draw venous blood and collect into the tube. Fill the tube with 55 to 65 µL of blood. QBC Malaria Test tubes are pre-coated with sodium heparin and dipotassium EDTA anticoagulants. -
Page 20: Section 6 Centrifugation Procedures
Section 6 CENTRIFUGATION PROCEDURES 6.1 MATERIALS PROVIDED The QBC Capillary Centrifuge is designed to spin up to 20 QBC-type blood tubes over a fixed time of 5 min. The centrifuge is supplied with a Power Pack and the test accessories listed in Section 3.1. 6.2 MATERIALS REQUIRED BUT NOT PROVIDED 6.2.1 QBC Hematology Tests In addition to a QBC Reader or Analyzer, the following disposables and test accessories are required for QBC... -
Page 21: Centrifugation Instructions
6.4 CENTRIFUGATION INSTRUCTIONS CAUTION DO NOT USE THIS CENTRIFUGE FOR SPINNING MICROHEMATOCRIT OR OTHER CAPILLARY TUBES. THE ROTOR AND COVER ARE DESIGNED TO ACCOMMODATE ONLY QBC TUBES. OTHER TYPES OF CAPILLARIES MAY BREAK, CAUSING BLOOD SPILLS AND LOSS OF SPECIMEN. 6.4.1 Affixing Identification Labels (QBC Malaria Test Only) Before Placing QBC Malaria Test tubes on the... -
Page 22: Testing Time
6.4.4 Testing Time Testing of QBC hematology tubes and QBC Malaria Test tubes promptly after centrifugation is recommended. The delays below, however, will not affect test results. • QBC Hematology Tubes: To obtain accurate cell counts, test hematology tubes in the QBC Analyzer 4 hours after centrifugation. -
Page 23: Section 7 Limitations Of Procedures
Section 7 LIMITATIONS OF PROCEDURES 7.1 QBC CENTRIFUGAL HEMATOLOGY TESTS QBC tests should be performed at temperatures between 20 and 32 ºC (68 and 90 ºF).* If tubes are run at temperatures below 20 ºC, test results may be erroneously high; if tested above 32 ºC, interfaces may become blurred and difficult to detect visually or automatically, depending on the model of QBC analyzer performing the test. -
Page 24: Section 8 Calibration Checks
Section 8 CALIBRATION CHECKS According to Federal Regulations, centrifuges, such as the QBC Capillary Centrifuge, require verification or calibration as follows: 1) before initial use; 2) after repair or adjustments; and 3) annually after use. The centrifuge timer, however, should be checked for accuracy at least every 3 months. The QBC Capillary Centrifuge has been fully calibrated at the factory and is ready to deliver consistent, accurate test results upon first use. -
Page 25: Section 9 Maintenance And Service
Section 9 MAINTENANCE AND SERVICE 9.1 GENERAL CLEANING CAUTION TO AVOID ELECTRICAL HAZARDS, ALWAYS DISCONNECT THE POWER CORD BEFORE CLEANING. Use soap or a mild detergent and water to clean the lid, housing and most parts of the QBC Capillary Centrifuge. (See below for special instructions on cleaning the rotor.) To prevent marring or scratching the finish, avoid solvents or strong abrasives. -
Page 26: Rotor Cleaning Procedures
• Cracks, especially hairline cracks in the region adjacent to the hub; • Surface corrosion, particularly in the region of the hub; • Deep scratches or severe dents. If any of the above defects are found, replace the rotor with a new assembly. See Section 9.6 for catalog numbers. Also inspect the motor shaft, shaft pin and head nut for signs of wear, corrosion or damage. -
Page 27: Releasing Lid Latch
9.3 RELEASING LID LATCH If the lid is latched and there is a loss of main power to the centrifuge – i.e., an interruption of primary electrical power – the lid will remain latched. A jammed plunger in the latch solenoid can also cause the lid to remain latched. -
Page 28: Troubleshooting
9.4 TROUBLESHOOTING A reference guide to common operating problems with the centrifuge is presented below. PROBLEM CAUTION ACTION Centrifuge shows no sign of power, but primary Loose power connection. Check all power plugs. electrical supply is available. Lid is not latched. Close and latch lid. - Page 29 9.5 TROUBLESHOOTING (continued) Troubleshooting Guide for 425740 Centrifuge Won’t Spin Power (Yellow Light) Lid Latched - Check Check all Yellow Light - Connections Flashing/Steady Turn Off - Let Yellow Light Bleed Out - Turn On Lid Will Pop Open Close Firmly and Try Again Noisy/Vibrates Lid Won’t Open...
-
Page 30: Parts List
Flashing Request service. overspeed shutdown. 9.6 PARTS LIST The following spare parts and accessories for the QBC Capillary Centrifuge are available from your QBC System distributor or through the nearest Drucker Diagnostics office: Part Description Catalog No. Rotor Head 421289... -
Page 31: Warranty
WARRANTY QBC Capillary Centrifuge Drucker Diagnostics warrants the QBC Capillary Centrifuge to be free from defects in workmanship and materials for a period of one (1) year from date of purchase, provided the centrifuge is operated in accordance with the Operator’s Manual.
Need help?
Do you have a question about the QBC 425740 and is the answer not in the manual?
Questions and answers