
Related Manuals for Drucker Diagnostics Apex 6


Summary of Contents for Drucker Diagnostics Apex 6
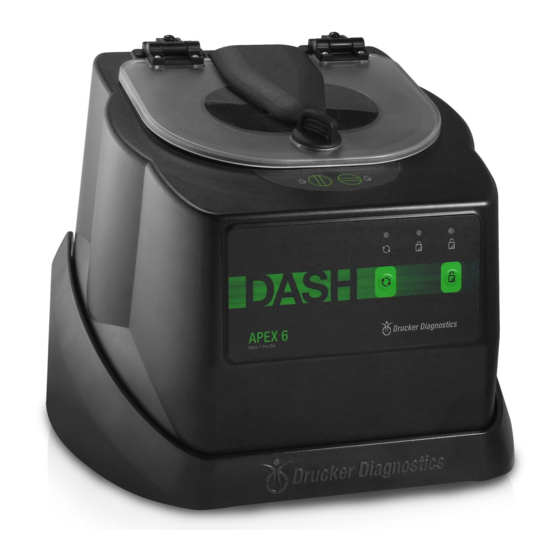
- Page 1 200 Shadylane Drive Philipsburg, PA 16866 Phone: (814) 342-6205 Fax: (814) 342-4510 www.druckerdiagnostics.com Service Manual Model Apex 6 Centrifuge DRUCKER DIAGNOSTICS SM013 MODEL APEX 6 SERVICE MANUAL REV: C...
-
Page 2: Table Of Contents
PREFACE ............................3 GENERAL DESCRIPTION OF MAJOR COMPONENTS ................. 3 WARRANTY INFORMATION ......................3 SPECIFICATIONS ..........................3 TROUBLESHOOTING ......................... 4 SERVICE INSTRUCTIONS ........................5 ASSEMBLY DRAWINGS ........................9 REVISION HISTORY .......................... 13 DRUCKER DIAGNOSTICS SM013 MODEL APEX 6 SERVICE MANUAL REV: C... -
Page 3: Preface
Failure to follow the procedures in this document may result in personal injury or instrument damage. Drucker Diagnostics will not be held liable for any injury or damage as a result of improper servicing. -
Page 4: Troubleshooting
Tighten rotor screw. PROBLEM POSSIBLE CAUSE SOLUTION Debris in air intake / exhaust ports Remove power before clearing debris. Whistling noise while running Gasket failure Requires service. Gasket failure Requires service. DRUCKER DIAGNOSTICS SM013 MODEL APEX 6 SERVICE MANUAL REV: C... -
Page 5: Service Instructions
6.6 Removing the Cabinet (Upper Housing) a) There are six screws that fasten the centrifuge cabinet to the base. b) Begin by unplugging the centrifuge and waiting 10 minutes for internal voltages to dissipate. DRUCKER DIAGNOSTICS SM013 MODEL APEX 6 SERVICE MANUAL REV: C... - Page 6 Use a #2 screwdriver to install the PCB screws. Ensure the grounding strap is installed at the lower left corner of the PCB. g) Important: over tightening the PCB screws can cause malfunction by stripping the screw threads away from the plastic mounting boss. DRUCKER DIAGNOSTICS SM013 MODEL APEX 6 SERVICE MANUAL REV: C...
- Page 7 6.11 Power Connections and Final Assembly a) Make certain that the lower assembly is unplugged from the external power supply. b) Connect the motor/power connector to J14 on the PCB. DRUCKER DIAGNOSTICS SM013 MODEL APEX 6 SERVICE MANUAL REV: C...
- Page 8 Carefully place the cabinet onto the base taking care not to pinch any wires between the two. g) Complete the assembly by replacing the nine screws and three washers using a #2 Phillips screwdriver. DRUCKER DIAGNOSTICS SM013 MODEL APEX 6 SERVICE MANUAL REV: C...
-
Page 9: Assembly Drawings
7 ASSEMBLY DRAWINGS 7.1 FINAL CENTRIFUGE ASSEMBLY 7.1.1 Reference drawing 01-076-109-000 DRUCKER DIAGNOSTICS SM013 MODEL APEX 6 SERVICE MANUAL REV: C... - Page 10 7.2 CABINET ASSEMBLY 7.2.1 Reference drawing 02-002-0-0043 DRUCKER DIAGNOSTICS SM013 MODEL APEX 6 SERVICE MANUAL REV: C...
- Page 11 7.3 LOWER ASSEMBLY 7.3.1 Reference drawing 02-003-0-0105 DRUCKER DIAGNOSTICS SM013 MODEL APEX 6 SERVICE MANUAL REV: C...
- Page 12 7.4 MOTOR ASSEMBLY 7.4.1 Reference drawing 02-005-1-0010 DRUCKER DIAGNOSTICS SM013 MODEL APEX 6 SERVICE MANUAL REV: C...
-
Page 13: Revision History
8 REVISION HISTORY Revision # Date Details of Change 11/17/2015 Original Issue - DR-4324 7/11/2018 DR-5998 DRUCKER DIAGNOSTICS SM013 MODEL APEX 6 SERVICE MANUAL REV: C...
Need help?
Do you have a question about the Apex 6 and is the answer not in the manual?
Questions and answers