Advertisement
Quick Links
Advertisement

Related Manuals for Raidon InTANK iR4300-S2


Summary of Contents for Raidon InTANK iR4300-S2
- Page 1 InTANK iR4300-S2 User Manual...
- Page 2 User Manual » InTANK iR4300-S2 User Manual ..............1 » InTANK iR4300-S2 產品使用說明 .............8 V1.0...
-
Page 3: Table Of Contents
User manual had already been carefully verified before publishing, however, the actual product and its specification will be based upon the time of delivery from RAIDON. Any update to the product or its relevant information may be listed on www.raidon.com.tw Product is subjected to change without notice. -
Page 4: Operating Information
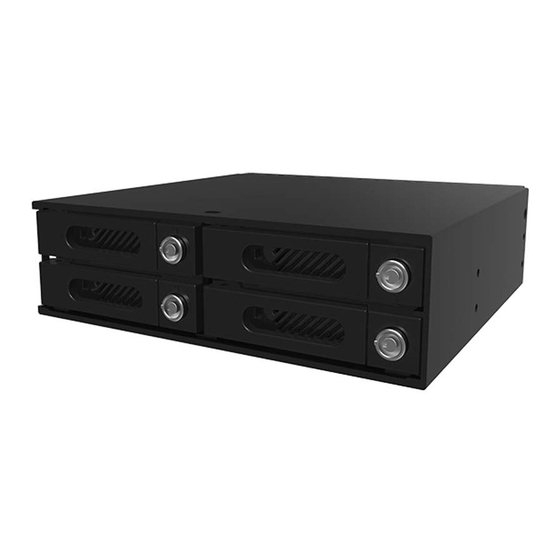
iR4300-S2 User Manual Front and Rear Views A. HDD/SSD Tray & Tray D. Cooling Fan I. Monitoring Signal Connector Handle E. 3-pin Fan Connector J. SATA Port B. Tray Key Lock & Push- F. Buzzer K. Two 15-pin Power Connectors Open Button G. -
Page 5: Hardware Requirements And Precautions
iR4300-S2 User Manual 3. Hardware Requirements and Precautions 1. Computers or servers with SATA I & SATA II & SATA III. 2. Hard drive with SATA I & SATA II & SATA III 3. The product allows the user to simultaneously utilize two hard drives manufactured by different companies. - Page 6 iR4300-S2 User Manual 5. Get 4 screws from Accessory Kit 6. Inser all 4 HDD/SSD Trays your iR4300-S2. and screw and fasten them into the right positions. 7. Install iR4300-S2 into one CD-ROM bay with screws from Accessory Kit,. Then properly connect SATA Cable and 15-pin Power Supply Cable (from your PC system) to it.
-
Page 7: Raid Mode And Buzzer Settings
iR4300-S2 User Manual 5. RAID Mode and Buzzer Settings RAID: Buzzer: Clone Data : While using iR4300-S2 as a data disk, and once you write a data, it will be saved into all 4 HDDs at the same time and kept a data back-up for data protection purpose. So, once one of the 4 HDDs becomes defect, you shall still use your iR4300 product with the rest 3 HDDs. -
Page 8: Frequently Asked Questions
7. We strongly recommend our users to always keep personal data with a safe copy wgile using iR4300-S2. And RAIDON will not be responsible at any data loss by your improperly use of RAID or mistake in using it. - Page 9 iR4300-S2 User Manual About Auto Rebuilding Function What will happen if we turn off the computer’s power while iR4300-S2 is still executing data auto rebuilding? he mirror mode (RAID 1), if the power is out of the auto rebuilding process, the controller will remember when completion percentage of the auto rebuilding process and resume the rebuilding process when the power is back on.
- Page 10 User Manual » InTANK iR4300-S2 產品使用說明 關於這份手冊 感謝您使用 RAIDON 的產品。本手冊將介紹 InTANK iR4300-S2 產品。在您開始使用 iR4300-S2 產品 前,建議您先閱讀過本手冊。手冊裡的資訊在出版前雖已被詳細確認,實際產品規格仍將以出貨時為 準;任何產品規格或相關資訊更新請您直接到 www.raidon .com.tw 網站查詢,本公司將不另行通知。 若您想獲得 RAIDON 最新產品訊息、使用手冊、韌體或對 RAIDON 產品有任何疑問,請您聯絡當地 供應商或到 www.raidon.com.tw 取得相關訊息。 本手冊相關產品內容歸 銳銨科技股份有限公司 版權所有 目錄索引 1. 產品外觀及包裝內容 2. 環境需求 3. 硬體需求與注意事項 4. 硬體安裝...
- Page 11 iR4300-S2 User Manual 正面與背面示意圖 A. 硬碟托盤手把 E. 風扇連接埠 I. 外引訊號 B. 硬碟卡榫按鍵 F. 蜂鳴器 J. SATA 連接埠 C. 硬碟讀寫燈 G. RAID 模式 K. SATA 15Pin 電源輸入埠 D. 風扇 H. 重置鈕 LED 燈號說明 硬碟燈號 狀態 蜂鳴器 備註 藍燈 紅燈 開機 閃爍→恆亮 —...
- Page 12 iR4300-S2 User Manual 3. 硬體需求與注意事項 1. 電腦或伺服器具備 SATA I、SATA II 或 SATA III 介面。 2. 具備 SATA I、SATA II 或 SATA III 介面的硬碟。 3. 本系統允許使用不同廠牌的硬碟。但如果要獲得更好的效能,我們強烈建議使用相同廠牌型號的硬碟。 4. 安裝硬碟前請先確認所使用的硬碟並無壞軌或是其他問題,以免導致系統損毀或資料遺失。 5. 硬碟格式化後,iR4300-S2 的總使用儲存容量或許會與硬碟容量加總後的有所不同。 注意: 一旦使用模式確認後 , 使用相同的硬碟進行模式切換將會導致資料遺失 . 如果需要進行模 式變更 , 請於變更前先進行資料備份。 4. 硬體安裝 請參照以下步驟完成硬體安裝...
- Page 13 iR4300-S2 User Manual 7. 將主體安裝於電腦機殼上的 CD-ROM 位置,請使用配件零件包的螺絲固定,並連接產品所附的連 接線。 8. iR4300-S2 的 RAID 出廠預設為 JBOD。第一次使用請在 JBOD 的狀態下開啟電腦的電源開關,待 抽取盒燈號維持藍燈恆亮時,即完成機器安裝設定。 9. 機器安裝設定完成後,即可依需求設定 RAID 模式,請參考「產品使用注意事項 /2. 切換 RAID 設定 的標準程序」,做 RAID 模式切換設定。 5. RAID 與蜂鳴器切換設定 RAID 設定: 蜂鳴器設定: Clone 模式: 將 iR4300-S2 當成硬碟備份機使用,電腦的一筆資料會同時寫入 iR4300-S2 的四顆硬碟 內,四顆硬碟進行同步寫入達到備份效果,任一顆硬碟損壞仍可繼續運作,將損壞硬碟更...
- Page 14 iR4300-S2 User Manual 6. 產品使用注意事項 若想得到較佳的使用效能與選購硬碟的便利性,建議使用規格及廠牌相同的 2.5 吋硬碟。 切換 RAID 設定的標準程序: 步驟 1:在關機狀態下移除 iR4300-S2 的 SATA 連接線,再將 iR4300-S2 背板上的「RAID 模式」 調至 JBOD。 步驟 2:壓住「重置鈕」,再開啟電腦的電源開關,待蜂鳴器發出「1 長音 2 短音」後鬆開,再關 閉電腦。 步驟 3:將 iR4300-S2 背板上的「 RAID 模式」調至您所需要的模式。 步驟 4:壓住「重置鈕」,再開啟電腦的電源開關,待蜂鳴器發出「1 長音 2 短音」後鬆開,再關 閉電腦。 步驟...
- Page 15 iR4300-S2 User Manual 7. 常見問題 連接 iR4300-S2 後系統不穩定 安裝完 iR4300-S2 後,電腦無法開機或是電腦認不到 iR4300-S2。 1. 請確認 SATA 線有正確的跟電腦連接且硬碟是可正常運作。 2. 如果一切正常但使用者還是無法正常開機,這有可能是因為硬體上的相容性問題。如果是硬體 上相容性問題,請連繫我們的客服部門。 使用時,電腦運作正常但是 iR4300-S2 的存取效能不正常。 請確認 iR4300-S2 是否正在資料重建。 1. 請確認所使用的連接線長度,是否所使用的 SATA 線太長以及是否合乎標準規範。 2. 如果線材的長度與規格都沒問題,請關閉 iR4300-S2 並取出其中的硬碟。直接接硬碟連接到 電腦並進行檢測,有可能是硬碟中的壞軌導致。 硬碟損毀 RAID 1 模式下,如果放入一顆新的硬碟,系統的總容量會是? 1. iR4300-S2 的總容量是依據一開始安裝的主硬碟容量而定。 2.
- Page 16 www.raidon.com.tw...
Need help?
Do you have a question about the InTANK iR4300-S2 and is the answer not in the manual?
Questions and answers