
Related Manuals for Thermo Scientific Finnpipette F2


Summary of Contents for Thermo Scientific Finnpipette F2
- Page 1 Finnpipette ® Single Channel Variable & Fixed Volume Multichannel Instructions for Use 操作指南...
- Page 2 The CE-mark covers the system containing the CE-marked Finnpipette F2 pipette and the CE-marked Finntips. Product specifications are subject to change without prior notice. Finnpipette and Finntip ®...
-
Page 3: Table Of Contents
CONTENTS PRODUCT DESCRIPTION PACKAGE SAFETY PIPETTE OPERATION PIPETTING TECHNIQUES CALIBRATION AND ADJUSTMENT MAINTENANCE TROUBLE SHOOTING SPARE PARTS 27-36 目录 产品简介 包装 安全 移液器的操作 移液方法 校准与调节 维护保养 故障检修 27-36 备件... -
Page 4: Product Description
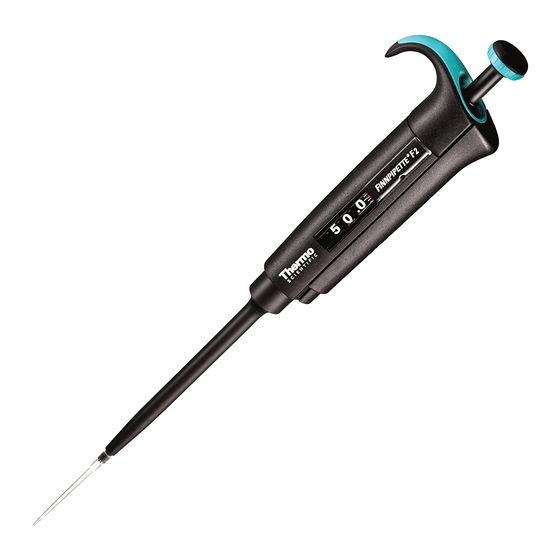
It operates on an air displacement principle (i.e. an air interface) and uses detachable, disposable tips. The adjusted delivery volume is displayed digitally on a readout window in the handle. The thirteen different models of Finnpipette F2 pipettes cover a volume range from 0,2 µl to 10 ml. Order No. Volume Range... -
Page 5: Package
Do not eject the tip towards anybody. The Finnpipette F2 is to be used by trained personnel with required laboratory skills. The instructions for use must be read prior to and during the use of the device (pipette and tip). The F2 pipette can be used between +4°C and +40°C. -
Page 6: Pipette Operation
To avoid inaccurate dispensing and/or leakage, check that the tip is properly attached to the pipette. When rotating the volume adjustment button, do not exceed the volume range of the pipette. Otherwise the pipette may be damaged or affect pipetting performance. Pipetting performance cannot be guaranteed if the tip is reused. - Page 7 Forward technique Fill a clean reagent reservoir with the liquid to be dispensed. 1 2 3 4 1 Depress the push button to the first stop. 2. Dip the tip under the surface of the liquid in the reservoir to a depth of about 1 cm and slowly release the push button.
-
Page 8: Calibration And Adjustment
1. Immerse the tip into the reagent and depress the 1 2 3 4 5 push button to the first stop, making sure the tip is well below the surface. 2. Release the push button slowly to the ready position. This will fill the tip. -
Page 9: Finnpipette F2 Fixed Volume Single Channel
ISO8655 calibration specifications Thermo Scientific Finnpipette F2 specifications according to ISO8655 standard. Finnpipette F2 Variable Volume Single Channel Range Volume Inaccuracy Imprecision µl µl s.d. µl 0,2-2 µl ±0.080 ±4 0.040 ±0.080 ±40 0.040 20.0 0,5-5 µl ±0.125 ±2.5 0.075 ±0.125... - Page 10 Manufacturer specification limits Finnpipette F2 Variable Volume Single Channel Range Volume Inaccuracy Imprecision Factory µl µl s.d. µl cv% calibration tip 0.2-2 µl ±0,050 ±2,50 0,040 2,00 Flex 10 ±0,024 ±12,00 0,020 10,00 0.5-5 µl ±0,075 ±1,50 0,050 1,00 Flex 10 ±0,030...
- Page 11 Finnpipette F2 Variable Volume Multichannel Range Channels Volume Inaccuracy Imprecision Factory µl µl s.d. µl cv% calibration tip 1.0-10 µl 8, 12, 16 ±0,240 ±2,40 0,160 1,60 Flex 10 ±0,120 ±12,00 0,080 8,00 5-50 µl 8, 12, 16 ±0,75 ±1,50...
-
Page 12: Maintenance
Maintenance When the Finnpipette F2 is not in use, make sure it is stored in an upright position. We recommend a Finnpipette stand for this purpose. The part # refer to exploded views beginning at page 27. Short-term service The pipette should be checked at the beginning of each day for dust and dirt on the outside surfaces of the pipette. - Page 13 9. All: Put the spring 15 and support 14 on top of the tip cone and carefully insert the tip cone assembly to the handle. Attach the tip cone by turning it first clockwise tight by hand, then do the final tightening with the service tool. 10.
-
Page 14: Trouble Shooting
Service Instructions for Multichannel Pipette Tip Cones To ensure even performance between all channels in a multichannel pipette, all tip cones have to be changed at the same time, if any of them needs to be changed. Don’t mix tip cones of different packages, because one bag contains a matched set of tip cones. -
Page 15: Flex
5 ml 4652110 5000 µl dark blue 5 ml 4652120 10000 µl dark blue 10 ml, Flex 10 ml Ext Finnpipette F2多通道移液器的十种不同型号涵盖了 1 µl 至 300 μl 之间的所 有量程范围。 订购号码 道数 量程范围 色标 Finntip 4662000 1 µl to 10 µl pink... - Page 16 1. Finnpipette移液器 2. 维修工具 3. 多道维修工具 4. 油脂 1g (订货号:3300200) 5. 说明书 6. 校准证书 安全 此符号代表注意 用途 此设备的用途是用来移取范围在0,2 μl 到 10 ml之间的液体 Finnpipette F2 以及 Finntips的设计是作为分析系统的一部分, 为那些负责 校验系统的终端客户可以得到可靠及安全的结果. 对健康的危害 对于危害的预防以及安全说明请遵循一般流程,例如:穿防护服,配带防 护眼镜及手套. 对于有害物质的使用以及废弃物的处理(例如:带有辐射的或者有潜在传 染性的物质),请遵循相关的安全说明或者一般实验室规范。. 移液器以及吸嘴不能在体内使用。 请不要使用移液器吸取液体后再注射入 人体内。 请不要在弹出吸嘴时,将吸嘴对着任何人。 Finnpipette F2 的使用者需要具备实验室操作技术并通过培训的人员。在使用...
-
Page 17: 移液器的操作
如果移液器的性能对于某个特定应用的输出至关重要,那么必须用其他可 替代的测试对结果进行确认。 如果没有这样的替代选择,那么需要通过重复测试来进行确认。移液过程 中不正确移液量的可能性还是无法完全避免的。 为了避免错误的注入或者漏液,请检查吸嘴是否完全安装到移液器上。 当旋转移液量调整按钮时,请不要超出移液器的液量范围。 否则会导致移 液器的损坏或者影响移液性能。 如果吸嘴再次被使用,那么移液器的性能将无法保证。 使用时,请选择颜色标记相匹配的吸嘴与移液器。 材料的处理 请遵循实验室或者国家特定的流程来处理具有生物危害或者带有辐射的废弃 物。处理具有传染性的物质,请参考当地法规。 警告 吸嘴可能具有潜在的传染性。请将所有使用过的一次性吸嘴按照生物危 害废弃物的要求处理。 警告 在处理移液器前请先进行消毒。 如果想要将之废弃,请与当地环保部门联系。如果想要了解更多信息,请联系 我们info.pipettes@thermofisher.com, 或者联系当地Thermo Fisher Scientific(赛默 飞世尔科技)代表。 关于原包装和包装材料,请使用您所知道的回收经营者。 移液器的操作 设定移液量 1. 使用移液器顶部的按钮设定移液量。如需增加移液 量,应按逆时针方向旋转按钮。如需减少移液量, 应按顺时针方向旋转按钮。 2. 应确保移液量设定到位且完整读取显示窗口上的读数。 3. 勿将液量设定在移液器指定的容量允许范围以外。 使用蛮力过度旋转按钮可能会导致卡壳并最终使移 液器受损。 安全标签 可在安全标签上记下移液器的用途、使用者姓名 缩写、校准日期等。可用较细的针将标签取下。 用笔在标签上书写,然后将标签放回原处。... - Page 18 正向移液方法 用于将液体注入干净的试剂容器内。 1 按下按钮至第一停点处。 1 2 3 4 2. 将吸嘴探入容器内液体表面下约1 cm处, 然后慢慢释放按钮。将吸嘴从液体中取 出并靠在容器边缘以去除多余的液体。 3. 轻轻按下按钮至第一停点即可获得所需 的液体容量。大约等候1秒钟以后, 即可继续将按钮按到底。这样做可排空 吸嘴内的液体。 4. 释放按钮使其还原至备用状态。如有必要, 可更换吸嘴然后继续进行移液操作。 反向移液方法 反向移液方法比较适合用于粘度较大或较容易产生泡沫的液体。也建议在微量 的移液操作中使用此技巧。将液体注入干净的试剂容器内。 1. 按下按钮到底。 1 2 3 4 2. 将吸嘴探入容器内液体表面下约1 cm处, 然后慢慢释放按钮。这样做可以将液 体吸入吸嘴。将吸嘴从液体中取出并靠 在容器边缘以去除多余的液体。 3. 轻轻按下按钮至第一停点即可获得事先设 定的液量。在第一停点处按住按钮。 吸嘴内会有部分残留液体,不应将其计入 实际的移液量。...
-
Page 19: 校准与调节
校准与调节 所有的Finnpipette产品均已在工厂经过校对和调节,以便通过正向移液方法提 供规定容量的蒸馏水或去离子水。使用其它移液方法可能会影响校准结果。因此 移液器在使用其它移液方法或用于不同温度和粘度的液体时,可进行重新调节。 仪器与试验要求 必须使用分析天平。应根据移液器内的试验液量选定天平的刻度精确度: 液量范围 刻度精确度 少于10 µl 0.001 mg 10-100 µl 0.01 mg 多于100 µl 0.1 mg 试验液:经蒸馏或去离子、ISO 3696标准3级水。试验应在无空气流动 的室内进行,并应使水、移液器和空气温度恒定在15°C与30°C之间,误差在 ±0.5℃上下。相对湿度必须大于50%。特别是液量在50µl以下时,空气湿度 越高越好,以便减少蒸发作用对液量产生的影响。建议使用专门的辅助仪器, 如加湿器。 校准检查的步骤 应检查移液器的最大液量(标定液量)和最小液量。新的吸嘴应预湿3-5次, 并对最大和最小两种液量各进行十次移液操作。每次移液(Ex)时都应对移液 器进行调节以获得所需的液量。建议使用正向移液方法。允许的最大误差值专 为正向操作方法而设计。建议对多道移液器的每一个通道都进行校准,但是仅 去校准两边最外侧的通道是比较合适的校准方法。在校准之前,请先通过使用 中间的某一个通道来进行调整检查。建议使用下表中ISO8655的校验标准或者 用户自定义标准。 步骤: 1. 进行一系列10次最小液量的移液操作。 2. 进行一系列10次最大液量的移液操作。 3. 计算以上两个系列操作的错误率(A)和不精确率(cv)。 4. - Page 20 ISO8655 校验规格 Thermo Scientific Finnpipette F2 的规格符合ISO8655的标准。 Finnpipette F2 可调式量程单道 量程 液量 错误率 不精确率 µl µl s.d. µl 0,2-2 µl ±0.080 ±4 0.040 ±0.080 ±40 0.040 20.0 0,5-5 µl ±0.125 ±2.5 0.075 ±0.125 ±25 0.075 1-10 µl ±0.120 ±1.2 0.080 ±0.120...
-
Page 21: Flex
生产商的规格范围 Finnpipette F2 可调式量程单道 量程 液量 错误率 不精确率 工厂用校 µl µl s.d. µl 验吸嘴 0.2-2 µl ±0,050 ±2,50 0,040 2,00 Flex 10 ±0,024 ±12,00 0,020 10,00 0.5-5 µl ±0,075 ±1,50 0,050 1,00 Flex 10 ±0,030 ±6,00 0,025 5,00 1-10 µl, micro 10 ±0,100... -
Page 22: Flex
Finnpipette F2 可调式量程多道 量程 道数 液量 错误率 不精确率 工厂用校 µl µl s.d. µl cv% 验吸嘴 1.0-10 µl 8, 12, 16 ±0,240 ±2,40 0,160 1,60 Flex 10 ±0,120 ±12,00 0,080 8,00 5-50 µl 8, 12, 16 ±0,75 ±1,50 0,35 0,70 Flex 200 ±0,25... -
Page 23: 维护保养
维护保养 不使用Finnpipette F2移液器时,务必将其竖直存放。建议使用Finnpipette专用 存放架。 零部件号码参见第27页的部件展示图。 短期维护保养措施 每天早上都应检查移液器表面是否有灰尘和污垢。 尤其应重视管嘴连件的清洁状况。除70%乙醇以外,不得使用任何其它溶剂对 移液器进行清洁。 长期维护保养措施 在不同的实验室,每年对移液器的使用情况各不相同,而且应用的物质种类也 有很大差异。为了保证对移液器的正确维护,实验室应当制定一套适合自己特 殊情况和需求的维护保养程序。 进行维护保养前,应先将移液器的各个部件全部拆卸下来。 µl 1-1000 移液器 1. 按下管嘴推出器。 2. 按逆时针方向旋转管嘴推出器11,然后将其拉出。 3. 使用辅件按逆时针方向将管嘴连件旋出。 4. 将活塞和其它部件拉出。轻推活塞退出全部活塞组件。 然后将管嘴连件倒置,轻轻拍打将所有部件退出管嘴连件。 切记要将所有部件按顺序排列在桌上以便进行组装。 5. 使用没有绒毛的干布清洁活塞、活塞弹簧和O形环。 6. 检查管嘴连件是否留有异物。 7. 使用移液器配套的润滑油为已清洁的部件上油。 8. 重新装好移液器的各个组件。 0.2-2ul, 0.5-5ul和1-10ul:首先,将弹簧22, O型圈23和24套在管子21上面,把0.2- 2ul的活塞插入到管子27中,然后再插到 管子21中.然后弹簧13,弹簧支撑16和管... - Page 24 0.5-5ml和1-10 ml移液器 1. 按下管嘴推出器。 2. 逆时针旋转管嘴推出器10, 将其打开。 3. 将管嘴推出器的底座14 (卡锁)卸下。 4. 逆时针旋转管柱13并将管嘴 连件拆下。 5. 按下管柱的卡锁将管柱拆下。 6. 清洁O形环12和管柱13并重新上油。 7. 按照与拆卸时相反的顺序将各个部件组装起来。 多道移液器长期保养 如果每天使用移液器,每三个月应该进行一次保养和 上油 1. 用工具插到15#环和23#推杆之间,直到这两个材料脱离. 2. 确认这个推出杆是否朝上,然后推出吸嘴推杆,将工具插入 46#孔内. 3. 轻微拧开推出杆上端,移出推出杆. 4. 从手柄出拔出仪器. 5. 拉出仪器弹簧19和夹子22. 6. 按压弹簧13,并从凹槽中取下闭锁片12,取下 弹簧13. 7. 卸下锁爪44和45,再拉出接管43和导管46. 8. 用螺丝起子从仪器盖子上卸下4颗螺丝钉,然后取 下盖子.
-
Page 25: 故障检修
消毒 吸嘴座可在121°C (252°F)(2个绝对大气压)下进行高温消毒35分钟。必要 时,可使用蒸汽消毒包。 吸嘴座经高温消毒后必须经过至少两个小时时间冷却至室温才可使用。移液前 务必确保仪器的干燥。建议在每次消毒之后检查校准情况。 故障检修 下表列出了可能会出现的问题及其解决办法。 解决方法 故障 可能的原因 必须妥善安装。 渗漏 吸嘴安装不正确。 清洁管嘴连件后,装上新 在吸嘴与管嘴连件之间有异物。 的吸嘴。 在活塞、O形环和缸体之间有 清洁O形环和缸体,并上好 异物。 润滑油。 缸体和O形环上的润滑油不够。 应适当润滑。 O形环已损坏。 更换O形环。 操作不正确。 移液结果不 按说明进行各步骤操作。 准确 吸嘴安装不正确。 必须妥善安装。 校准结果被更改:比如,因 按说明重新进行校准。 使用方法错误,导致校准结 果发生变化。 吸嘴连杆(单道)或者多道外壳 使用维修工具去锁紧吸嘴 松动 连件和外壳 移液器长时间不用,润滑油粘到 活塞堵塞... - Page 26 Conversion table Value of the conversion factor Z (µl/mg), as a function of temperature and pressure, for distilled water. 换算表 在不同温度和气压的作用下,蒸馏水的换算值 Z (µl/mg)。 Temperature Air pressure °C 101,3 15,0 1,0017 1,0018 1,0019 1,0019 1,0020 1,0020 1,0020 15,5 1,0018 1,0019 1,0019 1,0020 1,0020 1,0020...
-
Page 27: Spare Parts
Spare parts 备件 1062800 1µl-10ml 1062930 MCP 1-10 ml 0,5-5 ml 10 ml Fixed 2-5 ml Fixed * 42 * 42 * 2. * 3. Handle * 12. O-ring * 42. Tip Cone assy 2. 2211810 Fix 1-10ml 2. 2211590 10ml 2. - Page 28 100-1000µl 20-200µl 10-100µl 250 / 500 / 1000µl 200µl Fixed 25 / 50 / 100µl Fixed Fixed * 42 * 42 * 42 * 2. * 3. Handle * 17. O-ring * 42. Tip Cone assy 100-1000µl 250 µl Fixed 500 µl Fixed 1000µl Fixed 2.
- Page 29 2-20µl / 2-20µl Micro 1-10µl / 1-10µl Micro 5-50µl / 5-50µl Micro 10µl Fixed 20µl Fixed * 42 * 42 * 2. * 3. Handle * 19. O-ring * 20. O-ring * 24. O-ring * 42. Tip Cone assy 2-20µl 2-20 µl Micro 20 µl Fixed 2.
- Page 30 0,2-2 µl / 1 µl Fixed 0,5-5 µl / 5 µl Fixed * 42 * 42 * 2. * 3. Handle * 19. O-ring * 20. O-ring * 24. O-ring * 28. Sealing Combination * 42. Tip Cone assy 0,5-5 µl 5 µl Fixed 2.
- Page 31 * 50 * 2. * 3. Handle * 42. Tip Cone assy * 50. Module 1-10µl 2. 2211520 3. 2213180 42. 2212770 12 pcs 50. 2211260 8-ch 50. 2211270 12-ch 10-100µl 10-100µl 2. 2211550 3. 2213220 42. 2212790 12 pcs 50.
- Page 32 * 50 * 2. * 3. Handle * 42. Tip Cone assy * 50. Module 5-50µl 2. 2211560 3. 2213270 42. 2212780 12 pcs 50. 2211280 8-ch 50. 2211290 12-ch...
- Page 33 * 50 * 2. * 3. Handle * 42. Tip Cone assy * 50. Module 30-300µl 2. 2211680 3. 2213280 42. 2212800 12 pcs 50. 2211320 8-ch 50. 2211330 12-ch...
- Page 34 * 50 * 2. * 3. Handle * 42. Tip Cone assy * 50. Module 5-50µl 16-ch 2. 2211560 3. 2213300 42. 2212810 8 pcs 50. 2211350...
- Page 35 * 50 * 2. * 3. Handle * 42. Tip Cone assy * 50. Module 1-10µl 16-ch 2. 2211800 3. 2213290 42. 2212820 8 pcs 50. 2211340 Picture / 圖片...
- Page 36 Finntip (sterile and non-sterile) Finn • • • • • • FP F2 0.2 - 2 µl • • • • • • FP F2 0.5 - 5 µl • • • • • • FP F2 1 - 10 µl micro •...
- Page 37 Finntip Filter (sterile) • • • • • • • • • • • • • • • • • • • • • • • • • • • • • • • • • • • • • •...
-
Page 38: Flex
Tip Ordering Information Code Finntip Volume * 9400300 10 Micro 0,2-10 µl 10x96/rack 9400303 10 Micro sterile 0,2-10 µl 10x96/rack * 94060100 Flex 10 0,2-10 µl 10x96/rack 94060103 Flex 10 sterile 0,2-10 µl 10x96/rack * 9400610 20 Micro 0,2-20 µl 10x384/rack 9400613 20 Micro sterile... - Page 40 thermofisher.com info.pipettes@thermofisher.com © 2018 Thermo Fisher Scientific Inc. All rights reserved. All trademarks are the property of Thermo Fisher Scientific Inc. and its subsidiaries. Specifications, terms and pricing are subject to change. Not all products are available in all countries. Please consult your local sales representative for details. Thermo Fisher Scientific Oy Ratastie 2 01620 Vantaa...
Need help?
Do you have a question about the Finnpipette F2 and is the answer not in the manual?
Questions and answers