
Subscribe to Our Youtube Channel
Related Manuals for Alfa Laval MR-185S


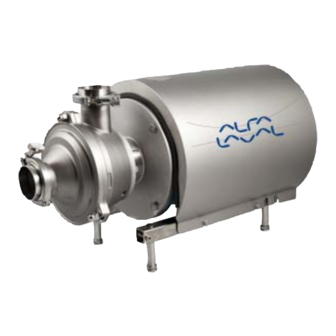
Summary of Contents for Alfa Laval MR-185S
- Page 1 Instruction Manual MR-166S, -185S, -200S Liquid-Ring Pump 3100-0005 ESE00675-EN5 2017-03 Original manual...
-
Page 3: Table Of Contents
................... 5.1. General maintenance ................5.2. Dismantling of pump - MR-166S ..............5.3. Dismantling of pump - MR-185S and MR-200S ..........5.4. Assambly of pump - MR-166S ..............5.5. Assembly of pump - MR-185S and MR-200S ..........6. Technical data .................. -
Page 4: Ec Declaration Of Conformity
1 EC Declaration of Conformity Revision of Declaration of Conformity 2009-12-29 The Designated Company Alfa Laval Kolding A/S Company Name Albuen 31, DK-6000 Kolding, Denmark Address +45 79 32 22 00 Phone No. hereby declare that Pump Designation MR-166S, MR-185S, MR-200S Type From serial number 10.000 to 1.000.000... -
Page 5: Safety
2 Safety Unsafe practices and other important information are emphasised in this manual. Warnings are emphasised by means of special signs. All warnings in this manual are summarised on this page. Pay special attention to the instructions below so that serious personal injury or damage to the pump are avoided. 2.1 Important information Always read the manual before using the pump! WARNING... -
Page 6: Safety Precautions
Always handle lye and acid with great care. Never use the pump for products not mentioned in Alfa Laval pump selection program. The Alfa Laval pump selection program can be acquired from your local Alfa Laval sales company. Maintenance: Always read the technical data thoroughly. (See chapter 6 Technical data). -
Page 7: Installation
3 Installation 3.1 Unpacking/delivery Step 1 CAUTION Alfa Laval cannot be held responsible for incorrect unpacking. Inspect the pump for visible transport damage. Check the delivery for: 1. Complete pump, MR-166S, MR-185S or MR-200S. 2. Delivery note. 3. Motor instructions. -
Page 8: Installation/Pre-Use Check - Mr-166S
CAUTION must be red and yellow. Alfa Laval cannot be held responsible for incorrect installation. CAUTION The pump does not prevent back flow when intentionally or unintentionally stopped. If back flow... - Page 9 3 Installation Study the instructions carefully and pay special attention to the warnings! The direction of rotation of the impeller can be checked by observing the direction of rotation of the motor fan. - See the indication label on the pump. Step 5 Avoid stresses to the pump Pay special attention to:...
-
Page 10: Installation/Pre-Use Check - Mr-185S And Mr-200S
The direction of rotation of the impeller can be checked by observing the direction of rotation of the motor fan. - See the indication label on the pump. 3.3 Installation/Pre-use check - MR-185S and MR-200S Step 1 Always have the pump electrically connected by Always read the technical data carefully. -
Page 11: Recycling Information
- At the end of use, the equipment shall be recycled according to the relevant, local regulations. Besides the equipment itself, any hazardous residues from the process liquid must be considered and dealt with in a proper manner. When in doubt, or in the absence of local regulations, please contact your local Alfa Laval sales company. -
Page 12: Operation
Study the instructions carefully and pay special attention to the warnings! The pump is fitted with a warning label indicating correct throttling. 4.1 Operation/Control Step 1 CAUTION Alfa Laval cannot be held responsible for incorrect operation/control. Always read the technical data carefully. Step 2 Danger of burns! -
Page 13: Trouble Shooting And Remedy
- Incorrect rubber grade - Select a different rubber grade - Abrasive particles in the liquid - Select stationary and rotating seal ring in silicon carbide/silicon carbide (only MR-185S, -200S) Leaking seals Incorrect rubber grade Select a different rubber grade... -
Page 14: Recommended Cleaning
4 Operation The pump is designed for cleaning in place (CIP). CIP = Cleaning In Place. Study the instructions carefully and pay special attention to the warnings! NaOH = Caustic Soda. HNO3 = Nitric acid. 4.3 Recommended cleaning Step 1 Caustic danger! Always handle lye and acid with great care. -
Page 15: Maintenance
1. Rotate impeller (11) through the inlet. 2. Ensure that the impeller does not come into contact with pump casing (9) or casing cover (10). 3. Adjust the impeller position if necessary (see section 4.4 for MR-166S and section 4.5 for MR-185S and MR-200S). Step 5 Ordering spare parts Contact your local Alfa Laval sales company. - Page 16 5 Maintenance Maintain the pump carefully. Study the instructions carefully and pay special attention to the warnings! Always keep spare shaft seals and rubber seals in stock. See separate motor instructions. Motor bearings Shaft seals Rubber seals Preventive maintenance Replace after 12 months Replace when replacing the (one-shift) shaft seal...
-
Page 17: Dismantling Of Pump - Mr-166S
5 Maintenance Study the instructions carefully. The items refer to the parts list and service kits section. Handle scrap correctly. 5.2 Dismantling of pump - MR-166S Step 1 Loosen screws (43) and remove shroud (5). 3100-0022 Step 2 Remove covers (2a) 3100-0081 Step 3 Remove cap nuts (14), washers (15a) and casing cover (10). - Page 18 5 Maintenance Study the instructions carefully. The items refer to the parts list and service kits section. Handle scrap correctly. Step 5 1. Remove impeller nut clockwise (13), (counterhold stub shaft (3)). 2. Remove impeller (11) from the stub shaft. 3100-0025 Step 6 Remove key (12) from stub shaft (3) using a pair of pliers.
- Page 19 5 Maintenance Study the instructions carefully. The items refer to the parts list and service kits section. Handle scrap correctly. Step 11 1. Remove screws (40). 2. Remove pump casing (9) from bracket (2). 3100-0031 Step 12 Remove thrower (21) from stub shaft (3). 3100-0032 Step 13 1.
-
Page 20: Dismantling Of Pump - Mr-185S And Mr-200S
5 Maintenance Study the instructions carefully. The items refer to the parts list and service kits section. Handle scrap correctly. 5.3 Dismantling of pump - MR-185S and MR-200S Step 1 Remove screws (34), shroud (31) and distance sleeve (42). 3100-0034... - Page 21 5 Maintenance Study the instructions carefully. The items refer to the parts list and service kits section. Handle scrap correctly. Step 6 Remove key (12) from stub shaft (3) using a pair of pliers. 3100-0038 Step 7 Turn stationary seal ring (28) clockwise and remove it from pump casing (9) (use the tool supplied).
- Page 22 5 Maintenance Study the instructions carefully. The items refer to the parts list and service kits section. Handle scrap correctly. Step 11 1. Remove screws (16) and washers (17). 2. Remove pump casing (9) from adaptor (2). 3100-0042 Step 12 Remove thrower (24) from stub shaft (3).
-
Page 23: Assambly Of Pump - Mr-166S
5 Maintenance Study the instructions carefully. The items refer to the parts list and service kits section. Lubricate the rubber seals before fitting them. 5.4 Assambly of pump - MR-166S Step 1 1. Fit stub shaft (3) on the motor shaft. 10-20mm 2. - Page 24 5 Maintenance Study the instructions carefully. The items refer to the parts list and service kits section. Lubricate the rubber seals before fitting them. Step 6 Ensure that the clearance between impeller (11) and pump casing 0.2-0.3mm (9) is 0.2-0.3 mm (tap gently with a plastic hammer). 3100-0051 Step 7 Remove impeller (11), pump casing (9) and bracket (2) without...
- Page 25 5 Maintenance Study the instructions carefully. The items refer to the parts list and service kits section. Lubricate the rubber seals before fitting them. Step 12 1. Place key (12) in the groove of stub shaft (3). 2. Fit impeller (11) on the shaft. 3.
-
Page 26: Assembly Of Pump - Mr-185S And Mr-200S
Study the instructions carefully. The items refer to the parts list and service kits section. Lubricate the rubber seals before fitting them. 5.5 Assembly of pump - MR-185S and MR-200S Step 1 Fit compression rings (4a+b), screws (5) and washer (5a) correctly on stub shaft (3). - Page 27 5 Maintenance Study the instructions carefully. The items refer to the parts list and service kits section. Lubricate the rubber seals before fitting them. Step 7 Ensure that the clearance between impeller (11) and pump casing 0.15-0.2mm (9) is 0.15-0.20 mm (tap gently with a plastic hammer). 3100-0066 Step 8 Remove impeller (11), pump casing (9) and adaptor (2) without...
- Page 28 5 Maintenance Study the instructions carefully. The items refer to the parts list and service kits section. Lubricate the rubber seals before fitting them. Step 13 1. Place key (12) in the groove of stub shaft (3). 2. Fit impeller (11) and impeller nut (13) on the shaft. 3.
-
Page 29: Technical Data
MR is a liquid-ring pump specially designed for pumping liquids containing air or gas. The pump is for use in the food, chemical, pharmaceutical and similar industries. The pump is mainly used for CIP-return application. This instruction manual is part of the delivery. Study the instructions carefully. The pump is available in the following sizes, MR-166S, MR-185S and MR-200S. Data Max. -
Page 30: Torque Specifications
6 Technical data It is important to observe the technical data during installation, operation and maintenance. Inform personnel about the technical data. 6.2 Torque specifications The table below specifies the tightening torques for the screws, bolts and nuts in this pump. Always use the torques specified below if no other values are stated. -
Page 31: Noise Emission
6 Technical data It is important to observe the technical data during installation, operation and maintenance. Inform personnel about the technical data. 6.4 Noise emission Pump Type Sound pressure level (dBA) LKH-5 LKH-10 LKH-15 LKH-20 LKH-25 LKH-35 LKH-40 LKH-45 LKH-50 LKH-60 LKH-70 LKH-75... -
Page 32: Parts List And Service Kits
7 Parts list and service kits The drawings show MR-166S, -185S and -200S and include all items. The items refer to the parts lists in the following sections. 7.1 Drawings MR 166 For further information, see parts list section 6.2. 3100-0075 3100-0076... -
Page 33: Drawings Mr 185/200
7 Parts list and service kits The drawings show MR-166S, -185S and -200S and include all items. The items refer to the parts lists in the following sections. 7.2 Drawings MR 185/200 For further information, see parts list section 6.3 3100-0077 Shaft seal 3100-0078... -
Page 34: Mr - Wet End
7 Parts list and service kits The drawing shows the MR-166S, sanitary version. The items refer to the parts lists in the following sections. 7.3 MR - Wet end 3 12 3100-0088... - Page 35 7 Parts list and service kits The drawing shows the MR-166S, sanitary version. The items refer to the parts lists in the following sections. Parts list Pos. Denomination ISO male ISO clamp O-ring, EPDM (Standard) Pump casing Casing cover Casing cover Impeller Impeller screw...
-
Page 36: Mr - Motor Dependent Parts
7 Parts list and service kits The drawing shows the MR-185S -200S, sanitary version. The items refer to the parts lists in the following sections 7.4 MR - Motor dependent parts 3 12 3100-0088... - Page 37 7 Parts list and service kits The drawing shows the MR-185S -200S, sanitary version. The items refer to the parts lists in the following sections Parts list Pos. Denomination Motor ABB Bracket Bracket cover Shaft Screw Compression ring Compression ring...
-
Page 38: Mr - Shaft Seal
7 Parts list and service kits The drawing shows the MR-185S -200S, sanitary version. The items refer to the parts lists in the following sections 7.5 MR - Shaft seal 3 12 3100-0088... - Page 39 7 Parts list and service kits The drawing shows the MR-185S -200S, sanitary version. The items refer to the parts lists in the following sections Parts list Pos. Denomination Spanner for stationary seal ring Key for hexagonal socket Impeller tool Shaft seal tool ...
- Page 40 © Alfa Laval Corporate AB This document and its contents is owned by Alfa Laval Corporate AB and protected by laws governing intellectual property and thereto related rights. It is the responsibility of the user of this document to comply with all applicable intellectual property laws. Without limiting any rights related to this document, no part of this document may be copied, reproduced or transmitted in any form or by any means (electronic, mechanical, photocopying, recording, or otherwise), or for any purpose, without the expressed permission of Alfa Laval Corporate AB.
Need help?
Do you have a question about the MR-185S and is the answer not in the manual?
Questions and answers