Table of Contents
Advertisement
Advertisement
Table of Contents

Summary of Contents for imex Bullseye 80
- Page 1 USER MANUAL V1.0...
- Page 3 Secondary line 2 Secondary line 1 Summary line...
-
Page 4: Symbols Used
User Manual Congratulations on the purchase of your Bullseye 80. Carefully read the Safety Instructions and the User Manual before using this product. Symbols used The symbols used in the Safety Instructions have the following meanings: WARNING: Indicates a potentially hazardous situation or an unintended use which, if not avoided, may result in serious injury. -
Page 5: Limits Of Use
The person in charge of the instrument has the following duties: · To understand the safety instructions on the product and the instructions in the User Manual. · To be familiar with local safety regulations relating to accident prevention. · To inform Imex immediately if the equipment becomes unsafe. -
Page 6: Hazards In Use
Carry out periodic test measurements. Particularly after the instrument has been subject to abnormal use, and before, during and after important measurements. Make sure the Bullseye 80 optics is kept clean and that there is no mechanical damage to the bumpers. -
Page 7: Electromagnetic Compatibility (Emc)
Never attempt to repair the product yourself. In case of damage, contact the local dealership. Laser classification The Bullseye 80 produces a visible laser beam which emerges from the front of the instrument. It is a Class 2 laser product in accordance with: ·... -
Page 8: Inserting / Replacing Batteries
Do not stare into the laser beam or direct it towards other people unnecessarily. Eye protection is normally afforded by aversion responses including the blink reflex. WARNING: Looking directly into the beam with optical aids (e.g. binoculars, telescopes) can be hazardous Precautions: Do not look directly into the beam with optical aids. -
Page 9: Switch On And Off
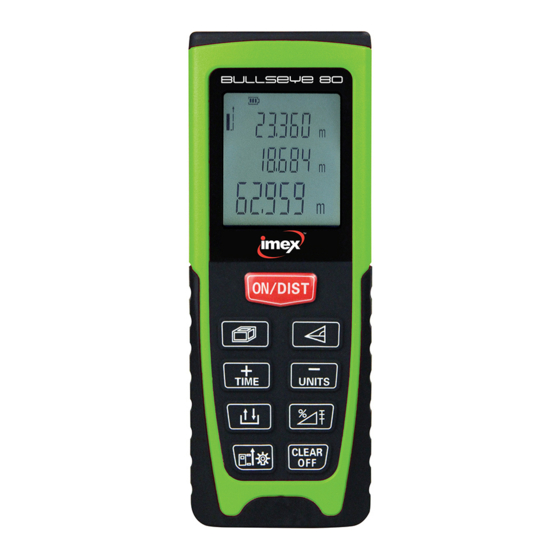
Keypad See figure A. ON / Measuring button Area / Volume button Pythagoras button Plus (+) / Timer button Minus (-) / Units button Storage button Angle / stake out function button Reference / Illumination button Clear / off button Switch on and off Switch on the instrument and laser. -
Page 10: Selecting Units
Display illuminations Pressing this button for longer switches the illuminations on or off. Selecting Units Press this key until the desired unit is displayed. Optional units: Length Area Volume 0.000 m 0.000 m² 0.000 m³ 0.00m 0.00 m² 0.00 m³ 0.00 ft 0.00 ft²... -
Page 11: Minimum/ Maximum Measurement
Minimum/ Maximum measurement This function allows the user to measure the minimum or maximum distance from a fixed measuring point. It is commonly used to measure room diagonals (maximum values) or horizontal distances (minimum values). Press and hold down this button. Then slowly sweep the laser back and forth and up and down over the desired target point (e.g. -
Page 12: Indirect Horizontal Distance
Volume Press this button until this symbol appears on the display. Press this button to take the first length measurement (e.g. length). Press this button to take the second length measurement (e.g. width). Press this button to take the third length measurement (e.g. height). The result is shown in the summary row. -
Page 13: Indirect Measurement
Indirect measurement By using Pythagoras’ theorem, the instrument can calculate distances. This function is helpful, if the distance to measure can not be reached directly. Make sure you adhere to the prescribed sequence of measurement: All target points must be in a horizontal or vertical plane. ... - Page 14 Double Pythagorean calculation E.g. using 3 measurements to determine a distance Press this button until this symbol appears on the display. Press this button to trigger the measurement. Then the first value is adopted. Press this button to trigger the measurement. Then the second value is adopted.
-
Page 15: Tilt Sensor Calibration
History storage Press this button twice and the previous 30 results (measurements or calculated results) are shown in reverse order. buttons can be used for navigation. Press this button to use the result from the summary line for further calculations. Timer Press and hold down this button to set a 5-second time delay. -
Page 16: Message Codes
to confirm the result. Press Press to cancel the result. Press twice to exit without saving. Message codes All message codes are displayed with either “Info” or “Error”. Info Cause Remedy Calculation overflow Repeat procedure Temperature too high Cool down instrument Temperature too low Warm up instrument Receiver signal too weak... -
Page 17: Technical Data
Technical data Range (use target plate for longer) 0.05m to 80m Measuring accuracy up to 80m(in the room) Typ. : ±1.5mm Smallest unit displayed 1 mm Laser class Ⅱ Laser type 620-690 nm, <1 mW Automatic switch off 3 minutes of inactivity Display illumination √... -
Page 18: Measuring Conditions
Measuring conditions Measuring range As for the measure range limit, please refer to the technical specification. At night, at dusk and when the target is shadowed the measuring range without target plate is increased. Use a target plate to increase the measurement range during daylight or if the target has a bad reflection. -
Page 19: Warranty Card
Warranty Card Instrument Model Serial Number Date of sales Sale company Sale Address Packing list Name Quantity Unit Remarks Main body AAA battery Instrument cap Lanyard User manual Certificate Name:Hand-Held Laser Distance Meter Model:Bullseye 80 Testing: Date:... - Page 20 Copyright © Imex Group International 2016 www.imexlaseres.com...


Need help?
Do you have a question about the Bullseye 80 and is the answer not in the manual?
Questions and answers