VIA Technologies AMOS-825 Quick Start Manual
Linux evk v3.0.4
Hide thumbs
Also See for AMOS-825:
- User manual (36 pages) ,
- Quick start manual (22 pages) ,
- Quick start manual (22 pages)
Table of Contents
Advertisement
Quick Links
Advertisement
Table of Contents

Related Manuals for VIA Technologies AMOS-825


Summary of Contents for VIA Technologies AMOS-825
- Page 1 QUICK START GUIDE VIA AMOS-825 Linux EVK v3.0.4 1.00-10042018-154700...
- Page 2 VIA Technologies, Inc. reserves the right the make changes to the products described in this manual at any time without prior notice.
- Page 3 VIA AMOS-825 Linux EVK v3.0.4 Quick Start Guide Revision History Version Date Remarks 1.00 10/04/2018 Initial release...
-
Page 4: Table Of Contents
VIA AMOS-825 Linux EVK v3.0.4 Quick Start Guide Table of Contents 1. Introduction ����������������������������������������������������������������������������������������������������������������������� 1 1�1 EVK Package Contents �������������������������������������������������������������������������������������������������������������������������� 1 1�1�1 Firmware Folder Contents ������������������������������������������������������������������������������������������������������������� 1 1�1�2 Document Folder Contents ������������������������������������������������������������������������������������������������������������ 1 1�1�3 Tools Folder Contents �������������������������������������������������������������������������������������������������������������������� 1 1.2 Version Information and Supported Features ��������������������������������������������������������������������������������������... -
Page 5: Introduction
VIA AMOS-825 Linux EVK v3.0.4 Quick Start Guide 1� Introduction This Quick Start Guide provides an overview of how to boot the Android EVK system image on the VIA AMOS- 825 system (Bare board: VIA VAB-820 with NXP i.MX 6Quad Cortex-A9 processor) and configure the supported hardware function in the build. The VIA AMOS-825 Linux EVK v3.0.4 is developed based on the NXP fsl-yocto-3.14.28_1.0.0 (Yocto 1.7 Dizzy) and enables the hardware features of the VIA AMOS-825 system. 1�1 EVK Package Contents There are three folders in the package listed as below. Firmware folder Description via-image-gui-imx6qamos825.sdcard SD card image u-boot.imx U-Boot boot loader zImage Kernel zImage-imx6q-amos825.dtb Device tree modules-imx6qamos825.tgz All module drivers Document folder Description AMOS-825_Linux_EVK_v3.0.4_Quick_Start_ Quick Start Guide Guide _v1.00_20181004.pdf... -
Page 6: Version Information And Supported Features
VIA AMOS-825 Linux EVK v3.0.4 Quick Start Guide 1�2 Version Information and Supported Features • U-Boot version: 2014.04 • Kernel version: 3�14�28 • Evaluation image: OpenEmbedded-core built with Yocto 1.7 Dizzy • Development based on NXP fsl-yocto-3.14.28_1.0.0 (Yocto 1.7 Dizzy) • Supports SPI with eMMC or Micro SD boot (default) • Supports 7” Projective capacitive touch monitor (800 x 480) (through I2C interface) • Supports COM as debug port • Supports two FlexCAN TX/RX • Supports Gigabit Ethernet • Supports Line-out and Mic-in • Supports IEEE 802.11b/g/n Wi-Fi • Supports Bluetooth 4.0 º A2DP and SPP profile • Supports u-blox MAX-7 GPS/GNSS module •... -
Page 7: Image Installation
VIA AMOS-825 Linux EVK v3.0.4 Quick Start Guide 2� Image Installation This section explains the setup requirements for booting from a Micro SD card or the SPI ROM and eMMC. The precompiled U-boot and image are provided in the “Firmware” folder. 2�1 Booting from a Micro SD Card The first step is to install this image onto a Micro SD card. Insert a Micro SD card into your Linux host machine and make sure it is not mounted. Install the SD card image onto the Micro SD card with the commands below, replacing <device name> with the correct value for the card. *Important: Make sure you are writing to the correct device or the host system environment could be damaged� $ sudo dd if=via-image-gui-imx6qamos825.sdcard of=/dev/<device name> bs=1M conv=fsync Next, on the VIA AMOS-825, set the boot switch to the Micro SD position as shown below. Micro SD/SPI boot switch diagram Insert the prepared Micro SD card into the VIA AMOS-825, connect the specified touch monitor, and power on the VIA AMOS-825 to initiate the boot process. When the boot process is completed, you will see the OpenEmbedded desktop. -
Page 8: Booting From The Spi Rom With Emmc
VIA AMOS-825 Linux EVK v3.0.4 Quick Start Guide 2�2 Booting from the SPI ROM with eMMC The VIA AMOS-825 supports booting from the SPI ROM while loading the kernel and root filesystem from eMMC. The first step is to prepare the Micro SD card with the default image stored on it, according to section 2.1. Next, copy the u-boot.imx and via-image-gui-imx6qamos825.sdcard files from the Firmware folder onto a mass storage device such as a USB thumb drive. Make sure the boot selector is set to Micro SD boot then insert the Micro SD card and the USB thumb drive into the VIA AMOS-825. Next, on the VIA AMOS-825, set the boot switch to the Micro SD position as shown below. Micro SD/SPI boot switch diagram To check that the system has been correctly setup to the SPI ROM as an MTD block device, use the following command: $ ls /dev/mtdblock*/dev/mtdblock0 Please note that if you have previously saved the U-Boot parameters, it is recommended to clear that area of the SPI ROM with the following command: $ sudo dd if=/dev/zero of=/dev/mtdblock0 bs=512 seek=1536 count=16 To flash the U-Boot binary from the mass storage device onto the SPI ROM, use the following command: $ sudo dd if=u-boot.imx of=/dev/mtdblock0 bs=512 seek=2... - Page 9 VIA AMOS-825 Linux EVK v3.0.4 Quick Start Guide Next, in order to boot from the SPI ROM make sure the boot switch is set to SPI ROM boot. Micro SD/SPI boot switch diagram Next, connect the specified touch monitor, and power on the device to initiate the boot process. When the boot process is completed, you will see the OpenEmbedded desktop.
-
Page 10: Hardware Functions
VIA AMOS-825 Linux EVK v3.0.4 Quick Start Guide 3� Hardware Functions This section explains how to enable and test the hardware functions precompiled in the VIA AMOS-825 Linux EVK including setting U-Boot parameters, restoring default U-Boot parameters, using the OpenEmbedded console, configuring FlexCAN, configuring Watchdog timer, configuring RTC, connecting Wi-Fi, enabling Bluetooth, and configuring GPS. 3�1 Setting Up U-Boot Parameters When setting up the U-Boot parameters, the first step is to connect the host machine and the VIA AMOS-825 through the COM port. Use a serial port communication program such as PuTTY, GtkTerm, or Minicom to configure the serial port setting and connect to the debug console. There you will be able to see the U-Boot boot log and adjust settings in the U-Boot console. +------------------------------------------------------------+ Serial Device : /dev/ttymxc0 Lockfile Location : /var/lock Callin Program Callout Program Bps/Par/Bits : 115200 8N1 Hardware Flow Control... - Page 11 VIA AMOS-825 Linux EVK v3.0.4 Quick Start Guide Next, power on the VIA AMOS-825 to initiate the boot process. When prompted, press any key to stop the boot process and enter the U-Boot console as illustrated by the screenshot below. U-Boot 2014.04 (Oct 17 2015 - 18:49:13)AMOS825 ver:3.0.4 CPU: Freescale i.MX6Q rev1.5 at 996 MHz CPU: Temperature 30 C Reset cause: POR Board: MX6Q-AMOS825 I2C: ready DRAM: 1 GiB MMC:...
-
Page 12: Restoring Default U-Boot Parameters
VIA AMOS-825 Linux EVK v3.0.4 Quick Start Guide 3�2 Restoring Default U-Boot Parameters If the U-Boot parameters have been modified, the “destroyenv” command in the U-Boot console can restore the factory default settings. To restart the device, use the following commands: => destroyenv => reset 3�3 Using the OpenEmbedded Console The first step is to connect the host machine and the VIA AMOS-825 through the COM port. Use a serial port communication program such as PuTTY, GtkTerm, or Minicom to connect to the debug console. There you will be able to see the U-Boot boot log and adjust settings in the U-Boot console. Next, power on the VIA AMOS- 825 to initiate the boot process. When the boot process is completed you will be prompted to login. COM port diagram The default account is “root”, with no password set (just press Enter when prompted for password). Poky (Yocto Project Reference Distro) 1.7 imx6qamos825 /dev/ttymxc1 imx6qamos825 login: root... -
Page 13: Configuring Flexcan
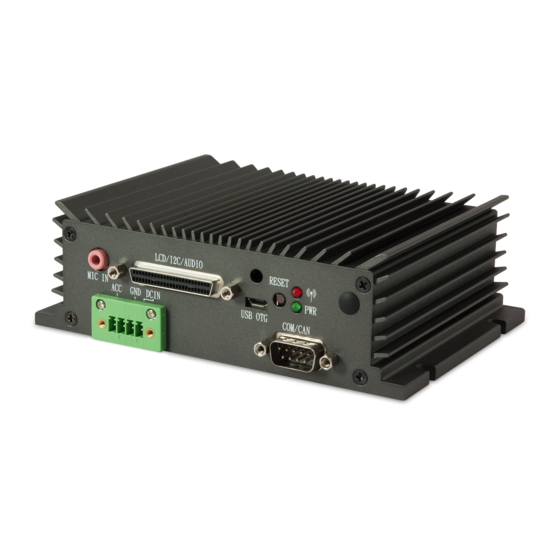
VIA AMOS-825 Linux EVK v3.0.4 Quick Start Guide 3�4 Configuring FlexCAN The COM/CAN port of the VIA AMOS-825 supports debug port (COM) and two CAN bus ports. The CAN bus supports CAN protocol specification Version 2.0B while the COM supports TX/RX for debugging purposes only. The first step is to connect the COM/CAN converter cable. Connecting COM/CAN conversion cable diagram COM/CAN port diagram Signal CANH1 CANL2 CANL1 CANH2 VCC5 COM/CAN port pinout table... -
Page 14: Configuring Watchdog Timer
VIA AMOS-825 Linux EVK v3.0.4 Quick Start Guide Please note that you need to disable the CAN bus first, set the CAN bus bitrate. The CAN bus bitrate should be 5000 < [BRT_value] < 1000000. CAN bus 1 is can0 and CAN bus 2 is can1. To set the CAN bus 1 bitrate [BRT_value], use the following command: # ip link set can0 type can bitrate [BRT_value] To enable the CAN bus 1, use the following command: # ifconfig can0 up To disable the CAN bus 1, use the following command: # ifconfig can0 down Use the cansend command to send CAN bus 1 data: # cansend can0 <ID>#<Data> <ID>: Device ID of CAN bus <Data>: Send out data Use the candump command to receive data from CAN bus 1: # candump can0 &... -
Page 15: Configuring Rtc
VIA AMOS-825 Linux EVK v3.0.4 Quick Start Guide 3�6 Configuring RTC The RTC (Real-Time Clock) keeps track of the current time values. The time values include the year, month, date, hours, minutes and seconds. To configure the RTC on the VIA AMOS-825, set the system time with the Linux date command as in the example shown below. $ date mmddHHMMYYYY Time Value 2-digit month 2-digit day 2-digit hours in 24h system 2-digit minutes YYYY 4-digit year Time value table For example, the value 061110072013 means June 11, 2013 10:07. The date command also accepts other time formats. For more information, use the following command: $ date --help To write the system time to the RTC, use the following command: $ hwclock -w -f /dev/rtc0 To read the RTC time, use the following command: $ hwclock -r 3�7... -
Page 16: Enabling Bluetooth
VIA AMOS-825 Linux EVK v3.0.4 Quick Start Guide 3�8 Enabling Bluetooth The following section explains setting up the Advanced Audio Distribution Profile (A2DP) and Serial Port Profile (SPP). 3�8�1 Setting Up Bluetooth A2DP Profile To add A2DP support to the AMOS-825, first copy and replace the pulseaudio-system.conf, bluetooth.conf to the /etc/dbus-1/system.d folder. Next, copy and replace the system.pa files to the /etc/pulse/folder. These files are located in the EVK/BT_Config folder of the BSP. To enable the Bluetooth service, use the following commands: $ rfkill unblock bluetooth $ hciconfig hci0 up $ hciconfig hci0 piscan $ /usr/lib/bluez5/bluetooth/bluetoothd -C -d & Use the following commands to run the “bluetoothctl” to show the Bluetooth MAC address and set up pairing mode for the VIA VAB-820-W module. $ bluetoothctl... -
Page 17: Setting Up Bluetooth Spp Profile
VIA AMOS-825 Linux EVK v3.0.4 Quick Start Guide The default audio output setting for the VIA AMOS-825 is Line-out. To list all the available audio output devices, use the following commands: $ pactl list short sinks 0 alsa_output.platform-sound.22.analog-stereo module-alsa-card.c s16le 2ch 44100Hz SUSPENDED 1 bluez_sink.14_06_05_24_09_E3 module-bluez5-device.c s16le 2ch 44100Hz SUSPENDED From the output, we can see the following: • 1 = Line-out • 2 = Bluetooth device To set up the audio output to a Bluetooth device, use the following command: $ pacmd set-default-sink 1 *Note: If you would like to change audio output after enabling a Bluetooth device, use the commands below:... - Page 18 VIA AMOS-825 Linux EVK v3.0.4 Quick Start Guide SPP server mode: If you do not change the listen channel number, the service will automatically use the default channel number. Make sure the server or client mode is using the same bluetooth channel number. To set up the SPP server mode and allow other devices to connect, use the following commands: $ sdptool add SP Serial Port service registered $ rfcomm listen hci0 Waiting for connection on channel 1 Connection from 5C:F3:70:25:DD:33 to /dev/rfcomm0 Press CTRL-C for hangup SPP client mode: If you do not change the listen channel number, the service will automatically use the default channel number.
-
Page 19: Configuring Gps
VIA AMOS-825 Linux EVK v3.0.4 Quick Start Guide 3�9 Configuring GPS The GPS-listener provides an application to configure the GPS function. To enable the GPS function, use the following command: $ gps-listener It will output the data received from the GPS module as illustrated in the screenshot below. $GPRMC,142015,00,A,2501.93961,N,12133.66111,E,0.068,,030314,,,A*73 $GPGSV,4,1,13,01,34,184,29,03,49,023,47,06,26,042,41,07,44,317,26*75 $GPGSV,4,2,13,08,13,323,,11,60,192,,13,29,242,38,16,33,071,16*79 $GPGSV,4,3,13,19,65,356,44,23,18,208,12,27,35,034,27,30,37,145,29*7B $GPGSV,4,4,13,32,01,154,*4B $GPZDA,142015.00,03,03,2014,00,00*62 GPS NMEA message... -
Page 20: Accessories
VIA AMOS-825 Linux EVK v3.0.4 Quick Start Guide 4� Accessories This section explains how to install and configure the module available for the VIA AMOS-825 system. 4�1 Configuring the VIA EMIO-2550 miniPCIe Mobile Broadband Module The VIA EMIO-2550 miniPCIe Mobile Broadband module supports 3G function. 4�1�1 Connecting to the Internet The first step is to insert an active SIM card into the VIA EMIO-2550 module, and then insert the VIA EMIO- 2550 module into the miniPCIe slot. After installing the module, connect the provided antenna to the module. Next, make sure to unplug any LAN cables or USB Wi-Fi dongles you have installed. Finally, power on the VIA AMOS-825. Inserting the VIA EMIO-2550 module diagram To check that the system has correctly detected the VIA EMIO-2550 module, use the following command: $ lsusb Make sure the printout message includes “Bus 001 Device 004: ID 1545:1102 U-Blox AG”. To configure the 3G function by creating a PPP connection with root privilege, use the following command: $ pppd call Module-ZU200 Once the PPP connection has been created, connect to the internet through your web browser. - Page 21 Taiwan Headquarters Japan China 1F, 531 Zhong-zheng Road, 940 Mission Court 3-15-7 Ebisu MT Bldg. 6F, Tsinghua Science Park Bldg. 7 Xindian Dist., New Taipei City 231 Fremont, CA 94539, Higashi, Shibuya-ku No. 1 Zongguancun East Road, Taiwan Tokyo 150-0011 Haidian Dist., Beijing, 100084 Japan China...
Need help?
Do you have a question about the AMOS-825 and is the answer not in the manual?
Questions and answers