
Subscribe to Our Youtube Channel
Related Manuals for Dynatone SLP-150


Summary of Contents for Dynatone SLP-150
- Page 1 OWNER’S MANUAL Dynatone Digital Piano SLP-150 N e w f e e l , n e w l o o k a n d n e w s o u n d...
-
Page 2: Precautions
PRECAUTIONS PLEASE READ CAREFULLY BEFORE PROCEEDING Please keep these precautions in a safe place for future reference. WARNING Always follow the basic precautions listed below to avoid the possibility of serious injury or even death from electrical shock, short-circuiting, damages, fire or other hazards. These precautions include, but are not limited to, the following: ㆍDo not open the piano or attempt to disassemble ㆍOnly use the voltage specified as correct for... -
Page 3: Caution
CAUTION Always follow the basic precautions listed below to avoid the possibility of physical injury to you or others, damage to the piano or other property. These precautions include, but are not limited to, the following: ㆍDo not place the power cord near heat sources ㆍDo not rest your weight or place heavy objects such as heaters or radiators, and do not on the piano. -
Page 4: Welcome
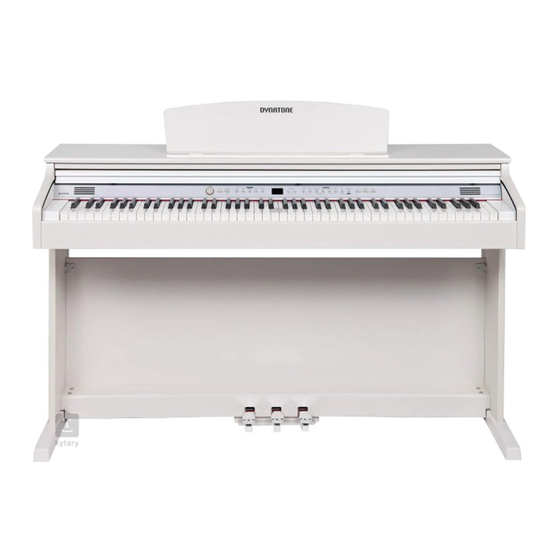
Welcome Thank you and congratulations on your purchase of Dynatone digital piano SLP-150. Your new Dynatone digital piano is a state-of-the-art musical instrument which incorporates the latest electronics technology to make its operation as easy as possible. In addition to the many features usually found on digital pianos, this contains a variety of educational resources that can be used for the learning of musical concepts and piano skills. -
Page 5: Table Of Contents
Table of Contents PRECAUTIONS Recording WARNING Recording and Playback CAUTION Demo Music Welcome Main Features Playback of the Music Demo Music List Table of Contents Drum and SFX Table Unpacking MIDI Implementation Setting Up Your Piano Troubleshooting Controls and Terminals Specifications Turning ON the Power Headphone... -
Page 6: Unpacking
Carefully take out the digital piano and its accessories from the packing box. The digital piano set consists of the following items. Unpacking Main Unit (a) Right, Left Legs (b) Right, Left Foots (c) Pedal Board (d) Back Panel (e) Owner's Manual 4 Bolt Caps (f) 2 Bolts for back panel - leg (k) -
Page 7: Setting Up Your Piano
Setting Up Your Piano Attaching both legs to the pedal board 1 Place the legs (b) onto the feet (c) and fix them using bolts (g) and nuts (h). Put the Bolt Cap into the bolt hole as shown on the illustration below. - Page 8 Attaching the main unit to the stand 1 Set the stand upright and gently lower the main unit on to the stand, then fix their connection with four Bolts (l) for Main Unit(a) as shown in the illustration. 2 Raise and hold the music stand using two metal supports on the rear of music stand.
-
Page 9: Controls And Terminals
Controls and Terminals Turning ON the Power 1 Connect the AC POWER ADAPTER. Insert the DC plug of the AC adapter into the piano and the AC plug into a household AC power outlet. ☞ See 'Connecting the pedal cord and AC adapter' on page 7. 2 Turn on POWER Press the STANDBY/ON switch to turn on the piano. -
Page 10: Connecting To Audio Devices
Connecting to Audio Devices Connectors are on the bottom of the main unit q LINE OUT jack (Stereo Phone jack) Connect the instrument's LINE OUT jack and the input jacks of a pair of powered speakers using appropriate stereo audio cable. wLINE IN jack (Stereo Phone jack) Connect the output jack (LINE OUT etc.) of an external synthesizer or the tone generator module and the instrument's LINE IN jack using appropriate stereo audio cable. -
Page 11: Connecting To The Pedal
Connecting the Pedal Insert the pedal plug into the pedal connector on the bottom of the main unit. Plug Pedal cord which is protruding from the top of the pedal assembly into the corresponding port on underside of the main unit. ☞... -
Page 12: Control Panel
Control Panel & VOLUME SECTION SETUP SECTION 1 MASTER VOLUME 6 SETUP Page 13 7 LED Display 8 DATA UP/DOWN VOICE SECTION 2 VOICE buttons 9 TUNE Page 13 Page 17 3 SPLIT 0 TRANSPOSE Page 14 Page 17 4 TWIN PIANO ! TOUCH Page 16 Page 18... - Page 13 PLAYER SECTION POWER $ DEMO A POWER SWITCH Page 21 Page 8 % RECORD B DC IN Page 20 Page 7 ^ PLAY/STOP Page 20, 21 CONNECTOR & TRACK 1 Page 20, 21 C HEADPHONE * TRACK 2 Page 20, 21 Page 8 D LINE OUT ( METRONOME...
-
Page 14: Basic Operation
Basic Operation Adjusting the Volume The piano has one volume knob on the panel for adjusting the volume. MASTER VOLUME This determines the entire volume of the piano. ☞ This also determines the volume level of the HEADPHONE(s). Selecting Voices The piano features a wealth of rich, authentic voices, including piano, organ, elec. -
Page 15: Layer
Voice List Grand E.Piano Harpsichord Organ E.Organ Strings Bass Percussion Piano Button 1 Button 2 Button 3 Button 4 Button 5 Button 6 Button 7 Button 8 G. Piano 1 E.Piano 1 Harpsichord Organ 1 E. Organ 1 Strings Acoust. Bass Drum Set G. -
Page 16: Changing The Split Point
w Call up the Split mode. To call up the split mode, press the SPLIT button. The lamp will begin flashing; the LED screen will display the number of current split voice. ☞ The default voice is '7-1' ACOUSTIC BASS in the split mode. e Select the split voice. -
Page 17: Using The Metronome
Using the Metronome The piano features a convenient metronome that is ideal for practice. ADJUSTING THE TEMPO OF THE METRONOME You can set the tempo to a range of 20 ~ 280 beats per minute by using the DATA/TEMPO buttons. ☞... -
Page 18: Function
Function Tune The Tune function lets you make fine adjustments to the pitch, allowing you to accurately match the tuning with that of other instruments. Press and hold down the SETUP button and press the TUNE UP or DOWN button. ☞... -
Page 19: Touch
Touch The touch option determines the extent to which the volume of the piano responds to your playing strength (velocity). 4 different types are available for tailoring the keyboard response to the selected voice, type of song, or your own playing preference. Press and hold down the SETUP button and press the TOUCH UP or DOWN button. -
Page 20: Initializing Digital Piano
Setup mode and re-initializing Digital Piano The set values for each of the 10 functions can be adjusted in the setup menu. The setup menu also gives you the option of re-initializing the piano, restoring the values of all functions to their default and bringing the piano to its initial status. -
Page 21: Recording
The piano features comprehensive song recording functions that allow you to record your own performance. A song records 2 tracks and approx. 9,000 notes can be Recording recorded into one track. Recording and Playback q Prepare recording to the Track 1 Select the desired voice and press both the RECORD and the TRACK 1 buttons. -
Page 22: Demo Music
50 pieces of piano music are enlisted in the piano as demo. You can playback the demo music for your own listening pleasure, or use them for practice. Demo Music Playback of the Music q Enter the demo music mode. Press the DEMO MUSIC button. -
Page 23: Demo Music List
Demo Music List Display Title Composer d 0 1 Etude op.10 no.1 C h o p i n , F r y d e r y k d 0 2 Etude op.10 no.4 F r a n c i s z e k d 0 3 Etude op.10 no.5 d 0 4... -
Page 24: Drum And Sfx Table
Drum and SFX Table Prog 1 Prog 57 Standard Drum (8-1) SFX 2 (8-2) 27 - D#1 High Q 28 - E1 Slap 29 - F1 Scratch Push 30 - F#1 Scratch Pull 31 - G1 Sticks 32 - G#1 Square Click 33 - A1 Metronome Click... -
Page 25: Midi Implementation
MIDI Implementation Function Recognized Transmitted Remark Basic Channel Default 1 -3 Mode Default OMNI OFF, POLY OMNI OFF, POLY Note ON/OFF 9nH kk vv #kk:note ON (0-127) #vv:velocity (1-127) Pitch Bender EnH bi bh Maximum swing +/- 1 tone 00 BnH 00H cc Bank Select 01 BnH 01H cc Modulation Wheel... -
Page 26: Troubleshooting
Troubleshooting ※ Be sure to check to following table whenever you encounter problems with the DIGITAL PIANO operation. PROBLEM CAUSE SOLUTION No sound 1. Power supply problem. 1. Check the power cord whether it's properly in AC outlet. 2. Volume setting is too low. 2. -
Page 27: Specifications
Specifications Section Contents PRODUCT DIGITAL PIANO KEYBOARD 88 KEYS (STANDARD) - 7 1/4 OCTAVES TOUCH RESPONSE OFF, SOFT, NORMAL, HARD MAX. POLYPHONY 64 NOTES SOUND 14 VOICES 1 DRUM KIT 1 SOUND EFFECT SET FUNCTIONS LAYER, SPLIT, TUNE, TRANSPOSE, MIDI LOCAL CONTROL, PEDAL DIGITAL SIGNAL PROCESSING EFFECT(13), REVERB(8) METRONOME...
Need help?
Do you have a question about the SLP-150 and is the answer not in the manual?
Questions and answers