Table of Contents
Advertisement
Quick Links
Advertisement
Table of Contents

Related Manuals for Measurement Computing PCI-CTR10


Summary of Contents for Measurement Computing PCI-CTR10
- Page 2 PCI-CTR10 9513-Based Counter/Timer User's Guide Document Revision 2, June, 2006 © Copyright 2006, Measurement Computing Corporation...
- Page 3 Measurement Computing. Thank you for choosing a Measurement Computing product—and congratulations! You own the finest, and you can now enjoy the protection of the most comprehensive warranties and unmatched phone tech support. It’s the embodiment of our two missions: To offer the highest-quality, computer-based data acquisition, control, and GPIB hardware and software available—at...
- Page 4 Information furnished by Measurement Computing Corporation is believed to be accurate and reliable. However, no responsibility is assumed by Measurement Computing Corporation neither for its use; nor for any infringements of patents or other rights of third parties, which may result from its use. No license is granted by implication or otherwise under any patent or copyrights of Measurement Computing Corporation.
-
Page 5: Table Of Contents
Introducing the PCI-CTR10 ......................1-1 Software features ............................1-1 PCI-CTR10 block diagram ..........................1-2 Chapter 2 Installing the PCI-CTR10 ........................2-1 What comes with your PCI-CTR10 shipment? ....................2-1 Hardware ..................................2-1 Additional documentation.............................. 2-1 Optional components ..............................2-1 Unpacking the PCI-CTR10..........................2-2 Installing the software ............................ -
Page 6: About This User's Guide
About this User's Guide What you will learn from this user's guide This user's guide explains how to install, configure, and use the PCI-CTR10 so that you get the most out of the counter features. This user's guide also refers you to related documents available on our web site, and to technical support resources. -
Page 7: Introducing The Pci-Ctr10
Software features For information on the features of InstaCal and the other software included with your PCI-CTR10, refer to the Quick Start Guide that shipped with your device. The Quick Start Guide is also available in PDF at www.mccdaq.com/PDFmanuals/DAQ-Software-Quick-Start.pdf Check www.mccdaq.com/download.htm... -
Page 8: Pci-Ctr10 Block Diagram
PCI-CTR10 User's Guide Introducing the PCI-CTR10 PCI-CTR10 block diagram PCI-CTR10 functions are illustrated in the block diagram shown here. Counter A AMD9513 (equivalent) 16 BIT COUNTERS Input Clock0 Gate0 Counter 0 1/3.33/5 MHz Output Clock0 PCI-CTR10 Input Clock1 Gate1 Block Diagram... -
Page 9: Installing The Pci-Ctr10
In addition to this hardware user's guide, you should also receive the Quick Start Guide (available in PDF at www.mccdaq.com/PDFmanuals/DAQ-Software-Quick-Start.pdf). This booklet supplies a brief description of the software you received with your PCI-CTR10 and information regarding installation of that software. Please read this booklet completely before installing any software or hardware. -
Page 10: Unpacking The Pci-Ctr10
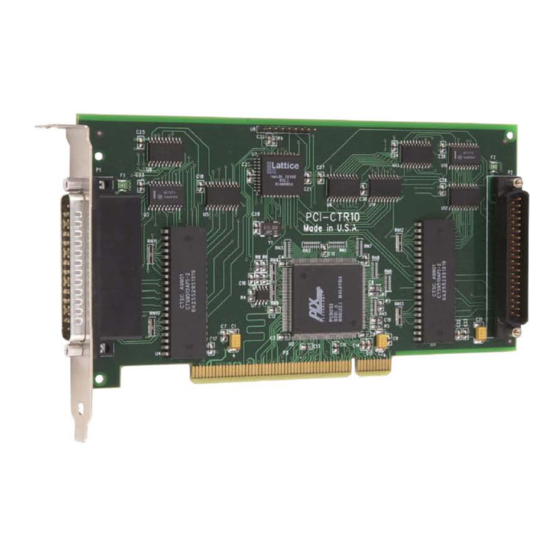
Turn your computer off, open it up, and locate two adjacent PCI expansion slots. From the rear of the computer, place the PCI-CTR10 in the left hand of the two empty slots, so that the empty slot is on the component side of the PCI-CTR10. Cabling is easier when there is an empty slot on the component side of the board. -
Page 11: Connecting The Board For I/O Operations
9513 are all accessible on these connectors. The signals on both connectors are identical. The second 9513 device on the PCI-CTR10 is accessible via connector P2 at the rear of the board, and is wired identically to the 9513 device on connector P1. -
Page 12: Field Wiring, Signal Termination And Conditioning
Figure 2-3. C37FFS-x cable Field wiring, signal termination and conditioning You can use the following MCC screw terminal boards and relay racks with the PCI-CTR10 board using the C37FF-x or C37FFS-x cable. — 37-conductor, shielded signal connection/screw terminal box that provides two independent 37- SCB37 pin connections. -
Page 13: Programming And Software Applications
We recommend that you use the Universal Library or one of the packaged application programs mentioned above for controlling your board. Only experienced programmers should attempt register level-programming. If you must use register-level programming in your application, refer to the Register Map for the PCI-CTR10. This document is available on our web site at... -
Page 14: Specifications
Chapter 4 Specifications Typical for 25 °C unless otherwise specified. Specifications in italic text are guaranteed by design. Counters Refer to CTS9513-2 data sheet for complete 9513 specifications and operating modes. The SAVE command for the CTS9513 device does not behave predictably when using clocks which are not synchronous with the logic timing. -
Page 15: Digital Input / Output
PCI-CTR10 User's Guide Specifications Parameter Conditions X2 clock frequency BCD scaling (X2 divided by 10, 100, 1000 or 10000) or Binary scaling (X2 divided by 16, scaler 256, 4096 or 65536) High pulse width 70 ns min (clock input) Low pulse width... -
Page 16: Interrupts
PCI-CTR10 User's Guide Specifications Interrupts Table 3. Interrupt specifications Number of user interrupts PCI interrupt PCI INTA# - mapped to IRQn via PCI BIOS at boot-time Interrupt enables External: IRQ_A ENABLE, IRQ_B ENABLE, active low, disabled by default through internal resistor to TTL high) and programmable through PCI9052-1;... -
Page 17: Main Connector And Pin Out
PCI-CTR10 User's Guide Specifications Main connector and pin out The P1 connector is compatible with the CIO-CTR05 and the PCI-CTR05. Both P1 and P2 are compatible with the CIO-CTR10. Table 7. Main connector specifications Connector types P1: 37-pin shielded D-type, right angle. - Page 18 Norton, MA 02766 Category: Electrical equipment for measurement, control and laboratory use. Measurement Computing Corporation declares under sole responsibility that the product PCI-CTR10 to which this declaration relates is in conformity with the relevant provisions of the following standards or other...
- Page 19 Measurement Computing Corporation 10 Commerce Way Suite 1008 Norton, Massachusetts 02766 (508) 946-5100 Fax: (508) 946-9500 E-mail: info@mccdaq.com www.mccdaq.com...
Need help?
Do you have a question about the PCI-CTR10 and is the answer not in the manual?
Questions and answers