Table of Contents
Advertisement
Quick Links
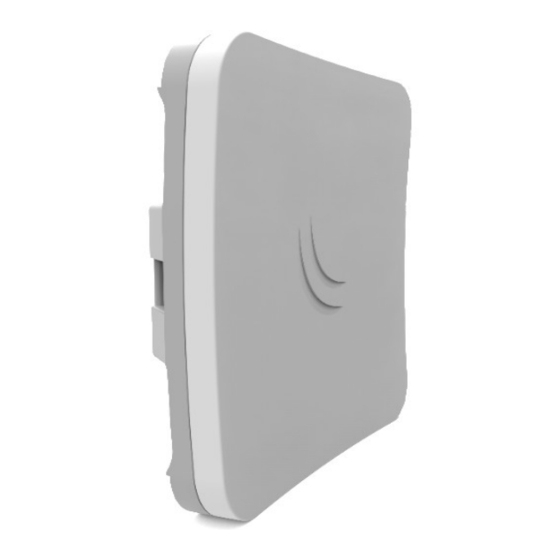
SXTsq-series
SXTsq series
The SXTsq is an outdoor wireless router with a built-in directional antenna. It can be used as a CPE or for point to point links (use RouterOS wireless
mode "bridge" to work as a single-client AP for point to point scenarios). List of products in series:
SXTsq Lite2
SXTsq Lite5
SXTsq 5 ac
SXTsq 5 High Power
Safety Warnings
Before you work on any equipment, be aware of the hazards involved with electrical circuitry, and be familiar with standard practices for preventing
accidents.
Ultimate disposal of this product should be handled according to all national laws and regulations.
All installation methods for mounting an access point on any wall surface is subject to the acceptance of local jurisdiction.
The Installation of the equipment must comply with local and national electrical codes.
This product is intended to be mounted outdoors on a pole. Please read the mounting instructions carefully before beginning installation. Failure to use the
correct hardware and configuration or to follow the correct procedures could result in a hazardous situation for people and damage to the system.
Use only the power supply and accessories approved by the manufacturer, and which can be found in the original packaging of this product.
Read the installation instructions before connecting the system to the power source.
We cannot guarantee that no accidents or damage will occur due to the improper use of the device. Please use this product with care and operate at your
own risk!
In the case of device failure, please disconnect it from power. The fastest way to do so is by unplugging the power plug from the power outlet.
It is the customer's responsibility to follow local country regulations, including operation within legal frequency channels, output power, cabling
requirements, and Dynamic Frequency Selection (DFS) requirements. All Mikrotik radio devices must be professionally installed.
Exposure to Radio Frequency Radiation: This MikroTik equipment complies with the FCC, IC, and European Union radiation exposure limits set forth for an
uncontrolled environment. This MikroTik device should be installed and operated no closer than 20 centimeters from your body, occupational user, or the
general public.
Quickstart
Open the Ethernet door.
Connect an Ethernet cable to the Ethernet port. The maximum diameter of Ethernet cable is 6mm.
Connect the other end of the Ethernet cable to the included PoE injector.
Plug the PoE injector into your network switch or computer.
Plug the included power supply into the PoE injector to start up the device.
Set LAN computer IP configuration to
The default IP address of the unit is
there is no password
We recommend clicking the "Check for updates" button and updating your RouterOS software to the latest version to ensure the best
performance and stability.
Choose your country, to apply country regulation settings and set up your password on the screen that loads.
MikroTik mobile app
automatic
(DHCP).
192.168.88.1
, open this address in your web browser to start the configuration. The username is admin and
(or, for some models, check user and wireless passwords on the sticker)
.
Advertisement
Table of Contents

Related Manuals for MikroTik SXTsq Series


Summary of Contents for MikroTik SXTsq Series
- Page 1 Dynamic Frequency Selection (DFS) requirements. All Mikrotik radio devices must be professionally installed. Exposure to Radio Frequency Radiation: This MikroTik equipment complies with the FCC, IC, and European Union radiation exposure limits set forth for an uncontrolled environment. This MikroTik device should be installed and operated no closer than 20 centimeters from your body, occupational user, or the general public.
- Page 2 In case IP connection is not available, Winbox can be used to connect to the MAC address of the device. In case you wish to boot the device from the network, for example, to use MikroTik Netinstall, hold the RESET button of the device when starting it, until the LED light turns off, then the device will start to look for Netinstall servers.
- Page 3 It's recommended to secure Ethernet cable to the pole using zip ties. With the distance from the device approximately 30 cm. As an additional option, you can use "quickMOUNT-X" – mounting bracket for easy adjustment that can be obtained separately. Product web page: https://mikrotik.com/product/qm_x Specially designed for the SQ series enables vertical and horizontal adjustment on the pole. Powering...
- Page 4 Hose Clamp SUS304 (Phillips type; clamping diameter range 30-70 mm). POE Injector with shielded connector/Gigabit POE injector. Specifications For more information about SQ series products, specifications, pictures, downloads, and test results please visit our web pages: SXTsq Lite2 https://mikrotik.com/product/sxtsq_lite2 SXTsq Lite5 https://mikrotik.com/product/RBSXTsq5nD SXTsq 5 ac https://mikrotik.com/product/sxtsq_5_ac SXTsq 5 High Power https://mikrotik.com/product/sxtsq_5_high_power...
- Page 5 Increase the separation between the equipment and receiver. Connect the equipment into an outlet on a circuit different from that to which the receiver is connected. Consult the dealer or an experienced radio/TV technician for help. FCC Caution: Any changes or modifications not expressly approved by the party responsible for compliance could void the user's authority to operate this equipment.
- Page 6 Информация о дате изготовления устройства указана в конце серийного номера на его наклейке через дробь. Первая цифра означает номер года (последняя цифра года), две последующие означают номер недели. Изготовитель: Mikrotikls SIA, Aizkraukles iela 23, Riga, LV-1006, Латвия, support@mikrotik.com. Сделано в Китае, Латвии или Литве. Cм. на упаковке.
- Page 7 MikroTik è conforme ai limiti massimi di potenza di trasmissione WLAN in conformità con le normative ETSI. Per ulteriori informazioni, consultare la dichiarazione di conformità sopra / Este dispositivo MikroTik cumple con los límites máximos de potencia de transmisión WLAN de acuerdo con las regulaciones ETSI.
Need help?
Do you have a question about the SXTsq Series and is the answer not in the manual?
Questions and answers