Table of Contents
Advertisement
Quick Links
Download this manual
See also:
Instruction Manual
Advertisement
Table of Contents

Related Manuals for Basler BE1-67


Summary of Contents for Basler BE1-67
- Page 1 INSTRUCTION MANUAL PHASE DIRECTIONAL OVERCURRENT RELAY BE1-67 Publication: 9 1709 00 990 Revision: G 05/2003...
- Page 2 INTRODUCTION This manual provides information concerning the operation and installation of the BE1-67 Phase Directional Overcurrent Relay. To accomplish this, the following is provided: Specifications Functional description Verification and operational tests Mounting information Setting procedure/example W A R N I N G !
- Page 3 First Printing: September 1988 Printed in USA Copyright© 1988 - 2003 Basler Electric Co., Highland, IL 62249 May 2003 CONFIDENTIAL INFORMATION OF BASLER ELECTRIC COMPANY, HIGHLAND, IL. IT IS LOANED FOR CONFIDENTIAL USE, SUBJECT TO RETURN ON REQUEST, AND WITH THE MUTUAL UNDERSTANDING THAT IT WILL NOT BE USED IN ANY MANNER DETRIMENTAL TO THE INTEREST OF BASLER ELECTRIC COMPANY.
- Page 4 (similar to the BE1-60). Updated Figures 4-1, 4-3 and 4-4 with the new style front panels. In Setting the Pickups , Step 11, page 5-13, added the Basler publication where the B6, Very Inverse, drawing can be found. Updated the manual style throughout.
-
Page 5: Table Of Contents
INDICATORS ..............3-4 BE1-67... - Page 6 TEST PLUG ..............6-1 Introduction BE1-67...
-
Page 7: Section 1 ! General Information
Figure 1-1. Single-Phase Directional Overcurrent Figure 1-1a shows the connections to the sensing circuits for a single phase BE1-67. Figure 1-1b illustrates the phasor quantities monitored by the relay for a unity power factor condition, and for a single phase fault. -
Page 8: Limited Region Of Operation
This angle is then used as the maximum torque angle and any current flowing in the half-plane defined by this angle is considered to be in the trip direction. Figure 1-2. Trip Direction Defined General Information BE1-67... -
Page 9: Load Current Approaches Fault Current
This limited region-of-operation characteristic (shown in Figure 1-4) is available by specifying option 3-5 or 3-6. Figure 1-4. Limiting the Region of Operation BE1-67 General Information... -
Page 10: Application
In the case where two sources of power can supply fault current, as shown in Figure 1-6, directional overcurrent relays will need to be applied to each end of the protected lines to prevent undesired tripping. Figure 1-5. Substations Fed From One Source General Information BE1-67... -
Page 11: Sample Application Calculations
Figure 1-6. Substations Fed From Two Sources SAMPLE APPLICATION CALCULATIONS In this sample illustrated by Figure 1-7, a three-phase, 60 hertz, BE1-67 relay is used at breaker position A. Assumed options for the relay include switch-selectable characteristic curves, switch-selectable characteristic angle and a directional instantaneous output. -
Page 12: Pickup
D(L) Based on these fault currents, the BE1-67 relay at A will pickup and begin to time out. But the primary concern is that the relay at D trips before the one at A. This is accomplished by selecting the appropriate pickup, time dial and characteristic for the 67 device. - Page 13 67 will see fault N, but that 67 will not. (The response of the BE1-67 Directional Unit is approximately 1 cycle, thereby blocking the overcurrent unit before it will see the fault current in the reverse direction.)
-
Page 14: Conclusions
Refer to Figure 1-9 for the Style Number Identification Chart. Model numbers BE1-67 designate the relay as a Basler Electric, Class 100, Phase Directional Overcurrent Relay. The model number together with the style number describes the options included in a specific device and appear on the front panel, drawout cradle and inside the case assembly. -
Page 15: Style Number Example
- Push-to-Energize output feature - Switch selectable characteristic angle and power supply status output - Semi-flush case mounting, M1-size case SPECIFICATIONS BE1-67 Phase Directional Overcurrent Relays are available in either single-phase or three-phase configurations with the following features and capabilities. BE1-67 General Information... -
Page 16: Current Sensing Input(S)
±5%. The TAP CAL adjustment allows the relay to be set anywhere between the value established by the TAP selector switch position and the next lower setting position. The setting of the relay is repeatable within ±2%. Dropout Ratio Better than 95% of the established pickup level. 1-10 General Information BE1-67... -
Page 17: Timing Characteristics
TIME DIAL, TAP and TAP CAL settings at 25°C. Instantaneous Overcurrent Pickup Range Continuously adjustable over the range of one to 40 times the pickup setting established for the time overcurrent element. Response Time Figure 1-10. Typical Instantaneous Response Time BE1-67 General Information 1-11... -
Page 18: Voltage Sensing Inputs
1.0 Vac at the setting of the characteristic angle. When polarizing voltage is less than the 1.0 Vac threshold, relay operation will be inhibited. Characteristic Angle Adjustment The BE1-67 is available with two types of adjustment for the characteristic angle. 1-12 General Information BE1-67... -
Page 19: Limited Range Of Operation (Optional)
Single-Phase Units When specified by the style number, either an internally operated or a current operated target will be supplied for each of the tripping outputs included within the relay (i.e., the time and instantaneous overcurrent functions). BE1-67 General Information 1-13... -
Page 20: Output Circuits
In standard tests, the relay has withstood 2 g in each of three mutually perpendicular planes, swept over the range of 10 to 500 Hz for a total of six sweeps, 15 minutes each sweep without structural damage or degradation of performance. 1-14 General Information BE1-67... -
Page 21: Characteristic Curves
To order full-size drawings of these characteristic curves, contact Customer Service Department of the Power Systems Group, Basler Electric and request publication number 9 1907 00 999. This publication contains nine full size (10 inch x 12 inch) characteristic curves on transparent paper (vellum). A drawing number is given under each graph. - Page 22 Figure 1-12. Timing Type B1 - Short Inverse (Drawing Number 99-0932) 1-16 General Information BE1-67...
- Page 23 Figure 1-13. Timing Type B2 - Long Inverse (Drawing Number 99-0931) BE1-67 General Information 1-17...
- Page 24 Figure 1-14. Timing Type B3 - Definite Time (Drawing Number 99-0933) 1-18 General Information BE1-67...
- Page 25 Figure 1-15. Timing Type B4 - Moderate Inverse (Drawing Number 99-0930) BE1-67 General Information 1-19...
- Page 26 Figure 1-16. Timing Type B5 - Inverse (Drawing Number 99-0929) 1-20 General Information BE1-67...
- Page 27 Figure 1-17. Timing Type B6 - Very Inverse (Drawing Number 99-0928) BE1-67 General Information 1-21...
- Page 28 Figure 1-18. Timing Type B7 - Extremely Inverse (Drawing Number 99-0927) 1-22 General Information BE1-67...
- Page 29 Figure 1-19. Timing Type E2 - BS-142 Long Inverse (Drawing Number 99-1093) BE1-67 General Information 1-23...
- Page 30 Figure 1-20. Timing Type E4 - BS-132 Inverse (Drawing Number 99-1094) 1-24 General Information BE1-67...
- Page 31 Figure 1-21. Timing Type E5 - BS-142 Inverse (Drawing Number 99-1095) BE1-67 General Information 1-25...
- Page 32 Figure 1-22. Timing Type E6 - BS-142 Very Inverse (Drawing Number 99-1096) 1-26 General Information BE1-67...
- Page 33 Figure 1-23. Timing Type E7 - BS-142 Extremely Inverse (Drawing Number 99-1097) BE1-67 General Information 1-27...
-
Page 34: Section 2 ! Human-Machine Interface
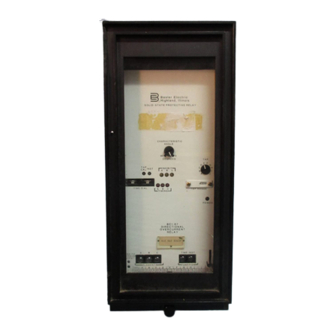
SECTION 2 HUMAN-MACHINE INTERFACE Table 2-1. BE1-67 Controls and Indicators (refer to Figures 2-1, 2-2 and 2-3) Locator Control Or Indicator Function CHARACTERISTIC This potentiometer (options 3-1, 3-3, 3-5 or 3-6 ) or 4-position ANGLE switch (options 3-2 and 3-4) defines the characteristic angle for the directional element of the relay. - Page 35 Figure 2-1. BE1-67, Three-Phase Relay With Characteristic Angle Control Knob Human-Machine Interface BE1-67...
- Page 36 Figure 2-2. BE1-67, Three-Phase Relay With Characteristic Angle and Limited Region Of Operation BE1-67 Human-Machine Interface...
- Page 37 Table 2-1. BE1-67 Controls and Indicators (refer to Figures 2-1, 2-2 and 2-3) - continued Locator Control Or Indicator Function PUSH TO ENERGIZE These momentary contact pushbutton switches are accessible by OUTPUT Pushbutton(s) inserting a 1/8" diameter non-conducting rod through the front panel.
- Page 38 Table 2-1. BE1-67 Controls and Indicators (refer to Figures 2-1, 2-2 and 2-3) - continued Locator Control Or Indicator Function N/T (Normal/Test) Switch This slide switch (shown in Figure 2-3) is mounted on the side of the digital board. This permits a technician to access a series of stored diagnostic routines to validate the calibration of the relay and to test and troubleshoot the device on the bench.
- Page 39 Figure 2-3. Location of Assemblies, Controls and Indicators Human-Machine Interface BE1-67...
-
Page 40: Section 3 ! Functional Description
BE1-67 Phase Directional Overcurrent Relays are microprocessor based time overcurrent relays with directional supervision. This allows the relay to be more effectively coordinated for the protection of transmission and distribution circuits. Figure 3-1 is a BE1-67 relay functional block diagram and illustrates the overall operation of the relay. -
Page 41: Voltage Sensing
The tripping characteristic of the relay is then defined by a line, that is, perpendicular to I . Note that the slight bow in this boundary about the origin is caused by the minimum sensitivity of the directional element: 0.02 ampere and 1.0 volt. Functional Description BE1-67... -
Page 42: Limited Region Of Operation
Figure 3-2.) This region (angle $ as shown in Figure 3-3) may be reduced by the LIMITED REGION of OPERATION control (a multi-turn potentiometer accessed through the front panel). The control is continuously adjustable (with reference to I in Figure 3-3) from ±5 degrees to ±90 degrees. BE1-67 Functional Description... -
Page 43: Indicators
Not present on single-phase relays. POWER SUPPLY Basler Electric enhanced the power supply design for unit case relays. This new design created three, wide range power supplies that replace the four previous power supplies. Style number identifiers for these power... -
Page 44: Logic Circuits
LOGIC CIRCUITS The logic circuits identified in the block diagram of Figure 3-1 and briefly described in the following paragraphs are intended to show functionally how the BE1-67 relay operates. Microprocessor The microprocessor fulfills many of the logic and signal processing functions described in the following paragraphs and performs all of the time overcurrent computations. -
Page 45: Target Indicator Circuits
Three-phase (Sensing Input type B) relays are supplied, when specified, with FUNCTION (TIME and INST) targets and ELEMENT targets (A, B, C). The FUNCTION targets are either type A or type B as specified by the style number. The ELEMENT targets are always type A (internally operated) targets. Functional Description BE1-67... -
Page 46: Section 4 ! Installation
GENERAL When not shipped as part of a control or switchgear panel, BE1-67, Phase Directional Overcurrent Relays are shipped in sturdy cartons to prevent damage during transit. Immediately upon receipt, check the model and style number against the requisition and packing list to see that they agree. Visually inspect the relay for damage that may have occurred during shipment. - Page 47 Figure 4-1. Outline Dimensions, Front View Installation BE1-67...
- Page 48 Figure 4-2. Outline Dimensions, Rear View BE1-67 Installation...
- Page 49 Figure 4-3. Outline Dimensions, Side View — Semi-Flush Mounting Installation BE1-67...
- Page 50 Figure 4-4. Outline Dimensions, Side View — Projection Mounting BE1-67 Installation...
- Page 51 Figure 4-5. Panel Drilling Diagram — Semi-Flush Mounting Installation BE1-67...
- Page 52 Figure 4-6. Panel Drilling Diagram — Projection Mounting BE1-67 Installation...
-
Page 53: Connections
Control circuit connections are shown in Figure 4-7. Typical ac connections for single-phase relays are shown in Figure 4-8. Typical ac connections for three-phase relays are shown in Figure 4-9. Internal connections are shown in Figures 4-10 and 4-11. Figure 4-7. DC Control Connections Installation BE1-67... - Page 54 Figure 4-8. Single-Phase AC Connections BE1-67 Installation...
- Page 55 Figure 4-9. Three-Phase AC Connections 4-10 Installation BE1-67...
- Page 56 Figure 4-10. BE1-67 Single-Phase, Internal Connection Diagram BE1-67 Installation 4-11...
- Page 57 Figure 4-11. BE1-67 Three-Phase, Internal Connection Diagram 4-12 Installation BE1-67...
-
Page 58: Section 5 ! Testing
(terminals 19 and 20 ) is open. Step 10. If there is a LIMITED RANGE OF OPERATION control in the relay (option 3-5 or 3-6), it is necessary to set this control to an angle of 91°. BE1-67 Testing... - Page 59 -1°. Then, starting from the maximum CW position, slowly rotate the LIMITED REGION OF OPERATION control CCW until the INHIBIT LED just lights. Step 11. Insure that the TEST/NORMAL switch (callout P of Figure 2-3) is in the NORMAL position. Figure 5-1. Single-Phase Test Setup Testing BE1-67...
-
Page 60: Verification Testing
If not, current or voltage connections are reversed and should be corrected. Step 3. Slowly turn the TAP CAL control CCW until the (associated phase) TIMING LED lights. This verifies the minimum pickup point of the specified range. BE1-67 Testing... -
Page 61: Instantaneous Overcurrent Pickup Test
It may be useful to record the results on polar graph paper to more clearly understand the significance of the results. Blank forms for this purpose are furnished as Figures 5-3 and 5-4. Testing BE1-67... - Page 62 Figure 5-3. Blank Polar Graph Form Figure 5-4. Blank Polar Graph Form BE1-67 Testing...
- Page 63 When shown on a polar plot, the result should be a straight line (through the origin ) from -90° to +90° ±5°. This plot defines the " Figure 5-5. = 0° trip region as shown in Figure 5-6. Testing BE1-67...
- Page 64 INHIBIT OFF. When shown on a polar plot, the result should be narrowed down included angle 10° (shown as the shaded region in Figure 5-7). Figure 5-7. Minimum Region Of Operation BE1-67 Testing...
- Page 65 INHIBIT LED is OFF. When shown on a polar plot, the result should be a straight line (through the origin) " Figure 5-9. = 45° from -45° to +135° ±5°. This plot defines the trip region as shown in Figure 5-9. Testing BE1-67...
- Page 66 INHIBIT LED is OFF. When shown on a polar plot, the result should be a straight line (through the origin) from -75° to +105° ±5°. This plot defines the trip region as shown in Figure 5-11. " Figure 5-11. = 75° BE1-67 Testing...
-
Page 67: Timing Curve Verification
TIMING CURVE VERIFICATION There are many timing characteristics available for BE1-67 relays. Table 5-2 provides two checkpoints for each of the twelve timing characteristic curve types. The characteristic included within the relay is defined in the style number by a two-character code. If this code is B1 to B7, E2, or E4 to E7, only one characteristic can be tested. -
Page 68: Directional Setting Procedure
Apply a voltage input of 120 Vac at a phase angle of 0° and a current input of 1.0 ampere (LOW range) or 3.0 amperes (HIGH range) at a phase angle defined by the following equation. Figure 5-12. Directional Setting BE1-67 Testing 5-11... -
Page 69: Verifying Relay Settings
60° Limited range of operation: B = 45° The relay that has been selected for this application is a BE1-67, style number B1E-Z2Y-B1N6F. Before applying sensing inputs to the relay, a few adjustments are necessary. Step 1. Since the relay includes the Z2 timing option, the characteristic curve needs to be selected. This is accomplished by removing the front panel and adjusting the TIME OVERCURRENT CHARACTERISTIC CURVE SELECTOR switch to position 6. -
Page 70: Setting The Pickups
Step 11. Adjust the TIME DIAL for a setting of 11. (This setting is determined from the characteristic curve for timing type B6, Very Inverse, Basler Drawing 99-0928 which is included in Basler publication 9 1907 00 999.) This setting will give a time delay of 0.6 second at 5 times pickup. This is the desired coordination point based on the required settings for this example.) - Page 71 INHIBIT LED turns ON and OFF. Plot the results on a polar coordinate graph for future reference. The resultant plot should look like Figure 5-14. " Figure 5-14. = 60°, Limited Range of Operation = 40° 5-14 Testing BE1-67...
-
Page 72: Section 6 ! Maintenance
TEST PLUG Test plugs (Basler p/n 10095) provide a quick, easy method of testing relays without removing them from the case. Test plugs are simply substituted for the connection plugs. This provides access to the external stud connections as well as to the internal circuitry. - Page 73 1 through 10 facing up. When using the test plug in the upper part of the relay, the numbers 11 through 20 are face up. Because of the test plug construction, it is impossible to insert it with the wrong orientation. Maintenance BE1-67...
Need help?
Do you have a question about the BE1-67 and is the answer not in the manual?
Questions and answers