Sign In
Upload
Download
Table of Contents
Contents
Add to my manuals
Delete from my manuals
Share
URL of this page:
HTML Link:
Bookmark this page
Add
Manual will be automatically added to "My Manuals"
Print this page
×
Bookmark added
×
Added to my manuals
Manuals
Brands
Kane Manuals
Measuring Instruments
AUTOplus 4-2
User manual
Kane AUTOplus 4-2 User Manual
Automotive exhaust gas analyzer
Hide thumbs
1
Table Of Contents
2
3
4
5
6
7
8
9
10
11
12
13
14
15
16
17
18
19
20
21
22
23
24
25
26
27
28
29
30
31
32
33
34
35
36
37
38
39
40
41
42
43
44
45
46
page
of
46
Go
/
46
Contents
Table of Contents
Bookmarks
Table of Contents
Table of Contents
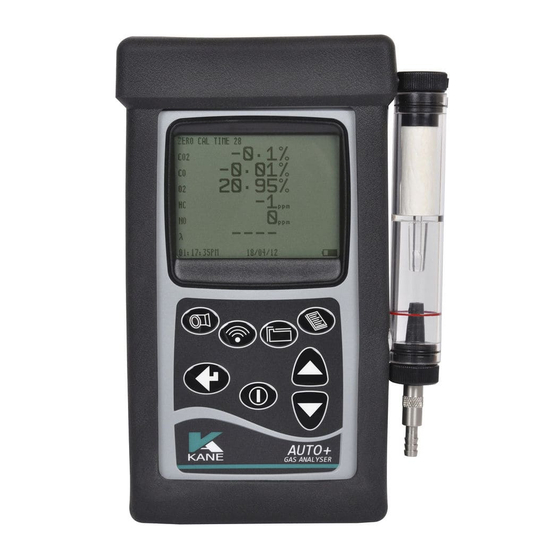
1 Analyser Layout and Features
Features and Keypad
Layout (Rear)
Standard Probe Configuration
2 Safety Warning
3 First Time Use
4 Normal Start up Sequence
Every Time You Use the Analyzer
Automatic Zero Calibration
The Keypad
Menu
Sampling the Exhaust Gas
Turning the Pump ON/OFF
Regular Checks During Sampling
Normal Shutdown Sequence
5 Printing Information-Optional Extra Only
Printing a 'Live' Test
Standard Printout
6 Maintenance
Emptying and Cleaning the In-Line Water Trap
Changing the Particle Filter
Cleaning
User Serviceable Parts
7 Problem Solving
8 Zero Checks and Re-Calibration
Zero Setting
9 Product Specification for Handheld
Appendices
Main Display Parameters
Lambda Calculation
Oxygen Balance Formula
Electromagnetic Compatability (Ce) Statement
End of Life Disposal
Product Registration
Advertisement
Quick Links
1
Features and Keypad
2
Analyser Layout and Features
3
First Time Use
4
Automatic Zero Calibration
5
Problem Solving
6
Zero Checks and Re-Calibration
7
Product Specification for Handheld
Download this manual
User Manual
AUTOplus
Automotive Exhaust
Gas Analyzer
December 2013
© Kane International Ltd
P/N: AP-UM/E
Table of
Contents
Previous
Page
Next
Page
1
2
3
4
5
Advertisement
Table of Contents
Need help?
Do you have a question about the AUTOplus 4-2 and is the answer not in the manual?
Ask a question
Questions and answers
Related Manuals for Kane AUTOplus 4-2
Measuring Instruments KANE 450 User Manual
Flue gas analyser (30 pages)
Measuring Instruments kane 455 Quick Reference Manual
Flue gas analyzer (13 pages)
Measuring Instruments Kane 455 Manual
Flue gas analyser with direct co2 measurement (48 pages)
Measuring Instruments Kane KANE451 Manual
Flue gas analyser with direct co2 measurement (52 pages)
Measuring Instruments Kane 457 Manual
Flue gas and ambient air analyser with direct co2 measurement (60 pages)
Measuring Instruments Kane 457 Manual
Flue gas and ambient air analyser with direct co2 measurement (61 pages)
Measuring Instruments Kane 457 Quick Reference Manual
(16 pages)
Measuring Instruments Kane 456 Manual
Flue gas analyser with direct co2 measurement (60 pages)
Measuring Instruments Kane 458s Manual
Flue gas analyser with direct co2 measurement and co sensor protection (36 pages)
Measuring Instruments Kane 400 Quick Reference Manual
(4 pages)
Measuring Instruments Kane KANE458 Quick Reference Manual
Flue gas analyser with direct co2 measurement & co sensor 'over-range' protection (4 pages)
Measuring Instruments Kane KANE900 Plus Manual
Hand-held combustion analyser (38 pages)
Measuring Instruments Kane 3200 User Manual
Differential pressure meter (9 pages)
Measuring Instruments Kane 9206 Quintox User Manual
Flue gas analyser (72 pages)
Measuring Instruments Kane KANE458s Manual
Flue gas analyser with direct co2 measurement and co sensor protection (53 pages)
Measuring Instruments Kane KANE988 Manual
Industrial flue gas analyser (48 pages)
This manual is also suitable for:
Autoplus 5-2
Autoplus
Table of Contents
Print
Rename the bookmark
Delete bookmark?
Delete from my manuals?
Login
Sign In
OR
Sign in with Facebook
Sign in with Google
Upload manual
Upload from disk
Upload from URL


Need help?
Do you have a question about the AUTOplus 4-2 and is the answer not in the manual?
Questions and answers