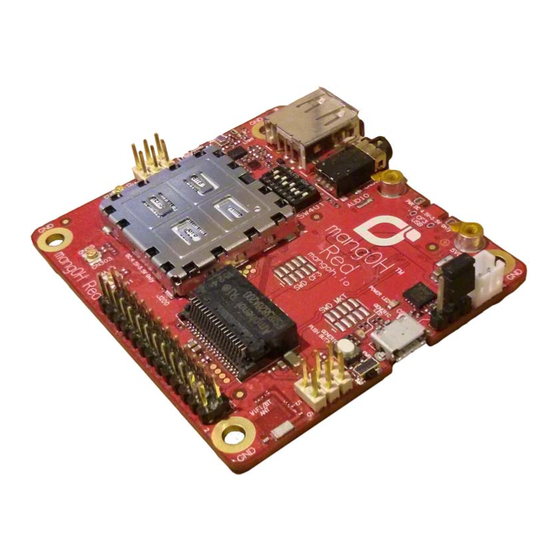
mangOH Red User Manual
Hide thumbs
Also See for Red:
- Manual (60 pages) ,
- Getting started (55 pages) ,
- Getting started manual (37 pages)
Table of Contents
Advertisement
Quick Links
Advertisement
Table of Contents

Related Manuals for mangOH Red


Summary of Contents for mangOH Red
- Page 1 Red User Guide 41110400 Rev 3 Contents subject to change...
- Page 2 Red User Guide Important Due to the nature of wireless communications, transmission and reception of data can Notice never be guaranteed. Data may be delayed, corrupted (i.e., have errors) or be totally lost. Although significant delays or losses of data are rare when wireless devices such...
- Page 3 © 2018 Sierra Wireless. Licensed under the Creative Commons Attribution 4.0 license, http://creativecommons.org/licenses/by/4.0/ Disclaimer Indicate any modifications made to the original document. Trademarks mangOH™ and the mangOH logo are trademarks of Sierra Wireless. Other trademarks are the property of their respective owners. Revision History Revision Release date...
-
Page 4: Table Of Contents
Red Components and Accessories ........ - Page 5 Red Configuration........
-
Page 6: Introduction
1: Introduction This user guide explains how to set up and begin using the mangOH™ Red with CF3 (Common Flexible Form Factor) modules. Once you have the mangOH Red set up, visit mangoh.io/mangoh-red-resources for developer documentation, code samples, and other materials. - Page 7 (Not included in kit) The mangOH Red schematic (available at mangoh.io/mangoh-red-resources-hardware), describes all interfaces supported by the mangOH Red. The following table identifies differences between mangOH Red interfaces, the CF3 standard, and WP Series modules. Refer to source.sierrawireless.com for module-specific Product Technical Specification Documents.
- Page 8 Red User Guide Table 1-2: Interface Variations (mangOH vs CF3 Specification vs WP Series Modules) Signal Names mangOH WP85/75 WP76xx WP77xx LowPower_RESET RESET_OUT_N RESET_OUT_N RESET_OUT_N RESET_OUT_N UIM2_VCC UIM2_VCC UIM2_VCC Reserved Reserved UIM2_DAT UIM2_DAT UIM2_DATA Reserved Reserved UIM2_RST UIM2_RST UIM2_RESET_N...
-
Page 9: Setup And Installation
Use safe ESD-handling practices (such as wearing proper ESD straps) to avoid possible ESD damage. • The mangOH Red kit comes with the CF3 module and cover pre-installed. If you remove the module, avoid touching the CF3 module socket (J200). These pins can be damaged if caught on clothing or other materials. -
Page 10: Initial Setup
Red User Guide 2.3 Initial Setup To begin using the mangOH Red, set up your hardware and software: Install / Update Windows Driver. See page 36. Install a Terminal Emulator. See page 37. 3. Verify the SW401 dipswitch pins are set correctly: a. - Page 11 7. Power up the mangOH Red: a. Use a micro-USB cable to connect the mangOH Red USB connector that you selected as the power supply in Step 6, and plug the other into your computer or AC adapter. CF3 USB connector...
- Page 12 Red User Guide • For information on additional hardware features, see Hardware Setup and Features on page 13. • For instructions on writing a program, see Write Your First Program on page 38. Rev 3 Sep.18 41110400...
-
Page 13: Hardware Setup And Features
• How to configure and control features using connectors and switches 3.4 Insert/Remove Embedded Module The mangOH Red has one CF3 module socket. (For a list of supported Sierra Wireless CF3 modules, see Table 1-2 on page 7.) Note: The mangOH Red comes with a CF3 module (WP76xx, WP77xx, WP8548, etc.) pre-installed. - Page 14 Figure 3-2: mangOH Red—Module Cover Attachment To remove a CF3 module from the mangOH Red: 1. Remove the module cover using the module cover removal tool—Starting at one corner, insert the tool in the pair of holes and carefully pry the cover away from the module.
-
Page 15: Power Supply Sources
• CONSOLE_USB—Serial connection used to access the module’s console for diagnostic purposes. Note: If you want to power the mangOH Red with an AC adapter instead of a computer’s USB connector, choose the appro- priate micro-USB connector: • Console—This leaves the CF3 USB connector available for SSH connections, AT commands, and firmware downloads. -
Page 16: Connect Battery Backup
Optionally, you can connect a rechargeable Li-Ion/Li-Polymer battery to the mangOH Red to provide uninterrupted power in the event that the primary power supply fails. If SW401 pin 5 is ON, the mangOH Red recharges the battery and then provides a trickle charge to maintain the battery’s full charge. -
Page 17: Connect Antenna(S)
3.3 V bias voltage • a. U.FL connectors Note: The mangOH Red includes an integrated antenna for the Wi-Fi/BT chipset. To connect an antenna to the Main, Diversity or GNSS antenna connector: 1. Place the mangOH Red face-up. Rev 3 Sep.18... -
Page 18: Sim, Sd, And Iot Expansion Cards
3.7.1 Inserting a micro-SIM Card To establish a mobile network connection with a CF3 module, you must install a micro-SIM in the connector on the bottom side of the mangOH Red. Use either of the following: • SIM card with activated account (e.g. the Sierra Wireless or AT&T SIM provided with the kit, or another carrier’s activated card), or... - Page 19 To install a SIM card: 1. Place the Dev Kit face-down (as shown). micro-SD (CN600—top) micro-SIM (CN600—bottom) Figure 3-9: SIM Connector and micro-SD Locations 2. Insert the SIM card with contacts face-down into the desired slot—note the location of the notched corner of the card in Figure 3-10.
-
Page 20: Inserting A Microsd Card
Red User Guide 3.8 Inserting a microSD Card To install a microSD card: 1. Place the Dev Kit face-down (as shown). micro-SD (CN600—top) micro-SIM (CN600—bottom) Figure 3-11: SIM Connector and micro-SD Locations 2. Insert the microSD card with contacts face-down into the top slot of CN600. -
Page 21: Inserting/Removing An Iot Expansion Card
To install an IoT Expansion Card: 1. Remove power from the mangOH Red (disconnect the micro-USB cable from the computer or AC adapter). Note: You must remove the power because IoT Expansion Cards are not hot-swappable—the card will be recognized when power is reapplied. - Page 22 2. Pull the expansion card straight out, using safe ESD-handling practices (such as wearing proper ESD straps). For detailed IoT Expansion Card slot interface information, refer to the mangOH Red Developer’s Guide. For detailed information about expansion cards, refer to the IoT Expansion Card Specification.
-
Page 23: Peripheral Connectors
3.9 Peripheral Connectors 3.9.1 Raspberry Pi Connector CN307 is a 26-pin connector that provides access to primary Raspberry Pi Rev B pin functions. Raspberry Pi-compatible connector Figure 3-16: Raspberry Pi Connector Power 3.3V (Pins 1/17) 5.0V (Pins 2/4) (Pins 3/5) GPIO (CF3) UART (Pins 7/11/13/15) -
Page 24: Audio Connection
The mangOH Red includes a 3.5 mm audio jack (CN500) for use with audio-enabled CF3 modules. If supported by the CF3 module, the jack can be used to make a voice call. By default, the audio jack is connected to the onboard mangOH codec, and is configured for use with a CTIA/ AHJ-compatible headset. For details, see Table 3-4 on page 30. -
Page 25: Control Connections
Figure 3-20: Console USB Output Connection 3.10.2 CF3 USB Connection The mangOH Red includes a micro-USB 2.0 connector (CN801) for access to the CF3 module’s interfaces (ECM, AT, etc.), and to install firmware downloads on the Wi-Fi/BT chipset. By default, this port is enabled and configured to connect to the CF3 module’s USB interface. - Page 26 Red User Guide CF3 USB connector Figure 3-21: CF3 USB Connector Rev 3 Sep.18 41110400...
-
Page 27: Led Indicators
3.11 LED Indicators The mangOH Red includes several LED indicators. Table 3-3: mangOH Red LEDs Description D803 - On when power is supplied by any power source (USB, 1—Power (VCC_3V3) battery) 2—IoT Expansion Card 0 D401 - On when an IoT Expansion Card is installed in slot IOT0. - Page 28 Red User Guide Top Side D803 - Power D410 - Generic Bottom Side D402 - Rx / Tx D401 - IOT0 D200 - WLAN connected Figure 3-22: LED Indicators Rev 3 Sep.18 41110400...
-
Page 29: Physical Switches
On—When power is connected to the board, power is supplied automatically to the module. SW402 has no effect. For details on resetting the mangOH Red or specific application blocks, see the mangOH Red Developer’s Guide. 1—Board reset (SW400) 2—ULPM/PWR_ON (SW402) Figure 3-23: Reset Switches 3.12.2 Buttons... -
Page 30: Mangoh Red Configuration
Red User Guide 1—Generic button (SW200) Figure 3-24: Buttons 3.13 mangOH Red Configuration 3.13.1 Default Configuration The mangOH Red‘s default configuration is described in Table 3-4. Table 3-4: mangOH Red Default Configuration Component / Switch Default Configuration / Behavior... -
Page 31: Switch And Jumper Configuration Options
• TP1_BOOT (Dip 7)=OFF • LowPower_RESET (Dip 8)=ON • 3.13.2 Switch and Jumper Configuration Options The mangOH Red uses several switches and jumpers to configure the board and CF3 module‘s operation, as detailed below in Table 3-5 through Table 3-8. -
Page 32: Low-Power I/O
Analog input 3.15 Low-power I/O The mangOH Red includes a connector that provides GPIOs and ADCs that can continue to be accessed when the CF3 module is in low power mode, and can provide low voltage power to the external sensors/devices connected to those pins. - Page 33 Table 3-8: SW401—Module Signals Control Signal On / Off State On (Default) Enable CF3 module’s POWER_ON signal PWR_ON Disable POWER_ON signal Enable CF3 module’s firmware download (recovery) mode. WIFI_UART1_TX Note: Similar functionality to TP1_BOOT Off (Default) Normal operation While in ULPM, CF3 module and accessories On (Default) receive power.
- Page 34 13—Generic button (SW200) 14—PWR_ON switch (SW402) 15—Reset switch (SW400) 16—CF3 module socket (J200) 17—Real Time I/O (CN310) 18—Low Power I/O (CN312) Figure 3-25: mangOH Red Assembly—Top Side Switches/Connectors Note: For reference only. For latest schematic, visit mangoh.io/mangoh-red-resources-hardware. Rev 3 Sep.18 41110400...
- Page 35 1—CF3 micro-USB connector (CN801) 2—micro-SIM (CN600, bottom slot) 3—microSD (CN600, top slot) 4—ESIM (U603 (DNI)) Figure 3-26: mangOH Red Assembly - Bottom Side Connectors Note: For reference only. For latest schematic, visit mangoh.io/mangoh-red-resources-hardware. Rev 3 Sep.18 41110400...
-
Page 36: Software Setup
4: Software Setup This chapter describes software resources that you will need on your computer to access the mangOH Red and develop applications for its CF3 module. Sample applications and instructional materials are available from the sites mentioned in this chapter. For detailed information on developing for the mangOH Red, see the mangOH Red Developer’s Guide and related documents... -
Page 37: Install A Terminal Emulator
Ports [COM & LPT] > Sierra Wireless NMEA Port (This is the port that you will use to communicate with the module from your terminal emulator.) 4.18 Install a Terminal Emulator To communicate with the mangOH Red, you need a terminal emulator program such as Tera Term or ® HyperTerminal When you have an emulator installed, use it to establish a console connection to the mangOH Red: •... -
Page 38: Write Your First Program
Red User Guide 4.20 Write Your First Program For instructions on building applications (including writing a ‘Hello World’ program to test your mangOH Red), and to download sample Legato applications, visit mangoh.io/mangoh-red-resources. Rev 3 Sep.18 41110400... -
Page 39: Console Access
A: Console Access If you have two USB ports on your dev machine, you can use one of them to display the mangOH Red’s diagnostic messages when the device boots, when certain commands are run, etc. To set up a window to display diagnostic messages: 1.
Need help?
Do you have a question about the Red and is the answer not in the manual?
Questions and answers