Table of Contents
Advertisement
Quick Links
Download this manual
See also:
User Manual
Models Included
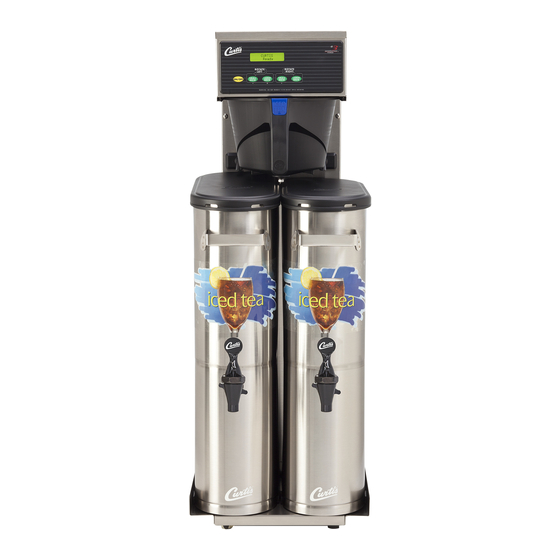
• RSTB
CAUTION: Equipment
must be installed to
comply with applicable
federal, state, and local plumbing/
electrical codes having jurisdiction.
CAUTION: Follow this
setup procedure before
attempting to use this
unit. Failure to follow these instruc-
tions can result in injury and/or void
of warranty.
CAUTION: DO NOT
connect the unit to hot
water. The inlet valve is
not rated for hot water.
IMPORTANT: After
setup, run a FULL
brewcycle. Place a tea
container to catch both hot water
from the brewcone and dilution
water from spout on the front
cover.
ISO 9001:2008 REGISTERED
WILBUR CURTIS CO., INC.
Montebello, CA 90640
For the latest information go to
www.wilburcurtis.com
Tel: 800/421-6150
Service Manual – RSTB Dual Dilution/Sweet Tea
Important Safeguards/Symbols
This appliance is designed for commercial use. Any servicing other than cleaning and routine main-
tenance should be performed by an authorized Wilbur Curtis Company service technician.
• DO NOT immerse the unit in water or any other liquid
• To reduce the risk of fire or electric shock, DO NOT open service panels. There are no user
serviceable parts inside.
• Keep hands and other items away from hot areas of the unit during operation.
• Never clean with scouring powders or harsh chemicals.
Symbols:
WARNINGS – To help avoid personal injury
Important Notes/Cautions – from the factory
Sanitation Requirements
Your Curtis G3 Brewer is Factory Pre-Set and Ready to Go, Right Out of the Box.
Following are the Factory Settings for your RSTB Tea Brewing System:
• Brew Temperature = 204°F
• Brew Volume = Set to dispensing vessel requirements (2.2 liters)
Generally there will never be a reason to change your G3 programming. However, should you
need to make slight adjustments to meet your brewing needs, programming instructions are pro-
vided later in this manual.
System Requirements:
• Water Source 20 – 90 PSI (Minimum Flow Rate of 1 GPM)
• Electrical: See attached schematic for standard model or visit www.wilburcurtis.com for
your model.
Equipment to be installed to comply with applicable federal, state, or local plumbing/electrical codes
having jurisdiction.
SETUP STEPS
The unit should be level (left to right and front to back), located on a secure surface. Connect a
water line from the water filter to the brewer.
NOTE: A water filtration system must be used to help maintain trouble-free operation. Air must be purged from the
cartridge prior to connection to equipment. In areas with extremely hard water, we highly recommend the use of
a Curtis approved water filter. For our full line of filters, log on to www.wilburcurtis.com.
NSF International requires the following water connection:
1. A quick disconnect or additional coiled tubing (at least 2x the depth of the unit) so that the machine
can be moved for cleaning underneath.
2. This equipment is to be installed with adequate backflow protection to comply with applicable
federal, state and local codes..
3. Water pipe connections and fixtures directly connected to a potable water supply shall be sized,
installed and maintained in accordance with federal, state, and local codes.
1. Plug in power cord.
2. Plumb water line. A 1/4" Flare has been supplied for water line connection. Use tubing sized suf-
ficiently to provide a minimum of 1.0 GPM.
3. Connect the Bag-in-Box sweetener. Take the clear line with the QCD bag connector and hookup
to the matching connector on the BIB sweetener (see Sweetener Connection, page 8).
FOR THE LATEST SPECIFICATIONS AND INFORMATION GO TO WWW.WILBURCURTIS.COM
W
C
C
ilbur
urtis
o
., i
.
nC
1
Advertisement
Table of Contents

Related Manuals for Curtis RSTB


Summary of Contents for Curtis RSTB
- Page 1 NOTE: A water filtration system must be used to help maintain trouble-free operation. Air must be purged from the cartridge prior to connection to equipment. In areas with extremely hard water, we highly recommend the use of a Curtis approved water filter. For our full line of filters, log on to www.wilburcurtis.com. IMPORTANT: After setup, run a FULL brewcycle.
-
Page 2: Setup Steps
SETUP STEPS (Continued) 4 Turn on the main power switch (bottom toggle switch, behind the brewer). The heating tank will start to fill. When the water level in the tank rises to the correct volume, the heating element will energize automatically. This eliminates the possibility of element burnout caused by an empty tank 5. In the initial warm-up of the heating tank, it will require 20 to 30 minutes to reach operating temperature (204°F). This is indi- cated when Ready to Brew appears on the LCD screen. 6. Prime the sweetener pump to prepare the unit for brewing. Hold a cup under the dilution spout to catch liquid sweetener. Press the PRIME button. Hold down the button until sweetener flows from the dilution spout. Release the button. The sweetener pump is now primed. Perform this at the initial tea brewer setup and thereafter, each time the BIB sweetener is replaced. 7. Run one full brew cycle, to purge the water lines and valves of air. Five seconds of dilution water at the beginning of each brew cycle is a normal function. This is a default of the system. 8. The unit is now ready to brew tea. SWEETENER SCHEMATIC LAYOUT... - Page 3 Your Curtis ADS System is Factory Pre‑Set for Optimum Performance. After connection to water and power; the rear toggle switch must be on. You will hear a beep sound, indicating power is available to the controller. <Dual – Sweet> CURTIS...
- Page 4 Programming ENTER PROGRAMMING: Turn off at the ON/OFF button (yellow). Press and hold BREW button (green #4) and then press and release ON/OFF button. Continue holding BREW button. Display will read , wait until is displayed Enter the 4-digit access code, the digits 1-4 correspond to the buttons (see illustration below).
- Page 5 Press to display number and change number, (the number can be changed 1 to 4) or < to move place and ex to exit. Banner Name (Factory set to Curtis) Press to display letters and change letters or < to move place and EX to exit. This feature allows up to 14 letters to be Banner Name programmed for company name.
- Page 6 Tea Quality Timer (Factory set to OFF) Press to Select. Press < or > to adjust from 0 to 10 hours in 1 hour increments. Timing starts when a brew button Tea Quality Timer is pressed. When time expires, the UCM will emit an audio alarm and the words Quality Timer will appear flashing on the screen.
- Page 7 TEA BREWER DAILY CLEANING 1. Wipe any spills, dust or debris from the exterior surfaces with a damp cloth. The outside surfaces of the brewer should be cleaned with stainless steel polish only, to IMPORTANT: Clean out prevent scratches. the screen, within the brewcone, to maintain 2. Clean the sprayhead and domed area around the sprayhead with a mild detergent the flow of brewed and warm water solution. Scrub well to remove residue. Rinse with and clear water. tea. Neglecting this screen will Dry with clean cloth. eventually cause the brewcone to 3. Remove the plastic brewcone and wash with a detergent solution or put through a overflow, spilling hot liquid over the dishwasher.
- Page 8 4. Place an empty tea container on the brew deck and an empty brewcone into the rails below the sprayhead. 5. Press the SWEET TEA brew button to run one complete brewcycle. 6. Allow the brewer to sit overnight with the cleaning solution in the sweetener line before flushing cleaning solution. 7. Flush the system by filling a one gallon container with clean hot water (no cleaning solution) and press the SWEET TEA brew button to run a brewcyle until all the cleaning solution has been flushed from the system. 8. Discard solution that poured into the container. 9. Remove the QCD from the flushing container and replace the cap. Reconnect the QCD to the Bag in the Box sweetener. 10. If desired, reset Tea Fast Brew to OFF. The unit is ready to resume brewing. TEA TIPS WARNING DO NOT refrigerate unused • Store tea bags in a dark, cool and dry place away from strong odors and moisture. tea overnight for later Do not refrigerate. consumption. • Do not hold brewed tea overnight. • Make sure your equipment is clean at all times. Clean tea-brewing equipment at least once a day. • Sanitize equipment at least once per week. • Do not let fresh-brewed iced tea sit at room temperature for more than 8 hours. As with other food products, if you adhere to proper preparation, holding and sanitation procedures, fresh-brewed iced tea is a safe beverage. The primary cause for high bacteria counts found in tea from food service businesses is related to excessive holding times and/or poor cleaning and sanitizing procedures.
-
Page 9: Main View
ILLUSTRATED PARTS LIST Main View ITEM PART № DESCRIPTION WC-58117 COVER, TOP BREWER WC-43134 O’RING, .426 X 9/16 O.D X .070 WALL EDPM TCTS WC-66079 SPOUT ASSY , DILUTION PLASTIC WC-826L* VALVE, INLET 1 GPM 120V 10W (OLDER UNITS) WC-856 VALVE, INLET 1 GPM 240V 10W WC-8556* HEAT SINK ASSY DV WC-895-104... -
Page 10: Illustrated Parts List
KIT, SPRAYHEAD FITTING WC-43089* GASKET, 1.00”OD x .625”ID x .030” THK WHITE EPDM WC-786-104* CONTROL MODULE, (UCM) 120VAC TCTS/T-RC WC-390159 LABEL, UCM OVERLAY RSTB 1BATCH CURTIS LOGO WC-390160 LABEL, UCM OVERLAY RSTB W/½BATCH CURTIS LOGO WC-29025* SPRAYHEAD, PURPLE ADVANCE FLOW GEM-6-101* FILTER, PAPER 15 x 5½... - Page 11 ILLUSTRATED PARTS LIST Heating Tank ITEM PART № DESCRIPTION WC-5853-102 COVER, TOP HEATING TANK GEN USE WC-43062* GASKET, TANK LID WC-6277 TANK, COMPLETE 1600W 120V TCTS/PTT WC-6290-101 TANK, COMPLETE TCTS/ PTT3/W/WC- 934-01ELEMENT WC-5527K KIT, PROBE, WTR LEVEL FITTING, O-RING, & NUT WC-904-04* ELEMENT, HEATING 1.6KW 120V W/JAM NUTS WC-934-04...
-
Page 12: Parts List
PARTS LIST Sweetener System 2 FEET 2 FEET 6 FEET ITEM PART № DESCRIPTION WC-37313 KIT, PUMP AND FITTINGS TCTS10200 WC-43059 CLAMP, HOSE SNAP NYLON .616/.707 WC-8653 QCD, LIQUID BOX BAG CONNECTOR WC- 800 VALVE, TRANSFER FLOJET SWEET TEA WC-53116 TUBE, CLEAR BEV ⅝ O.D x ⅜ I.D SWEETENER SYSTEMS... -
Page 13: Electrical Schematic
ELECTRICAL SCHEMATIC... -
Page 14: Rough-In Drawing
ROUGH-IN DRAWING 9.125" 16.625" (23.2 cm) (42.2 cm) 22.875" 34.250" (58.1 cm) 20.875" (87.0 cm) (53.0 cm) 22.875" 22.625" (58.1 cm) (57.5 cm) 13.375" (34.0 cm) 12.375" (31.4 cm) 1.250" (3.2 cm) - Page 15 This Page Intentionally Left Blank...
-
Page 16: Product Warranty Information
The warranty covers original equipment at time of purchase only. The Wilbur Curtis Co., Inc., assumes no responsibility for substitute replace- ment parts installed on Curtis equipment that have not been purchased from Wilbur Curtis Co., Inc. The Wilbur Curtis Co., Inc. will not accept any responsibility if the following conditions are not met.
Need help?
Do you have a question about the RSTB and is the answer not in the manual?
Questions and answers