
Subscribe to Our Youtube Channel
Related Manuals for KRAL OMG 13


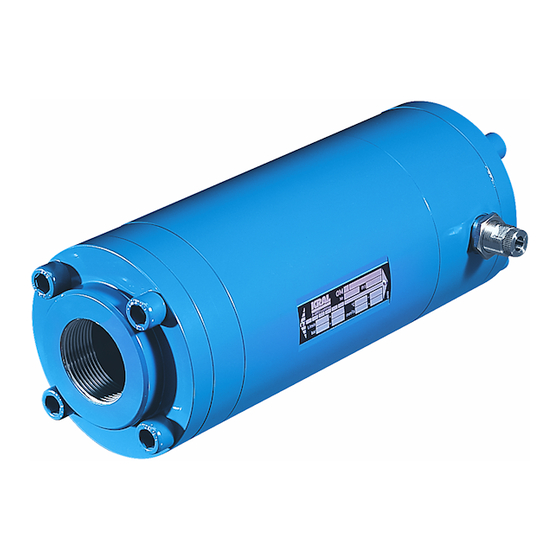
Summary of Contents for KRAL OMG 13
- Page 1 Operating Instructions KRAL Flowmeter. OMG Series OIO 14en Edition 07/2017 Original instructions www.kral.at...
-
Page 2: Table Of Contents
OMG with BSPP thread ▪ OMG with DIN flange Maintenance □ Load-bearing capacity □ Safety instructions on maintenance ▪ Load-bearing capacity OMG 13 □ Required maintenance ▪ Load-bearing capacity OMG 20 □ Re-calibration of the flowmeters ▪ Load-bearing capacity OMG 32 □... -
Page 3: General Information
General information General information About this document The operating instructions form part of the KRAL Flowmeter and must be kept for future reference. Furthermore please observe the associated documents. Target groups Target group Tasks □ Operator-owner Keep these instructions available at the site of use for future reference. -
Page 4: Associated Documents
Associated documents Associated documents Calibration certificate Declaration of conformity according to EU Directive 2006/42/EC Manufacturer's declaration as per EU Directive 2014/34/EU ATEX supplementary instructions for operation in areas at risk of explosions Manufacturer's declaration as per EU Directive 2014/68/EU Corresponding operating instructions for pick ups Corresponding operating instructions for temperature sensor Corresponding operating instructions for electronic equipment OIO 14en Edition 07/2017... -
Page 5: Proper Use
Proper use Proper use Safety □ Use flowmeters of the OMG series solely for flow measurement of lubricating liquids that are chemically neutral and do not contain any gas or solids content. □ Flowmeters require the operation with clean liquids. If coarse soiling, solid particles in the liquid or abrasive fine particles occur during operation, the flowmeter has to be protected additionally by a correspondingly dimensioned operating filter in the pipe system, see "Cleaning the pipe system", page 32. -
Page 6: Type Code
Type code Type code Labelling 1 Series 2 Size 3 Sensor technology 4 Function of sensor technology OMG-020.CABABA.0001 5 Material of bearing 6 Material of seal 7 Mechanical connection 8 Electrical connection 9 Version index Fig. 1 Type code Item Designation Description Series... -
Page 7: Rating Plate
Rating plate Item Designation Description Electrical A: Loose cable head connection B: Cable gland junction box X: Special design Version index For internal administration Rating plate 1 Serial number 2 Construction year 3 K-factor 4 Preferred flow direction 5 Maximum temperature 6 Type ®... -
Page 8: Load Due To Pressure Pulsation
In addition, the operational limits of the corresponding end connection, of the sealing material of the pick up and of the temperature sensor are to be observed. OMG 13 OMG 20 OMG 32 OMG 52 OMG 68 OMG100 OMG140 Flow rate... - Page 9 OMG 13 OMG 20 OMG 32 OMG 52 OMG 68 OMG100 OMG140 Pole number K-factor [P/l] 2 432 1280 79.6 33.6 17.7 Milliliters/pulse [ml/P] 0.411 0.782 2.14 7.04 12.56 29.76 56.50 Pulse frequency f2 (Q [Hz] 1170 1243 1393 1680...
-
Page 10: Substitute Operating Data
In addition, the operational limits of the corresponding end connection, of the sealing material of the pick up and of the temperature sensor are to be observed. OMG 13 OMG 20 OMG 32 OMG 52 OMG 68 OMG100 OMG140 Flow rate... -
Page 11: Omg With Din Flange
Outer diameter Total length Flowmeter length G1/4" without connections Flange thickness Pitch circle Fig. 3 Dimensioned drawing OMG with DIN flange OMG 13 OMG 20 OMG 32 Pressure [bar] 40 stage [mm] 95 [mm] 145 [mm] 94 [mm] 25.5* 25.5*... -
Page 12: Load-Bearing Capacity
Load-bearing capacity Load-bearing capacity Load-bearing capacity OMG 13 100000 5000 2000 50000 10000 1000 1000 h 5000 h 10000 h 30000 h 100000 50000 10000 5000 2000 1000 A Short-time operation B Continuous operation C Pressure loss D Flow rate The values apply for lubricating liquids at temperatures of up to 120 °C. -
Page 13: Load-Bearing Capacity Omg
Load-bearing capacity Load-bearing capacity OMG 20 100000 50000 10000 5000 2000 1000 1000 h 5000 h 10000 h 30000 h 100000 50000 10000 2000 1000 5000 10,5 13,5 A Short-time operation B Continuous operation C Pressure loss D Flow rate The values apply for lubricating liquids at temperatures of up to 120 °C. -
Page 14: Load-Bearing Capacity Omg
Load-bearing capacity Load-bearing capacity OMG 32 100000 50000 10000 5000 2000 1000 1000 h 5000 h 10000 h 30000 h 100000 50000 10000 5000 2000 1000 A Short-time operation B Continuous operation C Pressure loss D Flow rate The values apply for lubricating liquids at temperatures of up to 120 °C. Abrasive and aggressive liquids reduce the durability. -
Page 15: Load-Bearing Capacity Omg
Load-bearing capacity Load-bearing capacity OMG 52 100000 50000 10000 5000 2000 1000 1000 h 5000 h 10000 h 30000 h 100000 50000 1000 10000 5000 2000 17,5 52,5 87,5 122,5 157,5 A Short-time operation B Continuous operation C Pressure loss D Flow rate The values apply for lubricating liquids at temperatures of up to 120 °C. -
Page 16: Load-Bearing Capacity Omg
Load-bearing capacity Load-bearing capacity OMG 68 100000 50000 10000 5000 2000 1000 1000 h 5000 h 10000 h 30000 h 1050 100000 50000 10000 1000 5000 2000 A Short-time operation B Continuous operation C Pressure loss D Flow rate The values apply for lubricating liquids at temperatures of up to 120 °C. Abrasive and aggressive liquids reduce the durability. -
Page 17: Load-Bearing Capacity Omg
Load-bearing capacity Load-bearing capacity OMG100 100000 50000 10000 5000 2000 1000 1000 h 5000 h 10000 h 30000 h 1000 1200 1400 1600 1800 2000 2200 2400 2600 2800 3000 100000 50000 1000 10000 5000 2000 1000 A Short-time operation B Continuous operation C Pressure loss D Flow rate... -
Page 18: Load-Bearing Capacity Omg140
Load-bearing capacity Load-bearing capacity OMG140 100000 50000 10000 5000 2000 1000 1000 h 5000 h 10000 h 30000 h 1000 1500 2000 2500 3000 3500 4000 6000 6500 7500 4500 5000 5500 7000 100000 50000 10000 5000 2000 1000 1000 1250 1500 1750... - Page 19 Frequency: 50 Hz □ Wire cross-section: 3 x 0.75 mm □ Cable length for coiled tubing element: 1 m Size Heating output OMG 13 OMG 20 – 32 OMG 52 OMG 68 – 100 2 000 OMG140 on request If a coiled tubing element is used, the manufacturer recommends that the flowmeter and heating be insulated in order to avoid radiation losses.
-
Page 20: Fluid Heating System
Fluid heating system Fluid heating system Fluid heating systems are available for the sizes OMG 20 – 140. The fluid heating system consists of a heating jacket with pipe thread connections. CAUTION Damage to the device if water or steam id used as a heating fluid. ►... - Page 21 Description Description Function description 2/2a Fig. 1 Structure of the flowmeter OMG series 1 Connection 6 Ball bearing, floating bearing end 2 Screw plug 7 Measuring screw large 2a Temperature sensor connection 8 Ball bearing, fixed bearing end 3 Bearing cover 9 Pick up hole 4 Measuring housing 10 Pole wheel...
-
Page 22: Signal Generation
The measuring unit is maintained without contact and with a low degree of friction in the housing of the KRAL flowmeter by means of precision roller bearings. The bearing end at the pole wheel end is realized as a fixed bearing. Depending on the respective size, the following bearings are used: □... -
Page 23: Temperature Compensation
- require the use of a second pick up, see "Connection for the pick ups", page 30. This additional phase-offset signal and the incremental encoding inputs available in the KRAL electronic unit can be used to determine the direction of flow and to take it into consideration when calculating the total values. -
Page 24: Delivery
Unpacking and checking the state of delivery Unpacking and checking the state of delivery Transportation, storage and disposal 1. On delivery unpack the flowmeter and check for damage during transportation. 2. Report damage during transportation immediately to the manufacturer. 3. Store the supplied pick ups and temperature sensors for the installation. 4. -
Page 25: Preservation
Preservation Preservation Preservation has to be carried out additionally under the following conditions: Type of delivery Condition □ Storage time exceeding six weeks Standard delivery □ Unfavorable storage conditions such as high humidity, salty air, etc. □ Opened or damaged packaging Delivery with long-term preservation Tab. -
Page 26: Disposal
Disposal Disposal Aids: □ Solvents or industrial cleaners suitable for the pumped liquid WARNING Danger of poisoning and environmental damage from the pumped liquid. ► Wear protective clothing during all the work. ► Before disposing of the flowmeter collect the discharging pumped liquid and dispose of in accordance with the locally applicable regulations. -
Page 27: Installing The Flowmeter
Safety instructions for installation and removal Safety instructions for installation and removal Installation, removal and connection The following safety instructions must be observed: □ Flowmeters are precision measuring devices. ► Ensure cleanliness and take care during installation and removal. ► Do not take apart the flowmeter. ►... -
Page 28: Preferred Installation Variant
Installing the flowmeter Preferred installation variant Flow vertically from bottom to top ► Preferred installation variant. Recommendations for alternative installation variants Flow vertically from top to bottom No vertical installation with open outlet ► Ensure that the liquid does not flow freely out ►... -
Page 29: Protect The Flowmeter Against Soiling
Installing the flowmeter CAUTION Measuring error through air in the pipe system and/or incorrect installation of the flowmeter. ► In the case of horizontal installation of the flowmeter at the highest point of the pipe system an air pocket can arise that results in measuring errors. ►... -
Page 30: Electrical Connection
Electrical connection 1. Remove the protective covers and store them. 2. Install the flowmeter stress-free in the pipe system while taking the preferred direction of flow into account and ensure that the connections of the pick ups and temperature sensors remain accessible. -
Page 31: Operation
Removing the flowmeter WARNING Risk of injury through emitted hot, poisonous or corrosive pumped liquid when removing the flowmeter. ► Observe the safety regulations for handling dangerous liquids. ► Ensure that the flowmeter is not under pressure. ► Collect the emitted pumped liquid safely and dispose of it in an environmentally compatible manner. -
Page 32: Commissioning
Tab. 1, page 32. The mesh width of the operating filter is relevant to the size of the flowmeter. flowmeter size Mesh width max. OMG 13 – 20 [mm] OMG 32 – 140 [mm] 0.34... -
Page 33: Switching Off The Flowmeter
Switching off the flowmeter CAUTION Measuring error through gas inclusion in the pipe system. ► Before commissioning, make sure that the flowmeter is filled. ► Vent the pipe system. CAUTION Increased wear and/or blocking of the flowmeter due to solid particles or abrasive fine particles in the liquid. -
Page 34: Safety Instructions On Maintenance
Safety instructions on maintenance Safety instructions on maintenance Maintenance The following safety instructions must be observed during all the repair work: ► All the work may only be carried out by authorized qualified personnel. ► Wear protective clothing during all the work. ►... -
Page 35: Mounting Instructions Omg 13
Mounting instructions OMG 13 Mounting instructions OMG 13 Removing seals and bearings 915.1 080.1 739.1 Distance sleeve Sleeve 739.5** Spacer 080.1 Bearing cover Measuring housing Pole wheel 672.1 Measuring screw large 672.2 Measuring screw small Fig. 1 Fig. 2 739.1 O-ring 739.5**... -
Page 36: Installing Seals And Bearings
Mounting instructions OMG 13 Installing seals and bearings 1. Slide the sleeve 041 onto the measuring screw large 672.1, while taking the mounting direction into account, see Fig. 3, page 35. 2. Press the ball bearings 817.1, 817.2, 817.3 and 817.4 onto the measuring screw large 672.1 and measuring screw small 672.2. -
Page 37: Mounting Instructions Omg 20/32
Mounting instructions OMG 20/32 Mounting instructions OMG 20/32 Removing seals and bearings 739.5** 739.2 070.1 070.1 915.1 739.1 915.2 070.2 Fig. 7 Fig. 5 Fig. 6 869.4 817.4 672.2 817.3 064.2 904.2 Fig. 8 915.7 869.2 817.2 672.1 817.1 904.1 064.1*** 915.6 Fig. -
Page 38: Installing Seals And Bearings
Mounting instructions OMG 20/32 1. Remove the socket screws 915.1 and 915.2, take off the end covers 070.1 and 070.2, see Fig. 5, page 37. 2. Remove the O-rings 739.1, 739.2 and 739.5**, see Fig. 6, page 37. 3. Pull the distance sleeve 039 together with the set of screws out of the measuring housing, see Fig. -
Page 39: Removing Seals And Bearings
Mounting instructions OMG 52/68 Mounting instructions OMG 52/68 Removing seals and bearings 064.2 904.2 915.7 080.1 904.1 739.1 080.1 064.1 915.6 Fig. 11 Fig. 12 057.2 739.5** 080.1 057.1 739.1 Fig. 13 Fig. 14 Fig. 15 057.2 869.4 818.2 868.4 064.2 080.1 817.2... - Page 40 Mounting instructions OMG 52/68 Spacer 672.2 Measuring screw small 869.4 Circlip Spacer 739.1 O-ring 904.1 Lock washer 057.1 Threaded ring 739.5** O-ring 904.2 Lock washer 057.2 Threaded ring 817.1 Deep-groove ball bearing 915.6 Socket screw 064.1 Supporting ring 817.2 Deep-groove ball bearing 915.7 Socket screw 064.2...
-
Page 41: Installing Seals And Bearings
Mounting instructions OMG 52/68 Installing seals and bearings 1. Insert the O-rings 739.1 and 739.2 into the bearing cover 080.1 and 080.2. Insert the O-ring 739.5** into the pick up hole. 2. Press the ball bearings 818.1 and 818.2 into the bearing cover 080.1. Notice: Press the angular-contact ball bearings on in face-to-face arrangement, see Fig. -
Page 42: Removing Seals And Bearings
Mounting instructions OMG100/140 Mounting instructions OMG100/140 Removing seals and bearings 739.5** 080.1 739.1 739.1 080.1 Fig. 19 Fig. 20 Fig. 21 Fig. 22 868.4 869.4 817.2 672.2 868.3 870.2 064.2 821.2 904.2 915.7 080.1 869.2 868.2 817.1 672.1 056*** 870.1 868.1 064.1 915.6... -
Page 43: Mounting Instructions Omg100/140
Mounting instructions OMG100/140 Prerequisites: □ Flowmeter removed from the system □ End connection consisting of socket screws, flanges and seals removed □ Pick up inserts removed 1. Remove the socket screws 915.1 and 915.2, take off the bearing cover 080.2. Remove the O-ring 739.2. -
Page 44: Possible Faults
Possible faults Faults can have different causes. The following tables list the symptoms of a fault, the possible causes Troubleshooting and measures for elimination. Possible faults Fault Cause/Elimination □ Flowmeter leaks 1, 2, 8 □ No flow rate 3, 9, 10, 22, 24, 25 □... - Page 45 Troubleshooting Cause Remedy Outgassing ► Increase the system pressure. ► Reduce the temperature. Pulsations too high ► Use another feed pump. ► Carry out changes to the system. Back pressure too low ► Increase the back pressure. Flow rate fluctuations too high ►...
-
Page 46: General Drawings
General drawings General drawings Appendix 107.2* 739.4 739.3 107.1* 915.5 597.1 739.1 080.1 915.1 817.4 672.2 817.3 739.5** 817.2 672.1 817.1 Fig. 1 Exploded view OMG 13 OIO 14en Edition 07/2017 Operating Instructions... - Page 47 General drawings 915.4* 115.2* 739.4* 115.1* 739.3* 915.3* 915.2* 070.2 739.2 739.1 070.1 597.1 739.5** 817.4 869.4 672.2 817.3 904.2 064.2 915.7 915.1* 869.2 672.1 817.2 817.1 904.1 915.6 064.1*** Fig. 2 Exploded view OMG 20/32 Operating Instructions OIO 14en Edition 07/2017...
- Page 48 General drawings 915.4 107.2* 739.4 739.3 107.1* 915.3 597.2 080.2 739.2 597.1 739.1 080.1 915.2 915.1 868.4 869.4 817.2 672.2 057.2 739.5** 818.2 064.2 915.7 869.2 817.1 868.2 672.1 057.1 818.1 904.1 915.6 Fig. 3 Exploded view OMG 52/68 OIO 14en Edition 07/2017 Operating Instructions...
- Page 49 General drawings 915.4 107.2* 739.4 739.3 107.1* 915.3 597.2 080.2 915.2 739.2 739.1 597.1 080.1 915.1 868.4 869.4 817.2 672.2 870.2 821.2 904.2 868.3 739.5** 064.2 915.7 869.2 817.1 868.2 672.1 868.1 870.1 821.1 056*** 904.1 064.1 915.6 Fig. 4 Exploded view OMG100/140 Operating Instructions OIO 14en Edition 07/2017...
-
Page 50: Parts List
Parts list Parts list Pos. no. Part Pos. no. Part Distance sleeve 739.5** O-ring Sleeve 817.1 Deep-groove ball bearing Spacer 817.2 Deep-groove ball bearing Spacer 817.3 Deep-groove ball bearing 056*** Spacer 817.4 Deep-groove ball bearing 057.1 Threaded ring 818.1 Angular-contact ball bearings 057.2 Threaded ring 818.2... -
Page 51: Accessories
Accessories Accessories Junction box The junction box simplifies the electrical connection of the various sensors. Up to three sensors can be connected. The sensor cables are combined to form a multi-strand connecting cable which can be supplied as well optionally if required. The detailed assignment plan can be found on the inside of the junction box lid. -
Page 52: Mounting And Connecting The Junction Box
Accessories Mounting and connecting the junction box Fig. 7 Junction box 1 Temperature sensor cable 2 Pick up cable 3 Base plate junction box 4 Socket screw and washer 5 Socket screws and washers 6 Cable gland sensor inputs 7 Junction box lid Fig. -
Page 53: Connecting The Extension Cable
Tightening torques Connecting the extension cable Normally the line length does not influence the functional efficiency of the sensors. However, the manufacturer recommends not extending the connection cable of the junction box beyond a maximum length of 100 m. Extension cable as well as cable plug and cable box are available as accessories from the manufacturer. -
Page 54: Contents Of The Ec Declaration Of Conformity
Contents of the EC Declaration of Conformity Contents of the EC Declaration of Conformity The flowmeters described in these operating instructions are machinery in the sense of the Directive 2006/42/EC. The original of the EC Declaration of Conformity is enclosed with the machinery at delivery. The machinery fulfills all the relevant provisions of the following directives: Number Name... -
Page 55: Notes
Notes Notes Operating Instructions OIO 14en Edition 07/2017... - Page 56 KRAL AG, Bildgasse 40, Industrie Nord, 6890 Lustenau, Austria,Tel.: +43 / 55 77 / 8 66 44 - 0 Fax: +43 / 55 77 / 8 84 33, www.kral.at, E-Mail: kral@kral.at KRAL AG, 6890 Lustenau, Austria, Tel.: +43 / 55 77 / 8 66 44 - 0, E-Mail: kral@kral.at...
Need help?
Do you have a question about the OMG 13 and is the answer not in the manual?
Questions and answers