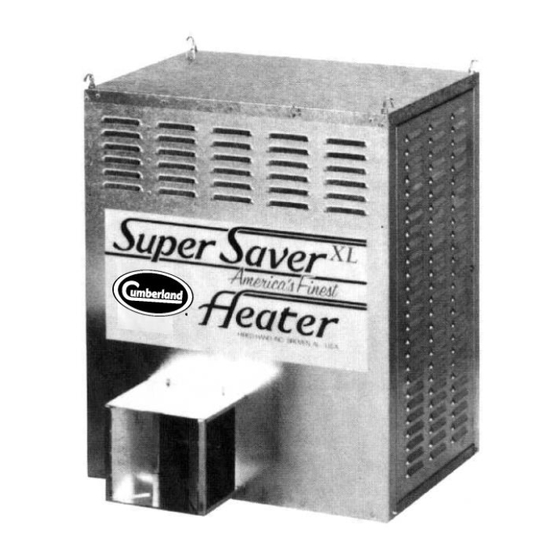
Cumberland SUPER-SAVER XL HH-SS-225-XL Owner's Manual
Agricultural building heater
Hide thumbs
Also See for SUPER-SAVER XL HH-SS-225-XL:
- Owner's manual (32 pages) ,
- Owner's manual (34 pages) ,
- Owner's manual (52 pages)
Table of Contents
Advertisement
MODEL
HH-SS-225-XL
Direct Spark Ignition
Wash Down Design
FOR YOUR SAFETY
If You Smell Gas:
1. Open windows
2. Do not touch electrical switches
3. Extinguish any open flames
4. Immediately call your gas supplier
CONSIGNES DE SECURITE
Si vous sentez une odeur de gaz:
1. Ouvrez les fenetres
2. Ne touchez pas aux interrupteurs
electriques
3. Etegnex toute flamme hue
4. Contactez immediatement votre
compangie de gaz
CUMBERLAND. 1004 E. Illinois St. Assumption, IL 62510 Phone 1-217-226-4421 Fax 1-217-226-4420
Owner's Manual
SUPER-SAVER XL
Agricultural Building Heater
MJ/h
kW
237
65.9
Manual Part No. 4801-5188 Rev 3-2016
FOR YOUR SAFETY
Do not store or use gasoline or any
flammable vapors and liquids in the
vicinity of this or any other appliance
CONSIGNES DE SECURITE
II es interdit dutiliser des liquides
inflammables ou degageant des
vapeurs inflammables, a proximite de
tout appareil fonctionnant au gaz
TM
HEATER
Date: 11-22-16
Date: 04-15-15
Date: 04-15-15Da
Date: 04-15-15
Advertisement
Table of Contents

Related Manuals for Cumberland SUPER-SAVER XL HH-SS-225-XL


Summary of Contents for Cumberland SUPER-SAVER XL HH-SS-225-XL
- Page 1 3. Etegnex toute flamme hue tout appareil fonctionnant au gaz 4. Contactez immediatement votre compangie de gaz CUMBERLAND. 1004 E. Illinois St. Assumption, IL 62510 Phone 1-217-226-4421 Fax 1-217-226-4420 Manual Part No. 4801-5188 Rev 3-2016...
-
Page 2: Table Of Contents
Table of Contents Warranty ................................3 Specifications And Requirements ........................4 Warnings And Cautions ............................5 Maintenance ................................7 Installation ................................8 5.1. Outside Mount ........................................8 5.2. Installing Dual-Flare Duct ....................................10 5.3. Connecting The Gas Supply ....................................10 5.4. Check for Gas Leaks ......................................11 5.5. -
Page 3: Warranty
7 to 10 years – end user pays 75% All Fiberglass Propellers Lifetime Flex-Flo/Pan Feeding Systems 2 Years AP/Cumberland ** Warranty prorated from list price: Feeder System Pan Assemblies 5 Years ** Cumberland 0 to 3 years – no cost to end-user Feed Tubes (1.75"... -
Page 4: Specifications And Requirements
Locate packing slip and make sure all of the listed parts are enclosed. If not, Adjustable Gas Leak Testing Wrench call your Cumberland Distributor Pipe Glue ¼ in. (7 mm.) Nut Driver immediately. Install screw hooks with hammer or drill. Model No. -
Page 5: Warnings And Cautions
3. Warnings And Cautions GENERAL HAZARD WARNING Failure to comply with precautions and instructions provided with this heater can result in death, serious bodily injury and property loss or damage from hazards of fire, explosion, burn, asphyxiation, carbon monoxide poisoning, and/or electrical shock. If you need assistance or heater information such as an instruction manual, labels, etc. - Page 6 W A R N I N G If Connected To A Remote Thermostat Heater May Start At Any Time! C A U T I O N ! Before installation, check that the local distribution conditions, nature of gas and pressure, and the current state of adjustment of the appliance are compatible.
-
Page 7: Maintenance
4. Maintenance M A I N T E N A N C E This appliance is in compliance with EN 12669 and must be commissioned after servicing. A qualified installer is required to install, commission, and adjust appliance. The appliance area should be kept clear & free from combustible materials, gasoline and other flammable vapors, and liquids. -
Page 8: Installation
5.1. Outside Mount Cumberland heaters are available in Universal Mount (UM) models. These heaters are designed to be mounted to the outside wall of a building. This saves valuable space inside the building and ensures fresh air intake for the heater. - Page 9 C A U T I O N ! The minimum side clearance to combustible walls must be 305 mm (12 inches). The minimum clearance between the appliance and rear wall must be 305 mm (12 inches). Weeds, snow, or other materials must not be allowed to accumulate on heater or adjacent to heater. Heater and thru-wall extension duct must be a minimum of 500 mm (20 inches) above ground and out of reach of livestock.
-
Page 10: Installing Dual-Flare Duct
5.2. Installing Dual-Flare Duct Fold Dual-Flare duct to shape as shown in Figure 2. Install Dual-Flare duct to heater exhaust (Figure 2) as shown with sheet metal screws provided. This provides a multi-directional heat flow that may be set by bending flaps. -
Page 11: Check For Gas Leaks
5.4. Check for Gas Leaks Before turning on gas, check main supply ball valve to be sure it is open (Figure 4). Be sure to check all connections for leaks with a Gas Leak Testing solution, (soap and water work well). Check to see if gas ball valve knob is in the ON position. -
Page 12: Electrical Installation
5.5. Electrical Installation Make sure a circuit breaker or similar cutoff device is provided to permit disconnection of electrical power to heater for service and cleaning. All wiring must meet local electrical codes. This heater is designed to be wired directly, with no plugs and outlets necessary. All electrical work should be performed by a certified electrician. -
Page 13: User Instructions
6. User Instructions 6.1 Start-Up Adjust thermostat higher than house temperature. Allow 20 seconds for heater to ignite. On initial start up or when heater has not been in service for some time, heater may require more than one attempt to purge air and ignite heater. -
Page 14: Gas/Air Requirements
7. Gas/Air Requirements W A R N I N G THIS HEATER IS APPROVED FOR AGRICULTURAL BUILDING USE ONLY. C A U T I O N ! LIMITING EXCESS BUILD UP OF CARBON DIOXIDE (CO In order to prevent build up of hazardous levels of CO the heater must only operate in a suitably ventilated room. -
Page 15: Conversion To Other Gases
8. Conversion To Other Gases Tools Required Adjustable Wrench Pipe Wrench Pipe Sealant Gas Leak Testing Solution Burner Orifice Ball Valve Gas Valve Super-Saver XL Heater – Australian Model Part No. 4801-5188 Rev 3-2016 Page 15 of 32... -
Page 16: Orifice Replacement
Orifice Replacement WARNING FIRE OR EXPLOSION HAZARD - - CAN CAUSE PROPERTY DAMAGE, SEVERE INJURY, OR DEATH. Disconnect power supply before wiring to prevent electrical shock or equipment damage. To avoid dangerous accumulation of fuel gas, turn off gas supply at service valve before starting installation and perform gas leak test after completion of installation. -
Page 17: Adjust The Manifold Pressure
11. Place the Gas Valve assembly with the Orifice Loosen and remove the Orifice from the (1/4) inside the Burner and allow the Gas Valve to pipe. rest in the support bracket. 10. Apply pipe sealant to threads and reinstall the new Orifice to the (1/4”) pipe. - Page 18 15. Update two labels located on the outside of the heater as shown below by placing the new labels over the old labels. First, the Gas Acceptable Pressures label must be covered by the new Acceptable Pressures label. Next, ONLY the bottom section of the model number/electrical/data information label will be covered for reflecting the new adjusted gas.
-
Page 19: Component And Wiring Diagram
9. Component And Wiring Diagram COMPONENT AND WIRING DIAGRAM 230 Volts A. C. 50 Hz Single Phase Super-Saver XL Heater – Australian Model Part No. 4801-5188 Rev 3-2016 Page 19 of 32... -
Page 20: Ladder Type Schematic Diagram
Ladder Type Schematic Diagram LADDER TYPE SCHEMATIC DIAGRAM 230 Volts A. C. 50 Hz Single Phase Super-Saver XL Heater – Australian Model Part No. 4801-5188 Rev 3-2016 Page 20 of 32... -
Page 21: Servicing Instructions
The Visual Check Charts define the proper action if any of these indications do not occur. Visual checks are an important and easy method to ensure that your Cumberland heater continues to operate properly. These checks should be performed regularly. ... -
Page 22: Checking Manifold Pressure
11.1 Checking Manifold Pressure To be performed by a certified gas technician only! Unplug heater from power source and turn ball valve to OFF position. Remove outlet pressure tap plug from gas control valve and connect pressure gauge. Return electrical power to heater and plug to power source and turn ball valve to ON position. -
Page 23: Chart 1 First Visual Check
11.2 Chart 1 First Visual Check Super-Saver XL Heater – Australian Model Part No. 4801-5188 Rev 3-2016 Page 23 of 32... -
Page 24: Chart 2 Second Visual Check
11.3 Chart 2 Second Visual Check Super-Saver XL Heater – Australian Model Part No. 4801-5188 Rev 3-2016 Page 24 of 32... -
Page 25: Chart 3 Third Visual Check
11.4 Chart 3 Third Visual Check Super-Saver XL Heater – Australian Model Part No. 4801-5188 Rev 3-2016 Page 25 of 32... -
Page 26: Pipe Sizing For Sufficient Gas Service
Pipe Sizing For Sufficient Gas Service THESE GUIDELINES ARE BASED ON THE U. S. STANDARDS. REFER TO LOCAL AND NATIONAL LAWS AND PRACTICE WHICH MAY SUPERSEDE THE FOLLOWING. 1. Using a system schematic, label each 3. Determine The Equivalent Length Of Pipe (ELOP) piping section of the system starting at the required for sufficient gas service. - Page 27 ‘Internal Diameter’, and read the number of the From step 3, ELOP = 60 m. Locate the column labeled 60 m in Table 3. pipe size for the particular pipe section. 5. Select a pipe section and read down the ELOP Example: For pipe section c-e, the iron pipe size column to find the maximum gas capacity that is 19.1 mm (3/4 in.) (Table 3: Locate 21 in the 60...
-
Page 28: Parts & Assemblies
Parts & Assemblies 3003-3004 Flame Sensor Probe 3005-0107 Thermostat Disk 1007-1614 Strain Relief 0404-6704 Base Bottom 0404-2358 Cord Support Bracket Super-Saver XL Heater – Australian Model Part No. 4801-5188 Rev 3-2016 Page 28 of 32... - Page 29 0404-10773 0404-11050 ISM Heater Hanger Brkt Top Panel 6401-0226 Door Assy. 0404-11466 Cabinet Front Panel 0404-11467 Cabinet Back Panel 1004-1406 SCRW Mach 1/4-20X1/2 pan sl Z 1009-1500 Ball Valve 3002-6010 Refer to Model No. DSI Electrode for Orifice type. 1021-1500 1041-1488 Pipe Fitting T Nipple...
- Page 30 6401-1318 Blower Wheel 0408-6673 Motor Mount Plate 3017-5090 Motor 6401-4589 (3001-1740 Covered Sail Sail Switch ONLY) Switch Assy Control Modules: 3591-2264 (Pektron) 3591-2265 (Pactrol) 1001-2158 NUT Lock 1/2 romex 3001-2862 Toggle Switch 1013-2047 Cable Fitting 3001-6003 Pushbutton Switch Super-Saver XL Heater – Australian Model Part No.
- Page 31 3001-1740 Sail Switch ONLY 6401-4589 Covered Sail Switch Complete Assy Super-Saver XL Heater – Australian Model Part No. 4801-5188 Rev 3-2016 Page 31 of 32...
- Page 32 PARTS LIST When Ordering Service Parts, Please Reference Model Number And Gas Type. Ref. Description Ref. Description Number Number 3005-0107 High Limit Thermo-Disc 160°C 3001-2862 Toggle Switch (320°F) 3002-6010 Electrode DSI 0408-6673 Mounting Bracket 3003-3004 Flame Sense Probe 3001-6003 Push Button Switch 1041-2426 ¼...
Need help?
Do you have a question about the SUPER-SAVER XL HH-SS-225-XL and is the answer not in the manual?
Questions and answers