Table of Contents
Advertisement
Quick Links
Installation Guide
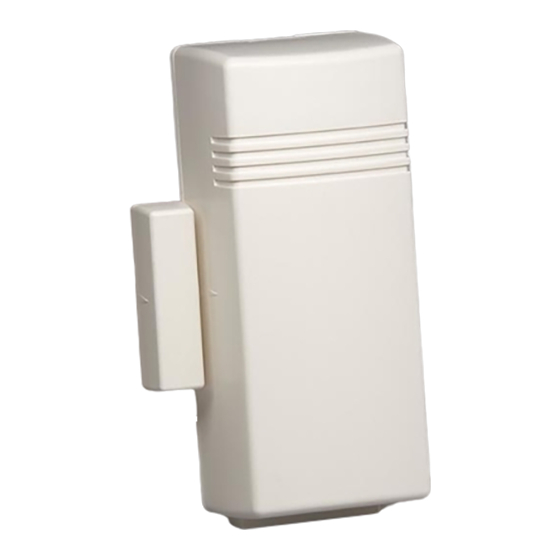
RE601 CryptiX
-Compatible Standard Door / Window
™
Features
For sensing things that open or separate
•
Strong, reliable RF signal
•
10-15 year battery life
•
Cover tamper
•
Low Battery indication
•
3 total zones
•
• Main reed switch + magnet
• 2 Optional External Contacts
Enrollment
Place panel in enrollment mode.
•
Sensor enrollment signal can be sent by one of these two ways.
•
• Remove the battery tab.
• Pull cover off to tamper device.
To set up zone and configure the sensor, log into the web based dealer portal
•
Installation
Place sensor on a door or window using the mounting holes.
•
Below are recommendations for sensor locations.
•
RE601_Cryptix-Compat_DWS_Instructions
24-Hour Tech Support Line: (715)808-0164
www.ResolutionProducts.com
Mounting holes
26-Feb-15
Mount the sensor with magnet on the side of the sensor with the mark as
•
pictured below.
Magnet Mark
Optional External Contact Mounting and Wiring
Optional External contact wiring.
•
• External Input #1: Outer Terminal Zone + Center Common Terminal
• External Input #2: Inner Terminal Zone + Center Common Terminal
Optional external contact zones are: normally closed – alarm on open.
•
No end-of-line resistors on external contact zones.
•
Magnet rests in
drilled hole on
top of door.
Note: External contacts not evaluated by ETL
RE601_Cryptix-Compat_DWS_Instructions
24-Hour Tech Support Line: (715)808-0164
www.ResolutionProducts.com
Inner Terminal Zone
External Input #2
Center Common Terminal
Outer Terminal Zone
External Input #1
External contact is
wired to the door
window sensor
through a hole
drilled in the
doorframe
26-Feb-15
Advertisement
Table of Contents

Subscribe to Our Youtube Channel
Related Manuals for Resolution CryptiX RE601


Summary of Contents for Resolution CryptiX RE601
- Page 1 Mount the sensor with magnet on the side of the sensor with the mark as • pictured below. Installation Guide RE601 CryptiX -Compatible Standard Door / Window ™ Features For sensing things that open or separate • Strong, reliable RF signal •...
- Page 2 Reed switch or optional external contact • Warranty Alarm, when… Resolution Products, Inc. will replace products that are defective in their first five (5) years. …magnet is pulled away from reed switch or FCC Notice …external contact is opened This device complies with Part 15 of the FCC rules. Operation is subject to the following two...
Need help?
Do you have a question about the CryptiX RE601 and is the answer not in the manual?
Questions and answers