
Related Manuals for BIG ASS FANS Pivot


Summary of Contents for BIG ASS FANS Pivot
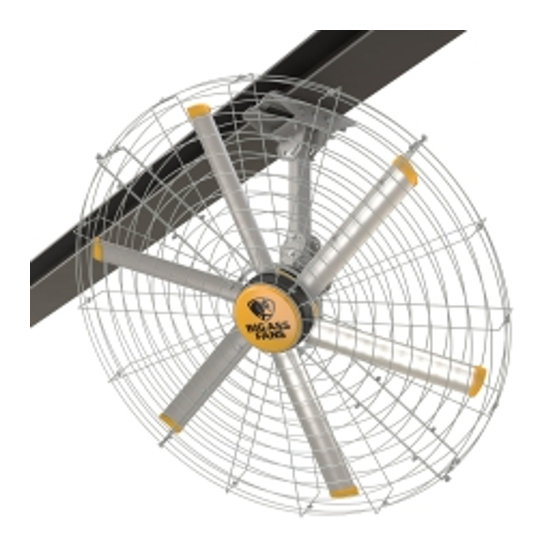
- Page 1 INSTALLATION GUIDE Pivot For help, call 1-877-BIG-FANS or visit www.bigassfans.com...
- Page 2 PRE-INSTALLATION CHECKLIST Did a structural engineer approve the mounting structure? See page 5 for Big Ass Fans approved mounting structures. Are you familiar with the function and use of the safety cable? See p. 14 for information on properly securing the safety cable.
- Page 3 Big Ass Solutions or provided by manufacturers. Pivot is a trademark of Delta T Corporation. All other trademarks used herein are the properties of their respective owners. No part of this document may be reproduced or translated into a different language without the prior written consent of Big Ass Solutions. The information contained in this document is subject to change without notice.
- Page 4 Big Ass Fans if you have any questions regarding the electrical installation of this fan. WARNING: To reduce the risk of fire, electric shock, and injury to persons, Big Ass Fans must be installed with Big Ass Fan supplied controllers. Other parts cannot be substituted.
-
Page 5: Table Of Contents
2b. Attach Extension Tube (to Upper Yoke) 3. Secure Upper Safety Cable 4. Attach Main Fan Unit (to Lower Yoke) 5. Attach Pivot Joint 6a. Attach Lower Yoke (to Pivot Joint) 6b. Attach Lower Yoke (to Extension Tube) 7. Attach Center Cap Installing Airfoils 1. - Page 6 Electrical Installation Power Requirements for Fan Controllers Mounting the Wall Controller Input Power Conditioning Conduit and Piping Guidelines Power Wiring Guidelines Grounding Installing the Electronic Programming Module (EPM) Wiring: Early Suppression Fast Response (ESFR) Wiring: 100–125/200–250 V Single-Phase Fan Controllers Wiring: 200–250 V Three-Phase Fan Controllers Wiring: 400–480 V &...
-
Page 7: About Big Ass Fans
Today, though, Big Ass Solutions is much more than industrial—and much more than Big Ass Fans or Big Ass Light. Big Ass means quality, form, and function to solve problems in the built environment. It means having a herd of engineers on staff and the world’s only R&D facility dedicated to testing air movement on a grand scale. -
Page 8: Parts And Hardware
Section 1. Guy wires are designed to constrain fan’s lateral movement and are only included in some fan packages. Big Ass Fans recommends using guy wires if the fan’s extension tube is 4 ft or longer, if the fan is pivoted, if the fan is exposed to high winds, or if the fan is close to any building fixtures. Guy Wire hardware is bagged separately. - Page 9 TOOLS Big Ass Fans recommends gathering the following tools prior to beginning installation. Electrical Installation Mechanical Installation ☐ Phillips and Flat Head Screwdriver ☐ Standard Wrench Set ☐ 7 mm Nut Driver ☐ Standard Socket Set with Ratchet ☐ 5/16” Nut Driver ☐...
-
Page 10: Fan Diagram
D. Extension Tube. Extends the fan from the ceiling. E. Pivot Joint. Allows the fan to be pointed in different directions. If the fan is not going to be pivoted, it is not necessary to install the pivot joint. -
Page 11: Preparing The Worksite
• Big Ass Fans can only be hung from an I-beam or angle irons. Do not mount the fan to single purlins, trusses, or bar joists. Consult a structural engineer for installation methods not covered in this manual. -
Page 12: Pivot Angle
Observe the following safety measures when pivoting the fan: • To pivot the fan at its maximum angle, a minimum extension tube length of 3 ft is recommended. • The lowest moving part of the fan must be at least 10 ft (3.05 m) above the floor. -
Page 13: Attach Upper Yoke (To I-Beam)
MOUNTING STRUCTURE: I-BEAM ATTENTION Big Ass Fans can only be hung from an I-beam or bar joists. See the following page for bar joist mounting instructions. Consult a structural engineer for installation methods not covered in this manual. WARNING: The following instructions assume that the customer’s roof structure from which the fan will be hung is of sound construction, undamaged, and capable of supporting loads of up to 645 lbs (293 kg). -
Page 14: Select Proper Angle Irons
It is the sole responsibility of the customer to verify that the roof structure is adequate for fan installation. Big Ass Fans recommends consulting a structural engineer prior to fan installation. WARNING: Never use beam clamps when mounting the fan to angle irons! Beam clamps are only intended for I-beam installations. -
Page 15: Pre-Drill Angle Irons
2. Pre-drill angle irons Drill two Ø 9/16” (1.4 cm) holes exactly 5-3/8” (13.7 cm) apart in the centers of two angle irons. Measure the distance between the mounting points of the roof structure that the angle irons will span. Measure the same distance on the angle irons and drill Ø... -
Page 16: 4A. Fasten Single Angle Irons To Roof Structure Mounting Points
4a. Fasten single angle irons to roof structure mounting points ATTENTION If installation requires double angle irons (i.e., span is greater than 8 ft [2.4 m]), proceed to step 4b. Fasten the angle irons to the roof structure mounting points at each end with customer-supplied Grade 8 hardware. Do not tighten the hardware until the fan has been mounted to the angle irons. -
Page 17: 4B. Fasten Double Angle Irons To Roof Structure Mounting Points
4b. Fasten double angle irons to roof structure mounting points Fasten the angle irons to the roof structure mounting points at each end with customer-supplied Grade 8 hardware. The angle irons with fan mounting holes should be positioned on the inside, facing each other. Do not tighten the hardware until the fan has been mounted to the angle irons. -
Page 18: Attach Upper Yoke (To Angle Irons)
5. Attach upper yoke (to angle irons) Secure the upper yoke directly to the angle irons with the Beam Clip Hardware as shown. The angle irons should be aligned with the outermost holes of the upper yoke. Consult the diagrams below for distances between the angle irons. -
Page 19: Attach Balance Joint (To Upper Yoke)
Fasten the balance joint to the upper yoke (already attached to mounting structure) using the Balance/Pivot Hardware. Hand-tighten the bolts. The fan’s balanced position can change depending on the pivot angle of the fan or the angle of the roof. For this reason, do not fully tighten these bolts until the fan is completely assembled. -
Page 20: Secure Upper Safety Cable
3. Secure upper safety cable ATTENTION The saftey cable is a crucial part of the fane and must be installed correctly. If you have questions, call Customer Service for assistance. Secure the safety cable to the I-beam or angle iron by wrapping the safety cable around it and securing the looped ends with the shackle. -
Page 21: Attach Pivot Joint
ATTENTION If the fan will not be pivoted, it is not necessary to install the pivot joint. Skip this step and proceed to Step CAUTION: Install the bolts exactly as shown. Do not pivot the fan until it has been completely assembled. -
Page 22: 6B. Attach Lower Yoke (To Extension Tube)
6b. Attach lower yoke (to extension tube) CAUTION: The motor frame is heavy. Use care when raising it. Fasten the lower yoke and motor frame to the bottom of the extension tube with the Lower Yoke Hardware. Lower Yoke Hardware: a. -
Page 23: Attach Winglets
INSTALLING THE AIRFOILS 1. Attach winglets Attach the winglets to the ends of the airfoils with the Winglet Hardware. Use a Phillips head and standard screwdriver to secure the fastener. Attach winglets to all six (6) airfoils before attaching airfoils to fan. Winglet Hardware: a. -
Page 24: Attach Cage Bracket
INSTALLING THE CAGE 1. Attach cage bracket Attach the four (4) cage brackets with the Cage Hardware. Cage Hardware: a. (16) 1/4-20 x 1’’ Flange Bolt b. (16) 1/4-20 Flange Nut 2. Attach upper cage Attach the upper cage to the cage brackets using the Cage Hardware. Torque the bolts to 10 ft·lb (13.6 N·m). Install one section at a time. -
Page 25: Attach Lower Cage Sections (To Upper Cage)
3. Attach lower cage sections (to upper cage) Use two (2) outer cage clips (one on each end) to hang a lower cage section from the upper cage. Secure the lower cage section to the upper cage using the Cage Hardware. Repeat this step for the other cage sections. -
Page 26: Adjust Pivot Joint And Lower Yoke
1. Adjust pivot joint and lower yoke WARNING: Do not remove the bottom bolt of the pivot joint or the bottom bolt of the lower yoke. CAUTION: When the fan is pivoted, the motor should not be lower than the gearbox. -
Page 27: Attach Eyebolt To Motor Frame
INSTALLING THE GUY WIRES ATTENTION Guy wire installation is recommended if the fan’s extension tube is 4 ft (1.2 m) or longer, if the fan is pivoted, if the fan is exposed to hgh winds, or if the fan is close to any building fixtures. 1. -
Page 28: Install Remaining Guy Wires
4. Install remaining guy wires CAUTION: Over-tightening the guy wires could throw the fan off balance. CAUTION: The guy wires should be spaced evenly around the fan and clear of the airfoils. Repeat steps 1–3 to install the three (3) remaining guy wires. Evenly cinch all four guy wires into place using the Gripples . -
Page 29: Electrical Installation Safety
CAUTION: Shielded cable, if applicable, must be landed on the motor’s ground terminal! CAUTION: To avoid a short circuit, be very careful not to get metal chips in the controller! CAUTION: The Big Ass Fans product warranty will not cover equipment damage or failure that is caused by improper installation. -
Page 30: 13A13B13C 14 30 16 17
Power requirements for fan controllers The power requirements for Big Ass Fans controllers are shown in the specification table in the introduction. If multiple controls are connected to one feeder circuit, the circuit required is the sum of the feeder circuit requirements listed on the chart. -
Page 31: Conduit And Piping Guidelines
The nature of Variable Frequency Drive systems (VFD) must be considered prior to and during the installation of Big Ass Fans. Due to high frequency electrical noise on the output side of the fan controller, measures must be taken to ensure that wires and cabling are routed in a manner consistent with recommendations made in this section. -
Page 32: Grounding
A variety of cable types are acceptable for variable frequency drive installations. For many installations, unshielded cable is adequate if it can be separated from sensitive circuits. In all cases, parallel runs of control and motor cabling should be avoided when unshielded cable is used. Do not use cable with an insulation thickness of less than 15 mils. -
Page 33: Pe L1 L2
Motor ground The motor ground must be connected to a ground terminal on the VFD to aid in keeping high frequency electrical noise off of the building’s ground grid. Shielded motor cable terminations Either of the safety ground terminals on the drive provides a grounding point for the motor cable shield. The motor cable shield connected to one of the drive terminals must also be connected to the motor frame. -
Page 34: Wiring: Early Suppression Fast Response (Esfr)
Wiring: Early Suppression Fast Response (ESFR) WARNING: Wait three minutes after disconnecting before servicing! WARNING: Improper installation can cause electric shock or damage to the motor and controller. A qualified electrician should perform the installation. ATTENTION: If installing the fan in the United States, the fan must be installed per the following National Fire Protection Association (NFPA) guidelines: •... -
Page 35: Yel
Wiring: 100–125/200–250 V, single-phase fan controllers WARNING: Wait three minutes after disconnecting before servicing! WARNING: Improper installation can cause electric shock or damage to the motor and controller. A qualified electrician should perform the installation. The diagrams below shows wiring option for a 100–125/200–250 V, 1 Φ fan controller. See “Power Requirements for Fan Controllers”... -
Page 36: Ac Input Wiring Motor Output Wiring
Wiring: 200–250 V, three-phase fan controllers WARNING: Wait three minutes after disconnecting before servicing! WARNING: Improper installation can cause electric shock or damage to the motor and controller. A qualified electrician should perform the installation. The diagrams below show wiring options for a 200–250 V, 3 Φ fan controller. See “Power Requirements for Fan Controllers”... -
Page 37: 13A13B13C 14 30 16 17
Wiring: 400–480 V & 575–600 V, three-phase fan controllers WARNING: Wait three minutes after disconnecting before servicing! WARNING: Improper installation can cause electric shock or damage to the motor and controller. A qualified electrician should perform the installation. The diagram below shows wiring options for 400–480 V, 3 Φ and 575–600 V, 3 Φ fan controllers. See “Power Requirements for Fan Controllers”... -
Page 38: Daisy Chaining
WARNING: Wait three minutes after disconnecting before servicing! The following illustrations and parameter changes enable daisy chaining of the Pivot fan speed controller. The first fan provides a start/stop contact and 0–10 VDC analog speed reference for the downstream fan controller. -
Page 39: Wiring The Fan Motor: 9-Lead, Dual Voltage, Wye Motor Configurations
Wiring the fan motor: 9-lead, dual voltage, wye motor configurations The motor wiring configurations shown below are applicable to 9-lead dual voltage wye wound motors rated for 230/460 VAC and 330/600 VAC. Consult the motor nameplate and/or wiring placard for verification of required wiring connections. -
Page 40: Operating The Fan Controller
Operating the fan controller WARNING: The following startup procedures apply to standard model controllers. Procedures may vary depending on installation options and system automation. The installer should verify proper wiring, terminations, and proper voltage supply before proceeding. High voltage gloves and arc flash protection are recommended. -
Page 41: Annual Preventive Maintenance
PREVENTIVE MAINTENANCE Please take a few moments each year to perform the following preventive maintenance inspection on your fan to ensure its safe and efficient operation. If you have any questions, please contact Customer Service. WARNING: Risk of fire, electric shock, or injury to persons during cleaning and user-maintenance! Disconnect the appliance from the power supply before servicing. -
Page 42: Annual Maintenance Checklist
ANNUAL MAINTENANCE CHECKLIST Fan Model: Fan Model: Fan Model: Serial #: Serial #: Serial #: Location: Location: Location: Date Initials Date Initials Date Initials WWW.BIGASSSOLUTIONS.COM © 2015 DELTA T CORP. ALL RIGHTS RESERVED. -
Page 43: Troubleshooting
Airfoil noise comes from airfoils that are to 29 ft·lb (39.3 N·m). If the popping still occurs, verify that the airfoils not tightened to the specified torque. are not contacting each other. If they are, contact Big Ass Fans Customer Service. The fan will not start. - Page 45 10 days of the receipt of the replacement item. Instructions for returning the original item 1. Please use the return label that is included in the box containing the replacement part. The return shipment address is: Big Ass Fans ATTN: RMA#________ 800 Winchester Road Lexington, KY 40505 2.
-
Page 46: Warranty Claim Form Instructions
The Warranty Claim Form will include our acknowledgment and a Return Materials Authorization (RMA) number. Note: Do not return any item without first being assigned an RMA# by Big Ass Fans Customer Service. 2. No more than 10 days prior to the date you have made arrangements to replace the component part, call Customer Service at 1-877-BIG-FANS to arrange for replacement component delivery and original component pickup. -
Page 47: Warranty Claim Form
ATTENTION: Do not return any item without first being assigned an RMA# by Big Ass Fans Customer Service Department. The RMA# must appear on the outside of the box being returned. Items without an RMA# will not be accepted. -
Page 48: Responsibility Agreement
The undersigned understands and acknowledges receipt of the Warranty Claim Form and Instructions and agrees that Big Ass Fans has the right, upon receipt of returned merchandise, to make final determination as to whether this merchandise should be replaced at no cost under Big Ass Fan’s stated warranty policy. -
Page 49: Check-In Procedure
CHECK-IN PROCEDURE 2348 Innovation Drive Lexington, KY 40511 Phone: 1-859-233-1271 (Big Ass Fans Certified Installers Only) www.bigasssolutions.com ATTENTION These items must be completed prior to any additional installation crew members entering jobsite or any installation material being unloaded. Date: Company:... - Page 50 Big Ass Fans or otherwise specified in the installation instructions. If this installation will be performed outside the scope of work or not within the specifications of Big Ass Fans by customer’s request, please provide specific details: Please sign below if both parties agree that all aspects of this installation have been thoroughly explained and are of clear understanding and agreement of the installation to be completed.
-
Page 51: Close-Out Procedure
CLOSE-OUT PROCEDURE 2348 Innovation Drive Lexington, KY 40511 Phone: 1-859-233-1271 (Big Ass Fans Certified Installers Only) www.bigasssolutions.com Date: Company: Job Name: Address: Purchase Order No.: City/State/ZIP: Contact Name: Phone: E-mail: **SEE THE FOLLOWING PAGE FOR NFPA 13 REGULATIONS** The field crew supervisor and facility manager are to walk through the completed installation. - Page 52 Verifying the stability of the mounting structure is the sole responsibility of the customer and/ or end user, and Big Ass Fans hereby expressly disclaims any liability arising therefrom, or arising from the use of any materials or hardware other than those supplied by Big Ass Fans or otherwise specified in the installation instructions.
- Page 53 CONTACT US Talk to a Big Ass Fan Expert. Call us at at one of the numbers below or visit www.bigasssolutions.com Customer Service U.S.A & Rest of the World Canada 2348 Innovation Drive 6300 Northwest Dr, Unit 3 Lexington, KY 40511 Mississauga, ON L4V 1J7, Canada 1-877-244-3267 1-844-924-4277...
- Page 56 1001010801 Rev. N 2425 Merchant St., Lexington, KY 40511 1 (877) BIG-FANS | WWW.BIGASSFANS.COM...
Need help?
Do you have a question about the Pivot and is the answer not in the manual?
Questions and answers