BIG ASS FANS Powerfoil 8 Installation Manual
Hide thumbs
Also See for Powerfoil 8:
- Installation manual (68 pages) ,
- Installation manual (124 pages)

Subscribe to Our Youtube Channel
Related Manuals for BIG ASS FANS Powerfoil 8


Summary of Contents for BIG ASS FANS Powerfoil 8
- Page 1 INSTALLATION GUIDE Powerfoil ® Basic 6 ® For help, call 1-877-BIG-FANS or visit www.bigassfans.com...
- Page 2 I have the appropriate mount to accommodate the roof pitch and my building structure. Big Ass Fans can only be mounted to I-beams or angle iron. Do not directly mount the fan to single purlins, trusses, or bar joists. Consult a structural engineer for mounting methods not covered in this manual.
- Page 3 READ AND SAVE THESE INSTRUCTIONS WARNING AND CAUTION SYMBOL Indicates a hazard with a medium level of risk that could result in injury or death or damage to property if not avoided. ELECTRICAL WARNING SYMBOL Indicates an electrical hazard with a medium level of risk that could result in death or serious injury if not avoided.
- Page 4 CAUTION: Do not bend the airfoils when installing or servicing the fan. Do not insert foreign objects between rotating airfoils. CAUTION: Use this fan only in the manner intended by Big Ass Fans. If you have questions, contact Customer Service.
-
Page 5: Table Of Contents
10. Mount the Variable Frequency Drive (VFD) 11. Install the Electronic Programming Module (EPM) 12. Wire the Fan and VFD 13. Install the Airfoils 14. Install the Hub Cover (Powerfoil 8/Powerfoil 8 Plus only) Electrical Guidelines Cable Types Grounding Input Voltage Irregularities... - Page 6 Maintenance Annual Preventative Maintenance General Preventative Maintenance Annual Maintenance Checklist Troubleshooting General Troubleshooting Cutting the Extension Tube Status and warning messages Fault messages 179 diagnostics running display options Warranty Contact Us Check-In Procedure Close-Out Procedure...
-
Page 7: Technical Specifications
PF82-20 20 ft (6.1 m) 10 A @ 575–600 V, 3 Φ 2.7–2.2 A PF82-24 24 ft (7.3 m) Powerfoil 8 Plus Diameter Motor Size Minimum Circuit Size Full Load Amps (Fan) 25 A @ 200–240 V, 1 Φ 8.8–7.2 A 1.5 hp... -
Page 8: Before Installing Your Fan
BEFORE INSTALLING YOUR FAN Review the following pre-installation procedures and checks to ensure you have all necessary items for installation. Tools The largest Big Ass Fan weighs a maximum of 415 lbs (188 kg). A suitable means for lifting the weight of the fan, such as a scissor lift, at least two personnel, and the following tools will be required. - Page 9 Square washers are included and are only used if you are mounting the fan to angle irons. The number of square washers used depends on the number of angle irons used. 2. Guy wires and hardware are only included with your order if the fan’s lateral movement needs to be restrained. Big Ass Fans recommends using guy wires if the extension tube is four feet or longer, or if the fan is exposed to high winds or similar conditions, or if the fan is near building structural components.
-
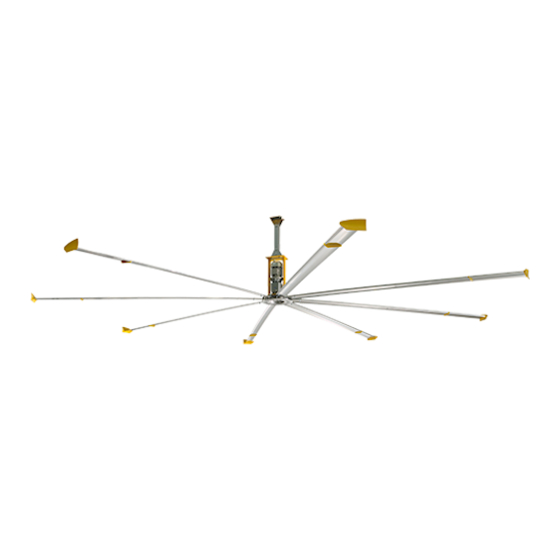
Page 10: Fan Diagram
FAN DIAGRAM Contact Customer Service if you are missing any parts or hardware needed for installation. Note: Powerfoil 8 illustrated below. Basic 6 has six airfoils and does not include the hub cover. Powerfoil Powerfoil Plus Winglet Winglet Safety Cable... -
Page 11: Where To Install Your Fan
WHERE TO INSTALL YOUR FAN Before beginning installation, check that the building structure and fan location meet Big Ass Solutions’ safety guidelines by confirming the below requirements. ☐ Fans mounted on fabricated I-beams, which are common in steel buildings, could cause the beam to flex and the fan to move significantly during operation. - Page 12 Clearance from HVAC equipment and radiant heaters The fan must be installed at the minimum distances shown below in relation to HVAC (Heating, Ventilation, and Cooling) systems. ≥1x fan diameter if at the same level or above diffuser. ≥2x fan diameter if below diffuser. HVAC Equipment Refer to the illustrations below.
- Page 13 The example below shows a situation in which the 90-Degree Offset mount must be used so that the fan hangs plumb to the ground. If you are uncertain of your roof pitch or do not have the correct mount to properly hang your fan, consult a structural engineer or contact Big Ass Fans Customer Service. Standard Upper Mount 90-Degree Offset Mount WWW.BIGASSSOLUTIONS.COM...
-
Page 14: Understanding Airflow Patterns
Understanding airflow patterns Correct fan placement is crucial for maximizing airflow distribution while adhering to safety standards. Airflow in an open area The airflow moves from the fan toward the floor. When airflow hits the floor, it moves outward in all directions. - Page 15 Powerfoil Plus airflow The Powerfoil Plus winglet creates a jet of air that flows outward at a 45° angle, passing over floor obstructions and delivering airflow in a much broader pattern. When planning fan placement, consider this fan’s larger coverage area.
-
Page 16: Overview
WARNING: Ensure there are no persons below the fan unit during installation! Overview Big Ass Fans can only be hung from an I-beam or angle irons. Consult a structural engineer for installation methods not covered in this manual. Follow the steps on the following pages to install your fan. -
Page 17: 1A. Prepare The I-Beam
1a. Prepare I-Beam ATTENTION If you are mounting your fan to angle irons, proceed to the following page. Measure the flange width of the I-beam from which the fan will be hung. Select the mounting holes that match the flange width of the I-beam from the diagrams below. Proceed to step 2. -
Page 18: B. Prepare The Angle Irons
1b. Prepare the Angle Irons CAUTION: Do not install the fan from a single purlin, truss, or bar joist. CAUTION: Unsupported angle iron spans should not exceed 12 ft (3.7 m). CAUTION: The angle irons must be fastened to the roof structure at each end. If you are mounting your fan to an I-Beam, see the previous page. - Page 19 B. Pre-drill angle irons Before drilling the angle irons, confirm that you have the appropriate mount to accommodate the roof pitch of your mounting structure. Drill two Ø9/16” (1.4 cm) holes exactly 5-3/8” (13.7 cm) apart in the centers of two angle irons. Measure the distance between the mounting points of the roof structure that the angle irons will span.
- Page 20 D. Fasten angle irons to roof structure mounting points Single Angle Iron Double Angle Iron Fasten the angle irons to the roof structure mounting Fasten the angle irons to the roof structure mounting points at each end with Grade 8 hardware as shown. points at each end with Grade 8 hardware as shown.
-
Page 21: Directly Mount Main Fan Unit To Angle Irons
2. Directly Mount Main Fan Unit to Angle Irons ATTENTION If you are installing the fan with an extension tube, skip to step 3a (I-beam) or 3b (angle irons). CAUTION: The main fan unit is heavy. Use caution when raising it. A 24-ft (7.3-m) fan weighs a maximum of 415 lbs (188 kg). -
Page 22: 3A. Attach Upper Mount To I-Beam
3a. Attach Upper Mount to I-Beam If you are mounting the fan to angle irons, skip to step 3b on the following page. Note: Spacers are only used on I-Beams when the beam flange exceeds 3/8” (1 cm). Secure the upper mount to the I-beam with the Upper Mount Hardware. Tighten the bolts to 40 ft·lb (54.2 N·m) using a torque wrench and 3/4”... -
Page 23: 3B. Attach Upper Mount To Angle Irons
3b. Attach Upper Mount to Angle Irons Secure the upper mount directly to the angle irons with the Upper Mount Hardware as shown. The angle irons should be aligned with the outermost holes of the upper mount. Consult the diagrams below for distances between the angle irons. -
Page 24: Attach The Extension Tube
4. Attach the Extension Tube Fasten the extension tube to the upper mount with the Extension Tube Hardware. Ensure the extension tube is hanging plumb to the ground, and then tighten the hardware so that it is snug, but not fully tightened. Note: If the mounting structure requires a non-standard length of extension tube, see “Cutting the Extension Tube.”... -
Page 25: Attach Lower Yoke
6. Attach Lower Yoke Attach the lower yoke to the bottom of the extension tube with the Lower Yoke Hardware as shown. Tighten the hardware so that it is snug, but not fully tightened. Lower Yoke Hardware: a. (2) 1/2-13 x 4-1/2’’ GR 8 Bolt b. -
Page 26: Confirm Orientation
If guy wires are needed and were not included with your fan order, contact Big Ass Fans Customer Service. A. Attach locking carabiners to main fan unit Attach the (4) locking carabiners to the guy wire brackets on the main fan unit as shown. - Page 27 B. Attach beam clamps For best results, the guy wires should be installed at 45° in the X-Y, Y-Z, and X-Z planes as shown below. If the angle deviates by more than 15°, contact Customer Service for assistance. Attach the beam clamp to the mounting structure. The guy wire should be approximately 45° from the horizontal plane.
- Page 28 C. Route guy wire through Gripple ® Route the guy wire through the Gripple, the carabiner on the fan, and then back through the Gripple as shown. Do not tighten the Gripple until the remaining guy wires have been installed. Note: To back the guy wire out of the Gripple, insert 1/16 (1.5 mm) Allen wrench into the small hole on the Gripple.
-
Page 29: Mount The Variable Frequency Drive (Vfd)
10. Mount the Variable Frequency Drive (VFD) WARNING: To reduce the risk of electric shock, wiring should be performed by a qualified electrician! Incorrect assembly can cause electric shock or damage the motor and the controller! Hazard of electrical shock! WARNING: The installation of a Big Ass Fan must be in accordance with the requirements specified in this installation manual and with any additional requirements set forth by the National Electric Code (NEC), ANSI/NFPA, and all local codes. -
Page 30: Install The Electronic Programming Module (Epm)
If you are mounting the VFD to the fan motor frame instead of the wall (onboard VFD option), skip this step and refer to the instructions at the end of this guide. Basic 6 & Powerfoil 8 Powerfoil 8 Plus... -
Page 31: Install The Airfoils
13. Install the Airfoils ATTENTION If the AirFence™ accessory was included with your fan order, examine each AirFence to ensure it is properly installed on the airfoil. Disconnect power to the fan before installing the airfoils. A. Attach winglets to airfoils Note: Check each airfoil to ensure the AirFence is still securely attached. -
Page 32: Install The Hub Cover (Powerfoil 8/Powerfoil 8 Plus Only)
14. Install the Hub Cover (Powerfoil 8/Powerfoil 8 Plus only) Attach the hub cover to the hub with the Hub Cover Hardware. Hub Cover Hardware: a. (4) 1/4” Plastic Rivet WWW.BIGASSSOLUTIONS.COM © 2016 DELTA T CORP. ALL RIGHTS RESERVED. -
Page 33: Cable Types
ELECTRICAL GUIDELINES WARNING: Installation must comply with specifications from National Electrical Codes and standards (NEC, VDE, BSI, etc.) regarding wire types, conductor sizes, branch circuit protection, and disconnecting devices. WARNING: To avoid a possible shock hazard and/or nuisance tripping caused by induced voltages, unused wires in the conduit must be grounded at both ends. -
Page 34: Grounding
Cable fittings To maximize abrasion resistance and strain relief, make sure that cable fittings for the flexible cable/portable cord are the appropriate type and size for the cable/portable cord outer jacket diameter. Do not install the flexible cable/portable cord in a manner that would place the cable in a bind or under excessive strain. Grounding The nature of Variable Frequency Drive systems must be considered prior to and during the installation of Big Ass Fans. -
Page 35: Delta Secondary
Delta secondary CAUTION: Care must be taken when connecting to a three-phase 240/120 V secondary as shown below. All VFD models rely on internal references made between each incoming phase and ground. To prevent nuisance tripping such as Overvoltage and Undervoltage faults, 200–240 V, three phase VFDs should be connected so that the High leg, or “phase B,”... -
Page 36: Branch Circuit Protection
Branch circuit protection CAUTION: VFDs may not be daisy chained on a branch circuit without providing either one fused disconnect or circuit breaker per controller. The VFD does not contain individual branch circuit over-current protection. Local code and/or NEC requirements may not permit installation of multiple VFDs on a shared feeder. -
Page 37: Vfd Wiring: Esfr (Early Suppression Fast Response)
VFD Wiring: ESFR (Early Suppression Fast Response) WARNING: Improper installation can cause electric shock or damage to the motor and controller. A qualified electrician should perform the installation. If installing the fan in the United States, the fan must be installed per the following National Fire Protection Association (NFPA) guidelines: •... -
Page 38: Vfd Wiring: 100-125 V & 200-240 V, 1 Φ Controller
VFD Wiring: 100–125 V & 200–240 V, 1 Ф Controller WARNING: Wait three minutes after disconnecting before servicing! WARNING: Improper installation can cause electric shock or damage to the motor and controller. A qualified electrician should perform the installation. The diagrams below shows wiring options for a 100–125 V and 200–240 V, single-phase VFD. Note: The VFD does not contain fusing! Power must be supplied to this controller via a dedicated circuit breaker or properly fused disconnect! 200–240 V, 1 Φ, 50/60 Hz Controllers... - Page 39 VFD Wiring: 200–240 V, 3 Ф Controller WARNING: Wait three minutes after disconnecting before servicing! WARNING: Improper installation can cause electric shock or damage to the motor and controller. A qualified electrician should perform the installation. The diagrams below shows wiring options for a 200–240 V, three-phase VFD. Note: The VFD does not contain fusing! Power must be supplied to this controller via a dedicated circuit breaker or properly fused disconnect! 200–240 V, 3 Φ, 50/60 Hz Controllers A disconnect is included with the VFD for 200–240 V,...
- Page 40 VFD Wiring: 400–480 V & 575–600 V, 3 Ф Controller WARNING: Wait three minutes after disconnecting before servicing! WARNING: Improper installation can cause electric shock or damage to the motor and controller. A qualified electrician should perform the installation. The diagrams below shows wiring options for a 400–480 V and 575–600 V, three-phase VFD. Note: The VFD does not contain fusing! Power must be supplied to this controller via a dedicated circuit breaker or properly fused disconnect! 400–480 V, 3 Φ, 50/60 Hz Controllers...
-
Page 41: Daisy Chaining
Daisy Chaining the Fans WARNING: Wait three minutes after disconnecting before servicing! The following illustrations and parameter changes enable daisy chaining of multiple fans. The first fan provides a start/stop contact and 0–10 VDC analog speed reference for the first downstream VFD, which then provides a new start/stop contact and 0–10 VDC analog speed reference for the following downstream VFD. -
Page 42: Motor Wiring: 9-Lead, Dual Voltage, Wye Motor Configuration
Motor Wiring: 9-Lead, Dual Voltage, Wye Motor Configurations The motor wiring configurations shown below are applicable to 9-lead, dual voltage, wye wound motors rated for 230/460 VAC and 330/600 VAC. Consult the motor nameplate and/or wiring placard for verification of required wiring connections. -
Page 43: Starting And Stopping The Fan
OPERATING THE CONTROLLER WARNING: The following startup procedures apply to standard model controllers. Procedures may vary depending on installation options and system automation. The installer should verify proper wiring, terminations, and proper voltage supply before proceeding. High voltage gloves and arc flash protection are recommended. -
Page 44: Heating Season
Cooling season The cooling effect created by the breeze from the Powerfoil 8 a n d B a s i c 6 fan keeps occupants comfortable with the thermostat at a higher setting. During the cooling season, every degree higher that the thermostat is reset reduces the energy consumed by the air conditioner by 1.5–2%. -
Page 45: Attach Mounting Brackets
It is the responsibility of the installer to install the fan according to facility and owner standards and all local and national safety codes. Big Ass Fans does not provide additional means of disconnect when the VFD is mounted onboard the fan. If preferred or required by local or national code, additional means of disconnect should be provided by the installer as specified by the owner of the fan or facility manager. -
Page 46: Attach Vfd
2. Attach VFD and tighten nuts Secure the VFD (provided with the fan) to the mounting brackets using the VFD Hardware. Fully tighten the 1/4” locknuts from the previous step. VFD Hardware: a. (4) 10-24 Pan Head Screw b. (4) 10-24 Nylock Nut 3. - Page 47 1. Install module under this 2. Roll module into position under this tab. 3. Plug module’s 6-pin connector into the “PL3” tab first. Module will click into place. socket on the VFD. 0.5 Nm/ 4.5 lb-in 1 2 3 4 5 <...
-
Page 48: Operation
Operation WARNING: The following startup procedures apply to standard model controllers. Procedures may vary depending on installation options and system automation. The installer should verify proper wiring, terminations, and voltage supply before proceeding. High voltage gloves and arc flash protection are recommended. -
Page 49: Annual Preventive Maintenance
• Observe the motion of the fan during operation. The fan should not wobble or precess. If any wobble is noticed, ensure the mounting structure is rigid enough to support the fan and that the guy wires, if used, are sufficiently taut. If guy wires were not used, Big Ass Fans suggests installing them. Contact Customer Service. WWW.BIGASSSOLUTIONS.COM ©... -
Page 50: Annual Maintenance Checklist
ANNUAL MAINTENANCE CHECKLIST Fan Model: Fan Model: Fan Model: Serial #: Serial #: Serial #: Location: Location: Location: Date Initials Date Initials Date Initials WWW.BIGASSSOLUTIONS.COM © 2016 DELTA T CORP. ALL RIGHTS RESERVED. -
Page 51: General Troubleshooting
GENERAL TROUBLESHOOTING Some issues can be resolved before requesting service. Review the troubleshooting tips listed below before contacting Customer Service for support. Customers in the United States Customers outside of the United States For questions about your product or For questions about your product or customer customer service inquiries, please call our service inquiries, please contact your local Big Ass toll free number (877-BIG-FANS) or visit... -
Page 52: Cutting The Extension Tube
Cutting the extension tube CAUTION: Make sure the safety cable is not damaged after cutting and drilling the extension tube! If your mounting structure requires a non-standard extension tube length, use the guidelines below to cut the extension tube. WWW.BIGASSSOLUTIONS.COM ©... -
Page 53: Status And Warning Messages
Troubleshooting the controller Some controller issues can be resolved before requesting service. Review the below warning and fault messages before contacting Customer Service for support. Status and warning messages Error code Description and corrective action EPM Contains Earlier Firmware Version This error will appear when you try to change a VF–D parameter and the EPM firmware is older than the VFD’s firmware. -
Page 54: Fault Messages
Fault messages Error code Description and corrective action High Temperature fault Check for excessive load or a dirty heatsink. Improve the drive cooling ability. Assertion Level fault Check the assertion level switch relative to P120. Personality fault Drive hardware error Cycle power, and then reprogram EPM. -
Page 55: Diagnostics Running Display Options
Error code Description and corrective action Output Transistor fault Short circuit, excessive load, excessive cable charging current Verify correct load (motor HP, motor wiring, cable length, cable type). Motor Short to Ground Motor Thermal OL Check actual motor current against FLA (P108) Flying Restart fault Failed motor speed sync attempt Single Phase fault... - Page 56 Error code Description and corrective action Actual Motor Current in Amperes Torque as a Percentage of Motor Rated Torque (vector mode only) Drive Output Power in kW Total kWH for Drive Lifetime Heatsink Temperature Degrees Celsius 0–10 VDC Input Voltage (VDC) 4–20mA Input Current (mA) Analog Output Level (VDC) Actual Drive Output Frequency (Hz)
-
Page 57: Contact Us
CONTACT US Talk to a Big Ass Fan Expert. Call us at one of the numbers below or visit www.bigasssolutions.com Customer Service United States Canada 2348 Innovation Drive 6300 Northwest Dr, Unit 3 Lexington, KY 40511 Mississauga, ON L4V 1J7 Canada 877-244-3267 1-844-924-4277... -
Page 59: Check-In Procedure
CHECK-IN PROCEDURE (Big Ass Fans Certified Installers Only) ATTENTION These items must be completed prior to any additional installation crew members entering the job site or any installation material being unloaded. Date: Company: Job Name: Address: Purchase Order No.: City/State/ZIP:... - Page 60 National Fire Protection Association Standard for HVLS — United States and Canada In accordance with sections 12.1.4 and 11.1.7: High Volume Low Speed (HVLS) Fans of NFPA 13, the installation of HVLS fans in buildings equipped with sprinklers, including ESFR sprinklers, shall comply with the following: •...
-
Page 61: Close-Out Procedure
CLOSE-OUT PROCEDURE (Big Ass Fans Certified Installers Only) Date: Company: Job Name: Address: Purchase Order No.: City/State/ZIP: Contact Name: Phone: E-mail: **SEE THE FOLLOWING PAGE FOR NFPA REGULATIONS** The field crew supervisor and facility manager are to walk through the completed installation. - Page 62 ☐ Customer declined install of controller included Scope of Work standard as part of Powerfoil X3.0 fan kit ☐ Big Ass Fans-certified installer installed the 110 V ☐ SmartSense not included on order per salesperson receptacle Additional Comments: Signatures of both parties are required to acknowledge that this installation has been completed to customer satisfaction, activate warranty, and to issue payment to contractor (with required documentation).
- Page 64 IND-INST-93-MUL-01 Rev. E 10/03/2017 2425 Merchant St., Lexington, KY 40511 1 (877) BIG-FANS | WWW.BIGASSFANS.COM...
Need help?
Do you have a question about the Powerfoil 8 and is the answer not in the manual?
Questions and answers