Table of Contents
Advertisement
Quick Links
Advertisement
Table of Contents

Related Manuals for JRC JMA-933B


Summary of Contents for JRC JMA-933B
- Page 1 Chart RADAR Installation Manual...
- Page 3 PREFACE Thank you for purchasing the JRC JMA-900B Chart RADAR. This manual describes how to install the equipment. For the best operation and performance results, read this manual thoroughly before insallation. For preventing electric shock and for securing periformance, grounding work is needed.
- Page 4 ● Before Operation ● Pictorial Indication Various pictorial indications are included in this manual and are shown on the component equipment so that you can operate them safely and correctly and prevent any danger to you and / or to other persons and any damage to your property during operation.
- Page 5 ● Precautions upon Equipment Operation ● Before installing the power cable, make sure to turn off the braker of the main power line. Otherwise, an electric shock or a malfunction may occur. When connecting/disconnecting the connection cables between the external equipment, make sure to turn off the braker of the main power line.
- Page 6 Do not touch the LAN/USB connectors directly with your hands. Otherwise, a malfunction may occur due to electrostatic charges. Divert electrostatic charges by touching chassis before accessing LAN/USB connectors.
-
Page 7: Table Of Contents
CONTENTS CONFIGURATION ....................1-1 Components........................... 1-1 1.1.1 JMA-900B Series ......................1-1 List of Circuits........................1-3 1.2.1 JMA-900B Series Scanner Unit, Tranceiver Unit............1-3 System Diagram........................1-8 System Configuration ......................1-14 INSTALLATION OF SCANNER UNIT..............2-18 Equipment Cable ......................... 2-18 2.1.1 H-2695110056* ......................2-18 2.1.2 H-2695111153* ...................... - Page 8 5.1.3.1 Select the equipment and the connect-acknowledge........5-3 5.1.3.2 Configuration Setting..................5-6 5.1.3.3 Sensor Setting ....................5-15 5.1.3.4 Alarm Relay Setting..................5-22 5.1.3.5 Update of Application Software............... 5-26 5.1.3.6 Update of SRB/ROL Software ................5-31 5.1.4 Setting of the Sensor ....................5-34 Setting of the Ships Paramater...................
-
Page 9: Configuration
A list of components and optional accessories are shown below. JMA-900B Series 1.1.1 ●JMA-900B Series List of Composition (Self Satanding TYPE) Scanner Tranceiver Performance MODEL Radiator Display Unit Unit Unit Montor JMA-933B-SA NKE-1139 NTG-3230 NJU-84 JMA-932B-SA NKE-1130 JMA-923B-7XA NKE-1129-7 NAX-16B-7 NTG-3225 NCD-2096 JMA-923B-9XA NKE-1129-9... - Page 10 ●Accessories NAME TYPE REMARKS 7ZPRD0694 (Japanese) Radar Mode Instruction Manual 7ZPRD0695 (English) 7ZPRD0696 (Japanese) ECDIS Mode Instruction Manual 7ZPRD0697 (English) 7ZPRD0744 (Japanese) Simplified Manual 7ZPRD0745 (English) Additional Manual for 7ZPNA4111 (Japanese) Chart Installation 7ZPNA4112 (English) Accessory 7ZZNA0426A CD/FD Cleaner Accessory 7ZZNA0427A FD(10 pieces)/FD Case ●Options...
-
Page 11: List Of Circuits
List of Circuits JMA-900B Series Scanner Unit, Tranceiver Unit 1.2.1 Table 1-1 JMA-933B-SA Scanner and Tranceiver Unit NKE-1139-1 NKE-1139-2 Scanner Unit Interconnection CAX-14 Radiator CTG-270 Safety Switch CSD-657 Encoder CHT-71A1 Motor MDBW10823 Scanner Unit AC100V Motor Driver 7EPRD0035* AC220V Motor Driver... - Page 12 Table 1-2 JMA-932B-SA Scanner Unit NKE-1130-1 NKE-1130-2 Scanner Unit Interconnection CAX-13 Radiator CTG-270 Safety Switch CSD-656 Encoder CHT-71A Motor MDVW10823 AC100V Motor Driver 7EPRD0035* AC220V Motor Driver 7EPRD0034* Brake Circuit CFA-255 Brake Contorl Circuit CCB-655 Brake Circuit Unit NZR-17 Modulator Unit NMA-551-1 Modulator Unit Scanner Unit...
- Page 13 Tabel 1-3 JMA-923B-7XA/JMA-923B-9XA Scanner and Tranceiver Unit NKE-1129-1 NKE-1129-2 Scanner Unit interconnection CAX-12 Safety Switch CSD-655 Encoder CHT-71A1 Motor MDBW10822 Scanner Unit AC100V Motor Driver 7EPRD0035* AC220V Motor Driver 7EPRD0034* Brake Circuit CFA-253 Brake Control Circuit CCB-655 Brake Circuit Unit NZR-15 Heater Control Part CHG-216...
- Page 14 Table 1-4 JMA-922B-6XA/JMA-922B-9XA Scanner Unit NKE-1125-61,NKE-1125-91 NKE-1125-62,NKE-1125-92 Scanner Unit Interconnection CAX-11 Safety Switch CSD-654 Encoder CHT-71A Motor MDBW10822 AC100V Motor Driver 7EPRD0035* AC220V Motor Driver 7EPRD0034* Brake Circuit CFA-253 Brake Control Circuit CCB-655 Brake Circuit Unit NZR-16 Modulator Unit NMA-550-1 Scanner Unit Modulator Unit Interconnection...
- Page 15 Table 1-5 NCD-2096/NCD-2096F Display Unit NCD-2096 NCD-2096F NDC-1445 NDC-1444 μATX Mother Board CMC-1323 ADD Card CKA-141 Flash Disk CDD-723 HDD (2 units) CDD-717 USB FD Drive CDD-719 DVD Drive CDD-719 ATX Power Supply CBD-1625 Front Panel Circuit 1 CCK-986 Front Panel Circuit 2 CCK-987 USB Secilty Dongle CYC-344...
-
Page 16: System Diagram
2 5 0 V - M P Y C - 4 (NEAREST APPROACH) (POWER FAIL) 2 5 0 V - T T Y C S - 4 CONNING DISPLAY (JAN-701-CON) 2 5 0 V - T T Y C S - 4 Fig 1-1 JMA-933B-SA System Diagram... - Page 17 NKE-1130-1/2 SCANNER UNIT NJU-84 PERFORMANCE HEATER OPTION MONITOR CIRCUIT BREAKER (SHIP YARD SUPPLY) (5A) AC100V,50/60Hz 1φ,200W ( W I T H M O N ) 0 . 6 / 1 k V - D P Y C Y S - 1 . 5 NBL-175 SHIP’S MAIN for HEATER...
- Page 18 NKE-1129-71/72 SCANNER UNIT NJU-85 PERFORMANCE HEATER OPTION MONITOR CIRCUIT BREAKER (SHIP YARD SUPPLY) (5A) AC100V,50/60Hz 1φ,100W ( W I T H M O N ) 0 . 6 / 1 k V - D P Y C Y S - 1 . 5 F L E X I B L E W A V E G U I D E NBL-175 F R - 9 ( J R C S U P P L Y )
- Page 19 NKE-1129-91/92 SCANNER UNIT NJU-85 PERFORMANCE HEATER OPTION MONITOR CIRCUIT BREAKER (SHIP YARD SUPPLY) (5A) AC100V,50/60Hz 1φ,100W ( W I T H M O N ) 0 . 6 / 1 k V - D P Y C Y S - 1 . 5 F L E X I B L E W A V E G U I D E NBL-175 F R - 9 ( J R C S U P P L Y )
- Page 20 NKE-1125-61/62 SCANNER UNIT NJU-85 PERFORMANCE HEATER OPTION MONITOR CIRCUIT BREAKER (SHIP YARD SUPPLY) (5A) AC100V,50/60Hz 1φ,100W ( W I T H M O N ) 0 . 6 / 1 k V - D P Y C Y S - 1 . 5 NBL-175 SHIP’S MAIN for HEATER...
- Page 21 NKE-1125-91/92 SCANNER UNIT NJU-85 PERFORMANCE HEATER OPTION MONITOR CIRCUIT BREAKER (SHIP YARD SUPPLY) (5A) AC100V,50/60Hz 1φ,100W ( W I T H M O N ) 0 . 6 / 1 k V - D P Y C Y S - 1 . 5 NBL-175 SHIP’S MAIN for HEATER...
-
Page 22: System Configuration
System Configuration NCD-2096 component units Item Unit Type Remarks ntity Monitor Unit 23.1 Inch LDC Unit H-7WSRD0002* NWZ-170-E/ET Monitor Unit CML-764-E/ET Interconnection LCD OPE CCK-972 Operation Unit Operation Circuit A CCK-973 NEC-5163-F/FT Operation Circuit B CCK-974 Operation Circuit C CCK-975 Operation Circuit D CCK-976 Operation Unit... - Page 23 USB3 J101 P101 P6401 J6407 J6408 J6409 J6411 J6401 Video USB3 COM1 COM2 COM3 P207 Video USB0 USB1 USB3 COM1 COM2 COM3 J207 W105 H-7ZCNA4031* J6402 J6403 J6405 J6404 J6406 J6410 W104 P6402 P6403 P6405 P6404 P6406 P6410 H-7ZCNA4030* W103 H-7ZCNA4029* W108 H-7ZCNA4034*...
- Page 24 1-16...
- Page 25 Each part of NDC-1444/1445 Processing Unit USB FD Drive DVD Drive USB Input/Output DVI Connector ATX Power Supply LAN Connector LCD_FAN Alarm RGB Connector SRB1 SRB1 UPS Battery Standard Terminal Board Power Supply Do not touch the LAN/USB connectors directly with your hands. Otherwise, a malfunction may occur due to electrostatic charges.
-
Page 26: Installation Of Scanner Unit
Installation of Scanner Unit Equipment Cable H-2695110056* 2.1.1 This is a 14-core shielded composite calbe. Theis cable is used to connect an NKE-1125 type scanner or an NKE-1130 type scanner, and an NTG-3225 type transmitter-receiver or an NTG-3230 type transmitter-receiver to the display unit. Fig 2-1 Cross-sectional drawing of H-2695110056* Table 2-1 H-2695110056* wire Core (No.) -
Page 27: H-2695111153*
H-2695111153* 2.1.2 This is an 18-core shielded composite cable. This cable is used to connect an interswitch to the display unit. Fig 2-2 Cross-sectional drawing H-2695111153* Table 2-2 H-2695111153* wire Wire NO. Cross Section (m ) No. of wire / φ Color Remarks 19 / 0.18... -
Page 28: Cable End Processing Method
Cable end processing method 2.1.3 Make a cable length with leeway that it is possible to do maintenance, a check, repair works easily. Secure a place of the house of a cable. Remove about one meter of the oute skin, and then process the double braided shield according to the procedures shown below. -
Page 29: Connection To Terminals
Connection to Terminals 2.1.4 A Terminal board circuit of a Display unit is no need for compressed terminal. (Except Power Supply Cables of Scanner unit’s Motor.) 1) Turn the screw counterclockwise by Slotted screwdriver so as open the cable inlet. 2) Insert strepped part of wire into cable inlet up to the dead end. -
Page 30: Installation Of Scanner Unit
Installation of Scanner Unit NKE-1125 Type Scanner 2.2.1 2-22... - Page 31 2-23...
-
Page 32: Nke-1129 Type Scanner
NKE-1129 Type Scanner 2.2.2 2-24... - Page 33 2-25...
-
Page 34: Nke-1130 Type Scanner
NKE-1130 Type Scanner 2.2.3 2-26... - Page 35 2-27...
-
Page 36: Nke-1139 Type Scanner
NKE-1139 Type Scanner 2.2.4 2-28... - Page 37 2-29...
-
Page 38: Installation Of Tranceiver Unit
Installation of Tranceiver Unit NTG-3225 Type Tranceiver 2.3.1 2-30... - Page 39 2-31...
-
Page 40: Ntg-3230 Type Tranceiver
NTG-3230 Type Tranceiver 2.3.2 2-32... - Page 41 2-33...
-
Page 42: Precautions
Precautions Insatallation of Scanner Unit 2.4.1 1) Precautions for transporting and storing the scanner ・ An scanner is a heavy load. Be very careful about handling it. ・ Do not allow the scanner fall on its side while it is stred or being installed. ・... - Page 43 Hook Rope Protector should be located between the rope and the radiator (Protector is attached on the radiator before delivery) Over 2.5m Scanner's support section Attach a rope to four (Do not use here for hoisting) hoisting eyebolts Side View Top View Fig 2-6 S-Band The cloth etc.
- Page 44 3) Installation and clamping method a) Installation direction • Installation should be done so that the cable gland is oriented toward the stern. b) Bolts, unts and tightening torque to be used • Use stainless steel bolts for the scanner and uniformly tighten all of the bolts using double nuts for each bolt so that the scanner will not become loose (Table 2-3).
- Page 45 c) Use of washer and corrosion-resistant measures • At the location where a bolt's head or nut comes in contact with the scanner chassis' legs and the mount base, insert a plain washer which fits the bolt; and, at the location where the nut comes in contact with the plain washer, insert a spring washer, and then securely tighten the nuts (Fig 2-8).
- Page 46 d) Grounding and corrosion-resistant measures • Ground the scanner chassis and the installation surface (hull) by using an earth line. Apply sealant to the connection portion of the earth line to prevent corrosion and damage by vibration (Fig 2-9). Fig 2-6 Grounding and corrosion-resistant measures 2-38...
-
Page 47: Routing Coaxial Cable And Flexible Waveguide
Routing Coaxial Cable and Flexible Waveguide 2.4.2 In the case of the three-unit system consisting of the display unit, transmitter-receiver, and the scanner, use a Coaxial cable, shown in Fig 2-10 , between the transmitter-receiver and the scanner for the S-band, and use a Flexible waveguide, shown in Fig 2-11, for the X-band. 1) Protecting coaxial cable and flexible waveguide •... - Page 48 2) Preventing the connecttng portion from becoming detahed due to vibration • Keep the connecting portion between the coaxial cable and the flexible waveguide and the scanner's chassis, and provide supporting members, as shown in Fig 2-12 and Fig 2-13, to prevent the connecting portion from becoming detached due to vibration.
-
Page 49: Scanner Installation Position
Scanner Installation Position 2.4.3 1) Physical selection criteria • Install the scanner at the center of the mast on the keel line. • If the scanner cannot be installed at the above position for some reason, the amount of deviation must be minimized. And, reinforce the mount base and the platform and take precautions to protect the scanner from vibration and impact at the installation position. - Page 50 Table 2-3 Swing circle Scanner unit (length) Swing circle NKE-1125-6 (6 feet) 1910mm NKE-1129-7 (7 feet) 2270mm NKE-1125-9 (9 feet) 2825mm NKE-1129-9 (9 feet) NKE-1130/1139 (12 feet) 4000mm • Avoid having a rope or signal flag from winding around the radiating section thereby preventing it from rotating.
- Page 51 2) Electrical selection criteria • The installation height of the scanner relates to the maximum detection distance. The higher is better. However, if it is too high, radio wave energy greatly attenuates above the scanner's vertical beam width (the point -3dB from the peak of the main lobe).
- Page 52 • If it is considered that sufficient installation height cannot be provided when the scanner is installed directly on the roof of the wheelhouse, use a mounting rack or radar mast (Fig 2-16). Normally, when the scanner installation height is less than 2 meters from the roof of the wheelhouse, provide a mounting rack assembled at an angle frame to install the scanner.
- Page 53 When installing two scanners, provide a height difference so that those two scanners do not enter each other's vertical beam width range. • To avoid interference with other equipment and to prevent radio noise from generating, do not place the VHF antenna, GPS antenna, and INMARSAT's dome within the range of the vertical beam width.
-
Page 54: Confirmation During Test Run
If there is a concern that structural objects existing within the vertical beam width may generate false images, equip the structural objects with a radio wave absorber. (There are two types of absorbers: broadband type having no specific resonant frequency and narrowband type which can absorb a band with a specific frequency. -
Page 55: Installation Of Display Unit
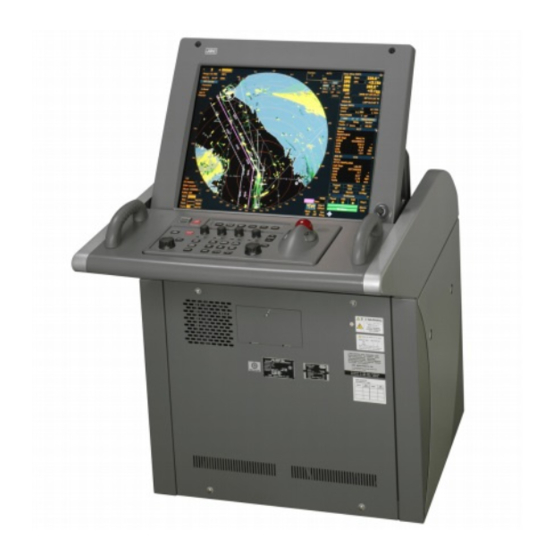
Installation of Display Unit Installation of Display Unit Setting the display unit Determine the installation location of the display unit by considering following conditions: (1) Consider and install the installation size to be specified at the outline drawing of in the place for which it is possible to insert a cable from the installation and the base of the bolt. - Page 56 Fig 3-1 NCD-2096...
- Page 57 Fig 3-2 NWZ-170-ET...
- Page 58 Fig 3-3 NDC-1444...
- Page 59 Fig 3-4 NCE-5163-FT...
-
Page 60: Installing Power Cable
Input Voltage Specification 3.2.1 Voltage: AC100/220V(±10%) Frequency: 50Hz / 60Hz Phase: Single Power consumption (Change with the connecting scanner): JMA-933B-SA, JMA-932B-SA: Approx. 600VA In maximum wind velocity 2200VA JMA-923B-7XA/6XA, JMA-922B-9XA/6XA: Approx. 550VA In maximum wind velocity 1900VA Connecting Power Cable 3.2.2 1) Remove 4 screws of the front cover of Display unit. - Page 61 The input powr supply of Display Unit changes by Model of connected Scanner Unit. Confirm the Model of Scanner Unit and input power supply of Display Unit. Radar Model Scanner Unit Model of Scanner Unit Model of AC100-115V AC220-240V JMA-933B-SA NKE-1139-1 NKE-1139-2 JMA-932B-SA NKE-1130-1 NKE-1130-2 JMA-923B-7XA...
-
Page 62: Connections With Scanner And Transceiver
Connect the device to AC OUT of Power supply located in display unit (Processing unit). For the procedure for processing the equipment cable terminal, see Section 2.1.2. DISPLAY UNIT NCD-2096 19-CORES COMPOSITE CABLE H-2695111153 (JRC SUPPLY) RADAR (JRC Supply) H-2695110056 (Interswitch) -
Page 63: Connection With Gps
Connection with GPS Connect the device to TB305(NAV1 RX+、NAV1 RX-) of standard terminal board circuit CQD-2121 location in the display unit (processing unit). DISPLAY UNIT NCD-2096 19-CORES COMPOSITE CABLE H-2695111153 (JRC SUPPLY) RADAR (JRC Supply) H-2695110056 (Interswitch) TB601 TB602 TB603... -
Page 64: Connection With Vessel Speed Unit (2-Axis Log)
Connection with Vessel Speed Unit (2-AXIS LOG) Connect the vessel speed unit to TB303(DLOG RX+、DLOG RX-) of standard terminal board circuit CQD-2121 located in the display unit (processing unit). DISPLAY UNIT NCD-2096 19-CORES COMPOSITE CABLE H-2695111153 (JRC SUPPLY) RADAR (JRC Supply) H-2695110056 (Interswitch) TB601 TB602... -
Page 65: Connections With Gyro And Electormagnetic Log
Connections with GYRO and Electormagnetic The GYRO signal should be connected to TB302 of standart terminal board circuit CQD-2121 in the display unit (processing unit). Connect synchro-type GYROs to R1, S1, S2, S3, and R2, and connect step-type GYROs to 1, 2, 3, and 5 (COMMON for 5). Connect a gyro equipment or equivalent that provided a below turn rate, otherwise the performance of signal process and target tracking decrese. - Page 66 DISPLAY UNIT NCD-2096 19-CORES COMPOSITE CABLE H-2695111153 (JRC SUPPLY) RADAR (JRC Supply) H-2695110056 (Interswitch) TB601 TB602 TB603 TB604 SVD1 VDOUT ALMRX+ SVD1E VDOUTE ALMRX- STIY1 TRIG+ TRIGOUT ALMTX+ STIY1E TRIG- TRIGOUTE ALMTX- SBP1 BPOUT MNT+ SBP1E BPOUTE MNT- SBZ1 BZOUT...
-
Page 67: Connection With Gyro (Iec61162-1/2)
Connection with GYRO (IEC61162-1/2) The HDT sentence and THS sentence of IEC-61162-1/2 can be received. The baud reat conforms to 4800/9600/19200/38400bps. Connection shoud be made to TB305 (GYRO RX+, GYRO RX-) of standard terminal board circuit CQD-2121 located in the display unit (processing unit). Precaution The true bearing update frequency greatly influences the radar signal processing performance and the target... - Page 68 DISPLAY UNIT NCD-2096 19-CORES COMPOSITE CABLE H-2695111153 (JRC SUPPLY) RADAR (JRC Supply) H-2695110056 (Interswitch) TB601 TB602 TB603 TB604 SVD1 VDOUT ALMRX+ SVD1E VDOUTE ALMRX- STIY1 TRIG+ TRIGOUT ALMTX+ STIY1E TRIG- TRIGOUTE ALMTX- SBP1 BPOUT MNT+ SBP1E BPOUTE MNT- SBZ1 BZOUT...
-
Page 69: Connection With Ais
AIS display. Signal name AIS_RX is an input to this radar display unit. Connect the signal to the transmission port of the AIS display. DISPLAY UNIT NCD-2096 19-CORES COMPOSITE CABLE H-2695111153 (JRC SUPPLY) RADAR (JRC Supply) H-2695110056 (Interswitch) TB601... -
Page 70: Connection With Ecdis
Target tracking information is output to ECDIS from TB601 (ARPA TX+, ARPATX-) of radar terminal board circuit CQD-2128 located in the display unit (processing unit). Target tracking information is outputted from JARAP TX+ and JARPATX- in the JRC format. DISPLAY UNIT NCD-2096 19-CORES COMPOSITE CABLE... -
Page 71: Connect With Alarm Monitoring System
3.10 Connect with Alarm Monitoring System This radar display unit has input/output functions for various contact signals intended for alarm monitoring system. Connect necessary signals by referring to the inter-board connection diagram. Terminal Signal Direction Description Notes block name CQD-2121 SYS ALM System alarm status is outputted. -
Page 72: Installation Of Cable Ground
3.11 Installation of Cable Ground Install the cable connected with scanner unit, interswitch and ECDIS in the cable graund referring to the figurebelow. Intall it in the cable ground where the cable with other shields has become empty, too. Roll conductive material such as the shield tapes in the cable when tightening the cable ground is lose and tighen hard. -
Page 73: Initial Setting
Initial Setting Confirming Power Supply 1) Set CBD-1625 ATX Poser Supply and CBD-1832 Power Supplu as follows. Set [ON] CBD-1625 ATX Power Suplly CBD-1625 ATX Poser Supplay Set [NOR] CBD-1832 Powe Suplly Set 110V or 220V Set the breaker is {OK} CBD-1832 Power Suplly... -
Page 74: Connecting To Cqd-2121 Standard Terminal Board
Connecting to CQD-2121 Standard Terminal Board When connecting/disconnecting the connection cables between the external equipment, make sure to turn off the breaker of the main power line. Otherwise, a fire or an electric shock may occur. Connect the cables from the external sensors according to the procedure below. CQD-2121 Standard Terminal Board ●... - Page 75 Each part of CQD-2121 Standard Terminal Board Ethernet Rotary Switch TB302 TB303 TB304 TB305 CQD-2121 Standard Terminal Board TB301...
-
Page 76: Setting Equipment Configuration
Setting Equipment Configuration Setting Ethernet Rotary Switch 4.3.1 1) Set Ethernet Rotary Switch on the CQD-2121 Standard Terminal Board. In the case with plural Display Unit, set the number of the Display Unit so as not to overlap. Ethernet Rotary Switch IP TYPE SET(S2)=2 IP SYS SET(S1)=1 to 4 CQD-2121 Standard Terminal Board... - Page 77 Relation between Ethernet Rotary Swtch and IP Address Number of Display Unit No.1 Chart Radar No.2 Chart Radar No.3 Chart Radar No.4 Chart Radar Setting of Ethernet Rotary Switch IP TYPE (S2) IP SYS (S1) IP Address (Main) Processing Unit 192.168.60.35 192.168.60.41 192.168.60.47...
-
Page 78: Connecting To Cqd-2128 Radar Terminal Board
Connecting to CQD-2128 Radar Terminal Board When connecting/disconnecting the connection cables between the external equipment, make sure to turn off the breaker of the main power line. Otherwise, a fire or an electric shock may occur. Turn the screw counterclockwise Insert the cable unit by a solted screwdriver so as to open the cable inlet. - Page 79 Each part of CQD-2128 Radar Terminal Board TB601 TB602 TB603 TB604 Relay output setting jumper pin TB605 CQD-2128 Radar Terminal Board Setting of TP1 to TP4 Pin name Setting Setting of TB604 7-8 (ARPAALM) CLOSE Setting of TB604 9-10 (RADAR CONTACT1) TB1~TB4 Setting of TB604 11-12 (RADAR CONTACT2) OPEN...
-
Page 80: Setting Of Gyro I/F
Setting of GYRO I/F Setting of STEP・SYNC 4.5.1 The GYRO I/F circuit of the system accepts most GYRO compasses by switching behavior. Step motor Type: DC24~DC100V Synchro-motor Type: Primary excitation voltage 50V~115V(AC) Before power-on operation, do the setting of the switches S1, S2, S5, S6, S7 and jumper JP1 on the GYRO I/F circuit (PC-4201) for your Gyro compass type by performing the procedure below. - Page 81 Procedures 1) Set S5 to “ OFF ”. The gyro compass and GYRO I/F are turned off. 2) Set S6 and S7 in accordance with the type of your gyro compass. There are two types of gyro compasses: one type outputs a step signal, and the other type outputs a synchro signal.
- Page 82 7) Connect the gyro signal and log signal cables to the terminal block. 8) Set S5 to “ ON ”. The gyro compass and GYRO I/F are connected. 9) After power-on operation, make sure of the radar video and the operation with the true bearing value.
- Page 83 S2 設定表/S2 SETTING TABLE BSHLOG ALARM GYRO SIMULATOR LOG SIMULATOR N.C. N.C. 5 SEC GYRO ALARM TIME 0.2 SEC NMEA(HDT/THS) HEADING SENSOR SOURCE GYRO SIGNAL 4800 bps 9600 bps NMEA BAUDRATE SETTING 19200 bps 38400 bps Table 4-2 OTHER SETTING switch(S2 DIP) 4-11...
-
Page 84: Setting
Setting Port Setting Display the Device Menu 5.1.1 1) Push the [POWER] button of the control unit and start up a display unit. 2) Move the cursor onto [Startup Menu], right-click the mouse and display [Password Dialog]. 3) Input password [8510] and left-click the [OK] button. The [Device Menu] menu will appear. Startup Menu Password Dialog ※1... -
Page 85: Display The Configulation Set Menu
Display the Configulation Set Menu 5.1.2 1) Left-click the [Configuration Set] button from the inside of [Device Menu]. Device Menu 2) Sub menu of Configulation Set is will appear. Select when setting Serial Relay I/F Board1,Serial Relay I/F Board2 and Analog Option Board to have been equipped with, connecting external equipment. -
Page 86: The Configuration Setting
The Configuration Setting 5.1.3 5.1.3.1 Select the equipment and the connect-acknowledge 1) Left-click the [Configuration Set] button from the inside of the menu point of Configulation Set. The [Configuration Set] dialog will appear. Configuration Set 2) Put a check in the board which the display unit is equipped with in "Select Equipment to set" of the [Configuration Set] dialog from the inside of the following menu and left-click the [Next] button. - Page 87 Confirmation the IP address The IP address of the setting of an Ethernet uni-selector in the CQD-2121 standard terminal board and the to that supporting NCM-860 control unit and the IP address which is set to Serial Relay I/F Board, the Radar I/F board can be confirmed when clicking Confirm IP by the Configulation Set dialog.
- Page 88 3) When the confirmation of the board ends normally, [Configuration Set] dialog is displayed.
-
Page 89: 5.1.3.2 Configuration Setting
5.1.3.2 Configuration Setting The [Configuration Set] dialog is divided every name of CQD-2121 (standard terminal board), CMJ-519 (analog option board), CQD-2130 (option terminal board) and the terminal board. Configuration Set CQD-2121 Terminal Board: The setting about the sensor which connected with CQD-2121 terminal board. - Page 90 Of the terminal name of the terminal board specified in the column of "Terminal board" in the end of each terminal board and the sensor name which is set, connecting is displayed in the column of "Sensor". The one where a check is included in the check box on the terminal name left is set to connection on. Also, when doing the confirmation and the setting change of the details about each terminal, Left-click the [Detail] button after making the radio button of Detail on the right on.
- Page 91 The [Port Set-Detail] dialog can do the confirmation or the setting change of the details of the sensor specification. For the details of the sensor, a default value is displayed by the select sensor. (Refer to appendix XXX"XXX" therefore to the default value of the sensor.) The changed setting isn't saved when doesn't left-click the [Set] button.
- Page 92 "Line Monitor" can confirm the dater sentence of the sensor which connected with the terminal of the terminal board. [Stop] button: Stop the monitor of the data sentence. Select equipment [Start] button: [Clear] button: Start the monitor of the data Clear the monitor of the data sentence.
- Page 93 When putting a check in " Log " of " Line Monitor " and confirming a data sentence, the data sentence to have been displayed in " Line Monitor " can be saved in the log file. Check the “Log”. When left-clicking the [Stop] button after the confirmation of the data sentence, the save screen of the log file is displayed.
- Page 94 Port Setting of the CQD-2121 terminal board 1) Put a check in the terminal name of the distribution-frame in the connected sensor cable from CQD-2121 standard terminal board. 2) Make the radio button of the terminal name of the setting terminal board on and left-click the [Detail] button.
- Page 95 When setting a sensor to Auto Pilot or Ship LAN by procedure 3), select use equipment from the inside of "Select Interfce Type". (1) Left-click the [ ] button. (2) Select the Type of Auto Pilot from the list. (3) Left-click the [Next] button. When selecting ”Auto Pilot”...
- Page 96 4) The [Port Set-Detail] dialog will appear. Confirm that the setting of each item becomes the default value of the select sensor. (Refer to appendix XXX"XXX" therefore to the default value.) 5) Select equipment form the ”Select Equipment” of “Line Monitor”. 6) Left-click the [Start] button and confirm that a data sentence is displayed right.
- Page 97 Board rate Length bits Size レ RADAR ALM Alarm System 4,800 NONE 1024 レ ARPA TT (MENA) -TX 4,800 NONE 4096 レ レ レ JAPRA JRC-TT-TX 4,800 NONE 4096 レ RADAR MNT Remaote Mainte 4,800 NONE 1024 レ レ 5-14...
-
Page 98: 5.1.3.3 Sensor Setting
5.1.3.3 Sensor Setting Set on the side of application in Serial Relay I/F Board1, Serial Relay I/F Board2 and Analog Option Board. The start up the screen of Sensor Setting Possible for start up with two ways. [Start up way 1] 1) Left-click the Close button of the Configulation Set screen. - Page 99 Setting of the ”Sensor” “Sensor” of the [Sensor Set] dialog select Use/Not Use of the sensor. When selecting Use, the sensor data which connected with the termainal board can be used. Set to Not Use therefore at the sensor not to use.
- Page 100 Left-click the [Recv Test] button of “Communication” of the [Sensor Set] dialog. [Line Monitor] dialog will appear. Select a place of the entry of the sensor data in "Select Port" and left-click the [Start] button. The receive-data of the set terminal board can be confirmed. Select a place of the entry of the sensor data Left-click the [Start] button Left-click the [Recv Test] button...
- Page 101 Setting of the ”Data Source” Set when “Current” is ”Use” Set when “TT(NMEA)-TX” is ”Use” Set when “VDR(JRC)” is ”Use” Set when “TT(NMEA)-TX” is ”Use” Set when ”GYRO I/F” and ”LOG(NMEA)” are “Use” Set when ”ENGINE INFO1/2” and ”WATER TEMP” are ”Use”...
- Page 102 Setting of the ”Priority” At the "Priority" tag of the [Sensor Set] dialog, set the order of priority of SRB to use with the standard sensor and the option sensor. Set the order of priority of the standard sensor Set the order of priority of the option sensor Primary 1st: SRB to use main select the equipment to be equipped with.
- Page 103 The save of the sensor setting The changed setting isn't saved when doesn't left-click the [Set] button. To save changed setting, always left-click the [Set] button. After the change of all setting and the save end, left-click the [Close] button and it ends the setting of a sensor.
- Page 104 Standard NAV1 15 Sec Not Use 0 Sec B-NET1 Not Use* 15 Sec Navtex (NMEA) Not Use Standard NAVTEX 0 Sec Navtex (JRC) Not Use Standard NAVTEX 0 Sec WIND Not Use Standard NAV1 15 Sec WEATHER Not Use Standard...
-
Page 105: 5.1.3.4 Alarm Relay Setting
5.1.3.4 Alarm Relay Setting The Alarm Relay Set set the alarm which is output from the CQD-2121 standard terminal board and the terminal of the CQD-2130 option board. 1) Left-click the [Alarm Relay Set] button. The [AlarmRelay Out Setting] dialog will appear. Standard Output Port: Set the standard alarm which is output to the terminal of the tarminal board pass SRB. - Page 106 ・Setting the ”Standard Output Port” and ”Optional Output Port” 1) Select the equipment which sets an alarm from the inside of "Select Unit". (1) Left-click the [ ] button (2) Select equipment form the list 2) Make the radio button of the terminal board which sets an alarm ON. On in the radio button of the terminal board which sets an alarm The terminal board which made a radio button on switches a terminal name.
- Page 107 3) Set an alarm from the inside of "Alarm Name" of each terminal name. The alarm to have set to each terminal name becomes output from the terminal of the terminal board. (1) Left-click the [ ] button (2) Select equipment form the list ・Setting the Internal Port(CQD-2121) 1) Set an alarm from the inside of "Alarm Name"...
- Page 108 2) After setting an alarm, left-click the [OK] button or the [Apply] button in the lower right of the [AlarmRelay Out Setting] dialog. [OK] button [Apply] button [OK] button: Save setting and close [AlarmRelay Out Setting] dialog. [Apply] button: Save setting. 5-25...
-
Page 109: 5.1.3.5 Update Of Application Software
5.1.3.5 Update of Application Software Executes the update of application software according to the following procedures. 1) Press the [POWER] for operation unit, and startup the “Startup Menu”. 2) The cursor is moved on “Startup Menu”, and right-click. The Password Dialog will appear. 3) Input the password [85100], and left-click the [OK] button. - Page 110 6) The cursor is moved on “Startup Menu”, and right-click. The “Password Dialog” will appear. 7) Input password [8510], and left-click the [OK] button. Input password [8510]. 2) Left-click the [OK] button. Startup Menu Password Dialog 8) Open the cover in front of DVD dirve is opened and “Update CD” is inserted in DVD drive. DVD drive 2) Insert the CD in the 1) Open the cover of the...
- Page 111 9) Left-click the [Software Update] button. 10) Left-click the [OK] button. 11) Left-click the [Yes] button. 5-28...
- Page 112 12) Checking the “Dual HDD”, and then setting the following set. 2)Exection Drive →C:\ Data Drive →D:\ Sub Drive →E:\ 1) Checking the “Dual HDD”. 3) Checking the “Inclucing INI file”. 4) Left-click the [Install] button. 13) Left-click the [Yes] button. 14) Select the “Display Type”...
- Page 113 15) Left-click the [OK] button. 16) Left-click the [OK] button, and push the [POWER] button for operation unit. Rebutes the display unit. This is the end of the software update. 5-30...
-
Page 114: 5.1.3.6 Update Of Srb/Rol Software
5.1.3.6 Update of SRB/ROL Software Update the software of CDJ-2373 SRB1/2 or CDC-1339 which the display unit was equipped with. 1) Left-click the [Update] button. The [Configuration Set] dialog will appear. 2) In the software, make the radio button of the board which update and left-click the [Next] button. (1) Make a radio button ON (2) Left-click the [Next] button 3) The [Dialog] dialog will appear. - Page 115 4) Select the file which update and left-click the [OK] button. File name Left-click the [OK] button The folder of the destination Drive name File type 5) Confirm that a selected file name is displayed and left-click the [Update] button. The update of the software will start.
- Page 116 6) Left-click the [Finish] button when the update of the software finish. Left-click the [Finish] button Display the“Completed” 5-33...
-
Page 117: Setting Of The Sensor
Setting of the Sensor 5.1.4 To use a sensor data by ECDIS software ([Navigation&Planning]), in addition to the setting by the environment setting to the preceding clause, the data source (Port) of the heading, the vessel speed, the water depth and the position must be specified by the following [Sensor Connection] setting. 1) Left-click the [ ] button of [Startup Menu] and start up [Navigation&Planning]. - Page 118 3) Specifie data source (Source) about the each item. The data sourse setting of the heading [Use Local Port] :Recive a sensor data route terminal board. [Use LAN] : Recive a sensor data route LAN. Specifie data source (Source). (GYRO I/F , GYRO (NMEA) or GPS Compass) Gyro ・GYRO I/F:...
- Page 119 Setting the position data source (POSN1/POSN2) [Use Local Port] :Recive a sensor data route terminal board. [Use LAN] : Recive a sensor data route LAN. Specifies a primary [POSN1] data source. ((D)GPS1, (D)GPS2, LORAN-C, GPS Compass and DR) [Use Local Port] :Recive a sensor data route terminal board. [Use LAN]...
-
Page 120: Setting Of The Ships Paramater
Setting of the Ships Paramater 1) Start up Navigation&Planning, and select [Menu]-[(7)Main]-[(5)Code Input] and input ‘9’ in [Code Input]. 2) Select [Menu]-[(1)Serviceman]-[(4)Ship’s Parameter]. The [Ship’s Parameter] dialog will appear. 3) Input a correct value to [Length] and [Beam] which is related to the equipped position of the equipment. -
Page 121: Setting Of The Installation Location
Setting of the Installation Location 1) Start up Navigation&Planning, and select [Menu]-[(7)Main]-[(5)Code Input] and input ‘9’ in [Code Input]. 2) Select [Menu]-[(1)Serviceman]- [(3)Install Location]-[(2)CCRP Setting]. The [CCRP Setting] dialog will appear. 3) Set each antenna position and monitor location (the location of display unit) of the own ship. ※Is not possible to establish outside more than the size of the own ship which was set at the ships paramater. -
Page 122: Setting Of The Radar Application
Setting of the RADAR Application Left-click the [ ] button of [Startup Menu] and start up [Radar]. Startup Menu The method of presentation of the serviceman menu 1) Left-click the MENU > Code Input. The Code Input menu will appear. 2) Input ‘9’... -
Page 123: Setting Of The Navigation Equipment
Setting of the Navigation Equipment 5.4.1 Set a connecting navigation device. 1) Left-click MENU > NAV Equipment Setting. The NAV Equipment Setting menu will appear. 2) Select the azimuth equipment which connects at the item of Heading. GYRO I/F: Select when receiveing in STEP and SYNC. NMEA GYRO: Select when receiving in NMEA. -
Page 124: Tune Adjustment
Tune Adjustment 5.4.2 Tune control of the transmitter and the receiver is conducted. This adjustment is made at the installation and the replacement of magnetron. 1) Open the Serviceman Menu. 2) Left-click the Adjust Menu. The Adjust Menu will appear. 3) Operate the ▲... -
Page 125: Tune Indicator Adjustment
Tune Indicator Adjustment 5.4.3 Sets the scale when tune indicator bar swings in maximum. 1) Set the range to over 48NM. 2) Open the Serviceman Menu. 3) Left-click the Adjust Menu. The Adjust Menu will appear. 4) Left-click the TXRX Adjustment. The TXRX Adjustment menu will appear. -
Page 126: Bearing Adjustment
Bearing Adjustment 5.4.4 Adjust the bearing so that bearing of the target measured by the ship’s compass matches the bearing of the tareget image shown on the radar screen. 1) Select the bearing display [H UP] mode. Set Image Processing (PROC) at Off. 2) Use own ship’s compass to measure the beating of an appropriate target (for example, a ship at anchor, a breakwater or a buoy) relative to the heading of the own ship. -
Page 127: Range Adjustment
Range Adjustment 5.4.5 Adjust the range so that the range of the target on the radar video screen is indicated correctly. 1) Seach the radar display for a known target of which range has been confirmed. 2) Open the Serviceman Menu screen. 3) Left-click the Adjust Menu. -
Page 128: Setting Of The Antenna Height
Setting of the Antenna Height 5.4.6 Sets the radar antenna height above sea level, but do not change this setting casually. 1) Measure the height from the sea level to the radar antenna in advance. 2) Open the Serviceman Menu. 3) Left-click the Adjust Menu >... -
Page 129: Setting Of The Main Bang Suppression
Setting of the Main Bang Suppression 5.4.7 Main Bang Suppressoion is adjusted to suppress main bang. A reflection signal form a 3D circuit including wave guide tube, which generally appears as a circular image focusing on the center of the radar display. Optimum adjustment allows main bang image to be dimly lit on the display. -
Page 130: Adjustmant The Performance Monitor
Adjustmant the Performance Monitor 5.4.8 When the following units are replaced, adjust the performance monitor according to the procedures shownin this section. ・Performance monitor ・Scaner unit 1) When the radar apparatus has interswitch function, make settings for a master display unit. 2) Open the Serviceman Menu. -
Page 131: Setting Of The Equipment Id
Setting of the equipment ID 5.4.9 Sets the equipment ID in case that several display units exist. If setting the incorrect equipment ID, the functions as follows do not work. ・In case of stand alone, the display position of antenna symbol mark and the rotation centre of echo is displayed at different position from the position set by CCRP. -
Page 132: Setting Of Alarm
Setting of Alarm 5.4.10 In case of connecting with alarm monitor system, set to operate as follows within specification of the alarm monitor system as follows. Confirm the communication specification with the alarm monitor system when you set it. ・Setting of output cycle of watchman timer reset contact signal ・Setting of alarm volume ・Output setting of relay contact signal ・Output setting of ALR sentence... -
Page 133: Output Setting Of Relay Contact Signal
5.4.10.3 Output Setting of Relay Contact Signal The output port of the relay contact signal is set. The setting not output or the output terminal fixation can be set. 1) Open the Alarm. 2) Left-click the Relay Output. 3) Set each output relay contact signal. The contact signal is output to the terminal set to set the name of the output terminal. -
Page 134: Setting Of Outside Ack Receive
5.4.10.5 Setting of Outside ACK Receive The reaction of display unit when external ACK is done can be set. This setting can set clitical alarm and normal alarm. ・Clitical Alarm: CPA/TCPA corresponds. ・Normal Alarm: Alarms other than clitical alarm. 1) Open the Alarm menu. 2) Left-click the External ACK Setting. -
Page 135: Backup Of Data
Submit the data backed up as attached material in the construction report. Mail address where data is submitted: XXXXX@jrc.co.jp Backup the data of the RADAR application according to the following procedures. 1) Insert the external memory of USB thumb drive etc. in the display unit. -
Page 136: Option Unit
OPTION UNIT Installation of Interswitch Unit Equipment Cable End Processing 6.1.1 1) Equipment cable end processing Tape Equipment cable Shielding Fig 6-1: Equipment cable end processing 2) End processing of each cable core Coaxial or Shield cable Vinyl cable Fig 6-2: End processing of each cable core Connection of Equipment Cable 6.1.2 1) Remove the cable retainer. -
Page 137: Plug Terminal Block Connecteion Procedures
Plug Terminal Block Connecteion Procedures 6.1.3 The terminal block of the display unit’s terminal boardcircuit is a plug terminal block which does not tequire a crimp-typeterminal. Connection procedures are described below. 1) Turn the screw counterclockwise by slotted screwdriver so as to open the cable inlet. 2) Insert stripper part of wie into cable inlet up to the dead end. -
Page 138: Installation Of Interswitch Unit
Installation of Interswitch Unit 6.1.4 a. NQE-3141-2A Basically, the interswitch unit is incorporated into the JMA-9100 series and delivered with the wiring completed. 1) Connect the cable (2695111153) between interswitch unit NQE-3141-2A and radar terminal board TB602 and TB603 located on the each radar display unit. See Fig6-12: NQE-3141-2A Inter-board connection diagram. - Page 139 Fig 6-6: Exterior drwing of NQE-3141-4A...
- Page 140 c. NQE-3141-8A 1) Securely ground the included earth plate to the hull’s earth. 2) Connect the cable (2695111153) between interswitch unit NQE-3141-4A and radar terminal board TB602 and TB603 located on the each radar display unit. See Fig6-13: NQE-3141-4A Inter-board connection diagram. 3) Confirm the installation.
- Page 141 Fig 6-7: Exterior drwing of NQE-3141-8A...
-
Page 142: Setting
Fig 6-8: NQE-3141-8A Cable entrance Setting 6.1.5 Since setting have been normally mode upon shipment from factory, it is advised to only confirm the settings. a. Setting of NQE-3141-2A, NQE-3141-4A Set DIP switches SW11, SW12 and SW13 as shown below. Fig 6-9: CML-304R DIP switch... - Page 143 1) SW11 setting (expansion mode, master/slave setting) 2 3 4 Set all OFF. 2) SW12 setting (radar connection setting) 2 3 4 Radar Conncetion Setting No.1 display unit connected No.1 display unit not conncted No.1 antenna connected No.1 antenna not conncted No.2 display unit conncted No.2 display unit not connected No.2 antenna connected...
- Page 144 b. NQE-3141-8A setting The internal structures of NQE-3141-8A include two unit of CCL-304R in the two-storied structure. Fig 6-10: NQE-3141-8A Internal structure Fig 6-11: Access to lower board of NQE-3141-8A ・Although dip switch settings are basically the same as the setting shown in Fig 6-10: Access to lower board of NQE-3141-8A, it is necessary to make setting for each of the two SW12.
- Page 145 ・Setting of upper CCL-304R, SW12 (radar connection setting) 1 2 3 4 Radar Connection Setting No.1 display unit connected No.1 display unit not conncted No.1 antenna connected No.1 antenna not conncted No.2 display unit conncted No.2 display unit not connected No.2 antenna connected No.2 antenna not connected No.3 display unit connected...
-
Page 146: Confirmation After Installation
BZ IN E MTR OUT1 - MTR OUT - PWR IN MTR OUT1 E MTR OUT E PWR IN E H-2695111153* (JRC SUPPLY) *はA, Bのようにリビジョンを示す。 “*” means revision, such as A, B and so on. Fig 6-12: NQE-3141-2A Inter-board connection diagram 6-11... - Page 147 2) NEQ-3141-4A H-2695111153* (JRC SUPPLY) H-2695111153* (JRC SUPPLY) H-2695111153* (JRC SUPPLY) H-2695111153* (JRC SUPPLY) Fig 6-13: NQE-3141-4A Inter-bard connection diagram 6-12...
-
Page 148: Installation Of Power Control Unit
INSTALLATION of POWER CONTROL UNIT Power control unit NQE-3167 is used when an antenna and a transmitter-receiver are installed at al location away from the briges, such as aforemast. By using NQE-3167 power control unit, the maximum length of the cable that connects between the display unit and the antenna (transmitter-recever) can be extended up to 400 meters. -
Page 149: Equipment Cable End Processing
Equipment Cable End Processing 6.2.2 Shielding Tape Equipment cable Fig 6-14: Equipment cable end processing End Processing of each cable core 6.2.3 Coaxial or Shield cable Vinyl cable Fig 6-15: End processing of each cable core Connection to Display Unit 6.2.4 Use 14-core composite cable 2695110056 and coaxial cable RG-10/UY to connect power control unit NQE-3167 to each display unit of NCD-2096/F. -
Page 150: General System Diagram Of Power Contorl Unit
General System Diagram of Power Contorl Unit 6.2.5 NKE-1130-1/2 SCANNER UNIT NJU-84 PERFORMANCE MONITOR 1 4 C O R E S C O M P O S I T E C A B L E H - 2 6 9 5 1 1 0 0 5 6 6 5 m M A X M A X 2 3 φ... - Page 151 ALL CABLES OF THE RADAR ARE TO BE RUN AWAY FROM THE CABLES OF RADIO EQUIPMENT. (ex. RADIOTELEPHONE, COMMUNICATIONS RECEIVER and DIRECTION FINDER. etc..) ESPECIALLY INTER-WIRING CABLES BETWEEN SCANNER UNIT AND DISPLAY UNIT OF THE RADAR SHOULD NOT BE RUN PARALLEL WITH THE CABLES OF RADIO EQUIPMENT. (S-BAND 30kW RADAR) Fig 6-17: JMA-933B-SA (NQE-3167) 6-16...
- Page 152 NKE-1125-61/62 SCANNER UNIT NJU-85 PERFORMANCE MONITOR 1 4 C O R E S C O M P O S I T E C A B L E H - 2 6 9 5 1 1 0 0 5 6 6 5 m M A X M A X 2 3 φ...
- Page 153 NKE-1125-91/92 SCANNER UNIT NJU-85 PERFORMANCE MONITOR 1 4 C O R E S C O M P O S I T E C A B L E H - 2 6 9 5 1 1 0 0 5 6 6 5 m M A X M A X 2 3 φ...
- Page 154 NKE-1129-71/72 SCANNER UNIT NJU-85 PERFORMANCE MONITOR 0 . 6 / 1 k V - D P Y C Y S - 1 . 5 ( W I T H M O N ) NTG-3225 1 4 C O R E S C O M P O S I T E C A B L E TRANSCEIVER-RECEIVER UNIT H - 2 6 9 5 1 1 0 0 5 6 3 0 m M A X...
- Page 155 NKE-1129-91/92 SCANNER UNIT NJU-85 PERFORMANCE MONITOR 0 . 6 / 1 k V - D P Y C Y S - 1 . 5 ( W I T H M O N ) 1 4 C O R E S C O M P O S I T E C A B L E NTG-3225 H - 2 6 9 5 1 1 0 0 5 6 3 0 m M A X...
- Page 156 MONITOR UNIT STEPDOWN AC220V,50/60Hz,1φ TRANSFORMER (JRC SUPPLY) max 5m NCE-5163-F 1 4 C O R E S C O M P O S I T E C A B L E OPERATION UNIT H - 2 6 9 5 1 1 0 0 5 6...
- Page 157 (ex. RADIOTELEPHONE, COMMUNICATIONS RECEIVER and DIRECTION FINDER. etc..) ESPECIALLY INTER-WIRING CABLES BETWEEN SCANNER UNIT AND DISPLAY UNIT OF THE RADAR SHOULD NOT BE RUN PARALLEL WITH THE CABLES OF RADIO EQUIPMENT. (S-BAND 30kW RADAR) Fig 6-23: JMA-933B-SA (NQE-3167) desktop 6-22...
- Page 158 STEPDOWN MONITOR UNIT AC220V,50/60Hz,1φ TRANSFORMER (JRC SUPPLY) max 5m NCE-5163-F 1 4 C O R E S C O M P O S I T E C A B L E OPERATION UNIT H - 2 6 9 5 1 1 0 0 5 6 4 0 0 m M A X M A X 2 3 φ...
- Page 159 STEPDOWN MONITOR UNIT AC220V,50/60Hz,1φ TRANSFORMER (JRC SUPPLY) max 5m NCE-5163-F 1 4 C O R E S C O M P O S I T E C A B L E OPERATION UNIT H - 2 6 9 5 1 1 0 0 5 6 4 0 0 m M A X M A X 2 3 φ...
- Page 160 1φ,100W 0 . 6 / 1 k V - D P Y C Y S - 1 . 5 NQE-3167 NBL-175 POWER CONTROL SHIP’S MAIN UNIT (JRC SUPPLY) max 5m for HEATER STEPDOWN AC220V,50/60Hz,1φ TRANSFORMER NCE-5163-F OPERATION UNIT SHIP’S MAIN H-7ZCRD1338 0 .
- Page 161 1φ,100W 0 . 6 / 1 k V - D P Y C Y S - 1 . 5 NQE-3167 NBL-175 POWER CONTROL SHIP’S MAIN UNIT (JRC SUPPLY) max 5m for HEATER STEPDOWN AC220V,60Hz,1φ TRANSFORMER NCE-5163-F OPERATION UNIT SHIP’S MAIN H-7ZCRD1338 0 .
-
Page 162: Inter-Board Connection Diagram Of Power Control Unit
Inter-board connection Diagram of Power Control Unit 6.2.6 Fig 6-28: Inter-board connection diagram of NQE-3167 JMA-922B-6XA/9XA 6-27... - Page 163 Fig 6-29: Inter-board connection diagram of NQE-3167 JMA-923B-7XA/9XA 6-28...
- Page 164 Fig 6-30: Inter-board connection diagram of NQE-3167 JMA-932B-SA 6-29...
- Page 165 Fig 6-31: Inter-board connection diagram of NQE-3167 JMA-933B-SA 6-30...
-
Page 166: Exterior Drawing Of Power Control Unit
Exterior Drawing of Power Control Unit 6.2.7 Fig 6-32: Exterior drawing of NQE-3167 6-31... - Page 167 Fig 6-33: NQE-3167 Cable entrance Fig 6-34: NQE-3167 terminal block Securely ground the include earthplate to the hull’s earth. 6-32...
-
Page 168: Installation Of Vdr
(processing unit). See the drawing below. When JRC’s VDR is used, by connecting it to TB604 (5, 6) MNT TX+/- of radar terminal board circuit CQD-2128 located in the display unit (processing unit), it is possible to use the online maintenance function.
Need help?
Do you have a question about the JMA-933B and is the answer not in the manual?
Questions and answers