
Related Manuals for JRC JMA-610 Series


Summary of Contents for JRC JMA-610 Series
- Page 1 JMA - 610 RIVER RADAR RIVER RADAR EQUIPMENT EQUIPMENT INSTRUCTION INSTRUCTION MANUAL MANUAL...
-
Page 3: Preface
PREFACE Thank you very much for purchasing the JRC river radar equipment, JMA-610. This equipment is a river radar equipment designed to obtain safe operation of ships. This equipment consists of a radar signal processing unit, a LCD display unit and a scanner unit as its main units. -
Page 4: Before Operation
BEFORE OPERATION Pictorial Indication Various pictorial indications are included in this manual and are shown on these equipment so that you can operate them safety and correctly and prevent any danger to you and/or to other persons and any damage to your property during operation. -
Page 5: Precautions
PRECAUTIONS DANGER Never conduct inspection or repair work of equipment components. Inspection or repair work by uncertified personnel may result in fire hazard or electrocution. For inspection and repair work of equipment components, consult with our branch office, branch shop, sales office, or our distributor in your district. When conducting maintenance, make sure to turn the main power off. - Page 6 WARNING When conducting maintenance work, make sure to turn off the power and unplug the power line of the processor so that the power supply to the equipment is completely cut off. Some equipment components can carry electrical current even after the power switch is turned off, and conducting maintenance work without unplugging the power connector may result in electrocution, equipment failure, or accidents.
- Page 7 WARNING Set the safety switch for stopping the scanner unit to the OFF position. Otherwise, an accidental contact with the rotating scanner unit may cause injury. When cleaning the screen, do not wipe it too strongly with a dry cloth. Also, do not use gasoline or thinner to clean the screen.
- Page 8 WARNING Set the safety switch for stopping the scanner unit to the OFF position. Otherwise, an accidental contact with the rotating scanner unit may cause injury. When disposing of used lithium batteries, be sure to insulate the batteries by taping terminals.
- Page 9 CAUTION When using the [SEA] function, never set the suppression level too high canceling out all image noises from the sea surface at close range. Detection of not only echoes from waves but also targets such as other ships or dangerous objects will become inhibited.
- Page 10 CAUTION Do not put watches, clocks, or magnetic cards close to the modulator unit since this unit holds magnetrons having strong magnetic force. Failure or data destruction of the above devices may result. Turn off the main power source before replacing parts. Otherwise, an electric shock or trouble may be caused.
- Page 11 PRECAUTIONS BEFORE OPERATION Cautions for high voltage High voltages from hundreds volts to tens of thousands volts are to be applied to the electronic equipment such radio and radar devices. You do not face any danger during normal operation, but sufficient cares are required for maintenance, inspection and adjustment of their internal components.
- Page 12 FIRST-AID TREATMENTS First-aid treatments As far as the victim of electric shock is not in dangerous condition, do not move him and practice artificial respiration on him immediately. Once started, it should be continued rhythmically. (1) Do not touch the victim confusedly as a result of the accident, but the rescuer may also get an electric shock.
- Page 13 When pulse is beating but breathing has stopped (Mouth-to-mouth respiration) Fig. 1 (1) Tilt the victim’s head back as far as this face looks back. (A pillow may be inserted his neck.) (2) Push his jaw upward to open his throat wide (to spread his airway). (3) Pinch the victim’s nostrils and take a deep breath, block his mouth completely with yours and blow into his mouth strongly.
- Page 14 When both pulse and breathing have stopped Perform the (Cardiac massage) Fig. 2 and (Mouth-to-mouth respiration) Fig. 1 When no pulse has come not to be felt, his pupils are open and no heartbeat is heard, cardiac arrest is supposed to have occurred and artificial respiration must be performed. (1) Place your both hands, one hand on the other, on the lower one third area of his breastbone and compress his breast with your elbows applying your weight on his breast so that it is dented about 2cm (Repeat compressing his breast 50 times or so a minutes).
-
Page 15: Glossary
GLOSSARY This section describes the main terms used for this equipment and general related maritime terms. AZI MODE (Azimuth Stabilization MODE): 1NM=1852m Bearing display mode Anti-clutter rain (FTC): NUP (North-Up): Rain/snow clutter suppression The north is always pointed to the top center Anti-clutter sea (STC): of the radar display. -
Page 16: Table Of Contents
CONTENTS PREFACE ....................... i BEFORE OPERATION ................... ii PRECAUTIONS ..................... iii GLOSSARY ......................xiii 1. GENERAL AND EQUIPMENT COMPOSITION FUNCTIONS ................... 1-1 1.1.1 FUNCTION OF THIS SYSTEM ............... 1-1 FEATURES ..................... 1-2 CONFIGURATION .................. 1-3 EXTERIOR DRAWINGS ................. 1-4 GENERAL SYSTEM DIAGRAMS ............1-8 2. - Page 17 3.3.3 SWITCH DAY/NIGHT MODE [DAY/NIGHT] ..........3-7 3.3.4 ADJUST BRILLIANCE OF INFORMATION ON RADAR DISPLAY (BRILLIANCE SETTING) ................ 3-8 3.3.5 ADJUST SOUND VOLUME (BUZZER VOLUME) ........3-8 3.3.6 RESET ALARM BUZZER [ALARM ACK] ..........3-9 3.3.7 SET DISPLAY COLOR ................3-9 BASIC OPERATIONS ................
- Page 18 3.7.3 SCREEN CAPTURE SETTING (ERASE FILE)........3-48 3.7.4 SCREEN CAPTURE SETTING (CAPTURE MODE)......3-48 3.7.5 SCREEN CAPTURE SETTING (AUTO CAPTURE INTERVAL)... 3-49 3.7.6 SCREEN CAPTURE SETTING (AUTO FILE ERASE)......3-49 USER SETTING ..................3-50 3.8.1 USER SETTING (LOAD USER SETTING)........... 3-50 3.8.2 USER SETTING (SAVE USER SETTING).
- Page 19 6. MAINTENANCE ROUTINE MAINTENANCE ..............6-1 MAINTENANCE ON EACH UNIT ............6-2 SCANNER UNIT NKE-316 ..............6-2 DISPLAY UNIT(ALPHA-SCREEN) ............6-5 7. TROUBLE SHOOTING FAULT FINDING ..................7-3 TROUBLE SHOOTING ................7-5 REPLACEMENT OF MAJOR PARTS ............. 7-7 8. AFTER-SALES SERVICE 9.
- Page 20 xviii...
- Page 21 GENERAL AND EQUIPMENT COMPOSITION NAMES AND FUNCTIONS OF CONTROL PANEL SWITCHES AND FUNCTIONS OF SOFTWARE BUTTONS BASIC OPERATION MEASUREMENT OF RANGE AND BEARING TRUE AND FALSE ECHOES ON DISPLAY MAINTENANCE TROUBLE SHOOTING AND ADJUSTMENT AFTER-SALES SERVICE DISPOSAL SPECIFICATIONS APPENDIX APPENDIX - xix -...
-
Page 23: General And Equipment Composition
SECTION 1 GENERAL AND EQUIPMENT COMPOSITION FUNCTIONS ........... 1-1 1.1.1 Function of This System ...... 1-1 FEATURES ..........1-2 CONFIGURATION ........1-3 EXTERIOR DRAWINGS ......1-4 GENERAL SYSTEM DIAGRAMS ..1-8... -
Page 25: Functions
DVI and RGB to a high resolution color LCD display unit. (The control unit is consisting of a radar process unit and an operation unit.) 1.1.1 Function of This System The JMA-610 series is a color radar system. The main functions include: sensitivity adjustment... -
Page 26: Features
FEATURES Realization of Large, Easy-to-see Screen with High Resolution The 19-inch color LCD with high resolution of 1280 1024 pixels can display radar images of 270 mm or more in diameter. Even short-range targets can also be displayed as high-resolution images. Target Detection by Latest Signal Processing Technology The system employs the latest digital signal processing technology to eliminate undesired clutter from the radar video signals that are obtained from the receiver with a wide dynamic range, thus improving the target... -
Page 27: Configuration
1.3 CONFIGURATION CONFIGURATION Scanner and Transmitted Output Power TRANSMITTED SCANNER TYPE BAND OUTPUT POWER 4.9 kW JMA-610 7 FT SLOT ANTENNA Radar Configuration and Ship’s Mains RADAR SCANNER CONTROL UNIT SHIP’S MAINS MODEL UNIT JMA-610 NKE-316 NCM-883 24 VDC Notes: An optional rectifier is necessary for using Ship's Mains 100/110/115/200/220/230 VAC. -
Page 28: Exterior Drawings
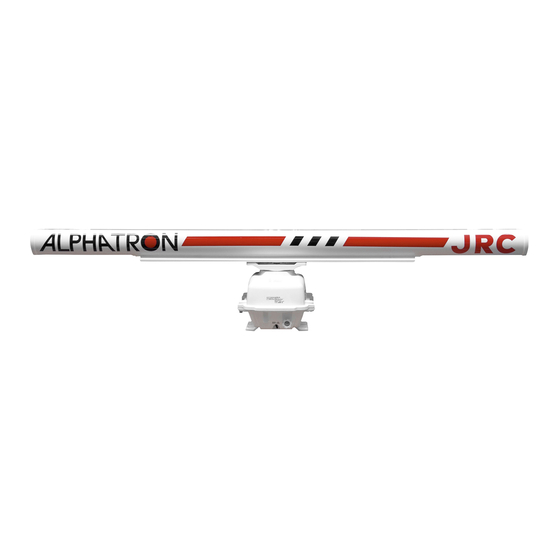
EXTERIOR DRAWINGS Fig. 1.1 Exterior Drawing of Scanner Unit, Type NKE-316 Fig. 1.2 Exterior Drawing of Processing Unit, Type NDC-1486 Fig. 1.3 Exterior Drawing of Operating Unit, Type NCE-7882A Fig. 1.4 General System Diagram of Radar, Type JMA-610... - Page 29 1.4 EXTERIOR DRAWINGS Unit mm Fig. 1.1 Exterior Drawing of Scanner Unit, Type NKE-316...
- Page 30 Unit mm Fig. 1.2 Exterior Drawing of Processing Unit, Type NDC-1486...
- Page 31 1.4 EXTERIOR DRAWINGS Unit mm Fig. 1.3 Exterior Drawing of Operating Unit, Type NCE-7882A...
-
Page 32: General System Diagrams
Cursor or OPERATING UNIT own ship s data NCE-7882A NMEA (Input) HDG /Depth /Temperature /ROT JRC SUPPLY /Rudder /Autopilot /Time /Trip GPSx2 Alpha chart SHIP S MAIN Fig. 1.4 General System Diagram of Radar, Type JMA-610 Note: Eliminating the interference on frequencies used for marine communications and navigation due to operation of the radar. -
Page 33: Names And Functions Of Control Panel Switches And Functions Of Software Buttons
SECTION 2 NAMES AND FUNCTIONS OF CONTROL PANEL SWITCHES AND FUNCTIONS OF SOFTWARE BUTTONS NAMES AND FUNCTIONS OF CONTROL PANEL ... 2-2 MENU LIST ..............2-6 NAMES AND FUNCTIONS OF ON-SCEEN CONT ... 2-11... - Page 34 Range Marker Interval Rate of Turn Indicator Range Scale Auto Pilot Indicator Sea Volume Position Rudder Indicator Rain Volume Position Depth or SOG Display Gain Volume Position Depth or SOG Numeric Display Tune Indicator AIS Information (while push) Auto Tuning Transmit/Standby Indicator TX Pulse Width Center Position Select...
-
Page 35: Names And Functions Of Control Panel Switches
2.1 NAMES AND FUNCTIONS OF CONTROL PANEL SWITCHES NAMES AND FUNCTIONS OF CONTROL PANEL SWITCHES Names and Functions of Control Panel Switches RAIN (Rain/Snow clutter Suppression) dial STBY (Standby) key DAY/NIGHT (Day/ Night Mode) key TX (Transmit) key SEA (Sea Clutter Suppression) dial EBL1/2 (Electric Bearing Line 1/2) key HL-OFF (Heading Line Off) key ALARM ACK... - Page 36 [STBY](standby) key Use this key to turn on the power of the equipment. Use this key also to switch the equipment from a transmitting state to standby state. [STBY] [TX] The power can be turned off by pressing the key and key concurrently while the power is On.
- Page 37 2.1 NAMES AND FUNCTIONS OF CONTROL PANEL SWITCHES [ENTER] (Enter) key Use this key to confirm or set menu selection and input of numeric values. This key is equivalent to the clicking of the left button of the track ball. [MENU] (Menu) key Use this key to open the menu.
-
Page 39: Menu List
2.2 MENU LIST MENU LIST This radar has 2 kinds of menu as following. Main Menu : This menu is for all users. Service Menu : This menu is for initial setting of JMA-610 at installation... - Page 41 2.2 MENU LIST...
- Page 43 2.2 MENU LIST 2-10...
-
Page 44: Names And Functions Of On-Sceen Controls
NAMES AND FUNCTIONS OF ON-SCREEN CONTROLS Fig 2.3 On-screen controls 2-11... - Page 45 2.3 NAMES AND FUNCTIONS OF ON-SCREEN CONTROLS RANGE To increase the observation range scale (maximum 32km), click + and to reduce the range (minimum 0.15km), click - . AUTO TUNE The mode is switched to M (manual) / A (automatic) whenever the button is clicked. TX/STBY At expiration of the pre-heat time after the power is turned on, Preheat changes to Standby.
- Page 46 14 15 P-LINE If this button is clicked, operation of P-LINE is acquired. Make adjustment by moving [JOG DIAL] or [TRACK BALL]. Determine the adjustment by click this button again. If this button is held down more than 2seconds, P-LINE will disappear. 16 17 If this button is clicked, operation of VRM is acquired.
-
Page 47: Basic Operation
SECTION 3 BASIC OPERATION SECTION 3 ......................3-1 3.5.5 MOVE OWN SHIP’S DISPLAY POSITION [OFF CENT] ......3-20 BASIC OPERATION ....................3-1 3.5.6 DISPLAY OTHER SHIPS’ TRAILS [TRAILS] ..........3-20 FLOW OPERATION ..................3-1 3.5.7 DISPLAY OWN VECTOR [OWN VECT] ............ 3-22 3.1.1 POWER ON AND START THE SYSTEM ............. -
Page 49: Flow Operation
3.1 FLOW OPERATION FLOW OPERATION Attention Do not put anything on the operation panel. If you put anything hot on it, it may be deformed. Do not give any impact to the operation panel, trackball, or controls. Otherwise, any failure or damage may result. POWER ON AND START THE SYSTEM OBSERVE AND... -
Page 50: Power On And Start The System
3.1.1 Power ON and Start the System CAUTION A malfunction may occur if the power in the ship is instantaneously interrupted during operation of the radar. In this case, the power should be turned on again. Attention Wait for about 2 seconds before turning on the power again. -
Page 51: Observe And Adjust Video
3.1 FLOW OPERATION Procedures Check that the ship’s mains are turned on. Press [STBY] key. The system is turned on, and the preheating time is displayed. Preheat is indicated at the upper left of the screen. Wait until the preheating time is over. When the preheating time is over, the preheating time screen disappears, and Preheat at the upper left of the screen changes to Standby . -
Page 52: End The Operation And Stop The System
3.1.4 End the Operation and Stop the System Exit Press [STBY] key. The radar will stop transmission and the antenna will stop rotating. Transmit at upper left of the screen changes to Standby . Maintain the standby state if radar observation is restarted in a relatively short time. Only pressing the [TX] key starts observation. -
Page 53: Basic Menu Operation
3.2 BASIC MENU OPERATION BASIC MENU OPERATION To open the menu : Press [MENU] key. To close the menu : Press [MENU] key again. To determine the selected item : Put the cursor on the item with trackball and press [ENTER] key. For example, the procedures to change the brilliance of VRM is as follows. - Page 54 4 Put the cursor on [Level4] displayed at the right of “3.VRM”. “Level4” will be highlighted. 5 Press [ENTER] key. Adjustment menu will be opened. 6 Put the cursor on [2.Level2]. “Level2” will be highlighted. 7 Press [ENTER] key. The brilliance of VRM will be set to “Level2”. 8 Press [MENU] key.
-
Page 55: Preparation
3.3 PREPARATION PREPARATION 3.3.1 Adjust Display Brilliance [BRILL] Procedures Press [BRILL] key or put the cursor on BRILL . Set the brilliance value with the [JOG DIAL] or [TRACKBALL] to obtain the best-to-see display with optimum brilliance and [ENTER] key. In consideration of the ambient brightness, adjust display brilliance that is high enough to easily observe the radar display but does not glare. -
Page 56: Adjust Brilliance Of Information On Radar Display (Brilliance Setting)
3.3.4 Adjust Brilliance of Information on Radar Display (Brilliance Setting) Brilliance can be adjusted for each item of information (shown below) on the radar display by operating the menu. SHM, RANGE RINGS, VRM, EBL & P-LINE, BEARING SCALE, CHARACTER, AIS SYMBOL & VECTOR, OWN MARK, RADAR VIDEO &... -
Page 57: Reset Alarm Buzzer [Alarm Ack]
3.3 PREPARATION 3.3.6 Reset Alarm Buzzer [ALARM ACK] When an audible alarm is issued, use [ALARM ACK] to acknowledge the alarm information, stop the alarm buzzing, and stop the alarm lamp flashing. (If more than one alarm has occurred, press the switch for each alarm indication.) The alarm stops buzzing, but the alarm indication does not disappear. -
Page 58: Basic Operations
BASIC OPERATIONS 3.4.1 Start Transmission [TX] Procedures Press [TX] key. The radar will start transmission and the antenna will start rotating. STANDBY at the upper left of the screen changes to TRANSMIT . Note: The radar does not start transmission if you press [TX] key while PREHEAT is indicated. 3.4.2 Stop Transmission [STBY] Procedures Press [STBY] key. -
Page 59: Tune
3.4 BASIC OPERATIONS 3.4.4 Tune CAUTION Normally, use the automatic tune mode. Use the manual tune mode only when best tuning is not possible in the automatic tune mode due to deterioration of magnetron. This radar system provides the automatic tune mode and the manual tune mode. The automatic tune mode automatically adjusts the tuning of the receiving frequency, and the manual tune mode enables tuning to be adjusted by using the dial located on the operation unit. -
Page 60: Control Sensitivity [Gain]
3.4.5 Control Sensitivity [GAIN] CAUTION If the gain is too high, unnecessary signals including receiver noise and false video increase resulting in reduction of visibility of targets. On the contrary, if the gain is too low, targets including ships and dangerous objects may not be clearly indicated. -
Page 61: Suppress Rain/Snow Clutter [Rain]
3.4 BASIC OPERATIONS Turning [SEA] control clockwise suppresses sea clutter returns. Turning [SEA] control counterclockwise intensifies sea clutter returns. The sea clutter suppression function suppresses sea clutter returns by decreasing the receiving sensitivity on a short range. Turning the [SEA] control clockwise heightens the effect of sea clutter suppression. However, be careful that excessive suppression causes low signal-strength targets such as buoys and boats to disappear from the radar display. -
Page 62: Interference Rejectio [Ir]
3.4.8 Interference Rejection [IR] Interference by other radars is rejected. Attention When viewing a radar beacon or SART signal, select IR Off (Interference Rejection Off) because IR processing suppresses the video. Procedures Put the cursor on IR at the upper right of the screen and press [ENTER] key. -
Page 63: Hide Ship's Heading Line (Hl Off)
3.4 BASIC OPERATIONS 3.4.10 Hide Ship’s Heading Line (HL OFF) Procedures Hold down [HL OFF] key. The ship’s heading line is hidden while [HL OFF] key is held down. The ship’s heading line (HL) that presents the course of own ship is always shown on the radar display. -
Page 64: General Operations
GENERAL OPERATIONS 3.5.1 Move Cross Cursor Mark by Trackball The cross cursor mark is used for position designation and other purposes in various operating procedures. The cross cursor mark + moves in coupling with the trackball. If the trackball is rotated up and down or right and left, the cross cursor mark follows the move of the trackball. - Page 65 3.5 GENERAL OPERATIONS The bearing of EBL1 is fixed . EBL2 Operation If EBL1 is selected or EBL2 is not displayed, press [EBL1/EBL2] key to select EBL2 before starting operation. (The currently selected EBL is highlighted at the lower left of the screen.) Procedures Press [EBL1/EBL2] key to select EBL2.
-
Page 66: Use Vrms (Variable Range Markers) [Vrm1/Vrm2]
3.5.3 Use VRMs (Variable Range Markers) [VRM1/VRM2] This function is to display and select variable range markers (VRMs). Two VRMs are available: VRM1 is represented as a broken line, and VRM2 as a dotted line. VRM1 Operation If VRM2 is selected or VRM1 is not displayed, press [VRM1/VRM2] key to select VRM1 before starting operation. -
Page 67: Use P-Lines (Parallel Index Lines) [P-Line]
3.5 GENERAL OPERATIONS 3.5.4 Use P-LINEs (Parallel Index Lines) [P-LINE] P-LINE1 Operation If P-LINE2 is selected or P-LINE1 is not displayed, press [P-LINE] key to select P-LINE1 before starting operation. (The currently selected P-LINE is highlighted at the lower center of the screen.) Procedures Press [P-LINE] key to select P-LINE1. -
Page 68: Move Own Ship's Display Position [Off Cent]
3.5.5 Move Own Ship’s Display Position [OFF CENT] The own ship’s position can be moved from the display center to stern or bow direction. Procedures Press [OFF CENT] key. The display at the upper right of the screen (Fig.2.3- ) will be changed. The own ship’s position will be moved from the display center as following each time the [OFF CENT] key is pressed: 60% of display radius... - Page 69 3.5 GENERAL OPERATIONS NOTE : Accurate true bearing signals and speed signals are necessary for using the true motion trails mode. Land Land Trails Trails Ship Ship Relative Motion Trails True Motion Trails Changing Motion Mode of Trails (Trails mode) Procedures Place the cursor over the position at the upper right as following figure.
-
Page 70: Display Own Vector [Own Vect]
3.5.7 Display Own Vector [OWN VECT] NOTE: The display of own vector needs the connection of the GPS and the heading sensor. And it is necessary to set the dimension of own ship and the position of GPS sensor in service menu to display the vector correctly (refer to 3.5.8). Procedures Press [OWN VECT] key. -
Page 71: Own Mark
3.5 GENERAL OPERATIONS 3.5.8 OWN MARK Editing own mark dimension Procedures 1 Hold press [ MENU] key more than 5 second. Code menu will be displayed. 2 Put the cursor on 0 and press [ENTER] key. Service menu will be displayed. 3 Put the cursor on 8. - Page 72 Paint Ship’s Mark Procedures Press [ MENU] key . Main menu will appear. Put the cursor on 6.OWN MARK and press [ENTER] key. Put the cursor on 1.Filled and press [ENTER] key. If On is selected, all ship’s mark will be painted. 4 Press [ MENU] key.
-
Page 73: Time Setting
3.5 GENERAL OPERATIONS 3.5.9 TIME SETTING Time is displayed in the information window at the lower right or left of the screen only when the kind of information is “OWN SHIP”. If other information (GPS/ DOCKING/ AIS or OFF) is selected, put the cursor on the button (Fig2.3-11 or 21) and press [ENTER] key. - Page 74 Set local date Procedures Press [ MENU] key. MAIN MENU will appear. 2 Put the cursor on 5.Date/Time Setting and press [ENTER] key. SETTING menu will appear. 3 Put the cursor on 2.Local Date and press [ENTER] key. LOCAL DATE SETTING menu will appear. 4 Adjust the time with [JOG DIAL] or trackball and press [ENTER] key.
-
Page 75: Change The Unit Of Rate Of Turn
3.5 GENERAL OPERATIONS 3.5.10 CHANGE THE UNIT OF RATE OF TURN The unit of “Rate of Turn” indicator can be changed. This indicator is displayed at the upper center of the screen (Turn Rate). Procedures Press [ MENU] key. MAIN MENU will appear. 2 Put the cursor on 3.Setting and press [ENTER] key. -
Page 76: Stc Curve
5 Press [ MENU] key. Menu will be closed. The mode of expansion can be switched by pressing [EXP] key on the operation unit. Effect of target enlargement : Select this mode particularly when resolution is required. Fair : Radar echoes are expanded by 1 scale in all directions. Strong : Radar echoes are expanded by 2 scales in all directions on the display. -
Page 77: Display User Map
3.6 DISPLAY USER MAP DISPLAY USER MAP Navigation information such as a maximum of 256 points of NAV lines, coastlines, depth contours, and NAV marks can be displayed, created, read, saved, corrected, and deleted. (This function is available only when navigation equipment is connected to this radar system.) Marks that can be used : 29 types Lines that can be used... - Page 78 Plotting a line Procedures Press [MENU] key . Select 8.Next and press [ENTER] key. Select 4.NAV Information and press [ENTER] key. Select 1.Edit User Map and press [ENTER] key. Select 1.Make with cursor and press [ENTER] key. 2 Select type of line with 1. Type and press [ENTER] key. 3 Select color of line with 2.Color and press [ENTER] key.
- Page 79 3.6 DISPLAY USER MAP Plotting a mark / line make with latitude and longitude Procedures Press [MENU] key. Select 8.Next and press [ENTER] key. Select 4.NAV Information and press [ENTER] key. Select 1.Edit User Map and press [ENTER] key. 2 Select 2.Make with L/L and press [ENTER] key.
-
Page 80: Correct Position On User Map (Shift )
3.6.2 Correct Position on User Map (Shift ). If the display position on the user map is different from an actual position, it can be changed to the correct position in manual mode. Correcting the display position on the user map (Shift). Procedures Press [MENU] key. -
Page 81: Set User Map Display (Mark Display Setting)
3.6 DISPLAY USER MAP 3.6.4 Set User Map Display (Mark Display Setting) The user map can be individually displayed (on) or hidden (off). Setting by type : Setting can be made by mark font and line pattern. Setting by color : Setting can be made by color of mark or line. The mark font display size can be selected. - Page 82 Setting display by color Procedures Press [MENU] key. Select 8.Next and press [ENTER] key. Select 4.NAV Information and press [ENTER] key. Select 4.Mark Display Setting and press [ENTER] key. 2 Select 2.Display Mark Color and press [ENTER] key. 3 Set about each colors and press [ENTER] key. : Displayed.
- Page 83 3.6 DISPLAY USER MAP Manually entering the own ship position (Own Ship Position) Use this function when editing navigation data for a location different from the own ship position. Procedures Press [MENU] key. Select 8.Next and press [ENTER] key. Select 4.NAV Information and press [ENTER] key.
- Page 84 Setting the geodetic system for navigation data to be saved (Geodetic) To create navigation information, set the geodetic system that is used with the connected navigation equipment. When navigation information is loaded, the geodetic system used when the navigation information was saved, is displayed. Make sure that the displayed geodetic system is identical to the one used with the navigation equipment.
- Page 85 3.6 DISPLAY USER MAP Geodetic System List Number Name WGS-84 WGS-72 Japan North American 1927(U.S) North American 1927(Canada & Alaska) European 1950 (Europe) Australian geodetic 1966 (Australia) Ordnance Survey of Great Britain (England) NAD-83 - (No Use) - (No Use) ADINDAN (Ethiopia &...
- Page 86 Deleting mark / line data (Delete) With regarding to the created user map, a mark or line is deleted individually. Procedures Press [MENU] key. Select 8.Next and press [ENTER] key. Select 4.NAV Information and press [ENTER] key. Select 1.Edit User Map and press [ENTER] key.
- Page 87 3.6 DISPLAY USER MAP Inserting a vertex into a line (Insert / Move Vertex) With regard to the created user map, a vertex is inserted into a line. Procedures Press [MENU] key. Select 8.Next and press [ENTER] key. Select 4.NAV Information and press [ENTER] key.
- Page 88 Correcting the mark or vertex of a line (Insert / Move Vertex) With regard to the created user map, a mark or line is corrected. Procedures Press [MENU] key. Select 8.Next and press [ENTER] key. Select 4.NAV Information and press [ENTER] key. Select 1.Edit User Map and press [ENTER] key.
- Page 89 3.6 DISPLAY USER MAP Deleting a mark or vertex of a line (Delete Vertex) With regard to the created user map, a vertex is deleted individually from a mark or line. Procedures Press [MENU] key. Select 8.Next and press [ENTER] key. Select 4.NAV Information and press [ENTER] key.
- Page 90 Clearing marks or lines at a time(Clear by Type / Color) With regard to the created user map, marks or lines are cleared by type or by color at a time. Procedures Press [MENU] key. Select 8.Next and press [ENTER] key. Select 4.NAV Information and press [ENTER] key.
-
Page 91: Operate User Map File (File Operations)
3.6 DISPLAY USER MAP 3.6.5 Operate User Map File (File Operations) [I] Loading navigation data (Load User Map) Procedures Insert a flash memory card into the card slot. In the case of loading the data from internal memory, a card is not necessary. 2 Press [MENU] key. - Page 92 [II] Discarding navigation data (Unload ). Procedures Press [MENU] key. Select 8.Next and press [ENTER] key. Select 4.NAV Information and press [ENTER] key. Select 5.File Operations and press [ENTER] key. 2 Select 4.Unload and press [ENTER] key. Confirmation Window will appear. 3 Select 1.Yes and press [ENTER] key.
- Page 93 3.6 DISPLAY USER MAP [IV] Clearing the saved navigation data (Erase) Procedures Insert a flash memory card into the card slot. In the case of erasing the data from internal memory, a card is not necessary. 2 Press [MENU] key. Select 8.Next and press [ENTER] key.
- Page 94 [V] Displaying saved navigation data (File Mark Display) Procedures Insert a flash memory card into the card slot. In the case of display the data of internal memory, a card is not necessary. 2 Press [MENU] key. Select 8.Next and press [ENTER] key. Select 4.NAV Information and press [ENTER] key.
-
Page 95: Screen Capture
3.7 SCREEN CAPTURE SCREEN CAPTURE CAUTION Do not turn the system off while the display shows “Copying” in a message area on the bottom center of the screen in order not to make a flash memory card damaged. 3.7.1 SCREEN CAPTURE SETTING (Select Card Slot) Flash memory card (CF card) is necessary for screen capture function (Save, Erase, Capture). -
Page 96: Screen Capture Setting (Erase File)
Folder is created in each one hour. Folder name : YYYYMMDD_hhmm Data name : YYYYMMDD_hhmmss YYYY : “year” when folder or data is created. MM : “month” when folder or data created. DD : “day” when folder or data is created. hh : “hour”... -
Page 97: Screen Capture Setting (Auto Capture Interval)
3.7 SCREEN CAPTURE Procedures Press [MENU] key. Select 8.Next and press [ENTER] key. Select 1.Screen Capture Setting and press [ENTER] key. 2 Select 4.Capture Mode and press [ENTER] key. 3.7.5 SCREEN CAPTURE SETTING (AUTO Capture Interval) This setting is to determine the interval in Auot-1 or Auto-2 mode. Procedures Press [MENU] key. -
Page 98: User Setting
USER SETTING The operation status of the radar is recorded. If the system is operated by more than one operator, the operators can register operation status as suitable for them and call the status. Operation status for up to five operations can be registered, and a name be assigned to each status. (Up to 10 alphanumeric characters) The status is saved in an internal memory, therefore a flash memory card is not necessary for this function. -
Page 99: User Setting (Erase User Setting)
3.8 USER SETTING 3.8.3 USER SETTING (Erase User Setting) The operating state saved in the system can be deleted by performing the operation below. Use this function to delete unnecessary operating state data. Procedures Press [MENU] key. Select 8.Next and press [ENTER] key. Select 2.User Setting and press [ENTER] key. -
Page 100: Format Card
FORMAT CARD This radar has two card slots. Inserting a flash memory card into a card slot, you can save the screen capture data (refer to Chapter 3.7) and mark/ line data (refer to Chapter 3.6). This function is for deleting all these files. Therefore, other data (for example, the data saved with PC) is not deleted by this function. -
Page 101: Ais Function
3.10 AIS FUNCTION 3.10 AIS FUNCTION When an AIS transceiver, a (D)GPS, and heading sensor are connected to the radar, AIS target will be drawn on the screen on the position of this target. Also there will be a name list at the bottom left and right side of the screen. -
Page 102: Display The Vessel Names On The Screen
3.10.3 DISPLAY THE VESSEL NAMES ON THE SCREEN By pressing [AIS LABEL] key or pressing AIS Label at the right top on the screen, the vessel names will be displayed beside the AIS symbol on the screen. Example of vessel name displaying 3.10.4 AIS Setting Menu Procedures Press [MENU] key. -
Page 103: Ais Symbol
3.10 AIS FUNCTION 3.10.5 AIS SYMBOL On the screen, the following symbols can be found: Description Symbol AIS information window AIS target without heading AIS target AIS target with blue sign AIS target with speed AIS target which is selected in the left or right bottom side window AIS target which is selected... - Page 104 3-56...
-
Page 105: Measurement Of Range And Bearing
SECTION 4 MEASUREMENT OF RANGE AND BEARING MEASUREMENT BY TRACKBALL ..4-1 MEASUREMENT BY RANGE RINGS ..4-2 MEASUREMENT BY EBLS AND VRMS .. 4-3... -
Page 107: Measurement By Trackball
4.1 MEASUREMENT BY TRACKBALL MEASUREMENT BY TRACKBALL 1 Make sure of the target echoes on the radar display. Procedures 2 Move the cursor mark to a target by the trackball. CURSOR on the radar display indicates the bearing and range of the target. The range is a distance from own ship’s position. - Page 108 MEASUREMENT BY RANGE RINGS 1 Press [RANGE RINGS] key. Procedures The Range Rings will appear on the radar display. The range between the target and own ships can be determined by visually measuring the target’s position that lies between two range rings. In this case, the distance interval of The Range Rings is 1km.
- Page 109 4.3 MEASUREMENT BY EBL AND VRMS MEASUREMENT BY EBLS AND VRMS 1 Press [EBL1/EBL2] key to select EBL1 display and operation. Procedures EBL1 button at the lower left of the radar display will be highlighted and the EBL1 will appear as a broken-line on the PPI display. 2 Turn the [JOG DIAL] to put EBL1 on a target.
- Page 110 ° ’ ° Figure 4.3...
-
Page 111: True And False Echoes On Display
SECTION 5 TRUE AND FALSE ECHOES ON DISPLAY RADAR WAVE WITH THE HORIZON ......5-1 STRENGTH OF REFLECTION FROM THE TARGET . 5-3 SEA CLUTTERS ............5-4 FALSE ECHOES ............5-6 DISPLAY OF RADAR TRANSPONDER (SART) ..5-9... -
Page 113: Radar Wave With The Horizon
5.1 RADAR WAVE WITH THE HORIZON The radar operator has a role of interpreting the radar displays to provide his best aid in maneuvering the ship. For this purpose, the operator has to observe the radar displays after fully understanding the advantages and disadvantages that the radar has. - Page 114 D (nm) Height of Target Height of Radar Scanner Detective Range Figure 5.2 When the height of own ship’s scanner is 10 m for instance, A target that can be detected at the radar range of 64 nm on the radar display is required to have a height of 660 m or more.
-
Page 115: Strength Of Reflection From The Target
5.2 STRENGTH OF REFLECTION FROM THE TARGET STRENGTH OF REFLECTION FROM THE TARGET The signal intensity reflected from a target depends not only on the height and size of the target but also on its material and shape. The echo intensity from a higher and larger target is not always higher in general. In particular, the echo from a coast line is affected by the geographic conditions of the coast. -
Page 116: Sea Clutters
SEA CLUTTERS In addition to the echo required for observing ships and land radar video image also includes unnecessary echo, such as reflection from waves on the sea surface and reflection from rain and snow. Reflection from the sea surface is called "sea clutter," and reflection from rain and snow is called "rain and snow clutter," and those spurious waves must be eliminated by the clutter rejection function. - Page 117 5.3 SEA CLUTTERS [II] Rain and snow clutter Rain and snow clutter is a video image that appears in a location where rain or snow is falling. The image changes according to the amount of rain (or the amount of snowfall). As precipitation increases, the image of rain and snow clutter becomes intensified on the radar display, and in the case of localized heavy rain, an image similar to the image indicating land is displayed in some cases.
-
Page 118: False Echoes
FALSE ECHOES The radar observer may be embarrassed with some echoes that do not exist actually. These false echoes appear by the following causes that are well known: [I] Shadow When the radar scanner is installed near a funnel or mast, the echo of a target that exists in the direction of the funnel or mast cannot appear on the radar display because the radar beam is reflected on the funnel or mast. - Page 119 5.4 FALSE ECHOES [IV] False Echo by Multiple Reflection When there is a large structure or ship with a high vertical surface near own ship as shown in Figure5.7, multiple refection returns may appear on the radar display. These echoes appear in the same intervals, of which the nearest echo is the true echo of the target.
- Page 120 [VI] Radar Interference When another radar equipment using the same frequency band as that on own ship is near own ship, a radar interference pattern may appear on the radar display. This interference pattern consists of a number of spots which appear in various forms. In many cases, these spots do not always appear at the same places, so that they can be discriminated from the target echoes.
-
Page 121: Display Of Radar Transponder (Sart)
5.5 DISPLAY OF RADAR TRANSPONDER DISPLAY OF RADAR TRANSPONDER (SART) The SART (Search and rescue Radar Transponder) is a survival device authorized by the GMDSS (Global Maritime Distress and Safety System), which is used for locating survivors in case that a distress accident occurs at sea. - Page 122 5-10...
-
Page 123: Maintenance
SECTION 6 MAINTENANCE Routine Maintenance ......6-1 Maintenance on each Unit ....6-2 Scanner Unit NKE-316 ......6-2 Display Unit (Alpha-screen) ....6-5... -
Page 125: Routine Maintenance
6.1 ROUTINE MAINTENANCE ROUTINE MAINTENANCE WARNING Never carry out internal inspection or repair work of the equipment by users. Inspection or repair work by unauthorized personnel may result in fire hazard or electric shock. Ask the nearest branch, business office or a dealer for inspection and repair. -
Page 126: Maintenance On Each Unit
MAINTENANCE ON EACH UNIT Scanner Unit NKE-316 WARNING Turn off the main power source before starting maintenance. Otherwise, an electric shock or injury may be caused. Turn off the main power if you need to be near the scanner unit for maintenance or inspection purposes. - Page 127 6.2 MAINTENANCE ON EACH UNIT CAUTION Do not put watches, clocks, or magnetic cards close to the modulator unit since this unit holds magnetrons having strong magnetic force. Failure or data destruction of the above devices may result. After finishing the maintenance work, turn “ON” the safety switch of scanner unit. Precautions in Mounting the Cover When the cover is removed for regular checkup and replacement of parts and refitted after such work, the procedures of fastening bolts shall be taken with the following precautions:...
- Page 128 (1) Radiator Attention If the radiator front face (radiation plane) is soiled with smoke, salt, dust, paint or birds’ droppings, wipe it with a piece of soft cloth wetted with alcohol or water and try to keep it clean at all times. Otherwise, radar beam radiation may attenuate or reflect on it, resulting in deterioration of radar performance.
-
Page 129: Display Unit(Alpha-Screen)
6.2 MAINTENANCE ON EACH UNIT Display Unit (Alpha-screen) WARNING When cleaning the screen, do not wipe it too strongly with a dry cloth. Also, do not use gasoline or thinner to clean the screen. Otherwise the screen surface may be damaged. Dust accumulated on the screen will reduce clarity and darken the video. -
Page 131: Trouble Shooting
SECTION 7 TROUBLE SHOOTING FAULT FINDING ......... 7-3 TROUBLE SHOOTING ....... 7-5 REPLACEMENT OF MAJOR PARTS ..7-7... - Page 133 7. TROUBLE SHOOTING WARNING Never carry out internal inspection or repair work of the equipment by users. Inspection or repair work by unauthorized personnel may result in fire hazard or electric shock. Ask the nearest branch, business office or a dealer for inspection and repair.
- Page 134 WARNING Turn off the main power source before starting maintenance. Otherwise, an electric shock or injury may be caused. Turn off the main power if you need to be near the scanner unit for maintenance or inspection purposes. Direct exposure to electromagnetic waves at close range result in death or serious injury.
-
Page 135: Fault Finding
7.1 FAULT FINDING FAULT FINDING In case of semiconductor circuits, it is deemed that there are few cases in which the used semiconductor devices have inferior quality or performance deterioration except due to insufficient design or inspection or by other external and artificial causes. - Page 136 Table 7-2 Alarm message list (GENERAL WARNING) ALARM TYPE MASSAGE Description GENERAL WARNING MAX Point Tried to enter navigation information beyond the specified. No Heading Data N-up selection when bearing data is invalid. Invalid Data Tried to enter any data beyond its range. No Position Data Mark or line input when the latitude and longitude is invalid.
-
Page 137: Trouble Shooting
F402 31.8 unit (5ZFCA00052) Table 7-5 Special Parts ( for NKE-316 ) Parts No. Name Type Manufacturer Location Code V101 Magnetron MAF1562R New JRC Scanner 5VMAA00116 Orient A101 Circulator FCX68R Scanner 5AJIX00027 Microwave A102 Diode Limiter NJS6930 New JRC Scanner... - Page 138 Table 7-6 Circuit Block to be Repaired ( for JMA-610 ) Location Circuit Block Type Remarks Scanner Motor and driver CBP-217 DC brush less motor Scanner Modulator CPA-276 Excluding Magnetron Scanner Receiver NRG-237 Including Front-end module Scanner Power supply circuit CBD-1783 Only resistance(10ohm/30W) with Scanner...
-
Page 139: Replacement Of Major Parts
7.3 REPLACEMENT OF MAJOR PARTS REPLACEMENT OF MAJOR PARTS CAUTION Turn off the main power source before replacing parts. Otherwise, an electric shock or trouble may be caused. Before replacing the magnetron, turn off the main power source and wait for 5 minutes or more until the high voltage circuits are discharged. - Page 140 Guaranteed term The guaranteed term is for one year from after the receipt of the product to the customer, but against the magnetron refers to below. Part name Type/code Guaranteed term Magnetron MAF1562R / for 4000 hours 5VMAA00116 Magnetron guarantee condition : Only for the radar has sensitivity remarkable decrease, another case is without guaranteed term.
- Page 141 7.3 REPLACEMENT OF MAJOR PARTS Replacement of magnetron (V101) Remove the shield cover of the modulator and check that no charge remains in the high-voltage modulator circuit. Then, disconnect the lead wire of the magnetron. The magnetron can be demounted by removing the screws fixing it.
- Page 142 7-10...
-
Page 143: After-Sales Service
SECTION 8 AFTER-SALES SERVICE When you Request for Repair Recommended Maintenance Radar Failure Check List... - Page 145 If any failure occurs in the product during its normal operation in accordance with the instruction manual, the dealer or JRC will repair free of charge. In case that any failure is caused due to misuse, faulty operation, negligence or force major such as natural disaster and fire, the product will be repaired with charges.
- Page 146 Radar Failure Check List When placing an order for repair of the product, it is requested that you could confirm the check items and fill the results and sent the sheet to our contact. If there is any unclear items, contact the ship on which the product is installed, and give the correct information on the product.
- Page 147 SECTION 9 DISPOSAL DISPOSAL OF THE UNIT ...... 9-1 DISPOSAL OF USED BATTERIES ..9-2 DISPOSAL OF USED MAGNETRON ..9-3...
-
Page 149: Disposal
9.1 DISPOSAL OF THE UNIT DISPOSAL DISPOSAL OF THE UNIT When disposing of this unit, be sure to follow the local laws and regulations for the place of disposal. -
Page 150: Disposal Of Used Batteries
DISPOSAL OF USED BATTERIES WARNING When disposing of used lithium batteries, be sure to insulate the batteries by taping the terminals. Otherwise, heat generation, explosion or a fire may occur. In this unit, Lithium batteries are used for the following parts: Radar Process circuit (CDC-1371): BT300 (Panasonic Corporation Energy Company: CR2032) Do not store used lithium batteries. -
Page 151: Disposal Of Used Magnetron
9.3 DISPOSAL OF USED MAGNETRON DISPOSAL OF USED MAGNETRON Magnetron is used in the Scanner NKE 316 When the magnetron is replaced with a new one, return the used magnetron to our dealer or business office. For detail, consult with our dealer or business office. -
Page 153: Specifications
SECTION 10 SPECIFICATIONS 10.1 JMA-610 TYPE RADAR ............. 10-1 10.2 SCANNER (NKE-316) ..............10-2 10.3 CONTROL UNIT(NDC-1486) ............10-3 10.4 INPUT SIGNAL ................ 10-4 10.5 OUTPUT SIGNAL ............... 10-5 10.6 STANDARD EQUIPMENT COMPOSITION ....... 10-5 10.7 DISTANCE BETWEEN UNITS ........... 10-5... -
Page 155: Type Radar
10.1 JMA-610 TYPE RADAR 10.1 JMA-610 TYPE RADAR (1) Type of Emission (2) Display type PPI method, vertically long display (3) Display panel Radar video effective diameter of 270mm (min) (4) Range Scale 0.15, 0.3, 0.5, 0.8, 1.2, 1.6, 2, 4, 8, 16 and 32km (5) Range Resolution Less than 15m (6) Minimum Detective Range... -
Page 156: Scanner (Nke-316)
10.2 SCANNER (NKE-316) (1) Dimensions Height 458mm Swing Circle 2270mm (2) Mass Approx. 36kg (3) Polarization Horizontal Polarization (4) Directional Characteristic Horizontal Beam Width: 1.0 (-3dB width) Vertical Beam Width: 25 (-3dB width) Sidelobe Level: Below –26dB (within 10 ) Below –30dB (outside 10 ) (5) Revolution Approx. -
Page 157: Control Unit (Ndc-1486)
10.3 CONTROL UNIT(NDC-1486) 10.3 CONTROL UNIT(NDC-1486) (1) Mounting Table mounting (2) Video Output RGB, H-sync and V-sync (SXGA) (3) Range Scale 0.15, 0.3, 0.5, 0.8, 1.2, 1.6, 2, 4, 8, 16 and 32km (4) Range Ring 0.05, 0.1, 0.1, 0.2, 0.2, 0.4, 0.4, 1, 2, 4 and 8km (5) Variable range marker Digital read-out on the screen (4 characters) 2 kinds of VRM (6) EBL... -
Page 158: Input Signal
10.4 INPUT SIGNAL Navigation equipment IEC61162-1/2 L./L: GGA>RMC>RMA>GNS>GLL COG/SOG: VTG>RMC>RMA TIME: TRIOP: ROT: RUDDER : AUTOPILOT: signal for bearing HEADING: THS>HDT>HDG>HDM>VHW Depth DPT>DBS>DBK>DBT ALR,VDM INLAND AIS sentence Rate of turn ROT 20mV/degrees: 30-0-30, 90-0-90. 300-0-300 Rudder RSA 20mV/degrees: 90-0-90 Transmit Trigger low impedance RADAR video 50 ohm matching... -
Page 159: Output Signal
10.5 OUTPUT SIGNAL 10.5 OUTPUT SIGNAL The signal for Slave Display TIY, VD, BP (2048 pulse), BZ Navigation information RADAR system data: RSD Own ship data: OSD External alarm Point-of-contact signal normal close. Max current : 200mA. 2ND monitor Analog RGB HD 15pin connector 1pcs (DVI connector 1pcs.) ACK. - Page 160 10-6...
-
Page 161: Appendix
APPENDIX HOW TO INSERT AND REMOVE A CARD Fig.1 Block Diagram of JMA-610 Fig.2 Terminal Diagram of JMA-610 Fig.3 Primary Power Supply Block Diagram of JMA-610 Fig.4 Internal Connection Diagram of Scanner Unit NKE-316 Fig.5 Internal Connection Diagram of Control Unit NCM-883... -
Page 163: How To Insert And Remove A Card
HOW TO INSERT AND REMOVE A CARD This system has two card slots and can save the screen capture data (refer to Chapter 3.7) and user map data (refer to Chapter 3.6) to the memory card. Insert memory card according to the procedures below. This system accept only CF (Compact Flash) card. - Page 164 Insert a card into processor unit Procedures Remove the rubber packing located at the backside of the processing unit cabinet, and expose the card slot. Insert the card. Insert the card until the card slot's eject button protrudes and complete the installation of a card.
- Page 165 APPENDIX Fig.1 Block Diagram of JMA-610...
- Page 166 Fig.2 Terminal Diagram of JMA-610...
- Page 167 APPENDIX Fig.3 Primary Power Supply Block Diagram of JMA-610...
- Page 168 Fig.4 Internal Connection Diagram of Scanner Unit NKE-316...
- Page 169 APPENDIX Fig.5 Internal Connection Diagram of Control Unit NCM-883...
- Page 170 ( 6ft(NAX-16B-6) and 9ft(NAX-16A-9) as the Optional.) Control Unit NCM-883 incorporating Radar Processing Unit NCD-1486 and Keyboard Operating Unit NCE-7882A / JRC Colour 18.1”LCD Display Unit NWZ-147 Signed for and on behalf of: Japan Radio Co., Ltd., Tokyo, Japan. Place and date of issue:...
- Page 172 Not use the asbestos For further information,contact: URL Head office : http://www.jrc.co.jp/eng/ Marine Service Department 1-7-32 Tatsumi, Koto-ku, Tokyo 135-0053, Japan : tmsc@jrc.co.jp e - mail : +81-50-3786-9201 One - call ISO 9001, ISO 14001 Certified CODE No.7ZPRD0767 CODE No.7ZPRD0767 JUL.
Need help?
Do you have a question about the JMA-610 Series and is the answer not in the manual?
Questions and answers