Table of Contents
Advertisement
Quick Links
NOTE:
Please read all instructions
carefully before using this
product
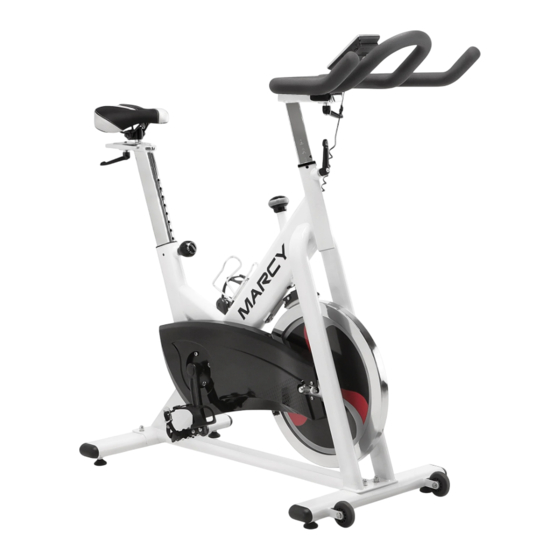
CLUB TRAINER
Table of Contents
NSP-490
Safety Notice
Hardware Pack
Assembly Instruction
Parts List
Warranty
Ordering Parts
Model
NSP-490
Retain This
Manual for
Reference
180724
ASSEMBLY &
OWNER'S
®
MANUAL
IMPEX
INC.
2801 S. Towne Ave., Pomona, CA 91766
Tel: (800) 999-8899 Fax: (626) 961-9966
www.marcypro.com
support@impex-fitness.com
Advertisement
Table of Contents

Related Manuals for Impex MARCY NSP-490


Summary of Contents for Impex MARCY NSP-490
- Page 1 Safety Notice Hardware Pack Assembly Instruction Parts List Warranty Ordering Parts Model NSP-490 Retain This Manual for Reference 180724 ASSEMBLY & OWNER'S ® MANUAL IMPEX INC. 2801 S. Towne Ave., Pomona, CA 91766 Tel: (800) 999-8899 Fax: (626) 961-9966 www.marcypro.com support@impex-fitness.com...
-
Page 2: Table Of Contents
ORDERING PARTS....................17 BEFORE YOU BEGIN ® Thank you for selecting the MARCY CLUB TRAINER NSP-490 by IMPEX INC. For your safety and benefit, read this manual carefully before using the bike. As a manufacturer, we are committed to provide you complete customer satisfaction. If you have any questions, or find there are missing or damaged parts, we guarantee you complete satisfaction through direct assistance from our factory. -
Page 3: Important Safety Notices
PHYSICIAN. THIS IS ESPECIALLY IMPORTANT FOR INDIVIDUALS OVER THE AGE OF PERSONS WITH PRE-EXISTING HEALTH PROBLEMS. READ INSTRUCTIONS BEFORE USING ANY FITNESS EQUIPMENT. IMPEX INC. ASSUMES NO RESPONSIBILITY FOR PERSONAL INJURY OR PROPERTY DAMAGE SUSTAINED BY OR THROUGH THE USE OF THIS PRODUCT. SAVE THESE INSTRUCTIONS. www.marcypro.com © IMPEX INC. -
Page 4: Warning Label Placement
The Warning Labels and Caution Label shown here have been placed on the Rear Stabilizer and Main Frame. If the labels are missing or illegible, please call customer service at 1-800-999-8899 for replacement. Apply the labels in location shown. © IMPEX INC. www.marcypro.com... -
Page 5: Hardware Pack
HARDWARE PACK www.marcypro.com © IMPEX INC. -
Page 6: Assembly Instructions
A.) Attach the Front Stabilizer (#15) to the Main Frame (#16) using two Ø8 Flat Washers (#5), M8 Domed Nuts (#6) and M8x2” Carriage bolts (#3). B.) Attach the Rear Stabilizer (#4) to the Main Frame (#16) using two Ø8 Flat Washers (#5), M8 Domed Nuts (#6) and M8x2” Carriage bolts (#3). © IMPEX INC. www.marcypro.com... - Page 7 Secure the saddle in position with the Adjustment Knob (#7). The correct height for the seat can be adjusted after the bike is fully assembled. B.) Attach the Seat (#13) to the Seat Post (#12) as shown and tighten the nuts around the bolts under the seat. © IMPEX INC. www.marcypro.com...
- Page 8 ATTENTION: YOU SHOULD ATTACH THE HANDLEBAR TO THE HANDLEBAR POST TIGHTLY Attach the computer (#56) to the support tube of the main frame (#16) with 4 screws (#86), and connect the sensor wire (A1 to A2) © IMPEX INC. www.marcypro.com...
- Page 9 The right crank arm is on the right-hand side of the cycle as you face the handlebar. B.) Note that the Right pedal should be threaded on clockwise and the Left pedal counter-clockwise © IMPEX INC. www.marcypro.com...
- Page 10 To increase tension and increase resistance (requiring more strength to pedal), turn the Tension Control Knob (#30) to the right. The Tension Control Knob is also the brake. B.) To decrease tension and increase resistance (requiring less strength to pedal, turn the Tension Control Knob (#30) to the left. © IMPEX INC. www.marcypro.com...
- Page 11 Use this safety feature in any situation where you would need to get off the bike and/or stop the bike’s flywheel. To use the Emergency Brake function, firmly press down on the Emergency Brake & Brake Control Knob (#30) to immediately stop the momentum of the flywheel. © IMPEX INC. www.marcypro.com...
-
Page 12: Exploded Diagram
EXPLODED DIAGRAM www.marcypro.com © IMPEX INC. -
Page 13: Parts List
Lock nut Brake Assembly sleeve Left crank Crank cover Bearing Right crank Fixing nut 2 Flywheel alignment bolt Screw ST4.2x¾” Flat washer Screw ST4.8x¾” Outer chain cover Little chain cover Axel Long fixing tube Short fixing tube www.marcypro.com © IMPEX INC. - Page 14 Spring cover Spring Plastic frame Brake pad cap Chain wheel Felt Pad Bolt M5x1⅛” Spring brake Lock nut Spring washer Bolt M5x⅜” Flat washer Bolt M6x¼” End cap End cap Screw ST4.8x½” Plastic ring Washer Bolt M5x⅜” www.marcypro.com © IMPEX INC.
-
Page 15: Care, Maintenance
6. Disposal Instructions – The equipment can be safely disassembled and disposed without unreasonable hazards. Call your local recycle agency regarding details of recycling. 7. The maximum user weight is 250 lbs. 8. Assembled Dimension: 50” x 21.5” x 47” www.marcypro.com © IMPEX INC. -
Page 16: Exercise Guidelines
The rate of work should be sufficient to raise your heartbeat into the target zone shown on the graph below. This stage should last for a minimum of 12 minutes though most people start at about 15-20 minutes © IMPEX INC. www.marcypro.com... - Page 17 The important factor here is the amount of effort you put in. The harder and longer you work the more calories you will burn. Effectively this is the same as if you were training to improve your fitness, the difference is the goal. www.marcypro.com © IMPEX INC.
-
Page 18: Warranty
IMPEX. IMPEX is not responsible or liable for indirect, special or consequential damages arising out of or in connection with the use or performance of the product or other damages with respect to any economic loss, loss of property, loss of revenues or profits, loss of enjoyments or use, costs of removal, installation or other consequential damages or whatsoever natures.
Need help?
Do you have a question about the MARCY NSP-490 and is the answer not in the manual?
Questions and answers