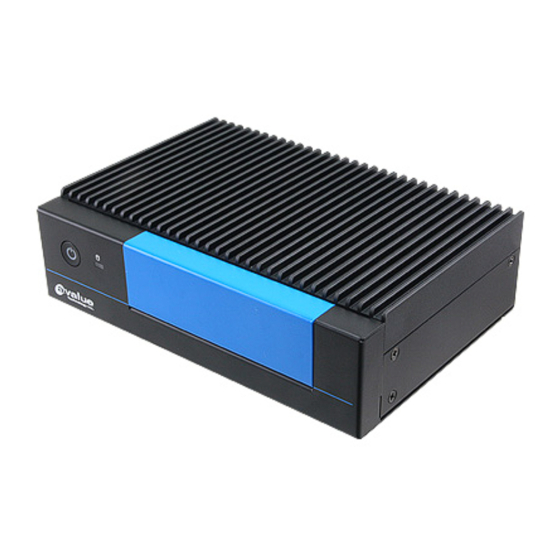
Summary of Contents for Avalue Technology EPC-SKLU
- Page 1 EPC-SKLU Intel® Core® SoC Processor Fanless Box PC Quick Reference Guide Ed – 14 March 2018 Copyright Notice Copyright 2018 ALL RIGHTS RESERVED. Part No. E2017CAG0A1R...
- Page 2 For the most frequently asked questions, you can easily find answers in your product documentation. These answers are normally a lot more detailed than the ones we can give over the phone. So please consult the user’s manual first. 2 EPC-SKLU Quick Reference Guide...
-
Page 3: Table Of Contents
2.1.2 Serial Port 2 connector (COM2) .................... 11 Installing Hard Disk & Memory (EPC-SKLU) ............12 Installing M.2 card & MPCIE devices (EPC-SKLU) ..........15 Installing Mounting Brackets (EPC-SKLU) ............16 Installing Din Rail Mounting (EPC-SKLU) ............17 Installing Stand (EPC-SKLU) ................18... -
Page 4: Getting Started
Risque d'explosion si la batterie est remplacée par un type incorrect. Jetez les piles usagées selon les instructions 1.2 Packing List 1 x EPC-SKLU Intel® Core® SoC Processor Fanless Box PC 1 x Driver/Utility DVD-ROM ... -
Page 5: System Specifications
2 x HDMI: Max. Resolution 4096x2160 @ 24Hz Resolution Dual display Multiple Display Ethernet 1 x Intel I211AT Chipset 1 x Intel I219LM Ethernet Interface 10/100/1000 Base-Tx Gigabit Ethernet Compatible EPC-SKLU Quick Reference Guide... - Page 6 With 2.5” hard drive: 0°C ~ 45°C (32°F ~ 113°F) with 1m/s air flow. Operating Humidity 0% ~ 90% relative humidity, non-condensing Storage -40°C ~ 75°C Temperature Certification CE, FCC Class B OS Supported Win10/8.1/7/Linux Note: Specifications are subject to change without notice. 6 EPC-SKLU Quick Reference Guide...
-
Page 7: System Overview
Serial port 1/2 connector D-sub 9-pin, male COM1/2 HDD indicator System power indicator LAN1/2 RJ-45 Ethernet 1/2 USB2.0 USB 2.0 connector x 2 USB3.0 USB 3.0 connector x 4 HDMI connector x 2 HDMI DC-IN DC Power-in connector EPC-SKLU Quick Reference Guide... - Page 8 EPC-SKLU Note: UL Certified Cables are required & purchased from the distributors. Français: Il est nécssaire que vous achetez des câbles certifiés par UL auprès des distributers. 8 EPC-SKLU Quick Reference Guide...
-
Page 9: System Dimensions
Quick Reference Guide 1.5 System Dimensions 1.5.1 Front & Top View (Unit: mm) EPC-SKLU Quick Reference Guide... -
Page 10: Hardware Configuration
EPC-SKLU 2. Hardware Configuration For advanced information, please refer to: 1- ECM-SKLU User’s Manual 10 EPC-SKLU Quick Reference Guide... -
Page 11: Epc-Sklu Connector Mapping
RTS# CTS# DTR# 2.1.2 Serial Port 2 connector (COM2) RS-232 Signal PIN PIN Signal DCD# DSR# RTS# CTS# RS-485 DTR# Signal PIN PIN Signal 485_Tx- 485_Tx+ RS-422 Signal PIN PIN Signal 422_Tx- 422_Tx+ 422_Rx+ 422_Rx- EPC-SKLU Quick Reference Guide 11... -
Page 12: Installing Hard Disk & Memory (Epc-Sklu)
EPC-SKLU 2.2 Installing Hard Disk & Memory (EPC-SKLU) Step1. For HDD installation, remove four screws from bottom cover. Step2. Evert the bottom cover. Step3. Install HDD/SSD. 12 EPC-SKLU Quick Reference Guide... - Page 13 Quick Reference Guide Step4. Fix HDD/SSD with four M3*4L screws. Step5. Put the bottom back and fix with four M3*5L screws. EPC-SKLU Quick Reference Guide 13...
- Page 14 EPC-SKLU Step2. For Memory installation, properly install the memory module and press until properly seated. 14 EPC-SKLU Quick Reference Guide...
-
Page 15: Installing M.2 Card & Mpcie Devices (Epc-Sklu)
Quick Reference Guide 2.3 Installing M.2 card & MPCIE devices (EPC-SKLU) Step1. Fix M.2 card using the screw in the Accessory Kit. Step2. Insert MPCIE cards into designated locations and fasten with the screw to complete MPCIE installation. EPC-SKLU Quick Reference Guide 15... -
Page 16: Installing Mounting Brackets (Epc-Sklu)
EPC-SKLU 2.4 Installing Mounting Brackets (EPC-SKLU) Step1. Remove 4 screws from the side. Step2. Insert and fasten screw on each side of the system to secure Mounting brackets. 16 EPC-SKLU Quick Reference Guide... -
Page 17: Installing Din Rail Mounting (Epc-Sklu)
Quick Reference Guide 2.5 Installing Din Rail Mounting (EPC-SKLU) Step1. Position brackets on both sides, matching the holes on the system. Step2. Insert and fasten screws on each side of the system to secure Mounting bracket. EPC-SKLU Quick Reference Guide 17... -
Page 18: Installing Stand (Epc-Sklu)
EPC-SKLU 2.6 Installing Stand (EPC-SKLU) Step1. Remove 2 screws from the side. Step2. Fasten 2 screws on the side of the system to secure Stand. 18 EPC-SKLU Quick Reference Guide...


Need help?
Do you have a question about the EPC-SKLU and is the answer not in the manual?
Questions and answers