Advertisement
Advertisement
Table of Contents

Related Manuals for Genexis DRG 7000-Series


Summary of Contents for Genexis DRG 7000-Series
- Page 1 DRG 7000-Series All-in-One Home Gateway Installation Guide...
-
Page 2: Table Of Contents
Copyright © 2018 Genexis B.V. All rights reserved Hereby, Genexis declares that the radio equipment type [designation of type of radio equipment] is in compliance with Directive 2014/53/EU. The full text of the EU declaration of conformity is available at the following internet address: https://genexis.eu/red/drg7000 Lodewijkstraat 1A, 5652 AC Eindhoven, The Netherlands. -
Page 3: Models Supported
Models Supported On the label on the back of your DRG (as shown on page 5) you can find the model number of your DRG. In the table below, you can find an overview of all models. Model CATV Port overview DRG 7820 Power DRG 7860... -
Page 4: Box Content
Box Content Power adapter Power adapter The main product in your package is your DRG. A power adapter is included. This will be used to power your DRG. - Page 5 DRG7xxx DRG7xxxx SSID: MAC: 00:0F:94:XX:XX:XX xxxxxxxxxxxx GNXxxxxxx WPA KEY: xxxxxxxxxxxx X.xxxxxxxxxx GUI: https://router WPS PIN: xxxxxxxx Username: admin MAC: 00:0F:94:XX:XX:XX Password: xxxxxxxx SSID: GNXxxxxxx GUI: https://router WPA KEY: xxxxxxxxxxxx Username: admin WPS PIN: xxxxxxxx Password: xxxxxxxx Made in China VER. x Information label Information labels The information on this label is needed when confi guring your DRG.
-
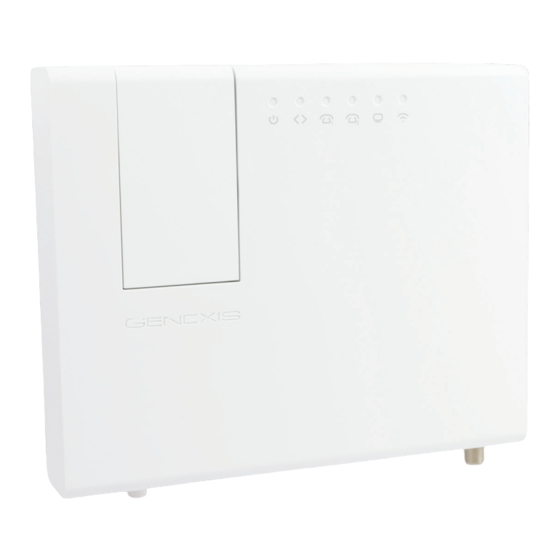
Page 6: Button Overview
Button Overview DRG with CATV Reset button WPS button Power button Reset button WPS button WPS button* Power button* The WPS button is located on the side of your DRG. It enables easy The power button is located on the bottom of your DRG. configuration with other wireless devices. -
Page 7: Port Overview
Port Overview Power Power connector LAN ports Telephone jacks USB 2.0 port Power button DRG with CATV Power Power connector LAN ports Telephone jacks Power button CATV connector USB 2.0 port... -
Page 8: Installation
Installation Dust caps present Dust caps removed 1. Remove dust caps fiber connector(s) 2. Remove dust caps connector(s) FTU If present, remove the dust caps from the fiber connector(s) on your DRG. If present, remove the dust caps (shown circled) from the connector(s) The number of connectors will vary depending on the exact model. - Page 9 Notches Tabs 3. Place your DRG 4. Connect to power Place your DRG on the FTU so that the tabs on the side of the DRG Connect the supplied power adaptor to the power socket on the DRG align with the notches on the FTU. Both tabs and notches are shown and then plug the adaptor into an AC socket.
- Page 10 Installation 5. Connect to your computer 6. Connect to your telephone Connect your computer or laptop to the appropriate LAN port using an When voice ports are available on your model, a standard analogue Ethernet cable. Your service provider will tell you exactly which port of telephone handset can be connected to one of the active voice ports the DRG to use.
- Page 11 7. Connect to your TV This step is only relevant if you have a DRG with a CATV connector. When TV is available on your model, you can connect an analogue television to the CATV connector using a coaxial cable with a male F connector.
-
Page 12: Lan (Network) Setup
LAN (Network) Setup 1. Check your connection On a Windows computer: › Open a web-browser on your computer and try to visit a web page. Open “Start” › For example, load your usual home page or favorite search engine. Select “Control Panel” ›... - Page 13 3. Test connection On a Mac OS computer: › Open “System Preferences” › Click on “Network” Try reloading the web page in your browser. If the connection is still not › Click on the “Ethernet Adaptor” in the left hand panel working, please refer to the troubleshooting section (as shown on ›...
-
Page 14: Wireless Setup
Wireless Setup DRG7xxxx MAC: 00:0F:94:XX:XX:XX GUI: https://router Username: admin Password: xxxxxxxx SSID: GNXxxxxxx WPA KEY: xxxxxxxxxxxx WPS PIN: xxxxxxxx Wireless Setup On a Windows computer: › When wireless connection is available on your model, you can set up Open “Start” ›... - Page 15 Your computer will now connect to the wireless network! On a Mac OS computer: › Once successfully connected, the Network and Sharing Center window Open “System Preferences” › will change to refl ect the new connection status. Click on “Network” ›...
-
Page 16: Led Status
LED Status Activity Description On (green) Powered up successfully On (red) System error On (fl ashing) System initialising No power Uplink cable connected Flashing Link is initialising or a fi rmware upgrade is in progress Uplink cable disconnected Voice service enabled and registered Flashing Voice service initialising Voice service disabled, or SIP registration failed... -
Page 17: Troubleshooting
Troubleshooting Issue Action LED is off Make sure you are using only the provided power adapter and have it connected to a working power outlet and the power button is in the on position. LED is red or fl ashing Turn the device off by removing the power adapter from the power socket. -
Page 18: Advanced Configuration
Advanced Confi guration Safety and Care Safe operation DRG7xxxx MAC: 00:0F:94:XX:XX:XX • Never look directly into the end of a fi ber optic cable. • Use only the supplied power adapter and make sure the GUI: https://router adapter is rated for use with the power supply. •... -
Page 19: Notes
Notes Place your spare label here Place your spare label here... - Page 20 © 2018 Genexis B.V. All rights reserved. Rev. 1.7. www.genexis.eu...
Need help?
Do you have a question about the DRG 7000-Series and is the answer not in the manual?
Questions and answers