Follett 15CI100A Installation, Operation And Service Manual
Countertop and freestanding ice and water
dispenser with chewblet ice machine
Hide thumbs
Also See for 15CI100A:
- Installation, operation and service manual (60 pages) ,
- Installation, operation and service manual (48 pages) ,
- Installation, operation and service manual (48 pages)
Table of Contents
Advertisement
Welcome to Follett
Follett equipment enjoys a well-deserved reputation for excellent performance, long-term reliability and outstanding
after-the-sale support. To ensure that this equipment delivers that same degree of service, review this guide
carefully before you begin your installation.
Should you need technical help, please call our Technical Service group at (877) 612-5086 or (610) 252-7301.
Please have your model number, serial number and complete and detailed explanation of the problem when
contacting Technical Service.
Getting Started
After uncrating and removing all packing material, inspect the equipment for concealed shipping damage. All freight
is to be inspected upon delivery. If visible signs of damage exist, please refuse delivery or sign your delivery receipt
"damaged." Follett Customer Service must be notified within 48 hours. Wherever possible, please include detailed
photos of the damage with the original packaging so that we may start the freight claim process.
801 Church Lane • Easton, PA 18040, USA
Toll free (877) 612-5086 • +1 (610) 252-7301
www.follettice.com
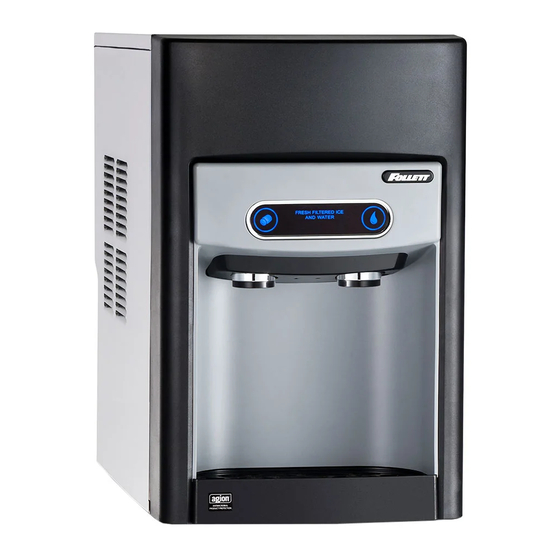
Countertop and Freestanding Ice and Water
Dispenser with Chewblet
Installation, Operation and Service Manual
15CI100A
Ice Machine
®
Rear Drain Model
Serial numbers after K39468
Installation and Service Videos:
www.follettice.com/servicevideolibrary
01214261R01
Advertisement
Table of Contents

Related Manuals for Follett 15CI100A


Summary of Contents for Follett 15CI100A
- Page 1 If visible signs of damage exist, please refuse delivery or sign your delivery receipt "damaged." Follett Customer Service must be notified within 48 hours. Wherever possible, please include detailed photos of the damage with the original packaging so that we may start the freight claim process.
-
Page 2: Table Of Contents
Evaporator Assembly ............... . 34 15CI100A with Rear Drain... -
Page 3: Before You Begin
00981100R01 Check your paperwork to verify that you received the correct dispenser. Follett configuration numbers are designed to provide information about the type of dispenser you are receiving. The following is an explanation of the different model numbers. -
Page 4: Important Safety Information
22.50" (57.2 cm) Unit Shipping Weight 100 lb (45.4 kg) Ambient Information CAUTION! The 15CI100A are for indoor use only. Designed for commercial use. Follett is not able to provide in-house services for residential installations. Maximum* Minimum* Air Temperature 100 F (38 C) 50 F (10 C) †... -
Page 5: Specifications
§ Must be grounded - requires 3-prong outlet. Do not remove ground. Refrigeration WARNING! Do not damage the refrigerant circuit. Refrigerant can cause personal injury and/or damage dispenser. § Refrigerant R134a – 5.0 ounces (142 grams) Heat Rejection § 1700 BTU/hr (498 W) 15CI100A with Rear Drain... -
Page 6: E15 Series Detailed Drawing
37.1 cm (14.62") 37.1 cm (14.62") 57.2 cm (22.50") 57.2 cm (22.50") 20.3 cm 17.5 cm (8.00") (6.88") 119.4 cm (47.00") 3/8" 6.10 cm 7.57 cm (2.40") (2.98") water inlet 62.2 cm (24.50") 56.2 cm (22.12") 15CI100A with Rear Drain... -
Page 7: Installation
To install internally, see Accessing Plug Internal Components on page Valve 6 . Connect power supply. Sanitize the dispenser prior to use (see Page 13). 1/4" MPT Storage bin drain tube pinch clamp can be installed externally or internally. 15CI100A with Rear Drain... - Page 8 If your dispenser has the internal water filter option, the water filter must be installed for the dispenser to operate. Because internal components will need to be accessed for both procedures, Follett recommends installing the water filter just prior to initial sanitizing.
-
Page 9: Maintenance/Cleaning Mode
4 . Remove the two screws (Fig . 6 .3) on the front panel (behind the drip tray). 5 . Remove and set aside the front panel (Fig . 6 .4) . Do not disengage the plug on the back of the User Interface . 15CI100A with Rear Drain... -
Page 10: Filter Display Indicator Activation
Filter Display Indicator Activation Fig . 7 If you purchased your dispenser with a Follett filter, the filter display indicator activation has been preset at the factory. If you are using an “after market filter,” an adjustment may be made to activate the “Fresh Filtered Ice &... -
Page 11: Nsf-Approved Cleaning And Sanitizing Procedure
§ Do not use bleach, it will damage the dispenser. Required Supplies § 15 Series: Follow the directions on the SafeCLEAN Plus packaging to mix 6 gal (22.7 L) of Follett SafeCLEAN Plus solution. Use 100 F (38 C) water. § Funnel, bucket, 38 C (100 F) potable water Ice machine and Dispenser 1 . - Page 12 2 . Plastic parts, including the user interface, can be cleaned with a non-abrasive glass cleaner. Clean stainless steel panels with stainless steel cleaner. 3 . Press and release maintenance/clean switch to put unit back into service. 15CI100A with Rear Drain...
-
Page 13: Service
Auger gearmotor has exceeded 0.55A. The HI amps and Time delay LEDs will illuminate, the machine will shut down for one hour, the LEDs will turn off, and the machine will resume normal operation. Service 8000 hour bushing check (call Follett technical service group at (877) 612-5086 or +1 (610) 252-7301). Maintenance Yellow Enter Maintenance Mode by pressing and holding maintenance/clean switch for 5 seconds. -
Page 14: Evaporator Disassembly
Lift and remove the top panel, set aside (Fig . 12 .5). 8 . Remove two screws (Fig . 12 .6) and remove left side panel. 9 . Remove two screws (Fig . 12 .7) and remove right side panel. 15CI100A with Rear Drain... - Page 15 § Remove main housing insulation (Fig . 14 .4). 13 . Remove all traces of Petrol-gel from auger shaft. 14 . Remove compression nozzle: Fig . 15 § Loosen hose clamp (Fig . 15 .1). § Remove transport tube (Fig . 15 .2). 15CI100A with Rear Drain...
- Page 16 Fig . 17 § Disconnect vent line from T fitting (Fig . 17 .1). 19 . Remove three M6x25 socket head allen screws Fig . 18 (Fig . 18 .1). 20 . Remove main housing (Fig . 18 .2). 15CI100A with Rear Drain...
-
Page 17: Evaporator Assembly
6 . Install main housing: Fig . 21 § Slide main housing onto auger shaft (Fig . 21 .1). § Install three M6x25 allen screws (Fig . 21 .2). § Connect vent line to T fitting (Fig . 21 .3). 15CI100A with Rear Drain... - Page 18 10 . Install gear motor: Fig . 24 § Install main housing insulation (Fig . 24 .1). § Slide gear motor onto auger shaft (Fig . 24 .2). § Install two M6x90 allen screws (Fig . 24 .3). 15CI100A with Rear Drain...
- Page 19 14 . Insert screwdriver into groove of auger shaft and pry shaft Fig . 27 outwards (Fig . 27 .1). 15 . Insert retainer into groove (Fig . 27 .2), ensure that retainer is aligned with hole in spacer. 15CI100A with Rear Drain...
- Page 20 16 . Install screw and tighten (Fig . 28 .1). Fig . 28 17 . Plug in gear motor (Fig . 29). Fig . 29 § BLUE to BLUE § BLACK to BLACK § WHITE to WHITE § Connect ground wire with ground screw. 15CI100A with Rear Drain...
-
Page 21: Water Feed Schematic
Water Feed Schematic Evaporator Float Water Chute (optional) Water Solenoid Valve Filter (optional) (optional) Water Solenoid Valve 15CI100A with Rear Drain... -
Page 22: Storage Bin Melt Water/Evaporator Feed/Clean Out System Schematic
Storage Bin Melt Water/Evaporator Feed/Clean Out System Schematic Storage Bin Storage Bin Drain Tube Pinch Clamp Vent System Schematic Storage Bin Vent Tube Reservoir 15CI100A with Rear Drain... -
Page 23: Refrigeration Schematic
Refrigeration Schematic CONDENSER FILTER-DRIER CAP TUBE COMPRESSOR EVAPORATOR LOW PRESSURE LIQUID HIGH PRESSURE VAPOR HIGH PRESSURE LIQUID LOW PRESSURE VAPOR 15CI100A with Rear Drain... -
Page 24: Condenser Fan Motor Removal (7 Series Shown)
Condenser Fan Motor Removal (7 Series Shown) 15CI100A with Rear Drain... -
Page 25: User Interface Display Identification
Exit Maintenance Mode by pressing and holding maintenance/clean switch until longer displays. Service - Call Follett Technical Service Group at 8000 hr (877) 612-5086 or +1 (610) 252-7301. bushing check The flashing wrench indicates that the 8000 hr bushing check is required. - Page 26 Internal leak in Locate leak and repair - Press reset dispenser on control board. Contact Follett if unit is leaking. Sleep mode Press either dispense button to return to normal operation. 15CI100A with Rear Drain...
-
Page 27: Electrical Wiring Diagram
Electrical Wiring Diagram 15CI100A with Rear Drain... -
Page 28: Parts
Parts 15 Series Exterior 15CI100A with Rear Drain... - Page 29 00974261 Not Shown Fitting, Elbow - 1/4" FPT x 3/8" Tube 00990796 Not Shown Drip Tray Drain Kit 00956375 Not Shown Drip Tray Drain Kit with 4" legs 00981977 Not Shown Covers, Agion, User Interface 00969030 15CI100A with Rear Drain...
-
Page 30: 15 Series Interior
15 Series Interior 15CI100A with Rear Drain... - Page 31 Control Board with Stand-offs 01051978 Capacitor, Gearmotor 00958041 Sensor, Retainer Hardware Kit 00958066 Relay and Overload 00157387 Heat Exchanger, Kit 01233998 Pinch clamp, Storage Bin Tubing 00988238 Tubing, Storage Bin Drain (includes barb fitting and hose clamp) 01102979 15CI100A with Rear Drain...
-
Page 32: 15 Series Bin Assembly
15 Series Bin Assembly 15CI100A with Rear Drain... - Page 33 01053248 Lid, Bin Assy 01053255 Bin, Assy 01053263 Auger, Dispense 01026251 Motor, Dispense 00957803 Cap and Insulation, Bin 01053305 Pinch clamp, Storage Bin Tubing 00988238 Tubing, Storage Bin Drain (includes barb fitting and hose clamp) 01102979 15CI100A with Rear Drain...
-
Page 34: Evaporator Assembly
Evaporator Assembly 15CI100A with Rear Drain... - Page 35 SafeCLEAN Plus liquid, 6 pack 01149954 Not Shown SafeCLEAN Plus liquid, case of 24 01149962 Not Shown 6" Legs for base stand, set of 4 00956318 Not Shown 4" Legs for countertop dispenser, set of 4 00956300 15CI100A with Rear Drain...
- Page 36 Warranty Registration and Equipment Evaluation Thank you for purchasing Follett ® equipment. Our goal is to deliver high value products and services that earn your complete satisfaction by delivering high-value products and services backed by outstanding customer and technical support.
Need help?
Do you have a question about the 15CI100A and is the answer not in the manual?
Questions and answers