BONAIRE B18 Installation Operation & Maintenance

BONAIRE B18 Installation Operation & Maintenance

B series commercial evaporative air conditioning

Advertisement

I
, O
& M
NSTALLATION
PERATION
AINTENANCE
B
B S
ONAIRE
ERIES
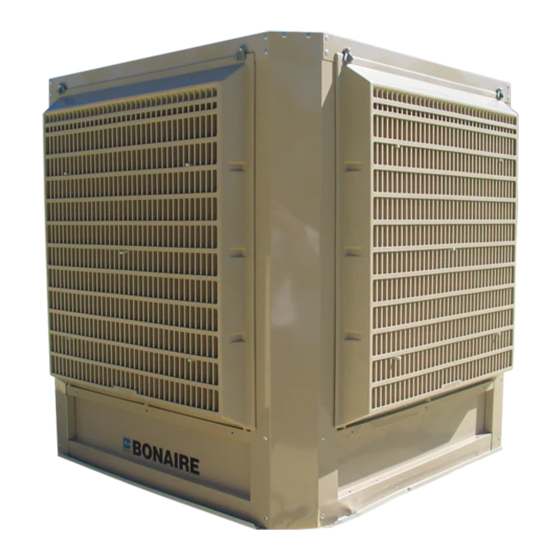
Commercial Evaporative
Air Conditioning
Bonaire B18 –B36
• IMPORTANT NOTICE •
Please leave this manual with the owner of this air conditioner.
Please keep this important manual in a safe place. It is the owner's responsibility to ensure that regular servicing as
per the Bonaire Evaporative Air Conditioner service recording planner is carried out. Failure to complete and record
the periodic service work as outlined will void all guarantees beyond statutory and legal requirements.

Advertisement

Table of Contents
loading

Summary of Contents for BONAIRE B18

  • Page 1 Please keep this important manual in a safe place. It is the owner’s responsibility to ensure that regular servicing as per the Bonaire Evaporative Air Conditioner service recording planner is carried out. Failure to complete and record the periodic service work as outlined will void all guarantees beyond statutory and legal requirements.
  • Page 2: Table Of Contents

    & M NSTALLATION PERATION AINTENANCE Table of Contents _______________________________________________________ 3 NTRODUCTION Dealer Responsibility _____________________________________________________ 3 Before Commencing ______________________________________________________ 3 ___________________________________________________ 4 NSTALLATION Unit Location Check List ___________________________________________________ 4 Precautions_____________________________________________________________ 4 Location and Orientation___________________________________________________ 4 Duct Connection Details ___________________________________________________ 5 Lifting the Unit___________________________________________________________ 6 Mounting the Air Conditioner _______________________________________________ 6 Ductwork System ________________________________________________________ 7 _________________________________________________ 8...
  • Page 3: Introduction

    Please take the time to fully read this Installation manual. Failure to follow these instructions may result in injury to you and damage to the air conditioner or your customer’s property. Installation of this Bonaire Evaporative Air Conditioner must conform to local building rules and regulations, electrical and plumbing codes, Environmental Protection Authority (EPA) regulations, and all applicable Australian Standards.
  • Page 4: Unit Installation

    & M NSTALLATION PERATION AINTENANCE Unit Installation UNIT INSTALLATION OCATION HECK • Place the unit well away from sources of smoke, dust and objectionable fumes so that only clean, fresh outside air will be drawn into the unit. (Refer AS1668) •...
  • Page 5: Duct Connection Details

    & M NSTALLATION PERATION AINTENANCE Unit Installation ONNECTION ETAILS B23 - 36...
  • Page 6: Lifting The Unit

    & M NSTALLATION PERATION AINTENANCE Unit Installation IFTING THE When lifting the units with a crane, sling the units from the base. Always correctly secure the product in the sling. Where lifting with a forklift, ensure the lifting tines are long enough to reach right through the bottom of the unit pallet.
  • Page 7: Ductwork System

    & M NSTALLATION PERATION AINTENANCE Unit Installation UCTWORK YSTEM It is essential that water cannot enter the building as a result of inadequate sealing (caulking or flashing) of the fixings, the ductwork system, system pipes and wiring. All duct designs and airflows must be calculated by a qualified air conditioning consultant or contractor in accordance with normal good ducting practices.
  • Page 8: Water Connections

    & M NSTALLATION PERATION AINTENANCE Water Connections WATER CONNECTIONS AYOUT...
  • Page 9 & M NSTALLATION PERATION AINTENANCE Water Connections...
  • Page 10: Water Installation

    & M NSTALLATION PERATION AINTENANCE Water Connections ATER NSTALLATION A permanent water supply is required to be connected to the unit. Units have been type test certified to MP52, Spec101. Certificate No.8663. Connecting the Water Supply • The water supply pipe work and connection to the air conditioner must be installed by a licensed plumber and conform to AS 3500, state &...
  • Page 11: Drain

    & M NSTALLATION PERATION AINTENANCE Water Connections Dump Valve (Optional) • To fit a dump valve a 40mm hole will be required in the lowest section of the tank using the optional sump dump well. Note:- the overflow assembly is still required.
  • Page 12: Electrical Connections

    & M NSTALLATION PERATION AINTENANCE Electrical Connections ELECTRICAL CONNECTIONS IRING ONNECTIONS • Have a licensed Electrician install a dedicated circuit from the distribution board with a separate circuit breaker for each unit installed. • Unit isolating switch is provided on the control box in the unit. Isolate the mains supply at the circuit breaker before conducting any electrical connect work.
  • Page 13: Wiring Diagram

    & M NSTALLATION PERATION AINTENANCE Electrical Connections IRING IAGRAM Single Phase B18, B23 Single Phase B33 Page 13...
  • Page 14 & M NSTALLATION PERATION AINTENANCE Electrical Connections Three Phase B36 Page 14...
  • Page 15 & M NSTALLATION PERATION AINTENANCE Electrical Connections Variable Speed Single Phase B18, B23 Page 15...
  • Page 16: Commissioning

    & M NSTALLATION PERATION AINTENANCE Commissioning COMMISSIONING ATER EVELS • Turn water on to unit and allow the reservoir to fill. The water should be 65mm to 70mm from the bottom of the tank. • If a dump valve is fitted, turn the pump (or dump circuit) on to activate the solenoid. Water pressure will be applied to the dump valve plunger via the black pressure pipe, cause it to close allowing the reservoir to fill.
  • Page 17: Fan Operation

    & M NSTALLATION PERATION AINTENANCE Commissioning PERATION • Check that pulleys are correctly aligned. • Check the belt tension is correct. Nominally 15 – 20mm depression. • Check bearings are tight on shaft • Set the fan running and check. •...
  • Page 18: Commissioning Check List

    & M NSTALLATION PERATION AINTENANCE Commissioning OMMISSIONING HECK You must complete, date and sign the ‘tick box’ checklist in the owner’s warranty card. Use this copy to check the installation prior to completing the owner’s documentation. Unit All equipment ordered by the All Controller functions for the customer is installed.
  • Page 19: Operating Instructions

    & M NSTALLATION PERATION AINTENANCE Operating Instructions OPERA TING INSTRUCTIONS SING YOUR ONDITIONER The principal of your unit is to introduce fresh air, which is washed through the filter pads to provided cool fresh air. The air is exhausted taking with it any heat loading on the space. Evaporative Air Conditioners must always function on 100% fresh outside air.
  • Page 20 & M NSTALLATION PERATION AINTENANCE Operating Instructions – 2 S PERATING NSTRUCTIONS PEED ONTROLS Turn on the water supply at the source and make sure that the water isolation valve at the unit is also turned on. Turn on the electrical power at the source and make sure that the isolating switch in the unit is turned on.
  • Page 21: Warranty - Australia Only

    & M NSTALLATION PERATION AINTENANCE Warranty – Australia Only WARRANTY – AUSTRALIA ONLY IMPORTANT: Please read this warranty information and complete the Dealer/Product information on the following page. KEEP this with your original purchase documents for any claim under warranty. WARRANTY PROCEDURES: Firstly refer to your owners manual to ensure you have followed the correct operating procedures of your product, and refer to the trouble shooting guide to assist solving any problems you may have.
  • Page 22 & M NSTALLATION PERATION AINTENANCE Warranty – Australia Only DIY installation Warranty • If the product has been installed as a DIY, a supply part only warranty will apply. Parts only will be supplied free of charge on the return of the faulty part and the owner will be responsible for all labour charges incurred for the part to be fitted by a qualified person.
  • Page 23 & M NSTALLATION PERATION AINTENANCE Warranty – Australia Only ROOF OF URCHASE It is important that the name of the Dealer or Retailer from whom you purchased your product and the name of the installer are recorded on this page. The installer is responsible for the correct installation, start up and demonstrating the operation of this product.
  • Page 24 & M NSTALLATION PERATION AINTENANCE Warranty – Australia Only Aged New Product Warranties For a new product warranty to apply, a product needs to be purchased and installed within 3 years of the manufacturing date by the original purchaser. aged as the result of extended storage or being used for ion purposes, the following Product that is demonstrat...
  • Page 25: Service & Maintenance

    & M NSTALLATION PERATION AINTENANCE Service & Maintenance SERVICE & MAINTENANCE ROBLEM OLVING PROBLEM PROBABLE CAUSE SUGGESTED REMEDY Undersized air conditioner. • Replace with larger air conditioner. • Clogged or dirty filter pads. • Clean or replace pads. • Insufficient air discharge openings •...
  • Page 26 & M NSTALLATION PERATION AINTENANCE Service & Maintenance PROBLEM PROBABLE CAUSE SUGGESTED REMEDY • Pump motor failure. • Replace complete pump. Pump fails to • Loose electrical connections. • Tighten electrical connections. operate • Pump control switch faulty. • Replace pump control switch. •...
  • Page 27 & M NSTALLATION PERATION AINTENANCE Service & Maintenance EGULAR AINTENANCE A qualified service technician should conduct any service work carried out on your commercial cooling product. It is important that periodical service is carried out on your product to ensure your will receive the efficiency benefits the product provides. Note: Local regulations and codes may require the owner to carry out and record specific maintenance in a log book e.g.
  • Page 28 Manufactured by Climate Technologies ABN 13 001 418 042 www.climatetechnologies.com.au P/N 1-M00-05-915/E...

This manual is also suitable for:

B33B23B36700c900c1400c ... Show all

Table of Contents