Table of Contents
Advertisement
Owner's Manual
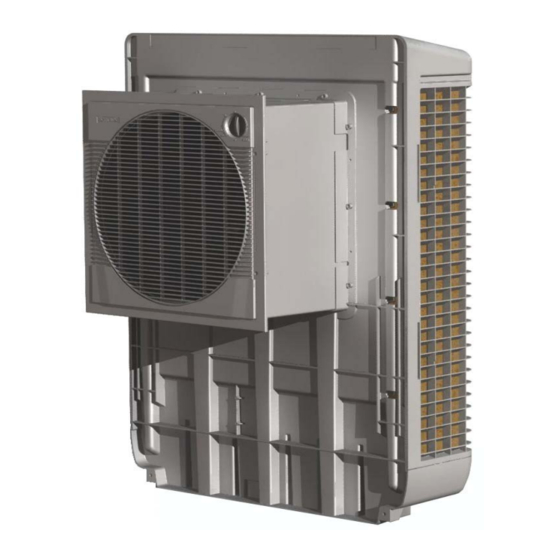
Durango Window Cooler
Model WEAC628
Please keep this important manual in a safe place. It is the owner's responsibility to
ensure that regular maintenance is carried out on this evaporative cooling product.
Failure to do so will void all guarantees beyond statutory and legal requirements.
Advertisement
Table of Contents

Related Manuals for BONAIRE Durango WEAC628


Summary of Contents for BONAIRE Durango WEAC628
- Page 1 Owner’s Manual Durango Window Cooler Model WEAC628 Please keep this important manual in a safe place. It is the owner’s responsibility to ensure that regular maintenance is carried out on this evaporative cooling product. Failure to do so will void all guarantees beyond statutory and legal requirements.
- Page 2 URANGO INDOW OOLER General Information Thank you for purchasing a quality Bonaire Evaporative Cooler. We care about your safety and would ask you to spend a few minutes reading these simple instructions before installing or operating this product. Safety! Read carefully all of these instructions prior to installing and operating the unit.
- Page 3 Climate Technologies. • Climate Technologies is constantly researching and developing improved prod features and there fore reserves the right to change the specifications without notice. E. & O.E. Page 3 WEAC628...
-
Page 4: Table Of Contents
Filter Pads .........................13 Water Tank ........................13 Water Distributor .......................13 Water Level / Float Valve ....................13 Motor and Fan ........................13 Bleed Off ...........................14 ...........................14 LECTRICAL ......................15 AINTENANCE LANNER Parts List ........................16 Problem Solving ......................17 Optional Extras ......................18 Warranty ........................19 Page 4 WEAC628... -
Page 5: Introduction
The principal of your unit is to introduce fresh air, which is washed through the filter pads to provide cool fresh air. The warm stale air within the room is forced out by the cool air through open doors or windows. Unit Internal View Page 5 WEAC628... -
Page 6: Unit Operation
Please Note: - Any additional pipe work fitted to the bleed off by the owner must slope away from the unit in a down hill manner. Page 6 WEAC628... -
Page 7: Cooler Operation
1 - Sleep Mode 2 - Normal Operation Max - Quick Cool down The unit will now operate with the fan motor only activated. • To turn the unit off, rotate the control knob to the O position Page 7 WEAC628... -
Page 8: Installation
Fix the fan assembly into place using the 12 pozi-drive screws supplied. Ensure the screws are done up tight so there is no vibration between the fan housing and the wet box. The unit is now ready for installing into your window. Page 8 WEAC628... -
Page 9: Nstallation
Fit in fill panel with screws (length of screws must not exceed 25mm (1”) in length) and seal any gaps with silicone. • Check that the unit is still level using spirit level on top edge of Rear Filter Panel. Page 9 WEAC628... -
Page 10: External Fixing Of The Unit
Ensure there is a 100mm (4”) clearance above the unit so the rear panel can be remove for service • Ensure that the unit is installed level in the vertical and horizontal positions as illustrated, prior to fixing the cooler. Page 10 WEAC628... -
Page 11: Water Connection
You may notice a wet paper smell as the water circulates around the f ilter pads. This is normal during the commissioning phase and at the beginning of each season when the unit is operated after the winter break. It will only last for a short time. Page 11 WEAC628... -
Page 12: Maintenance
Rear Filter Panel or be removed for servicing the filters, care should be taken to re-attach the hose and snap lock clamp before replacing Rear Filter Panel. IMPORTANT: The rotation of the snap lock clamp must be correct (see diagram above) to refit the Rear Filter Panel assembly. Page 12 WEAC628... -
Page 13: Eneral
This is normal. Motor and Fan Check that the fan spins freely and that there is no build up on the blades. Check the motor for corrosion and spray with an anti corrosive agent if necessary. Page 13 WEAC628... -
Page 14: Bleed Off
See diagram. LECTRICAL No general maintenance is required to the electrical system. Electrical connections and maintenance should only be carried out by a qualified electrician. Page 14 WEAC628... -
Page 15: Maintenance Planner
Drain and clean unit END OF SEASON Leave drain plug removed SERVICE AND Check motor and pump and SHUT DOWN spray with a water displacement lubricant. ALL MAINTENANCE CAN ONLY BE PERFORMED BY A QUALIFIED SERVICE PERSON. Page 15 WEAC628... -
Page 16: Parts List
Motor 6281610SP Fan Retaining Clip 6280804SP 6280806SP Control Knob 6280133SP Switch 6201609SP Capacitor 3.0 μF 0160183SP Float Valve Assembly 6280920SP Overflow Fitting 6050920SP Stand Pipe – 120mm 6280913SP Pump Filter Basket 6050811SP Pump 6280807SP Bleed Nipple 6280803SP Page 16 WEAC628... -
Page 17: Problem Solving
Bleed off should be checked to see if bleed nozzle is blocked, clear if necessary Rapid formation of ® and clean CELdek pad. white deposits on Increase the bleed rate – see pads page 14. More regular maintenance may be required. Page 17 WEAC628... -
Page 18: Optional Extras
To REMOVE the optional winter cover: 1. Simply pull the cover off using the winter cover handle. 2. Store the winter cover for the next winter. To purchase the optional winter cover please call your nearest Climate Technologies dealer. Page 18 WEAC628... -
Page 19: Warranty
The product must be installed in an easily and safe accessible area for service, appliances installed in areas not easily and safely assessable, costs will be borne by the owner for access equipment should maintenance be required. Page 19 WEAC628... - Page 20 An unauthorized person has attempting to repair the appliance. • A situation arises referenced in the trouble-shooting guide. • A charge will be made for, work done or a service call where there is nothing wrong with the appliance. Page 20 WEAC628...
- Page 21 For a product that is greater than 5 years of age from date of manufacture, the statutory warranty will apply to electrically functioning components only. All other components being cabinets, louvres, filters etc. will not be covered by warranty. Page 21 WEAC628...
- Page 22 Please attach your proof of purchase here. Your receipt is your warranty and will be required to validate any warranty. DEALER PRODUCT INFORMATION: Dealer/Retailer: Dealer Address: Dealer Phone Number: Unit Model Number: Serial No: Date Installed: Installed by: Date Commissioned: Signature: Commissioned by: Page 22 WEAC628...
- Page 23 (08) 8307 5230 Northern Territory New South Wales / (03) 8795 2457 Australian Capital Territory Western Australia (08) 9454 1000 Victoria/Tasmania (03) 8795 2456 Queensland (03) 8795 2457 Outside Metro areas please contact your nearest Climate Technologies Service Provider. Page 23 WEAC628...
- Page 24 Manufactured by Climate Technologies Pty Ltd ABN 13 001 418 042 26 Nylex Avenue Salisbury, SA 5108 AUSTRALIA www.climatetechnologies.com Part No 6282212/A...
Need help?
Do you have a question about the Durango WEAC628 and is the answer not in the manual?
Questions and answers
My swamp cooler is blowing air the wrong way
Need the bearings that go to the motor of a bon Air Durango.