FIBARO FGFS-101 Operating Manual
Flood sensor
Hide thumbs
Also See for FGFS-101:
- User manual ,
- Operating manual (21 pages) ,
- Operating manual (21 pages)
Table of Contents
Advertisement
Quick Links
USA
© 2014 Fibar Group Sp. z.o.o. All rights reserved.
Distributed by Fibaro
1040 East Lake Ave, Glenview, IL 60025, USA
www.fibaro.com
OPERATING MANUAL
FLOOD SENSOR
FGFS-101-USA-A-v1.00
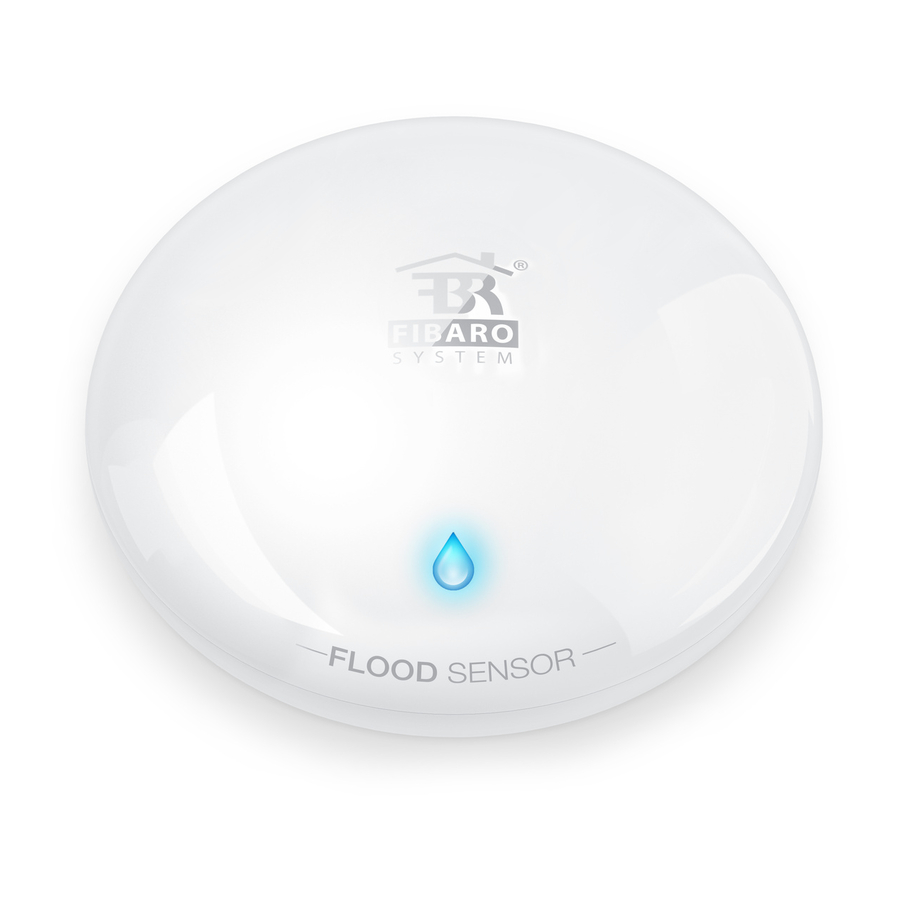
Fibaro Flood Sensor is a universal, Z-Wave compatible, flood and temperature
sensor. Device can be battery (ca. 2 years battery life) or VDC powered (12 or 24
VDC). Flood alarm is sent to the Z-Wave network devices or additionally to any
alarm system controller, through opening a NC (Normally Closed) contact.
The device has built in temperature sensor, monitoring temperature of e.g. floor.
Fibaro Flood Sensor is designed to be placed on the floor or on a wall with a flood
sensor probe extended by connected wire. The device has built in LED indicator
and acoustic alarm. In addition, the sensor is equipped with a tilt sensor reporting
tilt or movement to the main controller e.g. when someone has taken the Sensor
from its original location. LED diode signals flood, operating mode or the Z-Wave
network communication range. Fibaro Flood Sensor is sink-proof, which means it
drifts on the water surface and keeps on sending alarm signal in case of
substantial inundation of water.
SPECIFICATIONS
Power Supply:
12 - 24 VDC
Battery Type:
CR123A
Power Consumption (at VDC operation):
0,4W
Output terminals maximum current
25mA
carrying capacity
(ALARM NC, TAMP NC):
Maximum voltage at output terminals:
24VDC / 20VAC
Radio protocol:
Z - Wave
Radio frequency:
868,4 MHz EU;
908,4 MHz US;
921,4 MHz ANZ;
869,2 MHz RU;
Range:
up to 50m outdoors
up to 30m indoors
(Depending on terrain
and building structure)
Operational Temperature:
0 to 40
o
C*
Measured temperature range:
-20
o
C
to 100
o
C
Temperature measuring accuracy:
0,5
o
C (within 0 - 40
o
C range)
Dimensions (Diameter x Height):
72 x 28 mm
* Operational temperature in VDC powering mode: -20
o
C to 70
o
C
TECHNICAL INFORMATION
•
Compatible with any Z-Wave network controller,
•
May be connected to any alarm system (potential free output terminal),
•
Extremely easy installation - simply put on a surface prone to flooding,
•
May be installed anywhere - flood sensor's contacts extended with a wire,
•
Battery or VDC powered. When connected to an external, VDC power source, the
battery serves as an emergency power source,
•
Theft protection - tilt is reported to the Z-Wave network or alarm system's main
controller,
• Two operating modes - flood / temperature sensor or just a temperature sensor.
CAUTION
!
Connect while observing wiring diagram shown in this manual
only. Incorrect wiring may be dangerous or result in the device
breakdown.
I. GENERAL INFORMATION ABOUT FIBARO SYSTEM
Fibaro is a wireless system, based on Z-Wave technology. Fibaro provides many
advantages when compared to similar systems. In general, radio systems create a
direct connection between the receiver and transmitter. However, the radio signal
is weakened by various obstacles located in its path (apartment walls, furniture,
etc.) and in extreme cases it fails to transfer required data. The advantage of
Fibaro System is that its devices, apart from being transmitters and signal
receivers, also duplicate signal. When a direct connection path between the
transmitter and the receiver cannot be established, the connection may be
achieved through other intermediate devices.
Fibaro is a bi-directional wireless system. This means that the signal is not only
sent to the receivers but also the receivers send the confirmation of its reception.
This operation confirms their status, which checks whether they are active or not.
Safety of the Fibaro System transmission is comparable to the safety of
transmission in data bus wired systems.
Fibaro operates in the free bandwidth for data transmission. The frequency
depends on radio regulations in individual countries. Each Fibaro network has its
own unique network identification number (home ID), which is why it is possible to
co-operate two or more independent systems in a single building without any
interference.
Although Z-Wave is quite a new technology, it has already become recognized and
officially a binding standard, similarly to Wi-Fi. Many manufacturers in various
industries offer solutions based on Z-Wave technology, guaranteeing their
compatibility. This means that the system is open and it may be extended in the
future. Find more information at www.fibaro.com.
Fibaro generates a dynamic network structure. After Fibaro System is switched on,
the location of its individual components is automatically updated in real-time
through status confirmation signals received from devices operating in a "mesh"
network.
GLOSSARY OF TERMS:
• INCLUSION - the device sends out a Node Info frame, which
makes it possible to add it to the Fibaro System (HC 2 or HC Lite),
• EXCLUSION - remove the device from the Fibaro System,
• ASSOCIATION - controlling other devices included in the Fibaro System,
• Multi Channel Association - controlling other multi-channel devices included
in the Fibaro System
II. Z-WAVE NETWORK INCLUSION
Use TMP button to include the Fibaro Flood Sensor into the Z-Wave network. In
addition, the device may be included into the Z-Wave network in auto inclusion
mode, at connecting a DC power source (mode active only after the built in battery
has been disconnected).
Including the Fibaro Flood Sensor using auto inclusion mode:
1) Make sure a DC power source is disconnected and the sensor is located within
direct communication with the main controller's range. The battery must be
removed.
2) Open the cover.
3) Set the main controller into the learning mode (see a main controller's operating
manual).
4) Connect a DC power source to include the Fibaro Flood Sensor into the Z-Wave
network in autoinclusion mode.
5) Fibaro Flood Sensor will be detected and included.
i
NOTE
In case the Sensor is not detected, proceed to the manual
inclusion (described below) or reset the Sensor and repeat auto
inclusion procedure.
To deactivate auto inclusion mode, press TMP button once, after the Fibaro Flood
Sensor has been connected to a DC power supply.
Manual Z-Wave network inclusion:
1) Connect a DC power supply to the Fibaro Flood Sensor or insert a battery.
Make sure the sensor is located within the Z-Wave network's main controller's
range (see main controllers operating manual).
2) Set the main controller into the learning mode.
3) Triple click TMP button.
4) Fibaro Flood Sensor will be detected and included.
III. Z-WAVE NETWORK EXCLUSION
Complete the following steps to exclude a Fibaro Flood Sensor from the Z-Wave
network:
1) Remove sensor's cover.
2) Make sure sensor is connected to a battery or a DC power supply.
3) Set a main controller into learning mode (see main controllers operating
manual).
4) Triple click TMP button, located inside Flood Sensor's casing.
IV. SENSOR'S INSTALLATION
1) Remove top cover.
2) Include into the Z-Wave network (see pt. II).
3) Place sensor onto a surface prone to flooding. All three electrodes underneath
the device should evenly touch the surface.
4) If the sensor is to be DC powered, drill holes in it's casing and connect wires
observing the wiring diagram no.2.
5) Close sensor's casing.
NOTE
i
After completing installation it's recommended to test sensor's
operation by placing the entire sensor or it's probes' extension wire
onto water surface.
i
NOTE
The Sensor detects resistance (under 4MOhm) between
electrodes 1 and 3, 1 and 2 (according to scheme no.4), and
electrodes connected to contacts (SENS1 and SENS2).
!
CAUTION
Contacts SENS1 and SENS2 are dedicated to flood detection
only. Do not connect external voltage.
NOTE
i
When changing the Sensor's location, it's recommended to wake
up the device and reconfigure the Z-Wave network by triple
clicking the TMP button.
NOTE
The TMP button has two functions:
i
1) Including / Excluding the device into / from the Z-Wave network,
2) Tamper contact for II-nd Association Group. When a sensor is
included into the Z-Wave network, case opening alarm may be
activated (according to parameter 74 settings).
V. POWERING MODE INFORMATION
There are two powering modes for the Fibaro Flood Sensor. By default it's powered
by a factory included battery. In addition it can work with a constant current, after
connecting a 12 / 24 VDC power supply to +12 and GND terminals (see diagram
no.2). Powering mode configuration is carried out automatically, while a sensor is
being included into the Z-Wave network. When battery powered, a Fibaro Flood
Sensor communicates with a Z-Wave network main controller periodically.
Detected alarms are sent immediately, but configuration parameters and
associations settings only at specified wake up intervals, or at a manual wake up
(TMP triple click). In DC powering mode, configuration and associations
parameters are sent when necessary, and in addition a sensor serves as a Z-Wave
signal repeater.
Switching to a constant current powering mode:
1) Exclude a sensor from the Z-Wave network.
2) Connect constant current power source (12 / 24 VDC) to +12 and GND
terminals observing wiring diagram no.2.
3) Include the Fibaro Flood Sensor into the Z-Wave network.
In constant powering mode a sensor may operate without a battery. Installing a
battery is recommended though, as it will serve as an emergency power source.
When constant power fails, sensor will automatically shift to an emergency mode.
All reports, including flood and temperature, will be sent immediately, but it will not
be possible to modify the configuration or association settings until constant power
returns. If a sensor served as a signal repeater for other Z-Wave devices, in
emergency mode signal repeating function will be deactivated.
NOTE
i
Fibaro Flood Sensor will automatically exit emergency mode once
12/24 VDC at +12 and GND terminals is detected (according to
diagram no.2) and the device wakes up after detecting an event,
i.e. flood alarm, temperature report, tilt, or manual wake up using
TMP button.
BATTERY TIPS
Fibaro Flood Sensor's battery life is ca. 2 years at factory default
i
settings. The current battery level is displayed in a Home Center 2
interface. Red battery icon means a battery needs replacement. In
order to avoid triggering tamper alarm while replacing the battery,
II-nd association group's associations must be deleted, and
Sensor's parameters' configuration set to default.
Alternatively, the Sensor may be powered by VDC power source
(12 / 24 VDC in accordance with a wiring diagram no.2) - in such
a configuration, a battery will serve as an emergency power
supply.
NOTE
i
Mounting screws shown in a diagram no.3 are not included in the
package. Choose a screw type depending on the building material
it is being attached to.
DIAGRAMS' DESCRIPTION:
+12V - 12 / 24 VDC positive terminal
-GND - negative (ground) terminal
ALARM NC - potential-free flood sensor terminals (for wired systems)
TAMP NC - potential-free tamper terminals (for wired systems)
SENS1, SENS2 - flood sensor electrodes' terminals.
i
NOTE
ALARM NC and TAMP NC connectors may be used as EOL
protective loop's terminals.
VI. FIBARO FLOOD SENSOR RESET
Reset procedure deletes EPROM's memory, including all information on the
Z-Wave network and the main controller.
Fibaro Flood Sensor's reset procedure:
1) Make sure the Sensor is powered.
2) Press and hold a TMP button for 15 - 20 seconds. LED indicator glows yellow to
confirm entering 4th sub-menu.
3) Release the TMP button.
4) Click the TMP button, once.
The LED indicator glowing red and then turning off will confirm a successful reset.
Reset completion will be confirmed by an acousic signal, same as at the power
source connection.
NOTE
i
Reset procedure doesn't remove the Sensor from the Z-Wave
network's main controller memory. Prior to reset, a sensor must be
deleted from the Z-Wave network.
ALARM
SYSTEM HUB
AUX COM Z1 Z2
TAMP
ALARM
NC
NC
TMP
Fig. 1 - Connection with alarm system
Fig. 3 - Flood sensor's contacts
extended with a wire
VII. OPERATING THROUGH THE Z-WAVE NETWORK
Fibaro Flood Sensor has two sensors built in - flood and temperature sensors,
meaning it's a multichannel device. In the Z-Wave network's main controller the
Sensor will be shown as two devices.
Fig. 5 Flood Sensor icon in HOME CENTER 2
VIII. ASSOCIATIONS
Through an association Fibaro Flood Sensor may control another Z-Wave network
device, e.g. a Dimmer, Relay Switch, Roller Shutter, RGBW Controller, Wall Plug,
or a scene (scene only through the Home Center 2 main controller).
NOTE
i
Association allows for direct communication between Z-Wave
network devices. Main controller does not take part in such
communication. Using this mechanism, Fibaro Flood Sensor may
communicate with other devices even when the main controller is
damaged, e.g. in a fire.
TAMP
ALARM
NC
NC
TMP
12/24 VDC
+
ADAPTER
Fig. 2 - Connection to a constant power source
3
1
2
Fig. 4 - Probes marking
Fibaro Flood Sensor allows for the associations of three groups.
1-st Association Group is assigned to the device status - sending the BASIC SET
(default) or ALARM control frame to the associated devices.
2-nd Association Group is assigned to a TMP button and tilt sensor - ALARM
GENERIC control frame will be sent to the associated devices in case a TMP button is
released or a tilt sensor triggered (depending on parameter 74 settings)
3-rd Association Group reports the device status and allows for assigning single device
only (the main controller by default - the device reports its status to the main controller).
Fibaro Flood Sensor allows for controlling 5 regular and 5 multichannel devices per an
association group, out of which 1 field is reserved for the Z-Wave network main
controller.
To add an association (using Home Center 2 interface) go to device settings and click the
following icon:
Select the "device options" tab. Then specify to which group and what devices are to be
associated. Sending relevant information to devices that have been added to association
groups may take even a few hours depending on configuration parameters' settings.
IX. LED VISUAL SIGNALS AND SETTINGS
Fibaro Flood Sensor is equipped with a LED diode, signaling sensor's operating modes
and alarms. In addition the LED indicator may inform of the Z-Wave network range and
the current temperature.
LED indicator signaling modes:
1) Flood alarm is signaled with alternating white and blue light.
2) In battery powering mode, with parameter no.63 set to 1, LED indicator will periodically
show temperature readouts (depending on parameters 50, 51, 61 and 62 settings)
3) In constant powering mode, the current temperature readouts will be continuously
signaled with a colour depending on the parameters 50, 51, 61 and 62 settings.
4) Currently chosen MENU position is signaled with an illumination colour.
Press and hold the TMP button for at least 3 seconds to enter MENU. Inside MENU, each
of the positions will be signaled by another LED colour.
Advertisement
Table of Contents

Subscribe to Our Youtube Channel
Related Manuals for FIBARO FGFS-101


Summary of Contents for FIBARO FGFS-101
- Page 1 • EXCLUSION - remove the device from the Fibaro System, 2) Connect constant current power source (12 / 24 VDC) to +12 and GND Fibaro Flood Sensor is designed to be placed on the floor or on a wall with a flood terminals observing wiring diagram no.2.
- Page 2 - higher Wake up interval means the Sensor communicates less a colour determined by a Parameter 61 settings. By default the LED indicator Default setting: 2 disclaims any express or implied warranty, relating to the sale and/or use of the Fibaro shall not be extended. blinks blue.
Need help?
Do you have a question about the FGFS-101 and is the answer not in the manual?
Questions and answers