Dometic MSI912 Installation And Operating Manual
Sine wave inverter
Hide thumbs
Also See for MSI912:
- Installation and operating manual (444 pages) ,
- Installation and operating manual (432 pages)

Related Manuals for Dometic MSI912


Summary of Contents for Dometic MSI912
- Page 1 MSI912-1812T-IO-AU.book Seite 1 Freitag, 23. Dezember 2016 3:11 15 ENERGY & LIGHTING SINEPOWER MSI912, MSI1812T Sine wave inverter Installation and Operating Manual...
- Page 2 MSI912-1812T-IO-AU.book Seite 2 Freitag, 23. Dezember 2016 3:11 15...
-
Page 3: Table Of Contents
MSI912-1812T-IO-AU.book Seite 3 Freitag, 23. Dezember 2016 3:11 15 Please read this instruction manual carefully before installation and first use, and store it in a safe place. If you pass on the product to another person, hand over this instruction manual along with it. -
Page 4: Explanation Of Symbols
MSI912-1812T-IO-AU.book Seite 4 Freitag, 23. Dezember 2016 3:11 15 Explanation of symbols Explanation of symbols WARNING! Safety instruction: Failure to observe this instruction can cause fatal or serious injury. NOTICE! Failure to observe this instruction can cause material damage and impair the function of the product. - Page 5 MSI912-1812T-IO-AU.book Seite 5 Freitag, 23. Dezember 2016 3:11 15 General safety instructions • Electrical devices are not toys Always keep and use the device out of the reach of children. Safety when installing the device WARNING! • Installing the device may only be performed by qualified personnel who are familiar with the guidelines and safety precautions to be applied.
-
Page 6: Scope Of Delivery
MSI912-1812T-IO-AU.book Seite 6 Freitag, 23. Dezember 2016 3:11 15 Scope of delivery Operating the device safely WARNING! • Operate the device only if you are certain that the housing and the cables are undamaged. • Even after the fuse triggers, parts of the inverter remain live. -
Page 7: Accessories
MSI912-1812T-IO-AU.book Seite 7 Freitag, 23. Dezember 2016 3:11 15 Accessories MSI1812T Designation Sine wave inverter Connection cable with safety coupling (for 230 Vw output) Connection cable with safety plug (for 230 Vw supply) – Operating manual Accessories Designation Ref. no. -
Page 8: Intended Use
50 Hz or 60 Hz. Technical description The inverters can be operated wherever a 12 Vg connection (MSI912, MSI1812T) is available. The light-weight and compact construction of this device allows for easy installation in mobile homes, commercial vehicles or motor and sailing yachts. - Page 9 MSI912-1812T-IO-AU.book Seite 9 Freitag, 23. Dezember 2016 3:11 15 Technical description • Fuses (MSI1812T only): The LED on the inverter indicates an operating fault (constant red light). The fuse in the device must be pressed in again by hand after it is triggered.
- Page 10 MSI912-1812T-IO-AU.book Seite 10 Freitag, 23. Dezember 2016 3:11 15 Technical description Control elements The inverter has the following connections, displays and control elements on the back: REMOTE N.O. N.C. DC INPUT CHASSIS GROUND NEG (-) POS (+) Designation Description Terminal...
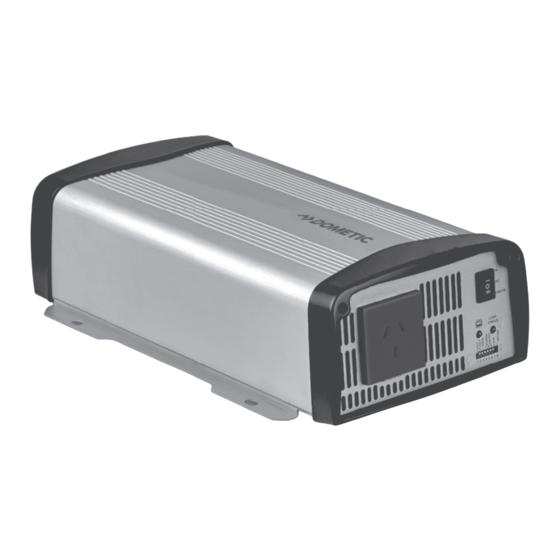
- Page 11 MSI912-1812T-IO-AU.book Seite 11 Freitag, 23. Dezember 2016 3:11 15 Technical description MSI912 The inverter has the following connections, displays and control elements on the front: MSI912 REMOTE LOAD STATUS AC OUTPUT 1 2 3 4 5 6 7 8 Designation...
- Page 12 MSI912-1812T-IO-AU.book Seite 12 Freitag, 23. Dezember 2016 3:11 15 Technical description MSI1812T The inverter has the following connections, displays and control elements on the front: MSI1812T REMOTE LOAD STATUS BREAKER AC INPUT AC OUTPUT 1 2 3 4 5 6 7 8...
-
Page 13: Fitting The Inverter
MSI912-1812T-IO-AU.book Seite 13 Freitag, 23. Dezember 2016 3:11 15 Fitting the inverter Fitting the inverter Tools required For the electrical connection you will need the following tools: • Crimping tool • 3multi-coloured, flexible connection cables. Determine the necessary thickness from the table in chapter “Connecting the inverter” on page 15. - Page 14 MSI912-1812T-IO-AU.book Seite 14 Freitag, 23. Dezember 2016 3:11 15 Fitting the inverter • The place of installation must be well ventilated. A ventilation system must be available for installations in small, enclosed spaces. The minimum clearance around the inverter must be at least 25 cm (fig. 6, page 13).
-
Page 15: Connecting The Inverter
• Reversed polarity can damage the inverter. • MSI912 only: The inverter should not be used to connect to a ring main, it must only be used to power individual appliances that are... - Page 16 MSI912-1812T-IO-AU.book Seite 16 Freitag, 23. Dezember 2016 3:11 15 Connecting the inverter Connecting the inverter to the battery NOTE Tighten the nuts and bolts to a maximum torque of 12 – 13 Nm. Loose connections may cause overheating. ➤ Set the main switch (fig. 4 1, page 11 and fig. 5 1, page 12) to “OFF”.
- Page 17 MSI912-1812T-IO-AU.book Seite 17 Freitag, 23. Dezember 2016 3:11 15 Connecting the inverter Connecting the 230 V power cable (MSI1812T only) ➤ Connect the 230 Vw connection cable with safety plug to the 230 Vw input jack (fig. 5 6, page 12).
- Page 18 MSI912-1812T-IO-AU.book Seite 18 Freitag, 23. Dezember 2016 3:11 15 Connecting the inverter Connect multiple appliances (MSI1812T only) The device is equipped at delivery with galvanic isolation. For the safe operation of multiple appliances, it is essential that a circuit breaker (residual current circuit breaker) is built into the socket distribution circuit, see sample circuit diagram in fig.
- Page 19 MSI912-1812T-IO-AU.book Seite 19 Freitag, 23. Dezember 2016 3:11 15 Connecting the inverter No. in fig. 9, Explanation page 18 230 Vw power source Additional devices, e.g. battery charger, refrigerator DC power source (battery) Inverter Set grounding bridge (At delivery: not set, shown by dotted line)
- Page 20 MSI912-1812T-IO-AU.book Seite 20 Freitag, 23. Dezember 2016 3:11 15 Connecting the inverter Connecting the external switch for turning on and off ON:INV. (TR ON) HI:INV. OFF:INV. (TR OFF) LOW:INV. ON:INV. BAT+ OFF:INV. BAT– ON:INV. DC POWER – OFF:INV. NOTE Use cables with a cable cross section of 0.25 – 0.75 mm².
- Page 21 MSI912-1812T-IO-AU.book Seite 21 Freitag, 23. Dezember 2016 3:11 15 Connecting the inverter Pin assignment NOTE Keep the cable lengths as short as possible (< 10 m), so there is no loss in the signal transmission. The pins of the RS-232 ports are assigned as follows:...
-
Page 22: Using The Inverter
MSI912-1812T-IO-AU.book Seite 22 Freitag, 23. Dezember 2016 3:11 15 Using the inverter Using the inverter 10.1 Switching on the inverter ➤ Set the main switch (fig. 4 1, page 11 and fig. 5 1, page 12) of the inverter to the “ON”... - Page 23 MSI912-1812T-IO-AU.book Seite 23 Freitag, 23. Dezember 2016 3:11 15 Using the inverter 10.2 Status indications “Input Level” LED (fig. 4 2, page 11 and fig. 5 2, page 12) The “Input Level” LED shows the present range of the input voltage.
- Page 24 MSI912-1812T-IO-AU.book Seite 24 Freitag, 23. Dezember 2016 3:11 15 Using the inverter 10.3 Configuring the inverter NOTE Settings can only be made using the dip switch if the S8 dip switch is “On”. You can adjust the device using the dip switch (fig. 4 4, page 11 and fig. 5 4, page 12).
- Page 25 MSI912-1812T-IO-AU.book Seite 25 Freitag, 23. Dezember 2016 3:11 15 Using the inverter Switching to energy-saving mode You can set the energy-saving mode using the S4, S5 and S6 dip switches. In this way, the battery you connect to the inverter is not discharged as quickly.
-
Page 26: Cleaning And Caring For The Inverter
MSI912-1812T-IO-AU.book Seite 26 Freitag, 23. Dezember 2016 3:11 15 Cleaning and caring for the inverter Cleaning and caring for the inverter NOTICE! Do not use sharp or hard objects or cleaning agents for cleaning as these may damage the product. - Page 27 MSI912-1812T-IO-AU.book Seite 27 Freitag, 23. Dezember 2016 3:11 15 Troubleshooting LED display Cause Remedy Quick flash Input voltage is too high Check the input voltage and reduce Slow flash Input voltage too low The battery needs recharging. Check the cables and connections.
-
Page 28: Warranty
MSI912-1812T-IO-AU.book Seite 28 Freitag, 23. Dezember 2016 3:11 15 Warranty Warranty The statutory warranty period applies. If the product is defective, please contact the manufacturer's branch in your country (see the back of the instruction manual for the addresses) or your retailer. -
Page 29: Technical Data
MSI912-1812T-IO-AU.book Seite 29 Freitag, 23. Dezember 2016 3:11 15 Technical data Technical data NOTE In the event of thermal overloading, the inverter reacts by reducing the power for temperatures of 40 °C and above. If the temperature exceeds 60 °C, the inverter switches off. - Page 30 MSI912-1812T-IO-AU.book Seite 30 Freitag, 23. Dezember 2016 3:11 15 Technical data Dimensions Ø7 mm 186,6 mm MSI1812T MSI912 REMOTE REMOTE LOAD STATUS BREAKER LOAD AC INPUT AC OUTPUT STATUS AC OUTPUT 1 2 3 4 5 6 7 8 1 2 3 4 5 6 7 8...
- Page 31 MSI912-1812T-IO-AU.book Seite 31 Freitag, 23. Dezember 2016 3:11 15 Technical data Overvoltage shutdown Overvoltage Device Shutdown Restart MSI912, MSI1812T 16 V 14.5 V Undervoltage shutdown Undervoltage Undervoltage Device warning Shutdown Restart MSI912, MSI1812T 11 V 10.5 V 12.5 V Excess temperature shutdown...
- Page 32 MSI912-1812T-IO-AU.book Seite 32 Freitag, 23. Dezember 2016 3:11 15 www.dometic.com AUSTRALIA Dometic Australia Pty. Ltd. 1 John Duncan Court · Varsity Lakes QLD 4227 1800 212121 · +61 7 55076001 Mail: sales@dometic.com.au AUSTRIA JAPAN SLOVAKIA Dometic Austria GmbH Dometic KK Dometic Slovakia s.r.o.
Need help?
Do you have a question about the MSI912 and is the answer not in the manual?
Questions and answers