Table of Contents

Related Manuals for Radio Shack PRO-2055


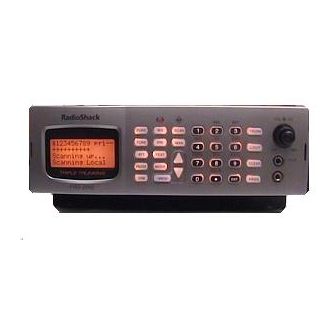
Summary of Contents for Radio Shack PRO-2055
- Page 1 20-428 PRO-2055 1,000 Channel Triple Trunking Mobile/Base Scanner NOTE: Actual product may vary from the images found in this document. Please read this user’s guide before installing, setting up and using your new product www.radioshack.com...
-
Page 2: Din Sleeve And
Contents Thank you for purchasing your PRO-2055 triple trunking scanner from RadioShack. You can mount your scanner in a fi xed position and use it as a base scanner or you can use it as a mobile scanner by mounting it in a vehicle. No additional hardware or add-on cards are needed. -
Page 3: Table Of Contents
The Basics contents your scanner’s keypad your scanner’s rear view your scanner’s display step 1: install your scanner mounting your scanner in your dashboard mobile mounting in your vehicle using your scanner as a base station step 2: power your scanner from a wall outlet through your vehicle’s ignition from your vehicle’s cigarrette lighter... - Page 4 The Basics storing known frequencies into channels CTCSS and DCS storing trunking frequencies into channels storing text tags fi nding and storing active frequencies searching a preprogrammed frequency range band charts searching active frequencies in a range manually tuning a frequency listening to the weather band skywarn using frequency copy...
- Page 5 The Basics trunking how trunking works setting squelch for trunking mode programming trunking frequencies care replacing fuse resetting/initializing your scanner service and repair birdie frequencies specifi cations The FCC wants you to know scanning legally glossary FAQs (Frequenctly Asked Questions) 95 warranty...
- Page 6 The Basics ©2005 RadioShack Corporation. All Rights Reserved. RadioShack, RadioShack.com. Hypersearch, Hyperscan, and Adaptaplug are trademarks used by RadioShack Corporation. Motorola, Smartnet, ASTRO and Privacy Plus are registered trademarks of Motorla Inc. EDACS is a registered trademark of MA-COM Inc. LTR is a registered trademark of EF Johnson.
-
Page 7: Your Scanner's Keypad
The Basics your scanner’s keypad — TRUNK stores the trunking ID code or holds the trunking ID while scanning. — L/OUT locks out selected channels and ID codes, and skips specifi ed frequencies during a search. — CLEAR clears an incorrect entry. —... - Page 8 The Basics FUNC — press in combination with other keys TUNE — Press TUNE, to perform various functions. PAUSE then e or d to tune to a frequency. ATT — Press to activate att enuation (reduce scanner sensitivity, block PAUSE — pauses search strong signals).
-
Page 9: Your Scanner's Rear View
The Basics Press to enter a number or a character (in text mode). ENT — press to ./DELAY — press to enter a confi rm frequency decimal point, space, or hyphen. and text entries. Press to program delay time for a channel/search bank. -
Page 10: Your Scanner's Display
The Basics your scanner’s display... -
Page 11: Step 1: Install Your Scanner
The Basics step 1: install your scanner You can mount your trunking scanner in your vehicle, install it for mobility, or install it as a base station. mounting your scanner in your dashboard If you are unsure about how to install your scanner in your vehicle, consult your automobile manufacturer, dealer, or a qualifi... -
Page 12: Mobile Mounting In Your Vehicle
The Basics To remove your scanner from the DIN sleeve, Note Note insert the two keys straight into the scanner’s front panel. Then, remove the scanner by pulling front panel. When mounting in your dashboard, you will need to connect an external antenna and an external speaker. -
Page 13: Using Your Scanner As A Base Station
The Basics 4. Remove the paper backing from each washer and stick one inside of each bracket’s ear, aligning the washer’s hole with the bracket’s hole. 5. Attach the mounting bracket to your vehicle’s surface using the supplied screws and lockwashers. 6. -
Page 14: Step 2: Power Your Scanner
The Basics step 2: power your scanner You can power your scanner from a wall outlet, through your vehicle’s ignition, or from your vehicle’s cigarette lighter. from a wall outlet 1. Connect the tip of the supplied AC adapter to the DC 13.8V jack at the rear of your scanner. -
Page 15: Through Your Vehicle's Ignition
The Basics through your vehicle’s ignition 1. Disconnect the cable from the negative (-) terminal of your vehicle’s battery. 2. Ground the black wire of the supplied DC power cord to your vehicle’s chassis. Be sure the grounding Note Note screw makes complete contact with the metal frame of your vehicle. -
Page 16: From Your Vehicle's Cigarrette Lighter
The Basics from your vehicle’s cigarrette lighter To power your scanner from a 12V power source in your vehicle, such as a cigarette-lighter socket, you need a 12V, 600 mA DC cigarette-lighter adapter (not supplied), available at your local RadioShack store. 1. -
Page 17: Step 3: Connect Your Scanner
The Basics step 3: connect your scanner connect the supplied antenna Push the antenna onto your scanner’s antenna connector and rotate until it locks into place. Your scanner’s sensitivity to various frequencies depends on its location and the antenna’s length. For best reception, adjust the antenna’s length as follows: Frequency Antenna Length... -
Page 18: Connect An External Speaker Or Headphones
The Basics Your local RadioShack store sells a variety of antennas. Always use 50-ohm coaxial cable, such as RG-58 or RG-8, to connect an outdoor antenna. For lengths exceeding 50 feet, use RG-8 low-loss dielectric coaxial cable. If your coaxial cable does not have a BNC connector, you will also need a BNC adapter (not supplied). - Page 19 The Basics listening safely To protect your hearing, follow these guidelines when you use headphones. • Adjust VOL (volume) to its lowest level before putting on headphones. With the headphones on, adjust VOL to a comfortable level. • Avoid increasing the volume once you set it. Over time, your sensitivity to volume decreases, so volume levels that do not cause discomfort might damage your hearing.
-
Page 20: Quick Start
The Basics quick start To help familiarize yourself with the scanner’s functions, keypad, and available frequencies, you can utilize one of these four features before you begin programming the scanner. Signal Stalker II — searches nearby strong signals quickly. See “Signal Stalker II”. Preprogrammed Search Banks —... - Page 21 The Basics AM mode The AM mode sets the scanner to receive transmissions using amplitude modulation (AM), primarily used for aircraft, military, some amateur radio, and some government transmissions. (Refer to “Specifi cations” for a list of the frequencies covered.) When the scanner receives a transmission on a channel set to the AM mode, it always stops on the transmission.
- Page 22 The Basics DCS (DC) mode DCS mode sets the scanner to receive transmissions using frequency modulation (FM) with Digital Coded Squelch (DCS) subaudible data signaling. DCS is very similar to CTCSS, except that a digital code is transmitted instead of an audio tone. Like CTCSS, DCS allows multiple users to share a single radio frequency without hearing each other’s transmissions.
- Page 23 The Basics this talk group information is also transmitted as subaudible data on each active channel. When the scanner receives a transmission on a channel set to the Motorola mode, it fi rst decodes the talk group ID data included with the transmission. In the open mode, the scanner stops on the transmission and displays the talk group ID on the bottom line of the display.
- Page 24 The Basics To properly map the raw Type I data to the correct fl eet-subfl eet format, you must program the correct fl eet map into the scanner. Fleet map information is widely available on the Internet for most Type I systems in use.
- Page 25 HR order, starting with Memory X01 in the selected bank. Your PRO-2055 scanner features a new tool to help you determine the correct channel mapping for LTR system frequencies. The scanner’s LTR Repeater Finder displays the current Home Repeater when monitoring LTR transmissions in manual mode.
- Page 26 The Basics To determine the correct Home Repeater programming, enter the system channels of an LTR system in any order. Be sure to program the mode for each LTR channel to LT. Listen to each channel one at a time in manual mode and watch for the decoded LTR data at the bottom of the scanner’s display.
- Page 27 The Basics the talk group ID on the bottom line of the display. In the closed mode, the scanner only stops on the transmission if the LTR data matches a talk group ID that you have stored in the bank’s talk group ID list and have not locked out.
- Page 28 The Basics In open mode, the scanner scans signals transmitted in all systems. The scanner stops on any ID code and only uses the ID list to look up ID text tags. In closed mode, the scanner stops only on signals that have an ID code which is found in the ID list for the bank.
-
Page 29: Setting Up Your Scanner
The Basics setting up your scanner turning on the scanner and setting squelch 1. To turn on the scanner, turn VOL clockwise. Multi- system Trunking Scanner appears. After about 3 seconds, you might hear a hissing sound. Then adjust VOL to a comfortable level. 2. -
Page 30: Storing Known Frequencies Into Channels
The Basics weak to understand. Most users prefer to position the squelch control a little bit past the point of threshold to avoid receiving noise or signals that are too weak to understand. storing known frequencies into channels Good references for active frequencies are RadioShack’s Police Call, Aeronautical Frequency Directory, and Maritime Frequency Directory. - Page 31 The Basics Press FUNC. Then press . The bank number Note Note moves in the direction of the arrow pressed. Press FUNC. Then hold down . The bank number moves continuously in the assigned direction. Press . The channel number moves upward one by one.
-
Page 32: Ctcss And Dcs
The Basics quality will not be affected by the offset. After a transmission, the scanner automatically pauses for 2 seconds on this channel before proceeding to the next active transmission. Press DELAY to turn the delay function off or on. See “Using Delay”. - Page 33 Beyond the Basics code will receive all traffi c on the channel, and will instantly decode and display any CTCSS or DCS code that is found with the transmission. You can then store the found code in the channel memory with one keystroke.
- Page 34 Beyond the Basics the scanner in program mode, navigate to the channel you wish to change, and follow the steps above. 6. When stopped on an active conventional channel while scanning, you can press MODE to cycle through the valid modes for that channel, including CTCSS and DCS.
-
Page 35: Storing Trunking Frequencies Into Channels
Beyond the Basics DCS Code Table: storing trunking frequencies into channels 1. Press PROG and FUNC then e or d to select the desired bank to program. 2. Press TRUNK to enter into trunking mode. 3. Repeatedly press MODE to select Motorola, EDACS, or LTR. -
Page 36: Storing Text Tags
Beyond the Basics 5. Enter the UHF trunking frequency and press ENT. 6. Repeat Steps 4 and 5 to enter the other trunking group frequencies for EDACS or additional control channel frequencies for Motorola systems. 7. If necessary, press MODE to change the receiving mode. - Page 37 Beyond the Basics • “H” is the second letter associated with 4 on the keypad. Press 4 then 2. • “A” is the fi rst letter associated with 2 on the keypad. Press 2 then 1. • “M” is the fi rst letter associated with 6 on the keypad.
- Page 38 Beyond the Basics assigning a text tag to a bank 1. Press PROG. 2. Press FUNC then press bank number. Bank X (0 through 9) selected. Fn+CLR to delete all frequencies, TEXT to edit tag appears. 3. Press TEXT, then enter the text using the keypad. 4.
- Page 39 Beyond the Basics M N O 6 then FUNC m n o P Q R S 7 then FUNC p q r s T U V 8 then FUNC t u v W X Y Z 9 then FUNC w x y z .
-
Page 40: Fi Nding And Storing Active Frequencies
Beyond the Basics fi nding and storing active frequencies You can search for transmissions in the scanner’s preprogrammed search bank. The search bank is divided into seven search bands. You can change the search range of Bank SR6 manually by setting the lower and higher ends of the search range. - Page 41 Beyond the Basics Follow these steps to select preprogrammed search bands and search them for active frequencies: 1. Repeatedly press SRCH to select your desired search bank (SR0, SR1, SR2, SR3, SR4, SR5, or SR6). 2. In the marine, CB, and FRS/GMRS/MURS bands, you can directly select a channel or search through the band.
-
Page 42: Band Charts
Beyond the Basics band charts search bank: SR0 marine band Two frequencies are assigned in one channel in Note Note some Marine frequencies. For example, 157.000 and 161.600 are assigned in Channel 20. Receive mode: FM Frequency Frequency (MHz) (MHz) 156.0500 156.2500 156.3000... - Page 43 Beyond the Basics 156.3250 156.3750 156.4250 156.4750 156.5250 156.5750 156.6250 156.6750 156.7250 156.8750 156.9250 156.9750 157.0250 157.0750 157.1250 157.1750 157.2250 157.2750 161.8250 161.8750 157.3250 157.3750 161.9250 161.9750 157.4250 Search bank: SR1 CB band Receive mode: AM Frequency Frequency (MHz) (MHz) 26.9650 26.9750 26.9850...
- Page 44 Beyond the Basics 27.2150 27.2250 27.2550 27.2350 27.2450 27.2650 27.2750 27.2850 27.2950 27.3050 27.3150 27.3250 27.3350 27.3450 27.3550 27.3650 27.3750 27.3850 27.3950 27.4050 Search bank: SR2 FRS/GMRS/MURS Receive Mode: FM Frequency Frequency (MHz) (MHz) 462.5625 462.5875 462.6125 462.6375 462.6625 462.6875 462.7125 467.5625 467.5875...
- Page 45 Beyond the Basics 151.9400 154.5700 154.6000 Search bank: SR3 Police/Fire band Receive Mode: FM Group Frequency Step (kHz) (MHz) 33.420 – 33.980 37.020 – 37.420 39.020 – 39.980 42.020 – 42.940 44.620 – 45.860 45.880 45.900 45.940 – 46.060 46.080 – 46.500 153.770 –...
- Page 46 Beyond the Basics 453.0375 12.5 – 453.9625 458.0375 12.5 – 458.9625 460.0125 12.5 – 460.6375 465.0125 12.5 – 465.6375 851.0125 – 860.9875 866.0125 12.5 – 868.9875 Search bank: SR4 Aircraft Receive mode: AM Frequency (MHz) Step (kHz) 108.000 – 136.99166 8.33 All scanners tune by steps.
-
Page 47: Searching Active Frequencies In A Range
Beyond the Basics Search bank: SR5 Ham band Receive mode: FM Group Frequency (MHz) Step (kHz) 28.0000 – 29.7000 50.0000 – 54.0000 144.0000 – 148.0000 222.0000 – 225.0000 420.0000 – 450.0000 12.5 1240.0000 – 1300.0000 6.25 search bank: SR6 programmable limit search Receive mode: FM or AM (Default setting) searching active frequencies in a range... - Page 48 Beyond the Basics 5. Enter your desired upper-end frequency and press ENT. 6. Press SRCH to start searching. 7. Rotate SQ clockwise and leave it set to a point just after the rushing sound stops. When the scanner fi nds an active frequency, it stops searching. You can copy and save a frequency into a specifi...
-
Page 49: Manually Tuning A Frequency
Beyond the Basics frequency or press to start searching down from the highest frequency. If you press PAUSE while searching, the scanner Note Note stops searching and *** PAUSED *** appears. Press PAUSE again, and the scanner resumes searching. manually tuning a frequency You can manually set the scanner to move through all receivable frequencies, or select a specifi... -
Page 50: Listening To The Weather Band
Beyond the Basics listening to the weather band The FCC (Federal Communications Commission) has allocated channels for use by the National Oceanic and Atmospheric Administration (NOAA). Regulatory agencies in other countries have also allocated channels for use by their weather reporting authorities. NOAA and your local weather reporting authority broadcast your local forecast and regional weather information on one or more of these channels. - Page 51 Beyond the Basics 1. Press WX until you identify the weather station with the strongest signal for your location. 2. Press FUNC, and then PROG to access the FIPS code entry table. 3. Use the e or d keys to select the desired FIPS code storage location.
-
Page 52: Skywarn
Beyond the Basics signal before the fi ve minute time out, press any key except DIM. 7. Press FUNC, and then WX to initiate SAME standby. The scanner will monitor the selected weather radio station for alerts with FIPS codes that match the codes you entered in the FIPS entry table. -
Page 53: Using Frequency Copy
Beyond the Basics fourth line. The scanner has 3 Skywarn channels. Press to select different Skywarn channels. To activate this function, you must program your Note Note desired Skywarn frequencies into the Skywarn channels. using frequency copy You can copy a frequency into a specifi ed channel, a vacant channel in a specifi... - Page 54 Beyond the Basics copying a frequency into an empty channel within a bank You can copy a frequency into a vacant channel in a specifi ed bank when the scanner stops on the frequency during search or tune mode. 1. Press FUNC then ENT when you fi nd a frequency you want to copy.
-
Page 55: Signal Stalker Ii
Beyond the Basics Signal Stalker II Your scanner’s Signal Stalker II feature provides a powerful new tool for you to rapidly detect, monitor and store frequencies for nearby radio transmissions. The Signal Stalker II feature is similar in functionality to portable frequency counters that cost much more than your scanner, but provides many advantages over typical portable frequency counters. - Page 56 Beyond the Basics frequencies only. To change the all bands to police/fi re or vice versa, press FUNC then You can also turn on/off frequency sub-bands using the corresponding number keys while Signal Stalker II is active. Priority mode is not available while using the Notes Notes Signal Stalker II.
-
Page 57: Scanning The Channels
Beyond the Basics L/OUT output power. You can press when the Signal Stalker II stops on these undesired transmissions to prevent the Signal Stalker II from stopping on them in future sweeps, however, the Signal Stalker II will still see their RF signal energy when sweeping through the 1 MHz segment. - Page 58 Beyond the Basics turning channel-storage banks off and on To turn off banks while scanning, press the bank’s number key so the bank’s number disappears. For example, to turn off bank 1, press . The scanner does not scan any of the channels within the banks you turned off.
-
Page 59: Using Ctcss And Dcs
Beyond the Basics using CTCSS and DCS Your scanner’s advanced, CTCSS and DCS decoder allows you to listen only to the group that is of interest to you by specifying the group’s specifi c CTCSS or DCS code for a certain frequency. CTCSS and DCS can also help reduce instances where interfering signals cause your scanner to stop on one channel. -
Page 60: Deleting All Frequencies In A Channel Bank
Beyond the Basics 4. Press PROG to enter the program mode. M changes to P. 5. Press FUNC. 6. Press CLEAR. The frequency number changes and 0.0000 appears. deleting all frequencies in a channel bank 1. Press PROG. 2. Press FUNC then the bank number you want to clear. Bank X selected. -
Page 61: Locking Out Channels Or Frequencies
Beyond the Basics Delay is automatically set as the default for each Notes Notes channel when you turn on the scanner. To turn delay on or off, press DELAY. (delay on) or (delay off) appears on the display. locking out channels or frequencies You can scan existing channels or search frequencies faster by locking out channels or frequencies that have a continuous transmission, such as a weather channel. - Page 62 Beyond the Basics You can lock out as many as 50 frequencies in each bank. If you try to lock out more, L/O Memory Full! appears. If you lock out all frequencies in one search bank and only this search bank is activated, All ranges Locked out! appears and the scanner does not search.
-
Page 63: Priority
Beyond the Basics If all locked-out frequencies are cleared within a bank, No Lockout appears. clearing all locked-out frequencies in a search bank 1. Press SRCH. 2. Select the search bank in which you want to clear all locked-out frequencies. 3. - Page 64 Beyond the Basics only when the scanner detects the weather alert tone. This scanner cannot set a channel as the priority channel if the channel’s receive mode is MOT, ED, or LTR. If you press PAUSE while the scanner receives the priority channel, the scanner displays *** PAUSED *** and stays on the priority channel even after the transmission fi...
-
Page 65: Changing The Receive Mode
Beyond the Basics on the display while scanning. If the scanner Priority Channel detects activity on the priority channel, appears. Or if the scanner detects a weather alert Priority Channel! tone in Priority WX mode, appears Weather ALERT for 3 seconds then changes to and the scanner sounds an alert tone. -
Page 66: Using The Attenuator
Beyond the Basics DC – accesses the FM mode, DCS System MO – accesses the FM Mode, Motorola Trunking System (with 4- or 5-digit ID code) ED – accesses the FM Mode, EDACS Trunking System (with 4-digit decimal ID code or 5-digit AFS code) LT –... -
Page 67: Turning The Key Tone On And Off
Beyond the Basics attenuator on or off. appears on the second line. Press FUNC and then ATT again to turn off the global Normal ATT. attenuation mode. appears on the bottom line for about 2 seconds. If you turn on the attenuator, the scanner might not Note Note receive weak signals. -
Page 68: Cloning The Programmed Data
You can transfer the programmed data to and from another PRO-2055 or PRO-97 scanner using an optional connecting cable with 1/8-inch (3.5 mm) phone plugs on both ends (not supplied, available at your local RadioShack store). -
Page 69: Trunking
(see “Storing Known Frequencies into Channels”) and input ID codes in the ID memory (see “Storing Talk Group IDs”). Your PRO-2055 automatically calculates Motorola voice channel frequencies when it decodes the control channel. This eliminates the need to enter all the Motorola group frequencies. - Page 70 Beyond the Basics channel memory location number on the third line and the Motorola ID number on the bottom line. To listen to the transmission, the mode of the Note Note programmed channel must be the same as that of the trunking channel (MO, ED, or LT).
-
Page 71: Setting Squelch For Trunking Mode
Beyond the Basics Motorola (above 406 MHz range), the scanner monitors the control channel between each transmission to identify talk groups. For some Motorola (under 512 MHz range) and LTR systems, the scanner uses the subaudible data sent with each transmission to identify talk groups. - Page 72 Beyond the Basics order. For example, home repeater order 1 would go into channel 01 for the current bank, and home repeater order 2 would go into channel 02. Follow these steps to program trunked frequencies: 1. Press and select the bank. PROG To move through the bank selection faster, press Note...
- Page 73 Beyond the Basics 4. Press PROG to enter the program mode. 5. Enter the desired trunking frequency then press ENT to store. 6. To enter additional trunking frequencies as subsequent channels in the same bank, press PROG or e to access the next open channel then enter the frequencies.
- Page 74 Beyond the Basics frequency. If the dual entry is intentional press ENT to accept. You may replace any frequency by selecting the bank and channel, pressing PROG and entering the new frequency. If you make an error in the entry process, press CLEAR as often as needed to erase the incorrect data.
- Page 75 Beyond the Basics 4. Press FUNC then 2. The display indicates Custom Range 1/3 on fi rst line, Base: 406.0000 on the second line, Offset: 380 on the third line and Step:25.0kHz on the bottom line. 5. While B in Base blinks, if necessary, press the desired Base frequency with the number keys and press ENT.
- Page 76 Beyond the Basics 2. Press FUNC then e or d to select the desired bank. 3. Press MODE and select Motorola trunking mode. 4. Press FUNC then 3. Use Up/Down keys to set 800MHz Motorola ch plan NORMAL appears. 5. Press e or d to select NORMAL or SPLINTER and press ENT.
- Page 77 Beyond the Basics 4. Enter the size code supplied with the Type I system information, referring to the instruction that appears on the display. If the information was not supplied, try the following common fl eet maps. Block Size Code —...
- Page 78 Beyond the Basics 5. Press ENT for each entry. If you make a mistake, press CLEAR and enter the correct size code. The default setting of the bank is for Motorola Type Note Note II. However, if you set Type I and you want to return to Type II, enter 15 at Step 4.
- Page 79 Beyond the Basics ID save X-XX The fi rst is the sub-bank number (0-4) in the bank. is the number of IDs from (00-29) in each sub-bank. If the ID has already been stored when you press TRUNK, ID was saved appears. When you try to store more than 150 talk group Note Note...
- Page 80 Beyond the Basics 8. If you want to tag the ID, press TEXT, enter the desired text tag for the ID. Then press ENT (see “Text Input Chart”). 9. To store the next ID memory in sequence, press e and repeat Step 7. 10.
- Page 81 Beyond the Basics talk group ID hold You can set your scanner to follow a trunking signal that you want to track during scanning. While the scanner is stopped on a voice channel (VC appears), hold down TRUNK until ID hold ON. appears. When ID hold is activated and the scanner receives a voice channel, the scan indication at the fi...
- Page 82 Beyond the Basics 3. Press FUNC and the number of the sub-bank you desire to turn on or off. For example to turn sub- bank 4 on or off, press FUNC. Then press 4. locking out talk group IDs 1. Press PROG. You can only lock out talk group IDs when the Note Note...
- Page 83 Beyond the Basics 1. Press FUNC then ./DELAY while you are programming the trunked ID. Use Up/Down keys to set ID Delay. ENTER key saves. 2.0 seconds appears. 2. Press e or d to select None, 0.5, 1.0, 1.5, 2.0, 2.5, 3.0, 3.5, or 4.0 seconds.
- Page 84 Beyond the Basics 1. Press PROG. 2. Press TRUNK to enter a talk group ID memory mode. 3. Select a talk group ID bank using FUNC, e or d. 4. Press FUNC then 6. Clear entire list ? Press 1 to clear all, any other key aborts appears.
-
Page 85: Care
Beyond the Basics care Keep the scanner dry; if it gets wet, wipe it dry immediately. Use and store the scanner only in normal temperature environments. Handle the scanner carefully; do not drop it. Keep the scanner away from dust and dirt, and wipe it with a damp cloth occasionally to keep it looking new. -
Page 86: Service And Repair
Beyond the Basics initializing your scanner Initializing your scanner clears all information stored in your scanner’s working memory. Initialize your scanner only when you are sure it is not working properly. 1. Turn off the scanner, and turn it on again. Multi- system Trunking Scanner appears. - Page 87 Beyond the Basics transmissions on the same frequencies. If you program one of these frequencies, you hear only noise on that frequency. If the interference is not severe, you might be able to turn SQ clockwise to omit the birdie. To fi...
-
Page 88: Specifi Cations
Beyond the Basics specifi cations Frequency Coverage: 25–54 MHz ............(in 5 kHz steps) 108–136.99166 MHz ........(in 8.33 kHz steps) 137–174 MHz ..... (in 5, 6.25, 7.5, or 12.5 kHz steps) 216.0025–225.0000 MHz ........ (in 5 kHz steps) 225.025–405.975 MHz ........(in 25 kHz steps) 406–512 MHz ..........(in 6.25 kHz steps) 806–823.9875 MHz ........ - Page 89 Beyond the Basics 806–960 MHz ..............0.7 µV 1240–1300 MHz ............. 0.7 µV 25–54 MHz ................ 1 µV 108–136.99166 MHz ............1 µV 137–174 MHz ..............1.5 µV 216–225 MHz ..............3 µV 406–512 MHz ..............2 µV 806–960 MHz ..............2 µV 1240–1300 MHz ..............
- Page 90 Beyond the Basics Operating Temperature ....–14 to 140° F (–20 to 60°) IF Rejection: 380.8 MHz at 154.1 MHz ..........60 dB 21.4 MHz at 154.1 MHz ..........100 dB Squelch Sensitivity: Threshold (FM and AM) ..........0.5 µV Tight (FM) ................
-
Page 91: The Fcc Wants You To Know
Beyond the Basics The FCC wants you to know This equipment has been tested and found to comply with the limits for a scanning receiver, pursuant to Part 15 of the FCC Rules. These limits are designed to provide reasonable protection against harmful interference in a residential installation. - Page 92 Beyond the Basics unless you have the consent of a party to the communication (unless such activity is otherwise illegal). This scanner has been designed to prevent reception of illegal transmissions. This is done to comply with the legal requirement that scanners be manufactured so as to not be easily modifi...
-
Page 93: Glossary
Beyond the Basics glossary Frequency — the receving signal location (expressed in MHz). To fi nd active frequencies, you can use frequency guides available from your local RadioShack store, frequency listings posted on the Internet, or the built-in search function. Channels —... - Page 94 Beyond the Basics stops on a transmission in the Motorola or EDACS mode, it checks to see if the ID has been stored in the associated ID list. In the Closed Mode, the scanner only stops on the transmission and displays its text tag if you have stored and not locked out the ID.
-
Page 95: Faqs (Frequenctly Asked Questions)
Beyond the Basics FAQs (Frequently Asked Questions) The scanner is not working at all. What’s wrong? The AC or DC adapter or DC cable might not be connected. Be sure the adapter/cable’s barrel plug is fully inserted into the PWR DC 13.8V jack. The center tip of the adapter/cable’s barrel plug must be set to positive. -
Page 96: Warranty
This product is warranted by RadioShack against manufacturing defects in material and workmanship under normal use for one (1) year from the date of purchase from RadioShack company-owned stores and authorized RadioShack franchisees and dealers. For complete warranty details and exclusions, check with your local RadioShack store.
Need help?
Do you have a question about the PRO-2055 and is the answer not in the manual?
Questions and answers