Table of Contents
Advertisement
Quick Links
Table of Contents
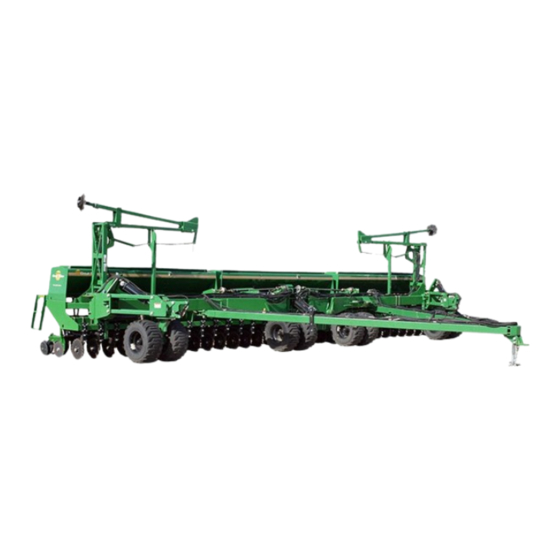
3-Section 40-Foot Heavy Duty Drill
Read the operator's manual entirely. When you see this symbol, the subsequent
!
instructions and warnings are serious - follow without exception. Your life and
the lives of others depend on it!
Illustrations may show optional equipment not supplied with standard unit.
ORIGINAL INSTRUCTIONS
© Copyright 2018
Table of Contents
Index
Operator Manual
3S-4010HD and 3S-4010HDF
Manufacturing, Inc.
www.greatplainsmfg.com
Printed 07/19/2018
Index
29121
EN
196-522M
Advertisement
Chapters
Table of Contents
Troubleshooting

Related Manuals for GREAT PLAINS 3S-4010HDF


Summary of Contents for GREAT PLAINS 3S-4010HDF
- Page 1 Table of Contents Index Operator Manual 3S-4010HD and 3S-4010HDF 3-Section 40-Foot Heavy Duty Drill Manufacturing, Inc. www.greatplainsmfg.com Read the operator’s manual entirely. When you see this symbol, the subsequent instructions and warnings are serious - follow without exception. Your life and...
- Page 2 Machine Identification Record your machine details in the log below. If you replace this manual, be sure to transfer this information to the new manual. If you or the dealer have added options not originally ordered with the machine, or removed options that were originally ordered, the weights and measurements are no longer accurate for your machine.
-
Page 3: Table Of Contents
Great Plains Manufacturing, Inc. provides this publication “as is” without warranty of any kind, either expressed or implied. While every precaution has been taken in the preparation of this manual, Great Plains Manufacturing, Inc. assumes no responsibility for errors or omissions. Neither is any liability assumed for damages resulting from the use of the information contained herein. - Page 4 Cover Index Cover Index...
-
Page 5: Signal Words
Be Familiar with Safety Decals Read and understand “Safety Reflectors and Decals” on page 6, thoroughly. Read all instructions noted on the decals. Keep decals clean. Replace damaged, faded and illegible decals. Great Plains | 196-522M | 07/19/2018 Table of Contents Index... - Page 6 A person touching almost any metal part can complete the circuit to ground, resulting in serious injury or death. At higher voltages, electrocution can occur without direct contact. Avoid overhead lines during seed loading/unloading and marker operations. Great Plains | 196-522M | 07/19/2018 Table of Contents Index...
- Page 7 Because operating equipment safely requires your full attention, avoid wearing entertainment headphones while operating machinery. Great Plains | 196-522M | 07/19/2018 Table of Contents Index...
- Page 8 Inspect all parts. Make sure parts are in good condition and installed properly. Remove buildup of grease, oil or debris. Remove all tools and unused parts from drill before opera- tion. Great Plains | 196-522M | 07/19/2018 Table of Contents Index...
- Page 9 Make sure all persons are clear of working area. Do not turn tractor too tightly, causing drill to ride up on wheels. This could cause personal injury or equipment damage. Great Plains | 196-522M | 07/19/2018 Table of Contents Index...
- Page 10 Keep lights in operating condition. Keep all safety decals clean and legible. Replace all damaged or missing decals. Order new decals from your Great Plains dealer. Refer to this section for proper decal placement. When ordering new parts or components, also request cor- responding safety decals.
- Page 11 848-512C WARNING: Cancer and Reproductive Harm - www.P65Warnings.ca.gov 848-512C 29122 On tongue at hitch; 1 total Danger: Pinch/Crush Hazard 818-590C 29122 On outside of left tongue near hitch; 1 total Great Plains | 196-522M | 07/19/2018 Table of Contents Index...
- Page 12 818-188C Rev. C 818-188C 29122 On outside of left tongue near hitch; 1 total Warning: High Pressure Fluid 29122 818-339C On outside of left tongue near hitch; 1 total Great Plains | 196-522M | 07/19/2018 Table of Contents Index...
- Page 13 Watch your step when climbing ladder or walking on walkboard. 838-102C 838-102C Top forward at each walkboard ladder; 2 total Caution: Tires Not A Step 818-398C Top face, each side of rockshaft; 2 total 29122 Great Plains | 196-522M | 07/19/2018 Table of Contents Index...
- Page 14 Cancer and Reproductive Harm - www.P65Warnings.ca.gov 818-587C 29122 On outside of left tongue near hitch; 1 total Caution: 85 PSI Tire Pressure 848-147C On rim of each wheel; 29122 6 total Great Plains | 196-522M | 07/19/2018 Table of Contents Index...
-
Page 15: Models Covered
Table of Contents Index Introduction Introduction Great Plains welcomes you to its growing family of new product owners. Your 3-Section 40-Foot Heavy Duty Drill has been designed with care and built by skilled workers using quality materials. Proper setup, maintenance, and safe operating practices will help you get years of satisfactory use from the machine. -
Page 16: Owner Assistance
Model Number:__________________________ Serial Number: __________________________ Your Great Plains dealer wants you to be satisfied with your new drill. If you do not understand any part of this manual or are not satisfied with the service received, please take the following actions. -
Page 17: Hitch Options
Always use a locking-style hitch pin sized to match the holes in the hitch and drawbar, and at least 1 in (3.8cm) in diameter. Figure 4 29182 Hitch Options Great Plains | 196-522M | 07/19/2018 Table of Contents Index... -
Page 18: Tractor Electrical Connections
Refer to Figure 7 Plug drill electrical lead into tractor seven-pin connector. If your tractor is not equipped with a seven-pin connector, contact your dealer for installation. Figure 7 26467 Lighting Connector Great Plains | 196-522M | 07/19/2018 Table of Contents Index... - Page 19 Refer to Figure 9 If the drill is equipped with the optional shaft monitor, mate the connector for the cab display. “Shaft Monitor” page 82 ordering information. Figure 9 26468 Shaft Monitor Connector Great Plains | 196-522M | 07/19/2018 Table of Contents Index...
-
Page 20: Lock Cylinders
Refer to Figure 10 Current Style Color Coded Hose Handles Great Plains hydraulic hoses have color coded handle grips to help you hookup hoses to your tractor outlets. Hoses that go to the same remote valve are marked with the same color. -
Page 21: Marker Extension
10in (25cm) Rows the mark left in the ground by the marker. The 3S-4010HD and 3S-4010HDF is symmetrical, and the values are the same on each side and independent of next pass direction. On a dual-marker drill, set each side. - Page 22 7. Slide the tube in or out to change extension. Secure Figure 14 18878 the nuts. Adjust Marker Extension 8. Pull forward and re-measure new mark. Return to step 6 if further adjustment is needed. Great Plains | 196-522M | 07/19/2018 Table of Contents Index...
-
Page 23: Operating Instructions
A cab console switch box provides clutch control by drill section for point row operation. Seeding depth and furrow coverage are controlled by Figure 15 29183 row unit down pressure and depth adjustments. 3S-4010HDF Folded Great Plains | 196-522M | 07/19/2018 Table of Contents Index... -
Page 24: Raising And Lowering
Set circuit lever to neutral. 2. Remove lock channels and stow them at their Figure 17 29081 storage locations. Rockshaft Lock Channel 3. Retract lift cylinders and fully lower drill. Great Plains | 196-522M | 07/19/2018 Table of Contents Index... -
Page 25: Lock Channels
Park, has brakes set, or otherwise cannot move. 1. Raise drill with lift cylinders until cylinders are fully extended. Figure 20 27183 2. Install lift locks. See “Raising” on page 20. Swivel Lock Cylinder Great Plains | 196-522M | 07/19/2018 Table of Contents Index... -
Page 26: Unfolding
Center section of drill can move forward during folding if trac- lock channels. tor is in Park, has brakes set, or otherwise cannot move. 6. Lower drill. See “Lowering” on page 20. Great Plains | 196-522M | 07/19/2018 Table of Contents Index... -
Page 27: Transport Weight
At higher voltages, electrocution can occur without direct contact. EXCESSIVE SPEED HAZARD Great Plains recommends transporting the drill empty. To Prevent Serious Injury or Death: Although designed for highway movement when loaded, Do Not exceed 20 mph maximum transport the additional weight of seed may cause the drill to speed. - Page 28 Comply with all national, regional and local laws when transporting on public roads. Watch Traffic The seed boxes obstruct a portion of your rear view. Be prepared for sudden maneuvers from following vehicles. Great Plains | 196-522M | 07/19/2018 Table of Contents Index...
-
Page 29: Loading Materials
6. Take all necessary materials safety precautions if the seed is treated. 7. Load seed evenly into compartments. To reduce wear on unused boxes that may also be present, remove final drive chain for Small Seeds box. Great Plains | 196-522M | 07/19/2018 Table of Contents Index... - Page 30 Table of Contents Index Operating Instructions HDF Seeding with Both Compartments A 3S-4010HDF drill can use the fertilizer compartment for seed (which is still metered by the main seed box meters). 1. Clean out both boxes. See “Main Seed Box Clean- Out”...
-
Page 31: Loading Fertilizer
3S4010HD Table of Contents Index Operating Instructions Loading Fertilizer The 3S-4010HDF models are equipped with a fertilizer 100% compartment capable of planting seed only, or seeding Fert. Seed Fert. Seed and applying fertilizer in the same field pass. Use only dry, granular fertilizer in the fertilizer box. - Page 32 Flap flips forward to block passage. The flap top edge is secured to the dividers. Rotate the bent clips to engage the edge of the flap, and tighten the knobs. Figure 30 16383 Seed/Fertilizer Flap Closed Great Plains | 196-522M | 07/19/2018 Table of Contents Index...
-
Page 33: Loading Small Seeds
5. To reduce wear, remove transmission (driver/driven) chains for main seed boxes. If you experience excessive seed shifting in your planting, consider installing additional optional partitions (page 86). Figure 31 29084 Small Seeds Main Box Open Great Plains | 196-522M | 07/19/2018 Table of Contents Index... -
Page 34: Single Marker Operation
• Begin to extend the opposite marker. • Retract it, and extend the original marker. Both markers unfolded: • Fully extend one side. • Momentarily Retract, then Extend to deploy opposite side. Great Plains | 196-522M | 07/19/2018 Table of Contents Index... -
Page 35: Acremeter Operation
Figure 33 29184 Be careful not to scratch the window. Meter Display (Acres) When active the lower left corner displays the revolutions per acre for which the meter is factory-programmed. Great Plains | 196-522M | 07/19/2018 Table of Contents Index... -
Page 36: Point Row
If lamp fails to illuminate with set ON, check the fuse . If open, check for damaged cable / failed clutch. Great Plains | 196-522M | 07/19/2018 Table of Contents Index... -
Page 37: Shaft Monitor Operation (Option)
Electric Clutch Lockup & Use only the provided 14mm length bolts. Longer bolts will damage the clutch. Shorter bolts may not effect a lock-up. Replacement bolts are Great Plains part number 802-782C. Figure 36 26168 Clutch Plate Nearly at Cutout... -
Page 38: Field Operations
5. Raise drill for turns (seed flow stops automatically). 6. Retract marker and make turn. Machine Damage Risk: Do not make short radius turns with the drill in the ground. Great Plains | 196-522M | 07/19/2018 Table of Contents Index... -
Page 39: Parking
5. Plug or cap seed delivery tubes to prevent pest entry. 6. Grease exposed cylinder rods to inhibit rust. 7. Use touch-up paint to cover scratches, chips and worn areas to prevent rust. Great Plains | 196-522M | 07/19/2018 Table of Contents Index... -
Page 40: Marker Adjustments
Planting Depth The 3S-4010HD and 3S-4010HDF has frame-mounted or unit-mounted coulters, and double-disk parallel-arm Setting nominal planting depth, and achieving it openers with depth-controlling press wheels. This... -
Page 41: Opener Plugging
, or even in (6mm) above FMC Coulter to Opener Depth seeding depth. In addition to checking depths at setup, be sure to check actual seeding results while planting. Great Plains | 196-522M | 07/19/2018 Table of Contents Index... -
Page 42: Coulter Spring
11. Raise and lower several times and confirm that the drill stops consistently at the new height. Running with the front tires floating or skimming on the ground will cause uneven coulter depth and may cause uneven seed depth. Great Plains | 196-522M | 07/19/2018 Table of Contents Index... - Page 43 6. Tighten the four U-bolts 7. Lower the drill to planting height and pull forward 30 feet (10m). 8. Check coulter blade to opener blade (furrow centerline) alignment. Great Plains | 196-522M | 07/19/2018 Table of Contents Index...
-
Page 44: Frame Height Without Frame-Mounted Coulters
Use these instructions with a drill having no coulters, or having unit-mounted coulters. Adjustments to individual unit-mounted coulters themselves are on page 45. If the drill has frame-mounted coulters, use the height procedure on page 37. Great Plains | 196-522M | 07/19/2018 Table of Contents Index... - Page 45 (above), or the wings may not be level. See “Leveling Drill” on page 65. Great Plains | 196-522M | 07/19/2018 Table of Contents Index...
- Page 46 Make sure the drill is level and the lift system bled and re- phased before adjusting the tool bar height. Running with the front tires floating or skimming on the ground will cause uneven coulter depth and may cause uneven seed depth. Great Plains | 196-522M | 07/19/2018 Table of Contents Index...
-
Page 47: Rate Setting
500 lbs (227 kg) per wing, or 1000 lbs (454 kg) per kit. The weights required are common “suitcase” tractor weights, and are widely available, although not supplied by Great Plains. Great Plains recommends loading no more than three sets of brackets, representing 3000 lbs (1361 kg) total. Figure 48 27068 Installing Frame Weights Do not add weight to the center section. -
Page 48: Row Unit Lock-Up
10HD Series Row Unit Adjustments Refer to Figure 49 (depicting an opener populated with optional accessories) From front to back, a Great Plains 10HD Series row unit can include the following capabilities (some optional): 1. Unit-Mounted Coulter (UMC): optional UMCs are used instead of frame-mounted coulters and are often preferred where soils are not rocky. - Page 49 in (10mm) below Figure 51 29125 in (19mm) below Coulter Blade Mounting Holes If a worn coulter cannot be adjusted to satisfactory operating depth, replace the coulter blade. Great Plains | 196-522M | 07/19/2018 Table of Contents Index...
- Page 50 At several row units, inspect the furrow created by the opener discs and closed by the press wheels. & Be sure to inspect rows both in and out of tire tracks. Inspect Furrow Here Figure 53 27064 Checking Furrow Great Plains | 196-522M | 07/19/2018 Table of Contents Index...
- Page 51 If you cannot achieve enough down force, adding a weight kit may help. See “Frame Weights” on page 43. Great Plains | 196-522M | 07/19/2018 Table of Contents Index...
- Page 52 Note 1: Setting to this down-force on all rows of a drill may require Markers and/or Weight sets Note 2: Setting this down-force on all rows require Markers and/or Weight sets due to frame-mounted coulters Great Plains | 196-522M | 07/19/2018 Table of Contents...
- Page 53 (and Small Seeds Tube Plug differ for opposing vs. concentric passes). When removing plugs to restore rows to operation, be sure to not disturb a factory-installed plug. Great Plains | 196-522M | 07/19/2018 Table of Contents Index...
-
Page 54: Lock-Up Pin
4. Remove the pin from the storage hole and insert and secure it in the lock-up hole. 5. Lower row unit. Parallel arm rests on lock-up pin. 6. Repeat for all rows needing lock-up. Figure 59 21981 Row Lock-Up Great Plains | 196-522M | 07/19/2018 Table of Contents Index... - Page 55 3. To reduce the spacing between the discs (the normal case), move one spacer washer from the inside to the outside of the disc. 4. Re-assemble and check disc contact. Figure 61 26385 Adjusting Disk Spacers Great Plains | 196-522M | 07/19/2018 Table of Contents Index...
- Page 56 To lock up Seed-Lock wheels: 1. Pull firming-wheel arm up as high as possible. 2. Flip the lock tip to hold the arm up. Figure 63 27072 Seed-Lok™ Lock-Up Great Plains | 196-522M | 07/19/2018 Table of Contents Index...
-
Page 57: Press Wheel Adjustment
Adjustments Press Wheel Adjustments Opener Depth (Press Wheel Height) Seeding depth on 3S-4010HD and 3S-4010HDF is set by frame-mounted coulter depth (if installed) and row unit depth. Whether frame-mounted coulters are installed or not, set frame height (page 37 or page 40) before making row unit depth adjustments. -
Page 58: Marker Chain Length
Correct this condition by lengthening chain one or two links. Figure 68 21888 Marker Chain Length Great Plains | 196-522M | 07/19/2018 Table of Contents Index... -
Page 59: Seed Plug
Check all stages of chains from ground drive Chain break wheels to meter boxes. Seed run-out Check seed box. Obstruction in meter. Clean-out meter. Seed plugs installed Remove any unintended seed tube plugs. Great Plains | 196-522M | 07/19/2018 Table of Contents Index... - Page 60 Bent or twisted opener frame Replace opener frame. Meter flutes locked up or Obstruction(s) in meter cups Clean out cups. shaft twisted Treatment build-up in cups Disassemble and clean cups/flutes. Great Plains | 196-522M | 07/19/2018 Table of Contents Index...
- Page 61 Drill hunts in transport Worn skid blocks Replace blocks or add shims Locks not engaged Check lock operation Caster detent pressure and caster pressure Adjust casters (page 70). plate not set properly Great Plains | 196-522M | 07/19/2018 Table of Contents Index...
-
Page 62: Lock-Up, Clutch
Disassemble and de-grease clutches. CAL mode on Move Master switch handle from CAL to ON. meters always on height switch always on Check adjustment of height switch (page 70). Great Plains | 196-522M | 07/19/2018 Table of Contents Index... -
Page 63: Maintenance And Lubrication
Check fittings for evidence of leaks. 6. Keep disk scrapers properly adjusted. 7. Replace any worn, damaged or illegible safety decals. Order new decals from your Great Plains dealer. See “Safety Reflectors and Decals” on page 6. Great Plains | 196-522M | 07/19/2018... -
Page 64: Materials Clean-Out
To aid clean out, lift vinyl cover shield and spray into fertilizer trays (with clean-out door open). Let drill boxes dry before closing clean-out doors. Figure 71 16382 Dew Shield at Openings Great Plains | 196-522M | 07/19/2018 Table of Contents Index... - Page 65 Push new seed flap down through metal bracket until flap snaps into place with “T” top resting on top of bracket. Figure 73 31047 816-302C Seed Tube Flap Great Plains | 196-522M | 07/19/2018 Table of Contents Index...
-
Page 66: Chain Maintenance
Refer to Figure 75 (arrow shows chain direction) Install clip with open end facing away from direction of Figure 75 26482 chain travel (shown by gray or striped arrows in chain Chain Clip Orientation routing diagrams). Great Plains | 196-522M | 07/19/2018 Table of Contents Index... -
Page 67: Bleeding Hydraulics
3. Crack fittings at rod end of cylinders. Retract cylinders to purge remaining air from system. Tighten fittings. 4. Repeat step 2 and step 3. 5. Re-pin small lock cylinders. Great Plains | 196-522M | 07/19/2018 Table of Contents Index... -
Page 68: Adjusting Fold Cylinders
If not repeat above steps until full open and full closed are achieved. Figure 76 27186 Fold Cylinder Shims Great Plains | 196-522M | 07/19/2018 Table of Contents Index... -
Page 69: Leveling Drill
6. Repeat the steps above until the drill is level end-to- end when drilling in actual seeding conditions. a. If row unit settings are not equal, they can cause section heights to be dissimilar. Balance rows before adjust frame level. Great Plains | 196-522M | 07/19/2018 Table of Contents Index... - Page 70 Drill should run with frame level or slightly lower in the front. Adjust eyebolts as needed. a. If openers are not level, or at correct depth, adjust depth and down-force settings before adjusting frame level. Great Plains | 196-522M | 07/19/2018 Table of Contents Index...
-
Page 71: Section Alignment
If you have trouble getting a section aligned, it may necessary adjust fold cylinders, “Adjusting Fold Cylinders” on page 64. Do not over-adjust or you may cause fold latching problems. Figure 80 27119 Section Alignment Great Plains | 196-522M | 07/19/2018 Table of Contents Index... - Page 72 Tighten bolts. & The two in hex shafts should have a (3.2mm) gap between them when the jaws have full contact. Figure 82 29220 Transfer Drive Jaws Great Plains | 196-522M | 07/19/2018 Table of Contents Index...
-
Page 73: Tongue Spacer Block
It is normal for the tongue assembly to rotate slightly when the wings move up and down independently. Adjusting tongue shims does not eliminate this. Figure 83 20362 Tongue Spacer Blocks Great Plains | 196-522M | 07/19/2018 Table of Contents Index... -
Page 74: Height Switch
If the caster is oscillating during transport turns, adjust the pressure plate bolt Figure 85 29224 Rear Caster Adjustments (left side shown) Great Plains | 196-522M | 07/19/2018 Table of Contents Index... -
Page 75: Marker Maintenance
Never allow anyone near the drill when folding or unfold- around another loosened fitting. Tighten that fitting. ing the markers. Repeat process until all loosened fittings have been bled and tightened. Great Plains | 196-522M | 07/19/2018 Table of Contents Index... -
Page 76: Marker Speed
Excessive [un]folding speed could damage markers and void the warranty. After adjusting the folding speed, tighten jam nuts on hex Figure 88 14048 adjustment screws to hold settings. Sequence Valve Adjustment Great Plains | 196-522M | 07/19/2018 Table of Contents Index... -
Page 77: Marker Shear Bolt
If grease-seal cap for marker-disk-hub bearings is damaged or missing, disassemble and clean hub. Repack with grease and install a new seal or grease cap. Figure 90 18795 Marker Bearing and Cap Great Plains | 196-522M | 07/19/2018 Table of Contents Index... -
Page 78: Lubrication
On rear casters, with wheels in trail, outside zerk is caster detent, and inside zerk is pressure plate pin (See page 70 for adjustments. See page 80 for 29073 pressure plate zerk.). Great Plains | 196-522M | 07/19/2018 Table of Contents Index... - Page 79 Type of Lubrication: Grease Quantity: Until grease emerges 29079 Gauge Wheel Assembly Pivot 1 zerk each of 2 pivots; 2 total Type of Lubrication: Grease Quantity: Until grease emerges 20320 Great Plains | 196-522M | 07/19/2018 Table of Contents Index...
-
Page 80: Parallel Arm
Zerks are on inside faces of cross-tubes between arms. Type of Lubrication: Grease Quantity: Until grease emerges 29073 Wing Flex Pivots 1 zerk each of 2 pivots; 2 total Type of Lubrication: Grease Quantity: Until grease emerges 27191 Great Plains | 196-522M | 07/19/2018 Table of Contents Index... - Page 81 Type of Lubrication: Grease Quantity: Until grease emerges 29071 Parallel Arm Lift Cylinder Pins 1 zerk each rod-end cylinder pin; 4 total Type of Lubrication: Grease Quantity: Until grease emerges 29073 Great Plains | 196-522M | 07/19/2018 Table of Contents Index...
- Page 82 Type of Lubrication: Grease Quantity: Until grease emerges 20306 Fertilizer Shaft Bearings (3S4010HDF only) 1 zerk each bearing, 2 per shaft; 6 total Type of Lubrication: Grease Quantity: Until resistance is felt 16381 Great Plains | 196-522M | 07/19/2018 Table of Contents Index...
- Page 83 1 zerk each box; 3 total Type of Lubrication: Grease Quantity: Until grease emerges 18082 Felt Barrier Seals (3S-4010HDF only) 1 seal at each shaft end, 6 total Type of Lubrication: Oil Quantity: Soak seal 16381 Seed Cup Drive Shaft Sprocket...
- Page 84 & These zerks are only present if the drill has frame- mounted coulters. These zerks only serve the coulter hubs. Coulter arm pivots are lubricated from the grease banks. 27067 Great Plains | 196-522M | 07/19/2018 Table of Contents Index...
- Page 85 2 races each marker; 2 or 4 total Type of Lubrication: Grease Quantity: Repack 15481 Main Wheel Bearings 2 races each of 6 wheels; 12 total Type of Lubrication: Grease Quantity: Repack 29022 Great Plains | 196-522M | 07/19/2018 Table of Contents Index...
-
Page 86: Options
13178 Hitches One hitch is selected upon initial order of an 3S-4010HD and 3S-4010HDF Drill, and includes the spring wire loop, safety chain, and all fasteners. Additional hitches may be ordered for conversion in the field, and include extra hitch mounting bolts, lock washers and nuts. -
Page 87: Flat Fold Markers
(28 kg) per bracket. The weight kit is field-installed. See “Frame Weights” on page 43 for use. Great Plains suggests using no more than 3 kits (6 brackets, 3000 lbs (1361 kg) on the 3S-4010HD and 3S- 4010HDF. Part... -
Page 88: No-Till
3S4010HD Table of Contents Index Options Coulters The 3S-4010HD and 3S-4010HDF supports either frame-mounted or unit-mounted coulters (page 86). It is not possible to install both types on the same drill. Frame-Mounted Coulters Frame-mounted coulters are recommended for heavier no-till conditions and rocky soil. They are independent of row-unit down-force and may be set to different (usually higher) force levels. -
Page 89: Small Seeds Attachment
Seed Tube Plug (Small Seeds) This plug stops seed flow from the small seeds box above the meter. Order one per row to set inactive. Description Part Number SML SDS CUP PLUG 133-315H 27407 Great Plains | 196-522M | 07/19/2018 Table of Contents Index... -
Page 90: Row Unit Options
GP25S UMC 15" TURBO BLD 204-617L 15in Coulter Blades operation, “Unit-Mounted Coulter Part Blade Adjustments” on page 45. Number COULTER BLADE (FLUTED) 15" OD 820-331C COULTER BLADE (TURBO) 15" OD 820-327C Great Plains | 196-522M | 07/19/2018 Table of Contents Index... -
Page 91: Press Wheels
29185 Seed Firmers The standard 3S-4010HD and 3S-4010HDF includes seed flaps. A choice of firmers is an option in the product bundles, or may be field-installed as kits. Only one type of seed firmer may be installed at the same time. -
Page 92: Tire Inflation
For assistance or 118-22.5 (445/65 D22.5) NHS 16-Ply 586 kPa information, contact your nearest Authorized Farm Tire Retailer. Manufacturer Web site Firestone www.firestoneag.com Gleason www.gleasonwheel.com Titan www.titan-intl.com Great Plains | 196-522M | 07/19/2018 Table of Contents Index... -
Page 93: Torque Values Chart
= foot pounds ⁄ 1330 2970 2190 4820 3560 25199m 25199 Torque tolerance + 0%, -15% of torquing values. Unless otherwise specified use torque values listed above. Hydraulic Diagrams Great Plains | 196-522M | 07/19/2018 Table of Contents Index... - Page 94 3S4010HD Table of Contents Index Appendix A - Reference Information Lift and Fold Hydraulics 29093 Great Plains | 196-522M | 07/19/2018 Table of Contents Index...
- Page 95 3S4010HD Table of Contents Index Appendix A - Reference Information Lock Cylinder Hydraulics 27063 Great Plains | 196-522M | 07/19/2018 Table of Contents Index...
-
Page 96: Chain Routing
3S4010HD Table of Contents Index Appendix A - Reference Information Left Marker Hydraulics 27180 Right Marker Hydraulics 27181 Chain Routing Great Plains | 196-522M | 07/19/2018 Table of Contents Index... - Page 97 3S4010HD Table of Contents Index Appendix A - Reference Information Rockshaft Figure 91 29123 Rockshaft Ground Drive Great Plains | 196-522M | 07/19/2018 Table of Contents Index...
- Page 98 3S4010HD Table of Contents Index Appendix A - Reference Information Transfer Shaft Input 132P Figure 92 29128 Transfer Shaft Input Chains Great Plains | 196-522M | 07/19/2018 Table of Contents Index...
- Page 99 Main Seed Drive, Center Section Drive Type Sprockets: 14T, 23T, 34T or 72T Fertilizer (Option): Range, Rear Sprocket: 16T, 47T, 60T 100P 114P Figure 93 29229 Main Seed Drive, Center Section Great Plains | 196-522M | 07/19/2018 Table of Contents Index...
- Page 100 Main Seed Drive, Wing Drive Type Sprockets: 14T, 23T, 34T or 72T Fertilizer (Option): Range, Rear Sprocket: 16T, 47T, 60T 100P 114P Figure 94 29230 Main Seed Drive, Wing (Left Shown) Great Plains | 196-522M | 07/19/2018 Table of Contents Index...
- Page 101 Fertilizer Drive (Option), Center Section 12T, 13T, 16T, 17T, 18T, 20T, DRIVER/DRIVEN 2x21T, 23T, 24T Fertilizer (Option): Range, Rear Sprocket: 16T, 47T, 60T 116P DRIVER DRIVEN Figure 95 29231 Fertilizer Drive, Center Section Great Plains | 196-522M | 07/19/2018 Table of Contents Index...
- Page 102 Fertilizer Drive (Option), Wing 12T, 13T, 16T, 17T, 18T, 20T, DRIVER/DRIVEN 2x21T, 23T, 24T Fertilizer (Option): 116P Range, Rear Sprocket: 16T, 47T, 60T DRIVER DRIVEN Figure 96 29232 Fertilizer Drive, Wing (Left Shown) Great Plains | 196-522M | 07/19/2018 Table of Contents Index...
- Page 103 3S4010HD Table of Contents Index Appendix A - Reference Information Small Seeds Drive (Option), Center Section 216P Figure 97 29233 Small Seeds Drive, Center Section Great Plains | 196-522M | 07/19/2018 Table of Contents Index...
- Page 104 3S4010HD Table of Contents Index Appendix A - Reference Information Small Seeds Drive (Option), Wing 216P Figure 98 29234 Small Seeds Drive, Wing (Left Shown) Great Plains | 196-522M | 07/19/2018 Table of Contents Index...
- Page 105 3S4010HD Table of Contents Index Appendix A - Reference Information Small Seeds Jackshaft (Option) Figure 99 29337 Small Seeds Jackshaft Great Plains | 196-522M | 07/19/2018 Table of Contents Index...
-
Page 106: Appendix B - Initial Setup
6. Secure the spindle and tube with the bolt and nut removed from the clamp. 7. Lower the wheel. Repeat step 2 through step 7 for 15 1 remaining wheels. Figure 101 29222 Gauge Wheel Shipping Clamp Great Plains | 196-522M | 07/19/2018 Table of Contents Index... - Page 107 Secure with bolt lock nut Figure 103 28205 Typical Press Wheel Assembly 11. Repeat step 9 and step 10 for each wing row. Great Plains | 196-522M | 07/19/2018 Table of Contents Index...
-
Page 108: Marker Installation
These items need to be completed prior to first use, but are not necessarily done by the dealer. Install Clutch Switch Module in Cab Figure 105 28096 Cab Switch Module Cabling Refer to Figure 105 (dimensions are inches) Great Plains | 196-522M | 07/19/2018 Table of Contents Index... - Page 109 Refer to Figure 106 1. Select two: 806-172C U-BOLT 3/4-10 X 10 1/32X11 1/2 From the front of the wing, insert the U-Bolts through the holes in the outside lug 27068 Great Plains | 196-522M | 07/19/2018 Table of Contents Index...
- Page 110 , flat washers lock washers and nuts 4. Repeat step 1 through step 3 for the right wing. Figure 106 20323 Weight Bracket, Outer Great Plains | 196-522M | 07/19/2018 Table of Contents Index...
- Page 111 Orient the adjustment leg toward the inside (center of drill), and secure with bolts , flat washers , lock washers and nuts 8. Repeat step 5 through step 7 for the right wing. Great Plains | 196-522M | 07/19/2018 Table of Contents Index...
- Page 112 If seed box offset dividers (page 85) were ordered, they were not factory-installed. Install seed box dividers per immediate planting requirements. See “HDF Seeding with Both Compartments” on page 26. 16669 Great Plains | 196-522M | 07/19/2018 Table of Contents Index...
- Page 113 3. Insert the partition under the bolt heads from the right. Slide it fully to the left. Re-tighten nuts and bolts (use Grade 2 torque). Figure 109 29094 Small Seeds Partition Great Plains | 196-522M | 07/19/2018 Table of Contents Index...
-
Page 114: Scraper Installation
Insert the scraper assembly between the middle four lower square holes of the opener frame. Secure with bolts and whiz nuts 7. Re-mount the removed disc blade. Figure 111 29228 Scraper Installation Great Plains | 196-522M | 07/19/2018 Table of Contents Index... - Page 115 90 days for commercial or rental purposes. This War- ranty is limited to the replacement of any defective part by Great Plains Manufacturing, Incorporated and the installation by the dealer of any such replacement part.
- Page 116 Table of Contents Index Table of Contents Index...
- Page 117 3S4010HD Table of Contents Index Appendix B - Initial Setup Great Plains | 196-522M | 07/19/2018 Table of Contents Index...
- Page 118 3S4010HD Table of Contents Index Appendix B - Initial Setup Great Plains | 196-522M | 07/19/2018 Table of Contents Index...
- Page 119 FMC depth, individual ......39 lift ............20 coulter blades ......84 FMC force .......... 40 lift locks ........21 coulter depth ........ 37 FMC (Frame-Mounted Coulter) ..39 lift switch ..........19 Great Plains | 196-522M | 07/19/2018 Cover Table of Contents...
- Page 120 ..........35 UM coulters .........86 seed rates .......... 43 parking jack ........14 UMC blades.........86 seed tube ........... 61 partition, small seeds ......86 UMC coulter depth ......45 seeding depth ......19 parts ...........12 Great Plains | 196-522M | 07/19/2018 Cover Table of Contents...
- Page 121 890-928C, scraper ......110 14mm ..........33 891-105C, acre meter ......82 170-004A, hitch ........82 891-106C, hectare meter ....82 170-038A, hitch ........82 170-039A, hitch ........82 170-059A, hitch ........82 18-22.5 NHS 16 Ply ......88 Great Plains | 196-522M | 07/19/2018 Cover Table of Contents...
- Page 122 Cover Table of Contents Cover Table of Contents...
- Page 123 Table of Contents Index Table of Contents Index...
- Page 124 Table of Contents Index Great Plains, Mfg. 1525 E. North St. P.O. Box 5060 Salina, KS 67402...
Need help?
Do you have a question about the 3S-4010HDF and is the answer not in the manual?
Questions and answers