Table of Contents
Advertisement
ART_3012
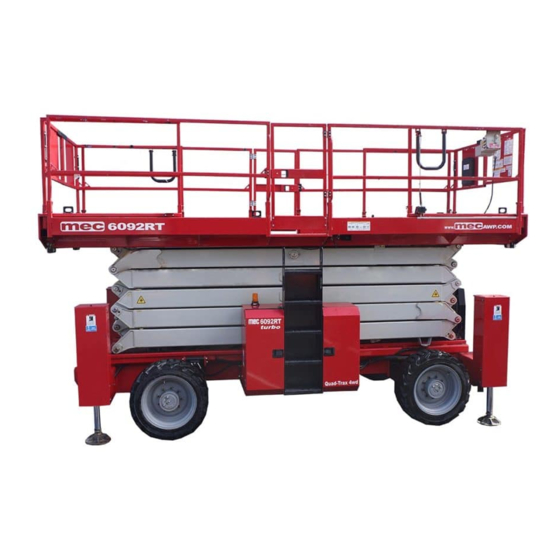
Scissor Lifts
6092RT - Serial #12900001 - Up
93808
October 2014
Operator's Manual
CE/Australian Specifications
Specifications . . . . . . . . . . . . . . . . . . . . . . . . . . . . . . . . . . . . . . . . . . . . inside cover
Safety. . . . . . . . . . . . . . . . . . . . . . . . . . . . . . . . . . . . . . . . . . . . . . . . . . . . . . . . . . . . . . 2
Safety Alert Symbols . . . . . . . . . . . . . . . . . . . . . . . . . . . . . . . . . . . . . . . . . . . . . . . . . . 2
Fall Protection . . . . . . . . . . . . . . . . . . . . . . . . . . . . . . . . . . . . . . . . . . . . . . . . . . . . . . . . 3
Electrocution Hazard. . . . . . . . . . . . . . . . . . . . . . . . . . . . . . . . . . . . . . . . . . . . . . . . . . 4
Tip-over Hazards. . . . . . . . . . . . . . . . . . . . . . . . . . . . . . . . . . . . . . . . . . . . . . . . . . . . . . 6
Fall Hazards. . . . . . . . . . . . . . . . . . . . . . . . . . . . . . . . . . . . . . . . . . . . . . . . . . . . . . . . . . . 7
Collision Hazards . . . . . . . . . . . . . . . . . . . . . . . . . . . . . . . . . . . . . . . . . . . . . . . . . . . . . 7
Additional Safety Hazards . . . . . . . . . . . . . . . . . . . . . . . . . . . . . . . . . . . . . . . . . . . . . 8
Battery Safety. . . . . . . . . . . . . . . . . . . . . . . . . . . . . . . . . . . . . . . . . . . . . . . . . . . . . . . . . 8
Component Locations. . . . . . . . . . . . . . . . . . . . . . . . . . . . . . . . . . . . . . . . . . . . . . . 9
Jobsite Inspection . . . . . . . . . . . . . . . . . . . . . . . . . . . . . . . . . . . . . . . . . . . . . . . . . 13
Function Tests . . . . . . . . . . . . . . . . . . . . . . . . . . . . . . . . . . . . . . . . . . . . . . . . . . . . . . . 13
Operating Instructions . . . . . . . . . . . . . . . . . . . . . . . . . . . . . . . . . . . . . . . . . . . . . 14
Prestart. . . . . . . . . . . . . . . . . . . . . . . . . . . . . . . . . . . . . . . . . . . . . . . . . . . . . . . . . . . . . . 14
Starting Engine from Lower Control Panel . . . . . . . . . . . . . . . . . . . . . . . . . . . . 15
Starting Engine from Upper Control Box . . . . . . . . . . . . . . . . . . . . . . . . . . . . . . 16
Base Controls Operation and Test . . . . . . . . . . . . . . . . . . . . . . . . . . . . . . . . . . . . 17
Platform Control Operation and Test . . . . . . . . . . . . . . . . . . . . . . . . . . . . . . . . . 18
Joystick Operation . . . . . . . . . . . . . . . . . . . . . . . . . . . . . . . . . . . . . . . . . . . . . . . . . . . 19
Outrigger Operation . . . . . . . . . . . . . . . . . . . . . . . . . . . . . . . . . . . . . . . . . . . . . . . . . 21
Shutdown Procedure . . . . . . . . . . . . . . . . . . . . . . . . . . . . . . . . . . . . . . . . . . . . . . . . 21
Emergency Systems . . . . . . . . . . . . . . . . . . . . . . . . . . . . . . . . . . . . . . . . . . . . . . . 22
Emergency Lowering . . . . . . . . . . . . . . . . . . . . . . . . . . . . . . . . . . . . . . . . . . . . . . . . 22
Deck Extension . . . . . . . . . . . . . . . . . . . . . . . . . . . . . . . . . . . . . . . . . . . . . . . . . . . . 23
Fold Down Platform Railings . . . . . . . . . . . . . . . . . . . . . . . . . . . . . . . . . . . . . . . 24
Machine Inspections and Maintenance . . . . . . . . . . . . . . . . . . . . . . . . . . . . . . 26
Pre-Start Inspection Checklist . . . . . . . . . . . . . . . . . . . . . . . . . . . . . . . . . . . . . . . . 27
Monthly Inspection Checklist. . . . . . . . . . . . . . . . . . . . . . . . . . . . . . . . . . . . . . . . . 28
Quarterly Inspection Checklist. . . . . . . . . . . . . . . . . . . . . . . . . . . . . . . . . . . . . . . . 29
Annual Inspection Report . . . . . . . . . . . . . . . . . . . . . . . . . . . . . . . . . . . . . . . . . . . . 30
Maintenance . . . . . . . . . . . . . . . . . . . . . . . . . . . . . . . . . . . . . . . . . . . . . . . . . . . . . . 31
Routine Maintenance . . . . . . . . . . . . . . . . . . . . . . . . . . . . . . . . . . . . . . . . . . . . . . . . 32
Scheduled Maintenance . . . . . . . . . . . . . . . . . . . . . . . . . . . . . . . . . . . . . . . . . . . . . 32
Maintenance Lock . . . . . . . . . . . . . . . . . . . . . . . . . . . . . . . . . . . . . . . . . . . . . . . . . . . 32
Lubrication . . . . . . . . . . . . . . . . . . . . . . . . . . . . . . . . . . . . . . . . . . . . . . . . . . . . . . . . . . 33
Warning and Instructional Decals . . . . . . . . . . . . . . . . . . . . . . . . . . . . . . . . . . . 34
Troubleshooting . . . . . . . . . . . . . . . . . . . . . . . . . . . . . . . . . . . . . . . . . . . . . . . . . . 37
Transport and Lifting Instructions.. . . . . . . . . . . . . . . . . . . . . . . . . . . . . . . . . . 38
Loading . . . . . . . . . . . . . . . . . . . . . . . . . . . . . . . . . . . . . . . . . . . . . . . . . . . . . . . . . . . . . 38
Lifting and Tie Down Instructions. . . . . . . . . . . . . . . . . . . . . . . . . . . . . . . . . . . . . 40
Advertisement
Table of Contents

Related Manuals for Mec 6092RT


Summary of Contents for Mec 6092RT
-
Page 1: Table Of Contents
Transport and Lifting Instructions........38 6092RT - Serial #12900001 - Up Loading . -
Page 2: Specifications
—Specifications— 6092RT Working Height* Outriggers Deployed 66 ft* 20 m* Outriggers Not Deployed 36 ft* 11 m* Platform Height Outriggers Deployed 60 ft 18 m Outriggers Not Deployed 30 ft Stowed Height Rails Up 128 in 3.25 m Rails Folded Down 97 in 2.46 m... -
Page 3: Introduction
This Operator’s Manual has been designed to provide you, the customer, with the instructions and operating procedures essential to properly and safely operate your MEC Aerial Work Platform for its intended purpose of positioning personnel, along with their necessary tools and materials, to overhead work locations. -
Page 4: Safety
For your safety and the safety of those around you, you must operate your machine as instructed in this manual. MEC designs aerial work platforms to be safe and reliable. They are intended to position personnel, along with their necessary tools and materials, to overhead work locations. -
Page 5: Fall Protection
6092RT Safety Fall Protection Operators must comply with employer, job site and governmental rules regarding the use of personal protective equipment. If required by your employer or job site, use personal fall protection equipment (PFPE) when operating this machine. All PFPE must comply with applicable governmental regulations, and must be inspected and used in accordance with the PFPE manufacturer’s instructions. -
Page 6: Electrocution Hazard
6092RT Safety Electrocution Hazard ELECTROCUTION HAZARD!!! THIS MACHINE IS NOT INSULATED! DEATH OR SERIOUS INJURY will result from contact with or inadequate clearance from any electrically charged conductor. Observe Minimum Safe Approach Distance. DO NOT work in close proximity to, or in contact with, energized power lines and electrical equipment. - Page 7 6092RT Safety Minimum Save Approach Distance 5000 V Max. volts Higher voltage 20000 V Min. volts 15000 V 10000 V 5000 V Lower voltage Min. volts (b) Avoid simultaneous contact across (a) Affected area areas of high potential difference CLEARANCES FROM LIVE AERIAL CONDUCTORS...
-
Page 8: Tip-Over Hazards
DO NOT replace items critical to machine stability with items of different weight or specification. DO NOT modify or alter the work platform without written permission from MEC, as modifications can increase weight and/or surface area resulting in instability. DO NOT place ladders or scaffolds in the platform or against any part of the machine. -
Page 9: Fall Hazards
6092RT Safety Fall Hazards DO NOT sit, stand or climb on the platform guard rails. Maintain a firm footing on the platform floor at all times. DO NOT exit the platform when elevated DO NOT climb down from the platform when elevated. -
Page 10: Additional Safety Hazards
6092RT Safety Additional Safety Hazards Explosion and Fire Hazards DO NOT operate the machine in hazardous locations or locations where potentially flammable or explosive gasses or particles may be present. Damaged Machine Hazards Conduct a thorough pre-start inspection of the machine and test all functions before each work shift to check for damage, malfunction and unauthorized modification. -
Page 11: Component Locations
6092RT Component Locations Component Locations Full Machine Deck Extension Deck Extension Release Handle Main Platform Deck Platform Controls Lift Cylinders Beams Chassis Controls Module Base Controls Fuel/Hydraulic Engine Compartment Fluid Module Outrigger ART_3019 93808 – October 2014 Page 9... - Page 12 6092RT Component Locations Modules Control Fuel/Fluid Module Module Sight Gauge Hydraulic Valve Blocks Hydraulic Tank Base Controls Fuel Tank Battery Disconnect Sight Gauge (inside) Battery Entry ladders not shown for clarity. ART_3026 Page 10 93808 – October 2014...
- Page 13 6092RT Component Locations Upper Controls Emergency Stop Speed / Torque Horn (Optional) Overload Indicator 6 Work Lights (Optional) Lift / Drive Up -- Preheat Down -- Generator (Optional) Start Switch 5 Steering Joystick Automatic Leveling Enable Bar 9 1 8...
- Page 14 6092RT Component Locations Lower Controls Starter Delay (Red) Start (Green) Hour Meter Emergency Stop Raise (Green) Lower (Green) Platform / Base Preheat Circuit Breaker Emergency Down CONTROL DESCRIPTION Selector Switch PLATFORM Select to operate from the platform control panel. BASE Select to operate from the base control panel.
-
Page 15: Jobsite Inspection
6092RT Jobsite Inspection Jobsite Inspection DO NOT operate this machine until you have read and understood the Safety section of this manual, have performed the Jobsite Inspection, Pre-Start Inspection and Routine Maintenance, and have completed all the test operations detailed in the Operating Instructions section. -
Page 16: Operating Instructions
6092RT Operating Instructions Operating Instructions DO NOT operate this machine until you have read and understood the Safety section of this manual, have performed the Jobsite Inspection, Pre-Start Inspection and Routine Maintenance, and have completed all the test operations detailed in the Operating Instructions section. -
Page 17: Starting Engine From Lower Control Panel
6092RT Operating Instructions Starting Engine from Lower Control Panel Be sure that the upper and lower EMERGENCY STOP Switches are reset. • Upper Control Box: Turn Engine Start Switch to RUN. ART_2404 R1 • Lower Control Box: Turn key switch to BASE. -
Page 18: Starting Engine From Upper Control Box
6092RT Operating Instructions Starting Engine from Upper Control Box • Lower Control Box: Turn the Key Switch to PLATFORM. Diesel Engine • Upper Control Box: Turn the Engine Start Switch to START - release when the engine starts. ART_2406 R1 •... -
Page 19: Base Controls Operation And Test
6092RT Operating Instructions Base Controls Operation and Test IMPORTANT—Be sure the area above the machine is clear of obstructions to allow full elevation of platform. Select BASE Operation • Turn the Selector Key Switch to BASE. ART_3035 Emergency Stop • Press the Emergency Stop Switch at any time to stop all machine functions. -
Page 20: Platform Control Operation And Test
6092RT Operating Instructions Platform Control Operation and Test IMPORTANT—Check that the route of travel to be taken is clear of persons, obstructions, debris, holes, and drop offs, and is capable of supporting the machine. Select PLATFORM Operation • Lower Control Box: Turn the selector switch to PLATFORM. -
Page 21: Joystick Operation
6092RT Operating Instructions Joystick Operation • Function speed is proportional and is controlled by the movement of the Joystick. Steer Proportional • The further it is moved forward, the faster the speed will be. Joystick • The Joystick returns to the neutral (center) position when released. - Page 22 6092RT Operating Instructions Steering • Always check front steer wheel direction before driving. • With the Mode Select Switch in the DRIVE position, squeeze the Enable Bar and press the Steering Switch with your thumb to steer left or right.
-
Page 23: Outrigger Operation
6092RT Operating Instructions Outrigger Operation Only lower the outriggers when the machine is on a firm surface. The surface must be capable of supporting the maximum ground pressure per wheel/outrigger (see specifications). The outrigger control switches is located on the front face of the Upper Control Box. -
Page 24: Emergency Systems
6092RT Emergency Systems Emergency Systems If the control system fails while the platform is elevated, have an experienced operator use the emergency lowering procedure to safely lower the platform. Do not attempt to climb down beam (scissors) assembly. Emergency Lowering The Emergency Lowering System is used to lower the platform in case of power or valve failure. -
Page 25: Deck Extension
6092RT Deck Extension Deck Extension The deck will extend in intervals of 12 inches (30 cm) throughout the entire length of the deck extension. The extension handle hang from the top rail at the right side of each deck extension. -
Page 26: Fold Down Platform Railings
6092RT Fold Down Platform Railings Fold Down Platform Railings Remove the safety snap pins that secure the front and rear deck extension rail panels together. Lift the bracket con- necting the tops of the deck extension rail panels. 4 places... - Page 27 6092RT Fold Down Platform Railings Fold Down Rails (continued) Remove the safety snap pins from main deck rail panels that attach to the entry gates. Lift the rails, pivot and place on top of the deck extension rails. 4 places...
-
Page 28: Machine Inspections And Maintenance
6092RT Machine Inspections and Maintenance Machine Inspections and Maintenance DO NOT operate this machine until you have read and understood the Safety section of this manual, have performed the Jobsite Inspection, Pre-Start Inspection and Routine Maintenance, and have completed all the test operations detailed in the Operating Instructions section. -
Page 29: Pre-Start Inspection Checklist
6092RT Machine Inspections and Maintenance Pre-Start Inspection Checklist The operator must conduct a thorough Pre-Start Inspection of the machine before each work shift. General Inspection Checklist Initial Description Check that the operator’s, safety, and responsibilities manuals are in the storage container located on the platform. -
Page 30: Monthly Inspection Checklist
6092RT Machine Inspections and Maintenance Monthly Inspection Checklist This checklist must be used at monthly intervals or every 100 hours of machine use, whichever occurs first. Failure to do so could result in death or serious injury. The frequency and extent of periodical examinations may depend on national regulations. -
Page 31: Quarterly Inspection Checklist
6092RT Machine Inspections and Maintenance Quarterly Inspection Checklist This checklist must be used at quarterly intervals or every 300 hours of machine use, whichever occurs first. Failure to do so could result in death or serious injury. Scheduled Maintenance Inspections should be conducted by qualified service technicians only. Photocopy this page for reuse. Keep inspections records up to date. -
Page 32: Annual Inspection Report
• If an item is found to be "Unacceptable" make the necessary repairs and check the "R" Repaired "Repaired" box. • When all items are "Acceptable", the unit is ready for service. "U" Unnecessary/Not Applicable • Please fax a copy to MEC at (559) 891-2488 or email to EMAIL ADDRESS Decals: Base: Operation: Proper Placement/Quantity... -
Page 33: Maintenance
6092RT Maintenance Maintenance DO NOT operate this machine until you have read and understood the Safety section of this manual, have performed the Jobsite Inspection, Pre-Start Inspection and Routine Maintenance, and have completed all the test operations detailed in the Operating Instructions section. -
Page 34: Routine Maintenance
6092RT Maintenance Routine Maintenance IMPORTANT— The operator may perform routine maintenance only. Scheduled maintenance must be performed by qualified service technicians. Perform routine maintenance as identified in the Pre-Start Inspection Checklist on page 27. Pre-Start Inspection Scheduled Maintenance Maintenance performed monthly, quarterly, annually and bi-annually must be performed by a qualified service technicians trained and authorized to perform maintenance on this machine, and must be done in accordance with the procedures outlined in the service manual. -
Page 35: Lubrication
6092RT Maintenance Lubrication Operator may perform routine maintenance only. Lubrication listed as Scheduled Maintenance must be performed by a qualified service technician. Fuel/Fluid Module Entry ladder not shown for clarity. Fuel Sight Gauge Add Oil Here Fuel Sight Gauge LEVEL... -
Page 36: Warning And Instructional Decals
6092RT Warning and Instructional Decals Warning and Instructional Decals each side of each extension 26 6 EACH SIDE Maintenance Lock 2 places front and rear of each module Fuel/Fluid Inside Module Module Outside of chassis rail Entry ladder not shown for clarity. - Page 37 6092RT Warning and Instructional Decals Decals (continued) 8606 91456 90721 9910 -- 4 Places 90721 9910 91930 8605 -- 6 Places 8911 90730 8911 93561 not used 93671 3 places 90717 -- 2 Places 90732 91388 CE -- 91775 not used...
- Page 38 6092RT Warning and Instructional Decals Serial Plate Location The serial plate is attached to the machine at the time of manufacture. Important information about the machine is recorded on the serial plate. ART_4701 Serial Plate Description MFG DATE. Month / Year of manufacture MODEL NUMBER.
-
Page 39: Troubleshooting
• Wires disconnected, broken, or loose? Block • Motor control processor Diagnostic LED OFF? Module LED should be ON. If not N or FLASHING, refer to Service Manual or contact MEC Technical Support. Diagnostic LED ART_3093 93808 – October 2014... -
Page 40: Transport And Lifting Instructions
Drivers are responsible for loading and securing machines, and should be properly trained and authorized to operate MEC machinery. Drivers are also responsible for selecting the correct and appropriate trailer according to government regulations and company policy. Drivers must ensure that the vehicle and chains are strong enough to hold the weight of the machine (see the serial number plate for machine weight). - Page 41 Transport and Lifting Instructions. Driving or Winching onto or off of a Transport Vehicle MEC does not recommend unassisted loading or unloading. Always attach the machine to a winch when loading or unloading from a truck or trailer by driving.
-
Page 42: Lifting And Tie Down Instructions
6092RT Transport and Lifting Instructions. Lifting and Tie Down Instructions Only qualified riggers should rig and lift the machine. Ensure that the crane capacity, loading surfaces and straps are sufficient to withstand the machine weight. See the serial plate for the machine weight. - Page 43 (1) year from date of registered sale or date the unit left the factory if not registered. MEC Aerial Platform Sales Corp. further warrants the structural weldments of the main frame and scissor arms to be free from defects in material or workmanship for five (5) years from date of registered sale or date unit left the factory if not registered.
-
Page 44: October
MEC Aerial Platform Sales Corp. 1401 South Madera Avenua • Kerman, CA 93630 USA Ph: 1-877-632-5438 • 559-842-1500 • Fax: 559-842-1520 www.mecAWP.com 93808 October 2014...
Need help?
Do you have a question about the 6092RT and is the answer not in the manual?
Questions and answers