Advertisement
Quick Links
Advertisement

Related Manuals for SpaNet SV2


Summary of Contents for SpaNet SV2
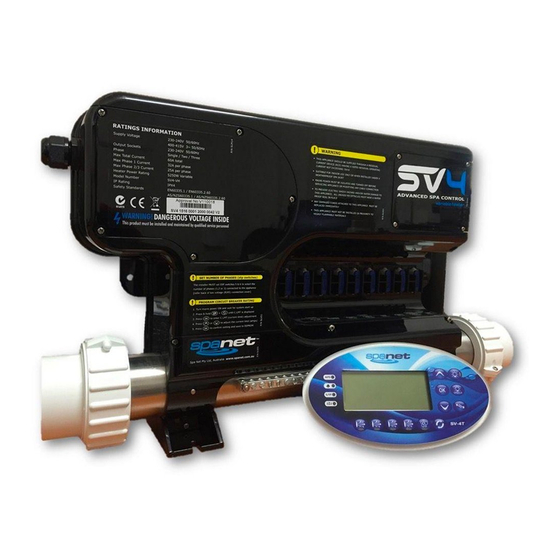
- Page 1 SV Series Spa Controls SV2 / SV2-VH / SV3 / SV3-VH / SV4-VH Installation & Technical Manual...
-
Page 2: Risk Of Electrical Shock
WARNINGS RISK OF ELECTRICAL SHOCK Please read the following before installing or connecting this appliance To prevent electric shock hazard and/or water damage to this appliance, all All electrical connections must be performed by a licensed electrician and unused receptacles must have a water proof seal in place. must confirm to all national, state and local electrical codes in effect at the time of installation. - Page 3 LED Light * Outlets not available on SV2 / SV2-VH models # Outlet not available on SV2 / SV2-VH / SV3 / SV3-VH models ^ Dedicated mains power outlets (always ON) ~ 1A maximum current draw. This is split between keypads, expand ports and light sockets.
- Page 4 SV Series Overview Fuse 1 Fuse 2 Fuse 3 Heater Connection (Phase 3 Loads) (Phase 2 Loads) (Phase 1 Loads) Terminal Block Mains Power Terminal Block Low Voltage Connections (12V) keypads, lights, in-pool sensor digital/analog expand ports Heartbeat LED Mains Power Cable Entry Points DIP Switch Bank...
- Page 5 Electrical Wiring (Terminal Block Connections) Push the wires into the correct terminals as labelled. Refer wiring guide below or on the sticker inside the terminal block area. AUS / NZ / European Models (230-240V AC) Tighten all screws on the terminal block with a screwdriver and check to ensure each wire has been firmly secured.
Need help?
Do you have a question about the SV2 and is the answer not in the manual?
Questions and answers