
Related Manuals for VPI Industries Classic Direct


Summary of Contents for VPI Industries Classic Direct
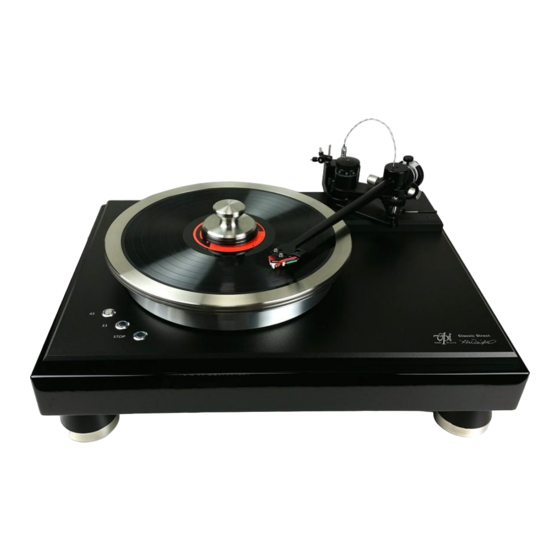
- Page 1 The VPI Classic Direct Turntable Setup and Instruction Manual VPI Industries, Inc., 77 Cliffwood Ave. #5D, Cliffwood, NJ 07721 http://www.vpiindustries.com...
- Page 2 Congratulations on your choice of the VPI Classic Direct Drive turntable, a world class turntable, handmade in the U.S.A. by VPI Industries. The Classic Direct Drive turntable takes advantage of 21st Century motor technology for accurate speed control utilizing a DSP based motor controller coupled with active feedback to control the motion of the platter.
- Page 3 1. TABLE SETUP The Classic Direct Drive must be placed on a flat, level surface. This will make setup easier. a. Remove the plinth from the shipping carton. b. Place the plinth at the desired location. c. Adjust the feet until the plinth is level front to back and side to side.
-
Page 4: Cartridge Mounting
2. CARTRIDGE MOUNTING: FOR CARTRIDGES WITH THREADED MOUNTING HOLES: Use the screws supplied by the cartridge manufacturer to mount the cartridge. Any other screws may not fit the thread properly and may even damage the threads and cartridge. USE ONE OF THE SUPPLIED WASHERS UNDER THE SCREW HEAD. - Page 5 Place the arm tube assembly on the lower bearing, taking care not to strain or damage the 4-color wire and Lemo connector. Place the arm in its rest. At the rear of the arm base assembly is the connector block. Plug the Lemo connector into its receptacle on top of the block.
- Page 6 FIG #2: THE PROPER WAY TO ALIGN A CARTRIDGE, ALIGN THE CARTRIDGE, NOT THE TONEARM HEADSHELL! SHOWN IN WHITE FOR CARITY. 4. TRACKING FORCE AND AZIMUTH Place the arm tube assembly on the lower bearing, taking care not to strain or damage the 4-color wire and Lemo connector.
- Page 7 The JMW 10.5i does not have a built-in tracking force gauge, but a Shure Stylus Force Gauge is supplied with your arm on a new unit. Following the gauge instructions set the tracking force to the cartridge manufacturer recommendation plus 1/10 of a gram more. We always recommend going to the high side when it comes to tracking force.
-
Page 8: Anti-Skating
this but it is there if you want to really fine tune. You will need a digital tracking force gauge to use this feature properly. 5. ANTI-SKATING: REMEMBER: A 10.5” ARM NEEDS VERY LITTLE ANTI-SKATING FORCE Anti-skating is one of the least understood forces acting on a tonearm. Skating force is created by friction between the stylus and the record, causing a force vector in a direction towards the center of the record when the headshell of the tonearm has an offset angle. - Page 9 7. Playing Records The VPI Classic Direct Drive turntable is easy to operate. The simple instructions below outline the operation. a. The power switch is located on the left side of the plinth on the underside front of the turntable.
- Page 10 To recover from a fault, press and hold the Stop and 33 RPM buttons for 10 seconds. d. If your Classic Direct Drive turntable is not in use for a long period of time, please disconnect the power supply from the mains supply.
- Page 11 VPI Industries, Inc. Limited Warranty VPI Industries, Inc. (VPI) warrants this unit against defects in materials and/or workmanship for three (3) years from the date of purchase by the original retail purchaser. VPI’s sole obligation under this warranty is limited to the repair or replacement, at VPI’s option, of any part(s) found to be defective.
Need help?
Do you have a question about the Classic Direct and is the answer not in the manual?
Questions and answers