
Related Manuals for VPI Industries JMW 10


Summary of Contents for VPI Industries JMW 10
- Page 1 JMW 10 AND 12 Tonearms Setup and Instruction Manual AllegroSound.com VPI INDUSTRIES INC., 77 CLIFFWOOD AVE #3B, CLIFFWOOD NJ 07721 PHONE: 732-583-6895, FAX: 732-946-8578 www.vpiindustries.com BEFORE YOU BEGIN...
-
Page 2: Cartridge Mounting
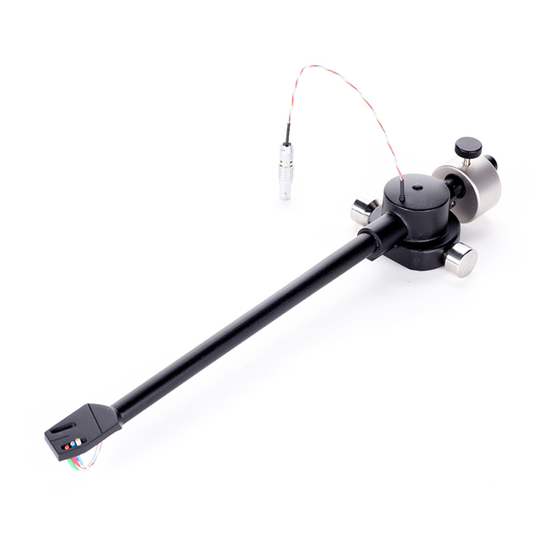
NOT FOLLOWING THIS MANUAL WILL VOID YOUR WARRANTEE. FAILURE TO SEND IN THE WARRANTEE CARD WILL VOID YOUR WARRANTEE Be very careful when handling the tone arm. The internal arm wire is exposed at the headshell and at the rear of the arm. This wire is very delicate and contains 64 strands of very pure copper. - Page 3 push the connectors all the way on, as this could damage the cartridge. Always back up the cartridge with your finger when pushing on the clips. AllegroSound.com THE COUNTERWEIGHT: The JMW tone arm comes with one large counterweight installed on the rear shaft of the tonearm.
- Page 4 going to the high side when it comes to tracking force. High frequency vibrations can cause a light-tracking cartridge to cause more damage to the grooves than running a cartridge at a heavy setting. Make sure the damping fluid is not installed when setting this force.
-
Page 5: Anti-Skating
AllegroSound.com ANTI-SKATING: One of the least understood forces acting on a tonearm is anti-skating. Skating force is created by friction between the stylus and the record creating a force vector in a direction towards the center of the record. Putting a stylus down on a flat grooveless record will cause the arm to shoot in toward the center of the record. - Page 6 Move the cartridge so that the stylus rests on the dot. Now, viewing the cartridge from above, line it up so that its sides are symmetrically positioned between the lines of the grid. If the cartridge has parallel sides, these should be made parallel to the grid lines. Also make sure that the cartridge is centered between the sets of lines.
- Page 7 AllegroSound.com ADDING DAMPING OIL: Among the things you unpacked earlier was a "Q" tip. Take this and sweep out the well around the pivot in the arm base assembly. After this is done, throw out the swab. Find the bottle of special damping fluid. Remove its cap and put in enough damping fluid to fill the cup 3/4 full.
-
Page 8: Set Screw
AllegroSound.com THE PROPER WAY TO ALIGN A CARTRIDGE WITH THE GRID OF THE JMW ALIGNMENT JIG. ALIGN THE CARTRIDGE, NOT THE TONEARM HEADSHELL! SET SCREW IF THE VTA KNOB SHOULD EVER LOOSEN UP, BACK OFF THE SET SCREW SHOWN, PUSH DOWN ON THE KNOB AND RETIGHTEN THE SET SCREW.
Need help?
Do you have a question about the JMW 10 and is the answer not in the manual?
Questions and answers