
Subscribe to Our Youtube Channel
Related Manuals for VPI Industries Classic 3


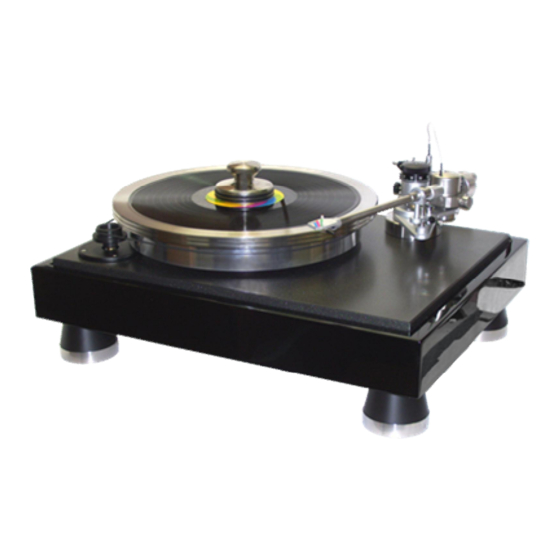
Summary of Contents for VPI Industries Classic 3
- Page 1 VPI Classic 3 Turntable Setup and Instruction Manual VPI Industries, Inc., 77 Cliffwood Ave. #3B, Cliffwood, NJ 07721 phone: 732-583-6895 fax: 732-946-8578 http://www.vpiindustries.com...
-
Page 2: Important: Read Before Proceeding
1. To avoid electrical shock, do not open the motor cover. 2. If the power cord provided with the Classic 3 does not reach an outlet, use a heavy-duty, grounded extension cord. 3. To avoid electrical shock, always plug the Classic 3 into a grounded outlet. -
Page 3: Unpacking The Box
Setting up the Classic 3 The Classic 3 must be placed on a flat, level surface. This will make setup easy, provide better sound quality, and put less strain on the main bearing. ·... -
Page 4: Before You Begin
Verify the turntable is level by using a 9- or 12-inch bubble level front-to-back and side-to-side on the platter. If it is not level, rotate the Classic 3 feet up or down. If you must turn the Classic feet more than three full turns, level the shelf or platform the table sits on first. -
Page 5: Cartridge Mounting
Always back up the cartridge with your finger when pushing on the clips. · The Classic 3 tone arm comes with one large dropped counterweight installed on the rear shaft of the tonearm. For most cartridges you will only need this large weight. - Page 6 · In some rare cases it may be necessary to use two counterweights together or a larger counterweight. Contact your dealer if a second or larger counterweight is needed. B. OVERHANG ADJUSTMENT: · This adjustment will yield the lowest distortion in the last third of the record, the hardest to track, when playing a typical 12"...
- Page 7 · Carefully swing the arm over the grid at the far end of the jig and place the stylus as close to the dot in the center of the grid as possible. Using a lighted magnifier or the new lighted + 1.5 glasses will make this job very easy. ·...
- Page 8 · The Classic 3 arm does not have a built-in tracking force gauge, but a Shure Stylus Force Gauge is supplied with your arm. Following the gauge instructions set the tracking force to the cartridge manufacturer recommendation plus 1/10 of a gram more.
-
Page 9: Anti-Skating
· Unlike other unipivot arms, the JMW’s lateral balance weight does not hang off to the side of the arm. Instead, its position around the bottom of the upper bearing housing places the weight below the pivot point. This increases mass below the pivot and increases arm stability. - Page 10 CAN GO TO THE MECHANICAL ANTI-SKATE SUPPLIED. E. ARM HEIGHT: Unlike many tone arms, the Classic 3 height is both easy and repeatable to vary. The knob next to the bearing housing bears a scale numbered from zero to ninety-nine.
-
Page 11: Playing Records
· If you have a gentle touch (so as not to bounce the turntable) you can simply vary the arm height while listening to the record and the changes in distortion those results. Depending upon your patience and other mental factors, you could go through this process for every record you own. -
Page 12: Additional Items Available From Your Dealer
· The motor will make some low-level noise. This will not get into the system. The motor and bearings will become quieter as you use your Classic 3. · After at least one year of use, the platter bearing and motor will need to be lubricated.
Need help?
Do you have a question about the Classic 3 and is the answer not in the manual?
Questions and answers