MAJORITY OAKINGTON Instruction Manual
Digital radio & music system
Hide thumbs
Also See for OAKINGTON:
- Instruction manual (38 pages) ,
- Instruction manual (36 pages) ,
- User manual

Subscribe to Our Youtube Channel
Related Manuals for MAJORITY OAKINGTON


Summary of Contents for MAJORITY OAKINGTON
- Page 1 O A K I N G T O N D I G I T A L R A D I O & M U S I C S Y S T E M OAK-CDAB-WAL | OAK Instructions Guide...
-
Page 2: Table Of Contents
Settings: Sleep Timer ������������������������������������������������������������������������������������������������ 23 Settings: Alarm or Timer Option ����������������������������������������������������������������������������� 24 Settings: Additional Functions ��������������������������������������������������������������������������������� 25 Specifications������������������������������������������������������������������������������������������������������������� 27 Support ���������������������������������������������������������������������������������������������������������������������� 27 Warranty �������������������������������������������������������������������������������������������������������������������� 27 Safety Information ������������������������������������������������������������������������������������������������������28 Register your product online for a FREE 3 year extended warranty at: www.majority.co.uk... -
Page 3: Controls And Functions
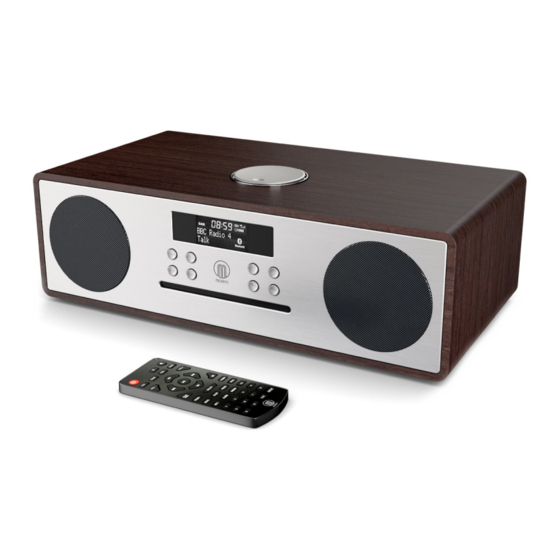
Controls And Functions Front View 1� Remote Sensor 7� Mode 2� Display Screen 8� Power/Standby 3� Standby Indicator 9� Play/Pause/Menu 4� Disc Port 10� Equaliser 5� Previous 11� Info 6� Next 12� Pair Bluetooth/Eject... - Page 4 Controls And Functions Top View 13� Navigate - Rotate to move up or down the menu screen when in DAB or FM� OK: Press to skip to subsequent menu in DAB or FM� Volume +/- Rotate to increase or decrease the volume level�...
- Page 5 Controls And Functions Rear View 14� Antenna 17� USB Input 15� 5V 1A Port for charging 18� Earphone Jack Mobile Device 19� Power Switch 16� AUX Audio Input 20� AC Power Connector...
- Page 6 Controls And Functions Remote Control...
- Page 7 Controls And Functions 21� ON/STANDBY Press and hold for manual tuning in FM 22� MODE: (CD/USB/Radio/BT) 36� NUMBER KEYS 23� REPEAT: for CD and USB 37� INFO: Press to turn on/off the 24� INTRO/AMS: (Automatic Music information on CD or USB Scan) Press to view information on DAB or Press to scan all tracks in CD or USB...
-
Page 8: What's In The Box
What’s In The Box? Box Contents 1� Majority Oakington Music 3� UK Standard Power Adapter System 4� User Guide 2� Remote Control... - Page 9 Instructions Guide Basic Operation Please note all (Ref�) refer to Pages 1-5 Controls and Functions� Plug the connector into the back of the system labelled AC- (Ref.20) and the power supply into the mains� Ensure the antenna (Ref.14) is extended as far as possible so that you can rotate it which will enable you to get the best signal you can�...
-
Page 10: Instructions Guide
Instructions Guide Basic Operation Standby To put the music system on standby, press the ‘Power/Standby’ button on the unit (Ref.8) or on the remote (Ref.21)� To turn off fully, switch off at the back of the unit and at the mains. Keep cord out of reach of children�... -
Page 11: Dab/Dab+ Radio
Instructions Guide DAB/DAB+ Radio Press the ‘Mode’ button (Ref.7) multiple times on the unit to switch to DAB/DAB+ Radio� To select the mode from the remote, press the ‘FM/ DAB’ button (Ref.22)� Fully extend the antenna (Ref.14)� On first use when DAB Radio is activated for the first time the display will show “Full Scan”�... -
Page 12: Dab/Dab+ Settings
Instructions Guide DAB/DAB+ Settings When on DAB/DAB+ mode, press the Menu button (Ref.29) on the remote to open DAB radio settings� Once pressed, the following options will be available to scroll through with the Navigation/OK dial (Ref.13) or the Previous and Next buttons on the remote (Ref.31/Ref.46) and can then be selected to open further setting options: Full Scan Select this option to initiate a scan for available DAB/DAB+ stations�... - Page 13 Instructions Guide DAB/DAB+ Settings Dynamic Range Compression (DRC) This function enables you to reduce the difference between the maximum and minimum audio volume being broadcast� This makes quiet sounds comparatively louder, and loud sounds comparatively quieter. DRC only works if it is enabled by the broadcaster for a specific station�...
-
Page 14: Dab/Dab+ And Fm Presets
Instructions Guide DAB/DAB+ and FM Presets How to store a preset station Up to 40 stations can be set for easy navigation� To store a station as a preset, press and hold the ‘Program’ button (Ref.43) on the remote for 3 to 5 seconds until “Preset Store <1: (Empty)” shows on the display�... -
Page 15: Station Information For Dab/Dab+ Radio
Instructions Guide Station Information for DAB/DAB+ Radio Press the ‘Info’ button on the remote (Ref.37) repeatedly to display the different programme information. Bit Rate: The data rate which the signal is being transmitted� Bit Error Rate (BER): Displays signal error rate� Channel and Frequency: Displays the station’s transmission channel number and frequency�... -
Page 16: Fm Radio
Instructions Guide FM Radio Press the ‘Mode’ button (Ref.7) multiple times on the unit to switch to DAB/DAB+ Radio� To select the mode from the remote press the ‘FM/ DAB’ button (Ref.22). The first time you switch to FM mode, the FM frequency “87�5 MHz”... -
Page 17: Fm Radio Settings
Instructions Guide FM Radio Settings When on FM mode, press the Menu button (Ref.29) on the remote to open FM radio settings� Once pressed, the following options will be available to scroll through with the Navigation/OK dial (Ref.13) or the Previous and Next buttons on the remote (Ref.31/Ref.46) and can then be selected to open further setting options: FM Scan Setting... -
Page 18: Station Information For Fm Radio
Instructions Guide Station Information for FM Radio Press the ‘Info’ button on the remote (Ref.37) repeatedly to show the different programme information. Signal Strength: Displays a signal bar with the strength of the current station� Time and Date: Displays the time and date� Frequency: Displays the station’s transmission frequency�... -
Page 19: Connecting To A Tv/Music System
Instructions Guide Connecting to a TV/Music System AUDIO AUDIO To connect the Music System/TV outputs to analogue inputs from the sound board, use the 3�5mm RCA audio cable (supplied) to connect the Music System/TV outputs with the AUX (L/R) input socket from the AUDIO sound board�... -
Page 20: Cd Playback
Instructions Guide CD Playback Please note all (Ref�) refer to Page 1-5 Controls and Functions� To choose CD Mode, press the ‘Mode’ button on the unit (Ref.7) repeatedly until CD mode displays on the screen� Alteratively, press the ‘CD’ button on the remote (Ref.22)� Insert the CD into the CD port at the front of the unit (Ref.4)�... -
Page 21: Cd Functions
Instructions Guide CD Functions Playing Repeatedly For CDs, press the ‘REPEAT’ button (Ref.23) on the remote multiple times to view options: Repeat All (ALL), Current Track (SINGLE) or Repeat Off (OFF). Highlight the option you would like to save, wait a few seconds, and the unit will store this setting automatically�... -
Page 22: Cd Playback And Basic Functions
Instructions Guide CD Playback and Basic Functions Please note all (Ref�) refer to Pages 1-5 Controls and Functions� Notes for usage * Please do not force the CD into the CD drive� * Once a CD has been inserted, eject by pressing and holding the ‘Eject’ button on the unit (Ref.12) or remote (Ref.38)�... -
Page 23: Bluetooth And Phone Connection
(Ref.7) or select ‘BT’ on the remote control (Ref.22)� The choices will be displayed on the front screen (Ref.2)� Turn on Bluetooth on your phone and “Majority Oakington” will appear� Select this to connect� When the unit makes a short sound, it has successfully connected�... -
Page 24: Aux
Instructions Guide AUX-In AUX Audio-In Insert a 3�5mm audio cable to the back of the unit (Ref.16)� To choose AUX mode, press the ‘Mode’ button (Ref.7) repeatedly on the unit until ‘AUDIO’ displays on the front screen (Ref.2)� Alternatively, select the ‘AUDIO’... -
Page 25: Settings: Time And Date
Instructions Guide Settings: Time and Date Manually Setting the Time and Date The time will automatically update after the first use of DAB radio. However, you can still set the time manually as follows� Ensure the unit is in standby mode� Press and hold the ‘Clock’ button (Ref.34) on the remote for a few seconds�... -
Page 26: Settings: Alarm Or Timer Option
Instructions Guide Settings: Alarm or Timer Option In Standby, a timer can be set to automatically turn on and off at certain times and can also be used as an alarm� Press and hold the ‘Timer’ button (Ref.50) on the remote control� The alarm sound options available will flash on the display. -
Page 27: Settings: Additional Functions
Instructions Guide Settings: Additional Functions System Reset Press the ‘Menu’ button (Ref.29) on the remote control� Use the ‘Previous’ or ‘Next’ buttons (Ref.31/Ref.46) to scroll to “System” and press the ‘Play/Pause’ button (Ref.47) on the remote control to select� Press the ‘Previous’ or ‘Next’ buttons (Ref.31/Ref.46) to scroll to “Factory Reset”... - Page 28 Troubleshooting Observation Potential Cause/Solution No sound The station is not tuned in� Fine tune the station� The volume is set to a low position� Increase the volume� Headphones may be connected� Disconnect the headphones� Buttons are not Turn off the unit and turn on after a few seconds. working Please also try unplugging/replugging the radio�...
-
Page 29: Specifications
Dimensions (WxHxD) Net Weight 1.5kg Support If you require further assistance with your new soundbar, please contact our support team on the Majority website: www�majority�co�uk/support Warranty All products come with a standard 12 month warranty� All items must be registered on www�majority�co�uk... -
Page 30: Safety Information
1� Read these instructions� 2� Keep these instructions� Instructions are also The apparatus shall not be exposed to dripping or available for download at www�majority�co�uk splashing and no objects filled with liquid, such as 3� Heed all Warnings vases, shall be places on the apparatus�... - Page 32 www�majority�co�uk...
Need help?
Do you have a question about the OAKINGTON and is the answer not in the manual?
Questions and answers