Table of Contents
Advertisement
Advertisement
Table of Contents

Related Manuals for Hyundai HG4050


Summary of Contents for Hyundai HG4050
- Page 1 USER GUIDE...
- Page 2 The engine exhaust from this product contains chemicals known to cause cancer, birth defects or other reproductive harm. ©2018 Hyundai Power Equipment. All Rights Reserved. Licensed by Hyundai Corporation, Korea. HG_UG_EN_2018-01-25...
- Page 3 Thanks for choosing the HG Series! You're excited to power up, so we'll keep this brief. Let's get started!
- Page 4 MASTER CONTRACT: 230179 REPORT: 70057567 PROJECT: 70108715 THIS PRODUCT MEETS ALL CERTIFICATION REQUIREMENTS FROM:...
- Page 5 This user guide covers the safety, operation and maintenance procedures for the HG1500, HG4050, HG6850, HG8750, and HG10,000. All information in this publication is based on the latest product information available at the time of print.
- Page 6 Product registration is required for all product support and warranty coverage. Warranty support, operation assistance and product support is provided by Midland Power Inc., a licensed manufacturer of Hyundai Power Equipment. Please contact us directly for any warranty service questions. 1-877-528-3772 support@hyundaipower.ca...
-
Page 7: Table Of Contents
TABLE OF CONTENTS 1. Safety 2. Learn About Your Generator 2.1 Component Identification 2.2 Control Panel 2.4 Make Sure You Have Everything 2.5 Assembly Instructions 3. Pre-Operation Check 3.1 Prepare the Air Filter 3.2 Check the Oil Level 3.3 Check the Fuel Level 3.4 Electric Start Battery Connection 4. -
Page 8: Safety
1. SAFETY DANGER! USING A GENERATOR INDOORS CAN KILL YOU IN MINUTES. THE ENGINE EXHAUST FROM THIS PRODUCT CONTAINS CHEMICALS KNOWN TO CAUSE CANCER, BIRTH DEFECTS OR OTHER REPRODUCTIVE HARM. 1.1 OPERATOR SAFETY WARNING! Always perform an oil, fuel and air filter check before starting the engine. ... - Page 9 Do not allow any moisture to come in contact with the generator. Do not touch the spark plug while the engine is operating or shortly after the engine has been shut down. 1.2 AC SAFETY WARNING! Before connecting the generator to an electrical device or power cord: ...
- Page 10 cause severe personal injury or death. Allow the generator set to cool down before performing any maintenance. Always wear safety glasses when cleaning the generator set with air. Do not clean the generator set with a pressure washer because it can cause damage to the generator set.
-
Page 11: Learn About Your Generator
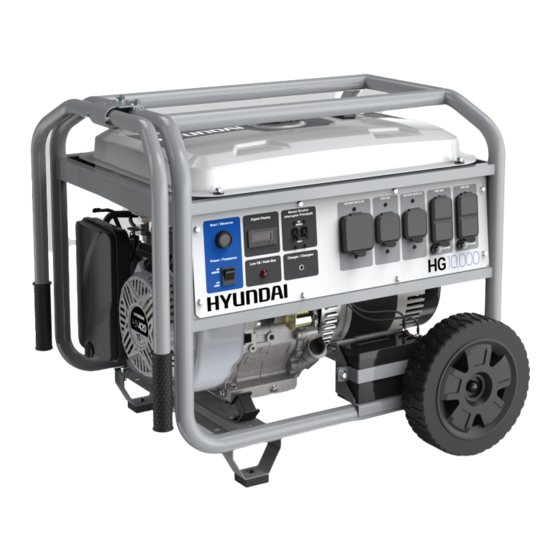
2. LEARN ABOUT YOUR GENERATOR This section will show you how to identify key parts of your generator. Going over the terminology below will make sure we’re on the same page. 2.1 COMPONENT IDENTIFICATION Fuel Tank Choke Lever Fuel Valve Front Panel Recoil Starter Handle... - Page 12 Fuel Gauge Fuel Gauge Handle Mount Fuel Tank Handle Mount Fuel Tank Choke Lever Gas Cap Choke Lever Handle Gas Cap Handle Front Panel Fuel Valve Front Panel Fuel Valve Air Filter Dipstick Air Filter Recoil Starter Handle Dipstick Recoil Starter Handle Fuel Gauge Handle Mount...
-
Page 13: Control Panel
120V outlet every two months to top up the battery and prolong its life. Voltage Selector (HG4050) When the switch is set to 240V, the generator will produce both 120 and 240 volt output but only half the power will be available for any 120 volt receptacle. - Page 15 HG SERIES...
- Page 17 HG SERIES...
-
Page 19: Make Sure You Have Everything
English user guide French user guide Engine oil Oil funnel Spark plug wrench Metal bar for turning spark plug wrench ITEMS INCLUDED (HG4050 - HG6850 - HG8750 - HG10,000) QUANTITY English user guide French user guide Engine oil Oil funnel... -
Page 20: Assembly Instructions
Install the wheel kit and feet as shown below. Install the handle kit by attaching the handle bar to the middle of the generator frame as shown on following pages. NOTE Add engine oil before use. Install Wheel Kit (HG4050 - HG6850 - HG8750 - HG10,000) - Page 21 HG SERIES...
- Page 23 HG SERIES...
-
Page 24: Pre-Operation Check
3. PRE-OPERATION CHECK These quick checks should be done each time the generator is started to ensure you get the most out of your generator. Set the generator on a level surface and the power switch to OFF. WARNING! EXHAUST GAS CONTAINS POISONOUS CARBON MONOXIDE. NEVER RUN THE GENERATOR IN AN ENCLOSED AREA. -
Page 25: Check The Oil Level
NOTE Running the engine without the air filter will quickly degrade the engine Always inspect air filter before using the generator. Check and clean the air filter according to the maintenance schedule. 3.2 CHECK THE OIL LEVEL Ensure the generator is on a level surface. Unscrew the oil cap and clean the dipstick. - Page 26 Effective Viscosity Range of Engine Oils 15W-50 Synthetic 5W-30 10W-30 5W-30 0°C °C 32°F °F NOTE Do not tilt the generator when adding engine oil. This could result in overfilling and damage to the engine. Using non-detergent or 2-stroke oil could shorten the engine’s working life.
-
Page 27: Check The Fuel Level
3.3 CHECK THE FUEL LEVEL WARNING! GASOLINE IS HIGHLY FLAMMABLE AND EXPLOSIVE UNDER CERTAIN CONDITIONS. REFUEL IN A WELL-VENTILATED AREA WITH THE ENGINE STOPPED. DO NOT SMOKE OR ALLOW OPEN FLAMES OR SPARKS IN THE AREA WHERE THE GENERATOR IS BEING REFUELED OR WHERE GASOLINE IS STORED. -
Page 28: Electric Start Battery Connection
3.4 ELECTRIC START BATTERY CONNECTION (HG8750 AND HG10,000) WARNING! BATTERIES PRODUCE EXPLOSIVE GASES. KEEP SPARKS, FLAMES AND CIGARETTES AWAY FROM THE BATTERY AT ALL TIMES. TO PREVENT THE POSSIBILITY OF CREATING A SPARK WHILE USING THE BATTERY, CONNECT CHARGING CABLES TO BATTERY TERMINALS FIRST, THEN TO THE GENERATOR. -
Page 29: Using Your Generator
4. USING YOUR GENERATOR DANGER! CARBON MONOXIDE USING A GENERATOR INDOORS WILL KILL YOU IN MINUTES. GENERATOR EXHAUST CONTAINS HIGH LEVELS OF CARBON MONOXIDE (CO), A POISONOUS GAS YOU CANNOT SEE OR SMELL. IF YOU CAN SMELL THE GENERATOR EXHAUST YOU ARE BREATHING CO. EVEN IF YOU CANNOT SMELL THE EXHAUST, YOU COULD BE BREATHING CO. -
Page 30: Starting Your Generator
4.1 STARTING YOUR GENERATOR WARNING! BEFORE USING THE GENERATOR, A GROUND WIRE MUST BE CONNECTED TO THE GROUND TERMINAL. THE TERMINAL IS LOCATED ON THE FRONT PANEL. BEFORE USING THE GROUND TERMINAL CONSULT A QUALIFIED ELECTRICIAN. NOTE Before starting the engine, disconnect all devices from the outlets on the front panel. - Page 31 When the engine warms up push the choke to the RUN/OPEN position. 4.1.2 MANUAL RECOIL START (HG4050 - HG6850 - HG8750- HG10,000) OPEN START Rotate the fuel valve to the OPEN position. If the engine is cold push the choke lever to the START/CLOSED position.
- Page 32 4.1.2 ELECTRIC START (HG8750 & HG10,000) OPEN START Rotate the fuel valve to the OPEN position. If the engine is cold push the choke lever to the START/CLOSED position. The choke is used to provide the proper air-fuel mixture when the engine is cold.
-
Page 33: Using The Hg Series With Your Appliances
4.2 USING THE HG SERIES WITH YOUR APPLIANCES After starting the HG Series you can connect your devices to it. Before starting make sure you know what you can power with your generator. Here’s how you can decide: Add the watt ratings of all the loads that the generator set will be powering at the same time. -
Page 34: Charging Automotive Batteries
4.3 CHARGING AUTOMOTIVE BATTERIES (HG1500 ONLY) WARNING! OVER-CHARGING A BATTERY MAY CAUSE EXPLOSION AND INJURY. AN EXPLOSIVE HYDROGEN GAS IS DISCHARGED THROUGH VENT HOLES IN THE BATTERY DURING CHARGING. DO NOT ALLOW SPARKS OR OPEN FLAMES AROUND THE GENERATOR OR BATTERY DURING THE CHARGING PROCESS. -
Page 35: Folding The Handle
Disconnecting the Battery Charging Cable Stop the engine. Disconnect the black lead from the negative (-) battery terminal, and the red lead from the positive (+) battery terminal. Reconnect the vehicle battery ground cable. 4.4 FOLDING THE HANDLE The handle folds down for compact storage and locks into position for easy maneuvering. -
Page 36: Stopping The Engine
Turn the power switch to the OFF position. Turn the fuel valve to the CLOSED position. CLOSED CLOSED Normal Operation (HG4050 - HG6850 - HG8750 - HG10,000) Switch off the connected electrical appliances, and disconnect them from the generator. Turn the power switch to the OFF position. -
Page 37: Maintenance
6. MAINTENANCE Proper maintenance keeps your generator in the best operating condition by ensuring safe, economical and trouble-free operation. Only use genuine parts and recommended fluids to replace the worn components. Improper maintenance may cause the generator to malfunction and can lead to serious injury. Contact customer support if you have any maintenance questions. -
Page 38: Maintenance Schedule
6.1 MAINTENANCE SCHEDULE Maintain the generator according to the maintenance schedule in this section. NOTE Service more frequently when used in dusty areas. These items should be serviced by an authorized service center, unless you have the proper tools and are mechanically proficient. Refer to manual for service procedures. -
Page 39: Emission Control System
6.2 EMISSION CONTROL SYSTEM Emission Source Exhaust gas contains carbon monoxide, nitrogen oxides (NOx) and hydrocarbons. It is very important to control the emissions of NOx and hydrocarbons as they are a major contributor to air pollution. Carbon monoxide is a poisonous gas. The emission of fuel vapors is a source of pollution as well. -
Page 40: Changing The Oil
Replacement parts and accessories The parts making up the emission control system in your product’s engine have been specifically approved and certified by the regulatory agencies. You can trust that the replacement parts supplied by customer service have been manufactured to the same production standard as the original parts. - Page 41 Remove the oil drain screw and allow the oil to completely drain into the pan. Reinstall drain screw before filling the engine with fresh oil up to the maximum mark on the dipstick. Do not overfill oil reservoir. Use a funnel to prevent spillage.
-
Page 42: Cleaning The Air-Filter
6.4 CLEANING THE AIR-FILTER WARNING! USING GASOLINE OR OTHER FLAMMABLE SOLVENTS CAN CAUSE A FIRE OR EXPLOSION. DO NOT OPERATE THIS PRODUCT WITHOUT AN AIR FILTER. A dirty air filter will restrict air flow into the carburetor. Clean and maintain the air filter regularly, especially in dusty areas. -
Page 43: Spark Plug Service
6.5 SPARK PLUG SERVICE NOTE DO NOT RINSE SPARK PLUG IN WATER. FOLLOW GUIDELINES AND BE CAREFUL NOT TO OVERTIGHTEN THE SPARK PLUG. Recommended spark plug: F7TC Check the spark plug gap and clean the carbon deposits at the bottom of the spark plug. -
Page 44: Spark Arrester Maintenance
6.6 SPARK ARRESTER MAINTENANCE Spark Arrester After the engine has cooled down remove the spark arrester from the muffler by loosening the screw. Use a brush to remove carbon deposits from the spark arrester. If the spark arrester is worn down, replace it. Reinstall the spark arrester. -
Page 45: Battery Charger
6.8 BATTERY CHARGER (HG8750 & HG10,000) If your HG series is equipped with an electric start it also features a battery charging port. When storing your generator for an extended period of time the battery will self-discharge, which could cause permanent damage or even complete failure of the battery. -
Page 46: Transportation & Storage
7. TRANSPORTATION & STORAGE Transporting the Generator Do not overfill the fuel tank (No residual fuel on the neck of tank). Do not use the generator in the vehicle. The generator should ONLY be used while in a well ventilated area. Avoid exposing the generator to prolonged direct sunlight while in an enclosed vehicle. - Page 47 Draining the Carburetor Carburetor Drain Screw 8. 6 8. 6. 2) Ta Container a ft 8. 6. 2) Ta k e off the s pa rk a rres ter a fter the eng ine cool d own. 8. 6. 2) Ta k e off the s pa rk a rres ter from the a fter the eng ine cool d own.
- Page 48 Long Term Storage Before storing the generator set for an extended period: Ensure that the storage area is free of excess humidity and dust. Drain the fuel tank and the carburetor. To prevent corrosion, coat screws and exposed metal with anti-rust oil at least twice per year.
-
Page 49: Troubleshooting
8. TROUBLESHOOTING If the engine does not start: Is there fuel in the tank? Refill the fuel tank. Turn the fuel switch to OPEN. Is the fuel switch OPEN? Turn the power switch to RUN. Is the power switch in RUN? Is there enough oil in the engine? Add the recommended oil. - Page 50 If appliances do not operate: Is the output indicator light ON? Contact an authorized Is the overload indicator light ON? dealer Check the electrical Contact an authorized appliance for any fault dealer Stop the engine and then replace or repair the appliance Restart the engine DC receptacle without any electricity: Repair or replace the appliance.
-
Page 51: Technical Specifications
9. TECHNICAL SPECIFICATIONS HG SERIES... -
Page 52: Wiring Diagram
10. WIRING DIAGRAM HG1500... - Page 53 WIRING DIAGRAM HG4050 HG SERIES...
- Page 54 WIRING DIAGRAM HG6850...
- Page 55 WIRING DIAGRAM HG8750 HG SERIES...
- Page 56 WIRING DIAGRAM HG10,000...
-
Page 57: Appendix
11. APPENDIX The standard condition of rated power output: Altitude: 0m Ambient temperature: 25°C Relative humidity: 30% Factor of Environment Correction: Altitude (m) Ambient Temperature°C 0.98 0.96 0.93 0.90 0.93 0.91 0.89 0.87 0.84 1000 0.87 0.85 0.82 0.80 0.78 2000 0.75 0.73... -
Page 58: Limited Warranty
Toll Free: 1-877-528-3772 E-mail: support@hyundaipower.ca Online: www.hyundaipower.ca Hyundai Power Equipment products are distributed by: Midland Power Inc. 376 Magnetic Drive, Toronto, ON M3J 2C4, Canada This product is warranted to be free of defects in material and workmanship for three years from date of purchase. - Page 59 Exclusions Not Covered by this Limited Warranty Normal engine/alternator wear Damage caused by lack of maintenance as described in the Hyundai User Guides, or negligence by using improper or impure motor oil, coolant, or fuel Damage caused by accidents, improper installation or storage;...
- Page 60 Batteries Batteries supplied with any generator product should be considered a bonus item and not covered by warranty. Batteries can be damaged by shock, shorting terminals, heat, acid spillage and a number of other factors that cannot be controlled after they have left our facility. It is the customer’s responsibility to take great care when handling a battery so no spillage of acid will occur and cause corrosion;...
- Page 61 Emission Control System Warranty Parts: This list applies to parts supplied by Midland Power Inc. and does not cover parts supplied by the equipment manufacturer. Please see the original equipment manufacturer’s emissions warranty for non-Midland Power Inc. parts. Consumable parts are covered up to a maximum of 30 days. SYSTEMS COVERED PARTS IN WARRANTY...
- Page 62 Warranty Claim Procedure Warranty service must be performed by one of our authorized service dealers. Do not return your product where purchased. If you feel your generator is malfunctioning due to a defect or misuse, simply contact our customer support center for technical advice, a warranty claim or general information.
- Page 63 Customer Service 1-877-528-3772 support@hyundaipower.ca www.hyundaipower.ca HG SERIES...
- Page 64 Enjoy! Be sure to check hyundaipower.ca for updates regarding your generator.
- Page 66 www.hyundaipower.ca support@hyundaipower.ca HG SERIES 1.877.528.3772...
Need help?
Do you have a question about the HG4050 and is the answer not in the manual?
Questions and answers