Sunny Health & Fitness SF-E905 User Manual
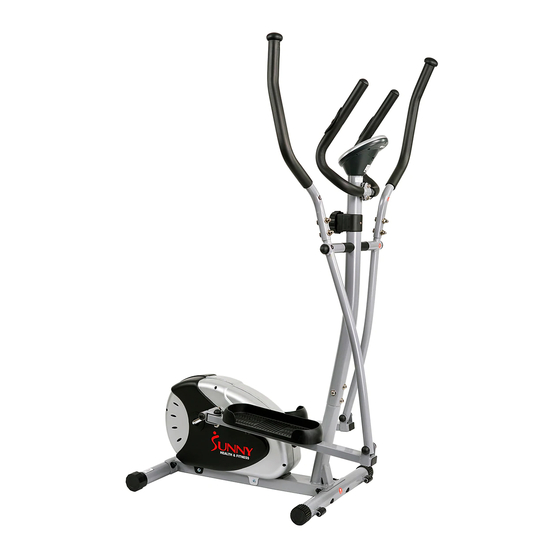
Magnetic elliptical bike
Hide thumbs
Also See for SF-E905:
- User manual (49 pages) ,
- Owner's manual (9 pages) ,
- User manual (18 pages)
Table of Contents
Advertisement
Quick Links
Advertisement
Table of Contents

Related Manuals for Sunny Health & Fitness SF-E905


Summary of Contents for Sunny Health & Fitness SF-E905
-
Page 1: User Manual
MAGNETIC ELLIPTICAL BIKE SF-E905 USER MANUAL IMPORTANT! Please retain owner’s manual for maintenance and adjustment instructions. Your satisfaction is very important to us, PLEASE DO NOT RETURN UNTIL YOU HAVE CONTACTED US: support@sunnyhealthfitness.com or 1- 877 - 90SUNNY (877-907-8669). -
Page 2: Important Safety Information
IMPORTANT SAFETY INFORMATION We thank you for choosing our product. To ensure your safety and health, please use this equipment correctly. It is important to read this entire manual before assembling and using the equipment. Safe and effective use can only be achieved if the equipment is assembled, maintained and used properly. -
Page 3: Exploded Diagram
EXPLODED DIAGRAM 1... -
Page 4: Hardware Package
EXPLODED DIAGRAM 2 HARDWARE PACKAGE #28 M10*L45*L25 4PCS #29 d10*1.5 4PCS #37 M8*40 4PCS #30 M10 4PCS #33 M8 4PCS #14 Φ20*d8.5*R25 4PCS #19RΦ16*89*L23*B0.5*20-R 1PC #19LΦ16*89*L23*B0.5*20-L 1PC #39 Φ #40L 1 PC 2PCS B0.5X20 13XB2 #40R 1 PC B0.5X20 #102 S8 1PC #103 S6 1PC #104 S13、S14 2PCS #105 S17、S19 2PCS... -
Page 5: Parts List
PARTS LIST Description Spec. Qty. Description Spec. Qty. Φ13XB2 Main Frame Spring Washer Front Stabilizer 40L/R Nylon Nut B0.5X20 1pr. Rear Stabilizer Nut Cap Roller Cap Square End Cap Leveler Cap Foam Grip Carriage Bolt M10XL57 Foam Grip Φ10X1.5XΦ Arc Washer Round End Cap 25XR28 Domed Nut... - Page 6 Hex Nut Bearing 6000z Hex Bolt M6XL15 Flywheel Axle Spring Washer Flywheel Flat Washer Bolt ST4.3X20 Axle Stop Ring Flange Nut Magnetic Board Axle Bolt ST5X20 Magnetic Board Flat Washer d10X20X1.5 Spring Flat Washer d5X1 Square Magnet Flat Washer d8X19X1.5 M10X1 Hex Thin Nut Alloy Sleeve...
-
Page 7: Assembly Instruction
ASSEMBLY INSTRUCTION STEP 1: Attach the Front Stabilizer (No. 2) and Rear Stabilizer (No. 3) onto the Main Frame (No. 1), secure with 4 Carriage Bolts (No. 6), 4 Arc Washers (No. 7) and 4 Domed Nuts (No. 8) which are pre-attached to the stabilizer, tighten with the Spanner (No. - Page 8 STEP 3: A: Attach the Swing Bar (No. 24L/R) to the long axle of the Handlebar Post (No. 9) with Hex Bolt (No. 25) and Flat Washer (No. with Spanners (No. 104). Note: Please do not fully tighten at this time.
- Page 9 If you experience any trouble with this step; please STOP and read our alternate assembly directions below before continuing. Incorrect installation can result in permanent damage to your machine. If you have trouble connecting this part; try this alternate assembly suggestion: Step A Disconnect the Connecting Joint (No.
- Page 10 STEP 5: A: Remove the preassembled 2 Spring Washers (No. 34) and 2 Hex Bolts (No. 35) from the Handlebar Post (No. 9). Attach Armrest (No. Handlebar Post (No. 9) in place. Secure it with 2 Spring Washers (No. 34) and 2 Hex Bolts (No.
- Page 11 ADJUSTMENTS & USAGE GUIDE 1.If you find there is no difference between tension level 1 to level 8, please check the connection of the tension cable. Please see Diagram A under Step 2. 2.If the meter does not show numbers correctly, please check the batteries. If the meter does not count the speed and time, please check the connections of Upper Sensor Wire (No.
- Page 12 6.If it is very hard to pedal on the higher tension levels, or you hear rubbing noises, please remove the Chain Cover (No. 65L/R), and adjust the screw seen in the following diagram. You will need to lower the position of the screw by turning counter-clockwise; this will keep the Magnet Board (No.
-
Page 13: Exercise Computer
EXERCISE COMPUTER FUNCTION KEYS: MODE: Press to select functions. Press and hold the MODE button for 6 seconds to reset time, distance and calories. SET: Press to set values of time, pulse, distance and calories when not in scan mode. Press the MODE button to cycle through functions: time, distance and calories to select desired function.
Need help?
Do you have a question about the SF-E905 and is the answer not in the manual?
Questions and answers