Table of Contents
Advertisement
Advertisement
Table of Contents

Summary of Contents for Kemppi X3
- Page 1 A7 MIG Welder X3 MIG Welder...
-
Page 2: Table Of Contents
4.2.1 Setup panel ..................About X3 MIG Welder product series . -
Page 3: Read First
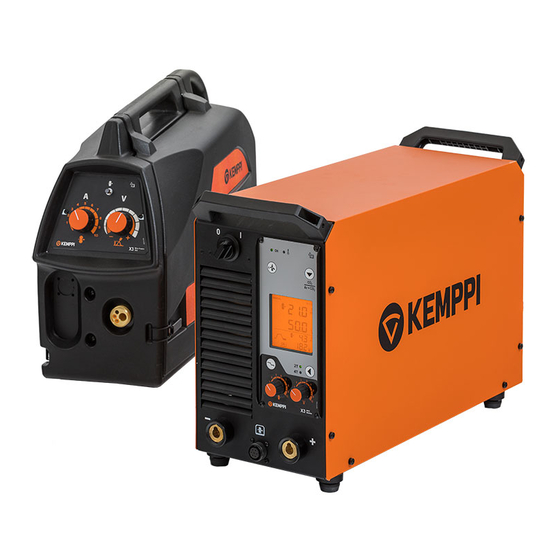
The X3 MIG Welder contains either a 400- or 500-ampere on the use, maintenance and safety of your Kemppi X3 Power Source and the X3 Wire Feeder 300 unit for wire Note: Gives the user a useful piece of information. -
Page 4: X3 Mig Welder Structure
Mains cable Feeder Mounting Plate. LCD display Power source fuse, 6.3 A • X3 Wheel Set / X3 Four Wheel Set (optional). The Fan grill Shielding gas heater fuse, 2 A power source can be equipped with large rear Earth return cable connector ( – ) 10. -
Page 5: X3 Wire Feeder
INSTALLATION 2.3 X3 Wire Feeder 3.2 Positioning of the machine 3.1 Before use Always make sure before use that the products have not Place the machine on a sturdy, level surface that is dry been damaged during transportation. and does not allow dust or other impurities to enter the machines cooling air flow. -
Page 6: Distribution Network
Unscrew the mounting screws on the cover plate rates of harmonic current may cause losses and distur- The X3 Power Source is connected to a 380 – 440 V three- of the machine, and remove the case by lifting it. -
Page 7: Wire Feeder Connection
Normally the wire feeder should be connected to the plus (+) pole. However, with some filler wires and shielding gases, you should connect it to the minus (-) pole, and the earth return cable to the plus pole. © Kemppi Oy 2018 X3 MIG Welder 1814... -
Page 8: Optional Accessories
If you are using wheels or undercarriage, you can attach X3 MIG Welder power source. the wire feeder on top of the power source using the X3 Wire Feeder Mounting Plate to create a compact welding unit that is easy to move around. -
Page 9: Operation
Too much or unnecessary loads can impact welding quality, load and wear to the wire feed system. © Kemppi Oy 2018 X3 MIG Welder 1814... -
Page 10: Feeding The Filler Wire
Feed the wire to the gun contact tip and prepare to weld. Press the Wire Inch button and allow the filler wire to feed through the gun cable to the contact tip. © Kemppi Oy 2018 X3 MIG Welder 1814... - Page 11 Mount the lower feed roll, ensuring that the pin on the shaft fits in the cut on the Al, (Fc, Mc, Ss, Fe) W001067 W001068 feed roll. U-groove W001069 W001070 W001071 W001072 © Kemppi Oy 2018 X3 MIG Welder 1814...
-
Page 12: Controlling The Welding System
Use the Setup panel on the X3 Power Source to change the settings of your welding system. The X3 MIG Power Source is equipped with an LCD display. Welding parameter settings are made through the X3 Wire Feeder control panel for wire feed speed... -
Page 13: Settings Menu Parameters
1 = On / 0 = Off Exit gouging mode by pressing Crater fill Resets the user interface and special settings to 2T/4T simultaneously. factory defaults on menu exit. Output terminals are live in carbon arc gouging mode. © Kemppi Oy 2018 X3 MIG Welder 1814... -
Page 14: Wire Feeder Control Panel
(MAG) if you are using mixed gas. MIG welding with 2T mode of the gun trigger. X3 MIG Welder has a factory set Pre gas time of 0.2 s • Push the trigger – welding starts after preset Pre and a Post gas time of between 2 – 4 s, depending on the gas time. - Page 15 Post gas time at least preset minimum. Pre gas time Crater fill time Post gas time Pre gas time Pre gas time Crater fill time Post gas time Post gas time © Kemppi Oy 2018 X3 MIG Welder 1814...
-
Page 16: Calibrating Wire Feed Speed
12 seconds. values. The X3 Wire Feeder 300 must always be calibrated before the first use and if combined with a different X3 Power Source. Check the wire feeder’s calibration regularly. Correctly If you enter a value that does not fit in, the machine calibrated wire feeder ensures quality welds. -
Page 17: Troubleshooting
• Check the mains cable and the wall plug waste! * Contact Kemppi service in case of Err 2 and Err 3 without mains voltage cause. In observance of European Directive 2002/96/EC on waste electrical and electronic equipment, and its im-... -
Page 18: Technical Data
TECHNICAL DATA X3 Power Source 400 / 400 AU Mains connection voltage 3~, 50/60 Hz 380 – 440 V (–10 %…+10 %) 380 – 440 V (–10 %…+10 %) Mains connection cable H07RN-F 4 G4 4 G4 Rated power at max. current 60 % ED 17.6 kVA... - Page 19 X3 Wire Feeder 300 Operating voltage 24 V Gun connection Euro Wire feed mechanism 4-roll Filler wires 0.6 – 1.6 mm MC/FC 0.8 – 2.0 mm Wire feed speed 0 – 25 m/min Wire spool weight (max) 20 kg Wire spool diameter (max)
-
Page 20: Ordering Codes
Earth return cables < 15.7 17.5 18.8 20 21.5 27.5 31.5 32.8 35.5 37 Earth return cable, X3 MIG Welder 50 mm², 5 m, max. 300 A 6184511 125 145 165 200 245 285 300 330 345 Earth return cable, X3 MIG Welder 70 mm², 5 m... - Page 21 And you know. userdoc.kemppi.com Declarations of Conformity – Overensstemmelseserklæringer – Konformitätserklärungen – Declaraciones de conformidad – Vaatimustenmukaisuusvakuutuksia – Déclarations de conformité – Dichiarazioni di conformità – Verklaringen van overeenstemming – Samsvarserklæringer – Deklaracje zgodności – Declarações de conformidade – Заявления о соответствии –...


Need help?
Do you have a question about the X3 and is the answer not in the manual?
Questions and answers