Subscribe to Our Youtube Channel
Summary of Contents for NanoCam Plus NCP-DVRT1
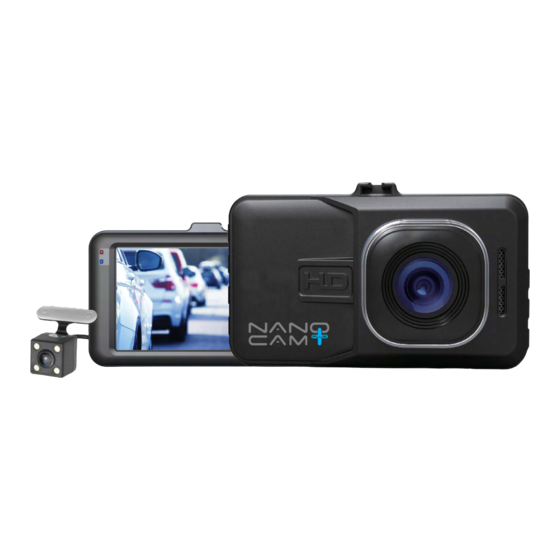
- Page 1 NCP-DVRT1 USER MANUAL FULL HD DUAL DASH CAM DVR WITH REVERSE CAMERA & REVERSE MONITOR...
-
Page 2: Table Of Contents
Caution ..................................4 Battery warning ................................4 Notes on Installation ..............................4 Introduction ................................5 1.1 Features ................................5 1.2 Package Contents .............................. 5 1.3 Product Overview ............................... 5 Getting Started ................................. 6 2.1 Inserting the Memory Card..........................6 2.2 Installing Car DVR ............................... 6 2.2.1 Adjust the angle of the DVR ........................ - Page 3 2.7.5 White Balance ............................11 2.7.6 Auto Record............................11 2.7.7 Record Audio ............................11 2.7.8 Park Mode ............................12 2.7.9 Set Date/Time ............................12 2.8.0 Language .............................. 12 2.8.1 Date Stamp............................13 2.8.2 Format ..............................13 2.8.3 Default Setting ............................13 Settings Menu .................................
-
Page 4: Caution
Caution • Ensure you are using your Car DVR within your countries’ road laws. Please make sure you are familiar with your local road legislation before use. • Avoid leaving your Car DVR in direct sunlight for extended periods of time in an unventilated space. •... -
Page 5: Introduction
1. Introduction Thank you for purchasing a NanoCam Plus Car DVR. We are certain that our product will give you trouble free operation while providing you with a safety feature that enhances your driving experience. Our products, like most after-market safety enhanced devices, are designed to assist and aid the driver, not to replace the manual function of the person operating the vehicle. -
Page 6: Getting Started
2. Getting Started 2.1 Inserting Memory Card With the Car DVR turned off and the screen facing towards you insert the memory card with the text on the Micro SD card facing away from you. Push the memory card in until a click is heard. Note: 1. -
Page 7: Connecting The Rear Facing Camera
2.3.2 Manual Power On/Off and Reset 2.3.2.1 Manual Power On Hold the (Power) button on the top of the camera until the NanoCam Plus start up screen appears. 2.3.2.2 Power Off Make sure that recording has been stopped and then press the (Power) button on the top of the car DVR. -
Page 8: Initial Settings
Initial Settings Before using the Car DVR we recommend Formatting the Inserted Micro SD Card and setting the correct Time and Date. 2.5.1 Formatting the Inserted Micro SD Card Formatting the Micro SD card will delete all information on the inserted Micro SD Card and prepare the card for use with the Car DVR. -
Page 9: Locked Recording
Note: 1. Because of how some vehicles are wired, the recording may continue when the engine is switched off. If this happens, please manually turn off the Car DVR or remove the car adapter from the cigarette lighter when not in use. 2. -
Page 10: Loop Recording
2.7.2 Loop Recording Loop recording allows you to set the duration that the camera will record before creating a new clip. To set the clip length please follow the instructions below. 1. Press the (OK) Button to stop the Car DVR from recording. 2. -
Page 11: White Balance
2.7.5 White Balance The White Balance setting is used to optimise your Car DVR to produce the best footage for the surroundings. To adjust the White Balance, please follow the instructions below. 1. Press the (OK) Button to stop the Car DVR from recording. 2. -
Page 12: Park Mode
2.7.8 Park Mode Park Mode watches over your parked vehicle and will trigger a recording when an impact is detected. 1. Press the (OK) Button to stop the Car DVR from recording. 2. Press the (Menu) Button to enter the Settings Menu. 3. -
Page 13: Date Stamp
2.8.1 Date Stamp Date stamp will stamp the current date and time onto the footage for future reference. To set the date stamp please follow the instructions below. 1. Press the (OK) Button to stop the Car DVR from recording. 2. -
Page 14: Settings Menu
3. Settings Menu Image Quality Photo Quality 2 Mins 5 Mins Loop Recording 3 Mins Motion Detection Auto Incandescent White Balance Daylight Fluorescent Cloudy Exposure Auto Record 10 Seconds 30 Seconds Screen Time out 20 Seconds Recording Audio Park Mode High G-Sensor Set Date... -
Page 15: Warranty
This warranty is provided in addition to your rights under the Australian & New Zealand Consumer Law. NanoCam Plus warrants that this product is free from defects in material and workmanship for a period of 12 months from the date of purchase or for the period stated on the packaging. - Page 16 www.nanocamplus.com.au www.nanocamplus.co.nz...


Need help?
Do you have a question about the NCP-DVRT1 and is the answer not in the manual?
Questions and answers
Hi, How do I change the settings so the reverse camera is the only camera being displayed on the DVR? I want it on whenever my car is running, not only when it’s in reverse. Right now it’s only a small square in the corner which is no good to me.