Table of Contents
Advertisement
Advertisement
Table of Contents

Related Manuals for NanoCam Plus NCP-DVR1080


Summary of Contents for NanoCam Plus NCP-DVR1080
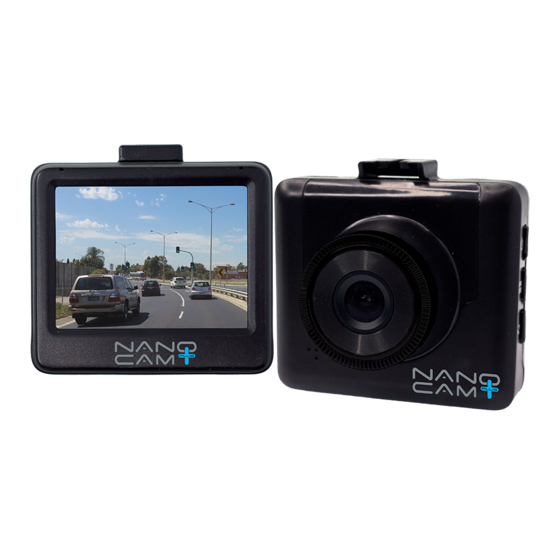
- Page 1 NCP-DVR1080 USER MANUAL FULL HD DASH CAM DVR WITH 2.4" SCREEN...
-
Page 3: Table Of Contents
Caution ..................................5 Battery warning ................................5 Notes on Installation ..............................5 Introduction ................................6 1.1 Features ................................6 1.2 Package Contents .............................. 6 1.3 Product Overview ............................... 6 Getting Started ................................. 7 2.1 Inserting the Memory Card..........................7 2.2 Installing Car DVR ............................... 7 2.2.1 Adjust the device position ........................ - Page 4 2.7.7 Date Stamp............................14 2.7.8 G Sensor .............................. 14 2.7.9 Shrink Video Files ..........................14 2.8.0 Park Mode ............................14 2.8.1 Number Plate ............................14 Photo Mode ................................15 3.1 Photo Menu ..............................15 3.1.1 Capture Mode ............................15 3.1.2 Resolution ............................. 15 3.1.3 Sequence .............................
-
Page 5: Caution
Caution • Ensure you are using your Car DVR within your countries’ road laws. Please make sure you are familiar with your local road legislation before use. • Avoid leaving your Car DVR in direct sunlight for extended periods of time in an unventilated space. •... -
Page 6: Introduction
1. Introduction Thank you for purchasing a NanoCam Plus Car DVR. We are certain that our product will give you troublefree operation while providing you with a safety feature that enhances your driving experience. Our products, like most after-market safety enhanced devices, are designed to assist and aid the driver, not to replace the manual function of the person operating the vehicle. -
Page 7: Getting Started
2. Getting Started 2.1 Inserting Memory Card With the Car DVR turned off and the screen facing towards you insert the memory card into the slot on the underside of the camera with the text on the Micro SD card facing away from you. Push the memory card in until a click is heard. Note: 1. -
Page 8: Powering The Car Dvr On / Off
2.3.2 Manual Power On/Off and Reset 2.3.2.1 Manual Power On Hold the Power button on the top of the camera until the NanoCam Plus start up screen appears. 2.3.2.2 Power Off Make sure that recording has been stopped and then press the Power button on the top of the car DVR. -
Page 9: Set The Date / Time
2.5.2 Set Date / Time Setting the Time and Date allows you to stamp your footage with the time as a reference. 1. Press the (Rec/Ok) Button to stop the Car DVR from recording. 2. Press the (Menu) Button to enter the Video Menu . 3. -
Page 10: Recording Screen
2.6.3 Recording Screen Number Icon Item Description Recording Indicator The Record Indicator will flash when the Car DVR is Recording Mode Mode shows whether you are in Video mode or Photo mode Loop Shows the duration of the loop clips Motion Detection The Motion Detection Icon will appear when Motion detection is activated Exposure... -
Page 11: Video Mode
2.6.4 Video Mode When the Car DVR is powered up the video screen will start by default. In this screen recording will automatically start and can be stopped by pressing the (Rec/Ok) Button. To access the Video Menu, ensure that the Car DVR is not recording then press the (Menu) button. -
Page 12: Exposure
2.7.3 Exposure Exposure is used to manually control the light sensitivity settings. To change the Exposure setting follow the instructions below. 1. Press the (Rec/Ok) Button to stop the Car DVR from recording. 2. Press the (Menu) Button to enter the Video Menu . 3. -
Page 13: Recording Audio
2.7.6 Recording Audio The Recording Audio setting allows you to mute the microphone during recording, or set it to record. To set your recording preferences, please follow the instructions below. 1. Press the (Rec/Ok) Button to stop the Car DVR from recording. 2. -
Page 14: Date Stamp
2.7.9 Shrink Video Files The Shrink Video Files setting allows you to shrink the output size of the video files. To set your recording preferences, please follow the instructions below. 1. Press the (Rec/Ok) Button to stop the Car DVR from recording. 2. -
Page 15: Photo Mode
3. Photo Mode This screen is used to capture still images using your Car DVR. To access the Photo screen ensure that the camera is not recording and press the (Mode) button. Photo mode also has a menu which is used to edit the photo settings. This menu can be accessed by pressing the (Menu) in the Photo Screen. -
Page 16: Sequence
3.1.3 Sequence When Sequence is activated, when a photo is triggered a sequence of 3 photos is taken. To activate or deactivate Sequence mode, follow the instructions below 1. Enter the Photo screen. 2. Press the (Menu) Button to enter the Photo Menu . 3. -
Page 17: White Balance
3.1.6 White Balance The White Balance setting is used to manually adjust the settings used to counteract different light conditions. This setting is set to Auto by default. To change the White Balance setting follow the instructions below. 1. Enter the Photo screen. 2. -
Page 18: Exposure
3.1.9 Exposure Exposure is used to manually control the light settings. To change the Exposure setting follow the instructions below 1. Enter the Photo screen. 2. Press the (Menu) Button to enter the Photo Menu . 3. Use the Buttons to navigate the Photo Menu and highlight the Exposure setting and press (Rec/Ok) to select. -
Page 19: Setting Menu
Note: 1. Menus cannot be accessed while the camera is recording. Please stop the recording before attempting to access the menu. 2. This setting can only be accessed through the Photo Menu, please make sure that you are in the Photo screen when you access the menu. -
Page 20: Language
3.2.3 Language The Language setting is used to select your preferred Language in the menus. To set the systems language follow the instructions below. 1. Ensure that the DVR is not recording. 2. Press the (Menu) Button to enter the Video Menu. 3. -
Page 21: Format
Note: 1. Menus cannot be accessed while the camera is recording. Please stop the recording before attempting to access the menu. 2. This setting can only be accessed through the Settings Menu which can be accessed via the Video and Photo Menus. 3. -
Page 22: Playback Screen
3.3 Playback Screen This screen is used to playback photos and videos. To access the Playback screen ensure that the camera is not recording and press the (Mode) button. This will send the camera to the photo screen. While in the Photo Screen press the (Mode) button again which will bring you to the Playback Screen. -
Page 23: Slide Show
3.4.3 Slide Show Slide show can be used to display a slide show of the saved photos and videos taken with your Car DVR. To activate the Slide Show please follow the instructions below. 1. Navigate to the playback screen using the instructions in the section labelled Playback Screen 2. -
Page 24: Menu Tables
4.0 Menu Tables 1080FHD 1920x1080 Single 55 Timer Capture Mode 2S Timer 10S Timer 720P 1280x720 Resolution 12M 4032x3024 3M 2048x1536 WVGA 848x480 10M 3648x2736 2MHD 1920x1080 VGA 640x480 Resolution 8M 3264x2448 VGA 640x480 3 Minutes Loop recording 5M 2592x1944 1.3 1280x960 2 Minutes 5 Minutes... - Page 25 Set Date and Time Delete Current Delete All Date / Time Delete 3 Minutes Lock Current Lock All Protect Auto Power Off Unlock Current Unlock All 1 Minute 2 Seconds 8 seconds Key Beeps Slide Show 5 Seconds English Italian French Chinese S &...
-
Page 27: Warranty
This warranty is provided in addition to your rights under the Australian & New Zealand Consumer Law. NanoCam Plus warrants that this product is free from defects in material and workmanship for a period of 12 months from the date of purchase or for the period stated on the packaging. - Page 28 www.nanocamplus.com.au www.nanocamplus.co.nz...
Need help?
Do you have a question about the NCP-DVR1080 and is the answer not in the manual?
Questions and answers