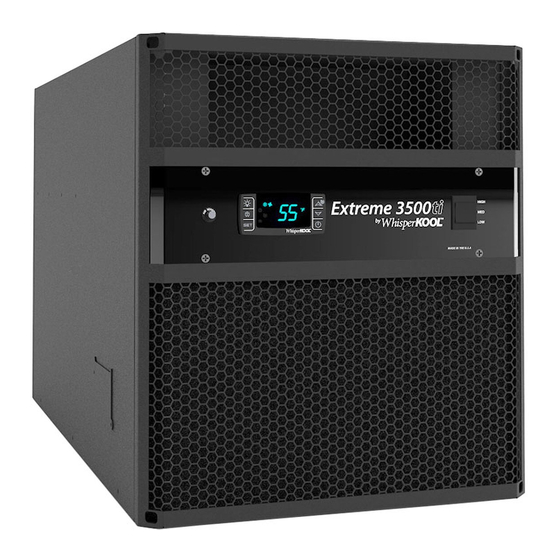
WhisperKool Extreme 3500ti Owner's Manual

WhisperKool Extreme 3500ti Owner's Manual

Fully ducted wine cellar cooling unit
Hide thumbs Also See for Extreme 3500ti:

Advertisement

Quick Links

WhisperKOOL EXTREME
OWNER'S MANUAL
The Coolest Thing In Wine Storage
033114
EXti

Advertisement

Table of Contents
loading
Need help?

Need help?

Do you have a question about the Extreme 3500ti and is the answer not in the manual?

Questions and answers

Subscribe to Our Youtube Channel

Summary of Contents for WhisperKool Extreme 3500ti

  • Page 1 WhisperKOOL EXTREME OWNER’S MANUAL The Coolest Thing In Wine Storage 033114 EXti...
  • Page 2 WhisperKOOL. Every effort has been made to ensure that the information in this manual is accurate. WhisperKOOL is not responsible for printing or clerical errors.
  • Page 3: Table Of Contents

    Technical Assistance & Accessories ......Installation Terms and Conditions ......www.whisperkool.com | Page 1...
  • Page 4: Quick Reference Guide

    QUICK REFERENCE GUIDE Front / Side View Grille w/Filter Water Port (Included with Built -in- Humidity Option) Controller Humidistat Connection (Included with Built -in- Humidity Option) Probe Input Compressor Access Panel Control Panel (see page 12 for details) Bottle Probe Fan Speed Control Rear / Side View Grille w/Filter...
  • Page 5 Exhaust Plenum Water Port (Included with Built -in- Humidity Option) Supply Plenum Intake Plenum Compressor Access Panel Return Plenum Rear Controller w/Remote Box Control Panel (see page 12 for details) Drain Port Bottle Probe Fan Speed Control www.whisperkool.com | Page 3...
  • Page 6: Controller

    QUICK REFERENCE GUIDE Standard Controller Layout *If your unit is installed through the wall and does not have a remote keypad you have the Standard Controller* Note: The 1 or 3-5 qualifies the amount of time in seconds that the button must be pushed to activate the feature. Refer to page 27 for complete listing of buttons and symbols.
  • Page 7: Fan Speed & Specifications

    Can be done if the outside temperature does not exceed 110°F, the external grille cover is Outside Venting required. Ducting Options Unit can be fully ducted. Warranty 2 year parts and labor / 5 year compressor www.whisperkool.com | Page 5...
  • Page 8: Introduction

    Thank you for purchasing a WhisperKOOL Extreme Series cooling unit. We strive to provide the highest quality products and the best possible customer service. If you have any questions about your WhisperKOOL unit, please call us at 1-800-343-9463 or visit whisperkool.com.
  • Page 9: Receiving & Inspecting The Unit

    Connection “T” (1) Please leave the WhisperKOOL unit in its original box until you are ready for installation. This will allow you to move the product safely without damaging it. When you are ready to remove the product from the box, refer to the installa- tion instructions.
  • Page 10: Quick Start Guide

    WhisperKOOL unit. Do not use a GFI (Ground Fault Interrupter) line. 4. For your convenience, the WhisperKOOL unit has two power inlets, one on the side of the unit and the other on the back. Use the selector switch, located on the right side of the unit, to select the inlet you would like to use.
  • Page 11: Preparing The Wine Cellar

    How to Build a Wine Cellar Instructional Video WhisperKOOL has a construction tutorial available on line at our website: www.whisperkool.com. This tutorial will walk you through the steps of constructing a properly built wine cellar and the installation of our WhisperKOOL product line. Wall & Ceiling Framing Build wine cellar walls using standard 2x4 or 2x6 construction methods and ceiling joists following the guidelines of local and state codes in your area.
  • Page 12 In cases where glass doors are used and the room size is close to the recommended unit size, the next larger size WhisperKOOL should be used. This will compensate for the insulation loss due to the lower insulating rating of glass.
  • Page 13 However, you must have a fresh air inlet as well. If your unit requires ducting, please contact WhisperKOOL to obtain a specially designed ducting plenums for the unit.
  • Page 14: Pre-Installation

    Electrical Needs The WhisperKOOL Extreme Unit requires a dedicated 115 volt 20 amp circuit. The unit draws a large amount of amps at initial start up. By designating a dedicated circuit breaker, you will guarantee the unit has enough power to run effectively.
  • Page 15: Preparing The Installation Location

    Make sure that the internal height remains at 16” (3500ti/tiR & 5000ti/tiR) or 22.25” (8000 ti/tiR) so that the WhisperKOOL unit will fit snugly through the framed cut- out.
  • Page 16: Preparing The Unit For Installation

    PREPARING THE UNIT FOR INSTALLATION Single Piece Mounting Bracket This sturdy bracket is used to frame the installation location and secures the unit to the wall studs. The bracket has been designed to hold the unit at a 2º degree angle, this helps project the air into the space and aids in condensation drainage.
  • Page 17: Optional Exterior Grille

    4. You will notice the side holes do not line up, use the supplied self tapping screws to fasten the grille and bracket to the unit ensuring the bracket stays perpendicular/square. 5. Continue through-the-wall installation. It is required to use the 1/2” self tapping screws provided. Do not drill screws into unit. Non-Flush Installation Flush Installation www.whisperkool.com | Page 15...
  • Page 18: Through-The-Wall Installation

    The screws should penetrate the studs as well as the upper and lower supports to provide adequate support for the WhisperKOOL unit (see illustration). Seal all cracks and gaps around the WhisperKOOL Extreme unit with an air-tight sealant or caulking to prevent air leakage.
  • Page 19 NOTES www.whisperkool.com | Page 17...
  • Page 20: Active Humidity Option Overview

    ACTIVE HUMIDITY OPTION OVERVIEW ACTIVE HUMIDITY SPECIFICATIONS Power Consumption 0.2 amps @ 120V/60 Hz Humidistat Range 30-90% RH Humidistat Accuracy ± 1% Humidistat Adjustment Increments Water Supply Feed Rate 0.63 gph @ 40 psi Accessory Included with Active Humidity Option: (1) 25 ft.
  • Page 21: Humidistat Installation

    Drill holes in the wall through the 2 mounting holes in the back of the humidistat cabinet as shown in Figure 4 and insert anchors into the holes. Fasten the humidistat to the wall with screws through the mounting holes. Screws Terminal Block Figure 4 www.whisperkool.com | Page 19...
  • Page 22 HUMIDISTAT INSTALLATION HUMIDISTAT INSTALLATION Wall Anchors Mounting With a Wall Mount Plate Make sure the humidistat is unplugged before installing the unit. Position the wall mount plate on the wall or junction box and ensure the plate is level and covers the junction box completely. Pull the electrical wires through the hole in the wall mount plate.
  • Page 23: Ducting Overview

    Install through-the-wall return air grilles at floor level, as they will collect dust from the floor. • Mount the unit lower than 18” from the ceiling. • Locate the supply or return air grille where it is blocked by bottles, boxes or cases. www.whisperkool.com | Page 21...
  • Page 24: Ducting Configurations

    DUCTING CONFIGURATIONS There are a variety of ways to duct this unit, please review the different configurations to determine a basis for your particular installation. Remember to contact a wine cellar professional if you have any questions. Half Duct Configuration Wine Cellar Cold Air Supply Cellar Side Return Air-Cellar Side...
  • Page 25 DUCTING CONFIGURATIONS Fully Ducted Attic Mounted Unit It is recommended to use our Insulation Box and Condensate Pan for this application. Insulation Box Condenser Exhaust Cold Air Condenser Intake Fresh Air Return Air Intake www.whisperkool.com | Page 23...
  • Page 26: Installing The Duct Plenums

    INSTALLING THE DUCT PLENUMS STEP 1: Remove the filter grill from the unit by unscrewing the screws that hold it in place. STEP 2: Move the Ducting Adapters into place STEP 3: Screw the ducting adapters into place using the supplied screws. 033114 EXti Page 24 | 1-800-343-9463...
  • Page 27: Remote Controller Installation

    The controller can be installed up to 50 feet away from the cooling unit, or up to 300 feet away with the extended connection wire available from WhisperKOOL. First you will need to determine how you will be routing the connection wire into the controller box.
  • Page 28 Remove the mounting bracket and secure the bracket to the wall in the desired location. Reattach the controller to the bracket. Mounting Bracket Below is an illustration of one possible way to configure the remote controller in a wine cellar. Cooling Unit Bottle Probe Remote...
  • Page 29: Drain Line

    Drain Line T-Fitting Failure to install the drain line voids the warranty. To prevent mold from growing, allow the drain line to hang above the water line. WRONG: Drain line is under water. www.whisperkool.com | Page 27...
  • Page 30: Liquid Measuring Thermostat

    LIQUID MEASURING THERMOSTAT The WhisperKOOL Series cooling units come equipped with a liquid temperature measuring thermostat. This incorporates the following advantages: Self-Calibrating Probe The probe contains a sensor chip, which actually communicates back and forth to the thermostat. This results in a consistent temperature setting and accuracy.
  • Page 31: Multi Speed Control

    MULTI FAN SPEED CONTROL Designed for wine cellars up to 1000 and 2000 cubic feet, the Extreme 3500ti/tiR, 5000ti/tiR and 8000ti/tiR feature multi-speed fans with a “high” setting for maximum performance in high-temperature (+110°F) environ- ments and a “low” setting for super-quiet operation.
  • Page 32: Unit Operation: Standard And Remote

    55°F and a dif- The ventilation system is ideal for ducting. The option- ferential of 1°F), the unit will turn off. The WhisperKOOL al collars fit standard ventilation ducting allowing the Humidity Management (WHM) is an adjustable feature...
  • Page 33: Standard Control Functions

    4. To deactivate the ER feature, press the ER button one time, and the ER logo will turn off. 5. The ER feature can be conveniently adjusted specific need by accessing the “Customer Preference Select Mode” (CPSM). See CPSM Instructions on page 29. www.whisperkool.com | Page 31...
  • Page 34 SET 1. Press the “Set” button once and it will display the Set Point. After approximately 5 seconds, the display will return to normal operation and display the Bottle Probe temperature. 2. Standard Controller - Press and hold the “Set” button for 3-5 seconds until the set point is displayed and the °F symbol starts blinking.
  • Page 35 Hes – Differential for Energy Reduction – This parameter is set at 4° above the set point, during the Energy Reduction mode. A decrease in this setting will decrease the set point, and an increase in this feature will increase the set point. www.whisperkool.com | Page 33...
  • Page 36: Standard Wire Schematic

    STANDARD WIRE SCHEMATIC 033114 EXti Page 34 | 1-800-343-9463...
  • Page 37: Remote Controller Functions

    After the 6 hour time period, the Set Point will automatically return to the original Set Point. 2. The CPC feature can be conveniently adjusted to the customer’s specific needs, by ac- cessing the “Customer Preference Select Mode” (CPSM). See Customer Preference Select Mode Instructions. www.whisperkool.com | Page 35...
  • Page 38 Set 1. Press the “Set” button once and it will display the Set Point. After approximately 5 sec- onds, the display will return to normal operation and display the Bottle Probe tempera- ture. 2. Press the “Set” button once and it will display the Set Point. Press the up and down arrows to change the set point.
  • Page 39 Con 40 min/Cof 10 min. In the event that there is a Probe 1 failure/ Alarm, the compressor/refrigeration system automatically starts a predetermined ON/OFF cycle, which is controlled by the Con and the Cof parameters. The customer can adjust these parameters to maintain the desired Bottle temperature. www.whisperkool.com | Page 37...
  • Page 40: Remote Wire Schematic

    REMOTE WIRE SCHEMATIC  Neutral Line 033114 EXti Page 38 | 1-800-343-9463...
  • Page 41: Maintenance Schedule

    2. Use a vacuum with brush attachment to clean coils. Be careful not to crush coil fins when cleaning. 3. Inspect for corrosion. 4. Check wiring connections and integrity of cords. 5. Examine duct work for cracks or possible leaks. 6. Pour a 50/50 bleach solution into the drain line every spring. www.whisperkool.com | Page 39...
  • Page 42: Troubleshooting Guide

    TROUBLESHOOTING GUIDE Unit has ice forming on the evaporator Possible Cause Solution Clean filter and coil with a vacuum. Evaporator filter and/or coil are dirty. If coil is very dirty, use a small hand spray with a small amount of liquid dish washer detergent. Spray coil, let set for 5 min, then flush with fresh water.
  • Page 43 Call Customer Service at 1-800-343-9463 Compressor and /or starting components faulty Call Customer Service at 1-800-343-9463 Humidity in cellar too low Possible Cause Solution Raise the Fon setting to increase the humidity level Not enough moisture www.whisperkool.com | Page 41...
  • Page 44: Technical Assistance & Accessories

    TECHNICAL ASSISTANCE WhisperKOOL Customer Service is available Monday through Friday from 8:00 a.m. to 4:00 p.m. Pacific Time. The customer service representative will be able to assist you with your questions and warranty information more effectively if you provide them with the following: •...
  • Page 45: Installation Terms And Conditions

    A. Two (2) Year Limited Warranty: For the period of TWO (2) YEARS (the “Limited Warranty Period”) from the date of original sale of a Product by WhisperKOOL, if a WhisperKOOL Product is found to be defective in material or workmanship after undergoing WhisperKOOL’s Customer Service troubleshooting, then, subject to the WhisperKOOL Product Limited Warranty Limitations and Exclusions as well as the other Terms and Conditions stated herein, WhisperKOOL will do the following, as appropriate, for the end user (“End User”) who has installed...
  • Page 46 16. No one has any authority to add to or vary the limited warranty on this Product. 3. Product Installation Requirements: A. Prior to installing a WhisperKOOL Product, the End User must read the WhisperKOOL Owner’s Manual and thereafter the End User must follow the required installation, use and maintenance procedures set forth by WhisperKOOL in WhisperKOOL’s Owner’s Manual.
  • Page 47 D. End User is responsible for all costs incurred for the installation and/or removal of the Product, or any part thereof, unless such cost has been agreed by WhisperKOOL to be a warranty repair prior to the work being performed.
  • Page 48 E. Correction of Errors and Inaccuracies: These Terms and Conditions may contain typographical errors or other errors or inaccuracies. WhisperKOOL reserves the right to correct any errors, inaccuracies or omissions, and to change or update these Terms and Conditions, at any time without prior notice.
  • Page 49 NOTES www.whisperkool.com | Page 47...
  • Page 50 WhisperKOOL 1738 E. Alpine Ave Stockton, CA 95205 1-800-343-9463 www.whisperkool.com 033114 EXti...

Table of Contents