Table of Contents
Advertisement
Quick Links
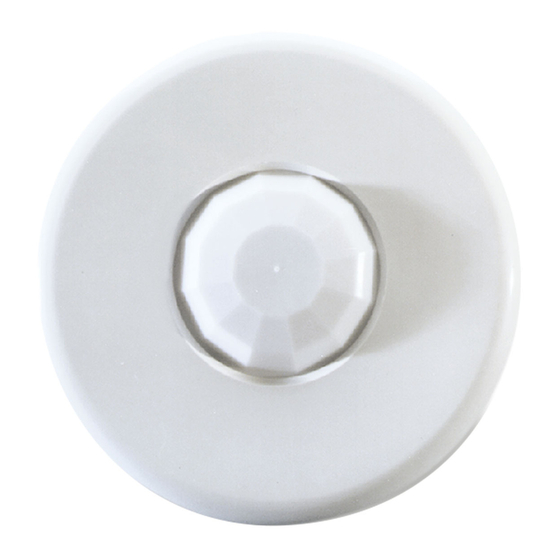
SENSOR ADJUSTMENT
The sensor comes factory preset and ready
DIP Switch Control
for operation.
for Time Delay and
If testing of operation is desired:
Sensitivity
MAX
•
Remove the sensor's cover (twist).
MIN
•
Refer to the DIP switch settings chart
below for switch configurations.
Light Level
Adjustment
•
Make sure that office furniture and fixtures
are in place.
1. Restore power to the lighting
circuits and turn the lights on.
DIP Switch #
1 2 3 4
• There is a one minute
warm-up when power is
15 seconds
initially restored to the sensor
– –
2 minutes
before the sensor works
–
–
4 minutes
6 minutes
– – –
properly.
–
–
8 minutes
2. For testing, set the Time Delay
– –
–
10 minutes
to minimum (15 secs.).
–
– –
12 minutes
– – – –
3. Set Sensitivity to maximum.
14 minutes
–
16 minutes
4. Turn Light Level Adjustment
– –
18 minutes
trimpot to maximum.
–
–
20 minutes
– – –
5. Replace the sensor's cover then
22 minutes
24 minutes
–
– –
move away from sensor and be
– –
– –
26 minutes
still. The lights should go off
–
– – –
28 minutes
after 15 seconds.
– – – – –
30 minutes
If lights remain on, see
Unwanted Sensor Activations
under Troubleshooting.
DIP Switch #
7 8
Sensitivity
Sensitivity
With movement in the area, the
–
–
Minimum
lights should turn back on.
–
Medium Low
–
6. If using the light level feature
Medium High
(otherwise skip to step 7),
Maximum
= ON
–
= OFF
turn the adjustment trimpot to
= Factory Presets
minimum, and repeat step 5.
Unless it is very dark, when the
lights turn off, the lights controlled by light level should not turn
back on even with movement in the area.
Until ready to make the final adjustment, leave the setting at maximum.
The controlled lights will then not be affected by ambient light levels.
To make the light level adjustment: (The final light level setting
for normal operation should be made at a time when... with the
lights off, the ambient light level is at the point where it is desired
for the lights to turn on.)
Set the Time Delay and the Light Level to minimum, then be still
until the lights turn off (about 15 seconds). Slowly turn the light
level adjustment toward maximum until the lights turn on—then
turn it back slightly. At this setting the lights will not turn on if
ambient light levels are above the current level.
7. Set the desired Time Delay for operation (DIP switches #1 – 6).
Factory preset Time Delay is 18 minutes; other suggestions are:
Offices and conference rooms (10 minutes), Classrooms (10 minutes),
Warehouses (6 minutes), Hallways (4 minutes).
✆Call 1(800)879-8585 For Technical Support✆
TROUBLESHOOTING
≠
CAUTION
USE PROPER SAFETY PRECAUTIONS WHEN
WORKING WITH OR NEAR HIGH VOLTAGE
Lights will not turn on:
1. Verify the lens is not masked in the direction being tested (see Masking).
2. Adjust Sensitivity settings up if needed (DIP switches #7 & 8).
3. Verify power pack and sensor connections are correct and secure.
LED
4. Check for +24VDC at RED wire from the power pack to sensor.
• If present, the problem may be with the sensor. Try another
5 6
sensor (if available).
• If there is no voltage, see Power Pack High Voltage Checklist, below.
Lights will not turn off:
1. Check that Time Delay settings are correct (DIP switches #1 – 6).
2. Decrease Sensitivity settings if needed (DIP switches #7 & 8).
3. Verify power pack and sensor connections are correct and secure.
4. Disconnect BLUE wire on power pack from sensor.
• If the lights turn off, the problem may be in the sensor. Turn
–
Sensitivity and Time Delay to minimum and allow the sensor
–
to time-out.
–
–
- If the lights turn off, the sensor is working correctly. See
Unwanted Sensor Activations, next page. And go through the
Sensor Adjustment process again.
• If the lights stay on, the problem may be in the power pack.
See Power Pack High Voltage Checklist, below.
–
Isolated relay not functioning properly:
CAUTION: Use proper high voltage precautions, if applicable.
1. Check that Time Delay settings are correct (DIP switches #1 – 6).
2. Check Sensitivity setting. Also see, Unwanted Sensor Activations,
next page.
3. Verify all wire connections from sensor are correct and secure.
4. Check that there is voltage to the Isolated Relay.
5. Check for +24VDC at RED wire from the power pack to sensor.
6. Use an ohmmeter to check the function of the Isolated Relay:
• Turn off the power connected to Isolated Relay wires (if applicable).
- With motion in front of the sensor's lens, check that the
connection between the BROWN and RED wires is open.
- With motion in front of the sensor's lens, check that the
connection between the ORANGE and RED wires is closed.
• Turn Sensitivity and Time Delay to minimum, cover the sensor's
lens with a cloth (not your hand), be still and allow the sensor to
time-out.
- Check that the connection between the BROWN and RED
wires is closed.
- Check that the connection between the ORANGE and RED
wires is open.
Power Pack High Voltage Checklist:
CAUTION: Use proper high voltage precautions.
1. Check that power pack high voltage wire connections are correct
and secure.
2. Check that the power pack is rated at the correct voltage.
3. Check that there is high voltage going into the power pack.
4. Try another power pack (if available).
Check Our Web Site For FAQs: www.wattstopper.com
Unwanted sensor activations (LED flashes):
Possible causes
≠
1. People moving or walking outside of the desired coverage area,
but in view of the sensor and within it's range (see Coverage
Patterns and Placement).
2. HVAC vents with heavy air flow.
Possible solutions
1. Masking (see Masking).
2. Setting the Sensitivity lower.
3. Relocating the sensor.
Sensor Override:
If the sensor fails, set DIP switch #6 to OFF. This overrides the sensor
and sets the circuits to "on".
ORDERING INFORMATION
Catalog#
CI-200
CI-200-1
B120E-P
B230E-P
B277E-P
B347D-P
S120/277/347E-P Slave Pack: 120/277VAC, 60Hz, 20A ballast
The Watt Stopper
®
, Inc. warranties its products to be free of defects in
materials and workmanship for a period of five years. There are no
obligations or liabilities on the part of The Watt Stopper, Inc. for
consequential damages arising out of or in connection with the use or
performance of this product or other indirect damages with respect to
loss of property, revenue, or profit, or cost of removal, installation or
reinstallation.
Santa Clara CA 95050 USA ¤ 1(800) 879-8585 1(972)578-1699
20–30VDC Occupancy Sensor
with Extended Range Lens (Standard)
20–30VDC Occupancy Sensor
with High Density /Reduced Range Lens
Power Pack: 120VAC, 60Hz, 150mA
20A ballast/13A incandescent
Power Pack: 230VAC, 50/60Hz, 150mA
20A ballast/13A incandescent
Power Pack: 277VAC, 60Hz, 150mA, 20A ballast
Power Pack: 347VAC, 60Hz, 150mA, 15A ballast
347VAC. 60Hz, 15A ballast
Putting a Stop to Energy Waste
®
86-0474-00r3 9/99
CI-200
version 2
360° PIR Occupancy Sensor
Voltage Supply . . . . . . . . . . 20 – 30VDC (24VDC Typical)
Current Consumption . . . . . . . @24VDC, 24mA Maximum
Isolated Relay Rating . . . . . . . . . . 1A @24VDC or 24VAC
Time Adjustment . . . . . . . . . . . . 15 seconds – 30 minutes
Sensitivity Adjustment. . . . . . . . . . . . minimum-maximum
Light Level Adjustment . . . . . . . . . . . . . . . . . . . 1 – 190FC
U.S. Patents:
4,757,204
Santa Clara, CA 95050 USA
4,787,722
1(800)879-8585 1(972)578-1699
Des360,842
Advertisement
Table of Contents

Related Manuals for Watt Stopper CI-200


Summary of Contents for Watt Stopper CI-200
- Page 1 The Watt Stopper, Inc. for - Check that the connection between the BROWN and RED consequential damages arising out of or in connection with the use or Set the Time Delay and the Light Level to minimum, then be still wires is closed.
- Page 2 12ft radius (500 sq ft) 9ft radius (300 sq ft) Rear housing The CI-200 has a multi-cell, multi-tier Fresnel lens with a field of view The CI-200 sensor can be mounted at various heights. When you will Connections for the following configurations: Mask (optional) of 360°.
- Page 3 five years. There are no obligations or liabilities – – – 2. HVAC vents with heavy air flow. 6 minutes Maximum on the part of The Watt Stopper, Inc. for consequential damages arising out of or 8 minutes – – Possible solutions in connection with the use or performance of this product or other indirect –...
- Page 4 (see Masking). Watt Stopper B series power packs supply power for up to 10 CI-205s. For open office areas with partitions it is When using more sensors than this, multiple power packs are required. Cut a hole in the ceiling tile—if using a:...
Need help?
Do you have a question about the CI-200 and is the answer not in the manual?
Questions and answers