
Related Manuals for Aeros COMBAT 12T


Summary of Contents for Aeros COMBAT 12T
- Page 1 NANOLIGHT TRIKE WING COMBAT 12T OWNER / SERVICE MANUAL Manufactured by: AEROS Ltd. Tel: (380 44) 4554120 Post-Volynskaya St. 5 Fax: (380 44) 4554116 Kiev 03061 E-mail: aerosint@aerosint.kiev.ua, Ukraine http:// www.aeros.com.ua...
-
Page 3: Table Of Contents
Table of Contents Introduction………………………………………………………………………………………………4 Technical Information and Operating Limitations………………………………………………...5 Combat 12T Reassembly after Shipping Procedure……………………………………………..5 Combat 12T Breakdown for Shipping Procedure…………………………………………………6 Combat 12T Set-Up Procedure……………………………………………………………………….7 Preflight Procedure……………………………………………………………………………………11 Speed to Fly…………………………………………………………………………………………….13 Combat 12T Breakdown……………………………………………………………………………...13 Wing Tuning…………………………………………………………………………………………….14 Maintenance…………………………………………………………………………………………….17 A Note about Cables and Cable Maintenance……………………………………………………19... -
Page 4: Introduction
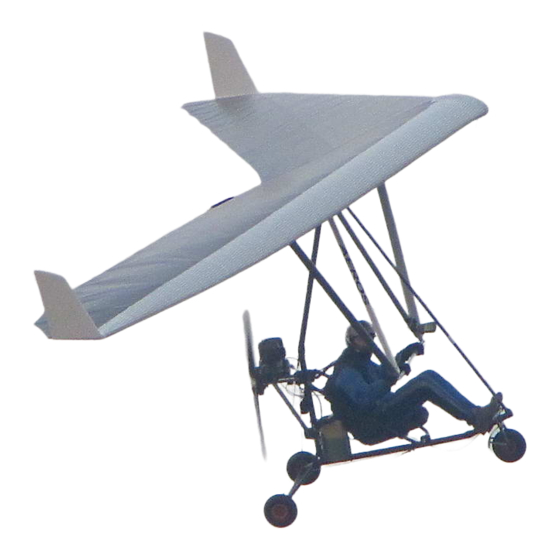
Thank you for purchasing an Aeros wing for your nanolight trike. The Combat 12T is a highest step in nanolight technology. It is designed for those who want to extend their abilities of flying faster and further with their light weight trikes with maximum level of safety. With this wing you will get an extremely pleasurable flying experience. -
Page 5: Technical Information And Operating Limitations
Operating the Combat 12T outside of the above limitations may result in injury and death. Flying a nanolight trike with the Combat 12T wing in strong or gusty winds or turbulence may result in loss of control of the wing, which may lead to injury and death. -
Page 6: Combat 12T Breakdown For Shipping Procedure
Put the control bar between leading edges in the rear part of the wing. Put the wing bag back on and zip it up. Combat 12T BREAKDOWN FOR SHIPPING PROCEDURE This process will basically be the reverse of reassembling after breakdown for shipping. Before beginning, read through the section above on how to re-install the rear leading edges. -
Page 7: Combat 12T Set-Up Procedure
6. Zip up the wing bag zipper. Combat 12T SET-UP PROCEDURE 1. Lay the wing on the ground, with the bag zipper up and the nose of the wing pointing into the wind. - Page 8 7. Spread the wings almost all the way so that the glider is resting on the wing tips and on the keel tube. heck all cables for any twisted thimbles or tangled cables. et the keel tube end rest on the ground. C 8.
- Page 9 Aeros convention is that the red marked battens go in the left wing and green marked battens in the right wing. Battens are numbered from the center outwards, and the longest batten in a Combat 12T is designated as the "No.
- Page 10 14. The next step is to install the inboard and outboard sprogs and secure them in position. Before doing so, working through the sprog access zippers, preflight the following items: - internal ribs to confirm that they are fully zipped up; - the sprog hardware and the sprog cable attachments at both ends of each sprog cable.
-
Page 11: Preflight Procedure
16. Mount the hang block to the keel tube. 17. Install the nosecone, taking care to align it so that it lies flat on top and bottom of the sail. Now your wing is ready to be mounted on your nanolight trike. WARNING BEFORE MOUNTING THE WING TO THE TRIKE INSTALL THE NOSE CONE. - Page 12 Look into the sail from the wing tip. Tip folded batten must be properly engaged. The washout tip must be installed. Check for any evidence of dents, deep scratches, cracks or bends in the LE tube. Be sure that the sail mount webbing is properly installed in the end cap slot and safely and correctly secured with the Velcro around the leading edge.
-
Page 13: Speed To Fly
The range of trim speed for the Combat 12T is 51 - 55 km/h (32-34 mph). The range of the stall speed for the Combat 12T, depending on the wing load, is 36 - 38 km/h (22-24 mph). The wing is stable at the beginning of stall. While pushing out the speed bar, the bar pressure is progressively increase. -
Page 14: Wing Tuning
2. Remove the hang bracket. 3. Remove plastic winglets. 4. Lift the keel tube up to your chest. Remove the keel tube stinger out of the keel tube. Place the end of the keel tube on the keel tube stinger. 5. - Page 15 If the battens tensioned too much, the handling will become harder. Make sure the battens tensioned on both wings identical. All battens on the Combat 12T (except the outboard lever battens) are tensioned by lever batten tips. The desired batten tension can be easily adjusted by the threaded batten tip adjuster.
- Page 16 On the Combat 12T, the hang point position is adjusted by repositioning the hang bracket along the keel tube.
-
Page 17: Maintenance
Aeros directly. It is not always obvious which items require attention and which may not. Minor dents or dings in a non-critical location on an airframe tube may not require any repair or maintenance. On the other hand, a wire that has been kinked one time can fail very quickly after that, and should be replaced immediately. - Page 18 2. Check your battens on a flat level floor against the batten diagram provided and correct any that deviate from the pattern by more than 6 mm (1/4"). 3. If you fly in a dusty or sandy environment, it will help to prolong the life of your batten pockets if you wipe each batten with a rag before you install it in the sail.
-
Page 19: A Note About Cables And Cable Maintenance
- If you are in doubt about any aspect of your wing, you should consult your dealer or Aeros for advice. - Fly a wing suited to your level of ability. A new risk may arise when you first fly a new type of the wing. - Page 20 12-CBT.12T.330.000.AD 5-CBT10.13.130.002.AD 3-CBT09.12.110.002.AD 9-CBT.12T.201.000.AD 1-CBTL.13.100.000.AD 24-CBT.12T.210.000 13-DSC15T.060.000.AD CBT.12T.040.000.AD Лит. Масса Масштаб Изм. Лист № докум. Подп. Дата 1:20 Combat 12T Air-Frame (Combat 12T Каркас) Разраб. 04.10.11 Пров. Т.контр. Лист 1 Листов 9 Нач. КБ Н.контр. Утв. CBT.12T.040.000.AD Копировал Формат А3...
- Page 21 A(1:1) 87-Nut M6, self-locking (DIN 985) 95-Washer M6 (DIN 125) 78-Болт 6-78 ОСТ131120-80 58-STL.231.000 48-STL.122.015 68-STL.521.003 23-CBT2.14.181.000 59-STL.232.000 87-Nut M6, self-locking (DIN 985) 18-STL.237.000.AD 95-Washer M6 (DIN 125) 63-STL.236.009 62-STL.236.007 95-Washer M6 (DIN 125) 87-Nut M6, self-locking (DIN 985) Лист CBT.12T.040.000.AD Изм.
- Page 22 B(1:1) 45-DSC14A.265.000 97-Washer M8 (DIN 125) 89-Nut M8 ОСТ133042-80 55-STL.181.000 93-Splint 2.0 x 20 SBS2020 94-Tapping Screw 4.2-16 44-DSC14A.262.000 43-DSC14A.261.000 11-CBT.12T.320.000.AD 47-STL.122.013 60-STL.235.000 44-DSC14A.262.000 47-STL.122.013 42-DSC14L.260.000 14-DSC14A.263.000.AD 42-DSC14L.260.000 82-Болт 6-79 ОСТ131155-80 83-Болт 6-86 ОСТ131155-80 95-Washer M6 (DIN 125) 95-Washer M6 (DIN 125) 87-Nut M6, self-locking (DIN 985) 87-Nut M6, self-locking (DIN 985) 15-DSC14A.264.000.AD...
- Page 23 C(1:1) 87-Nut M6, self-locking (DIN 985) 90-Safety Ring SBR1011 95-Washer M6 (DIN 125) 86-Nut M6 (DIN 936) 88-Nut M8, self-locking (DIN 985) 76-Болт 6-70 ОСТ131120-80 95-Washer M6 (DIN 125) 81-Болт 8-85 ОСТ131120-80 84-Болт(2) 6-78 ОСТ131120-80 87-Nut M6, self-locking (DIN 985) 49-STL.142.007 95-Washer M6 (DIN 125) 77-Болт...
- Page 24 D(1:1) 87-Nut M6, self-locking (DIN 985) 87-Nut M6, self-locking (DIN 985) 95-Washer M6 (DIN 125) 95-Washer M6 (DIN 125) 73-Болт 6-36 ОСТ131120-80 64-STL.236.011 66-STL.251.000 75-Болт 6-67 ОСТ131120-80 97-Washer M8 (DIN 125) 95-Washer M6 (DIN 125) 87-Nut M6, self-locking (DIN 985) 18-STL.237.000.AD 19-STL.252.000.AD 90-Safety Ring SBR1011...
- Page 25 E(1:1) 87-Nut M6, self-locking (DIN 985) 95-Washer M6 (DIN 125) 61-STL.236.005 55-STL.181.000 69-Болт 8-66 SPH 97-Washer M8 (DIN 125) 88-Nut M8, self-locking (DIN 985) 97-Washer M8 (DIN 125) 67-STL.521.000 55-STL.181.000 85-Blind Rivet d4x10 A2 36-CBT07.13.637.000 22-CBT07.119.000 47-STL.122.013 52-STL.154.000 87-Nut M6, self-locking (DIN 985) 95-Washer M6 (DIN 125) 41-DSC14A.114.000 50-STL.153.003...
- Page 26 F(1:1) 60-STL.235.000 48-STL.122.015 52-STL.154.000 50-STL.153.003 95-Washer M6 (DIN 125) 90-Safety Ring SBR1011 40-DSC14A.113.000 95-Washer M6 (DIN 125) 92-Safety Ring SBR1519 Лист CBT.12T.040.000.AD Изм. Лист № докум. Подп. Дата Копировал Формат А3 CBT.12T.040.000.AD...
- Page 27 70-Болт(2) 8-78 SPH 97-Washer M8 (DIN 125) 89-Nut M8 ОСТ133042-80 93-Splint 2.0 x 20 SBS2020 G(1:2.5) 34-CBT.12T.607.000 33-CBT.12T.606.000 91-Safety Ring SBR1016 65-STL.244.005 87-Nut M6, self-locking (DIN 985) 95-Washer M6 (DIN 125) 46-PRF15.TL.675 31-CBT.12T.605.001 87-Nut M6, self-locking (DIN 985) 95-Washer M6 (DIN 125) 87-Nut M6, self-locking (DIN 985) 46-PRF15.TL.675 95-Washer M6 (DIN 125)
- Page 28 93-Splint 2.0 x 20 SBS2020 89-Nut M8 ОСТ133042-80 97-Washer M8 (DIN 125) 70-Болт(2) 8-78 SPH H(1:2) 87-Nut M6, self-locking (DIN 985) 34-CBT.12T.607.000 95-Washer M6 (DIN 125) 46-PRF15.TL.675 33-CBT.12T.606.000 96-Washer M6 DIN 9021 A2 87-Nut M6, self-locking (DIN 985) 95-Washer M6 (DIN 125) 65-STL.244.005 74-Болт...
- Page 29 6 CBT2.13.144.000 Clevis Pin (Валик) 6x21.5 30ХГСА-б ГОСТ2590-88 Пров. Safety Ring SBR1011 Т.контр. Лист 1 Листов 1 Нач. КБ 8 FT500-19-9,5-40 Hot Shrink Tube (Термоусадка) L=40 "AEROS" Н.контр. 9 FT500-19-9,5-110 Hot Shrink Tube (Термоусадка) L=110 Утв. CBT07.13.140.000.AD Копировал Формат А3...
- Page 30 Clevis Pin (Валик) 6х29 Круг 10-B 30ХГСА ГОСТ2590-88 Пров. Safety Ring SBR1011 Т.контр. Лист 1 Листов 1 Нач. КБ 8 PBF.D 25,4-30 Hot Shrink Tube (Термоусадка) L=30 "AEROS" Н.контр. 9 PBF.D 25,4-100 Hot Shrink Tube (Термоусадка) L=100 Утв. CBT09.12.160.000.AD Копировал Формат А3...
- Page 31 Кол. на изделие - 1шт. 2-CBT.12T.191.000.AD 3-OPT.C09.003.000.AD 1-CBT.12T.190.000.AD CBT.12T.189.000.AD Лит. Масса Масштаб Изм. Лист № докум. Подп. Дата Разраб. 13.09.11 Keel Tube Assembled (Труба килевая СБ) Поз. Обозначение Наименование Кол. Пров. Т.контр. Лист 1 Листов 1 1 CBT.12T.190.000.AD Keel Tube №1 (Килевая труба №1) Нач.
Need help?
Do you have a question about the COMBAT 12T and is the answer not in the manual?
Questions and answers