Table of Contents
Advertisement
Quick Links
"PROFI"
owner/service MANUAL
Size: ____________
Manufactured by:
AEROS Ltd.
Post-Volynskaya St. 5
Kiev 03061
UKRAINE
TRIKE WING
Date of production: ____________________
Serial number: _______________________
Tel: (380 44) 455 41 18,
Fax: (380 44) 455 41 16
E-mail: aerosint@aerosint.kiev.ua,
http://www.aeros.com.ua
0
Advertisement
Table of Contents

Related Manuals for Aeros PROFI


Summary of Contents for Aeros PROFI
- Page 1 TRIKE WING “PROFI” owner/service MANUAL Size: ____________ Manufactured by: AEROS Ltd. Tel: (380 44) 455 41 18, Post-Volynskaya St. 5 Fax: (380 44) 455 41 16 Kiev 03061 E-mail: aerosint@aerosint.kiev.ua, UKRAINE http://www.aeros.com.ua Date of production: ____________________ Serial number: _______________________...
-
Page 2: Table Of Contents
Table of Contents S ec t io n 1 . G en eral I n f o rmat ion _____________________________________________________3 1.1. Introduction__________________________________________________________________________3 1.2. Main Data___________________________________________________________________________3 S ec t io n 2 . Set U p Pr oc ed ur e ________________________________________________________4 2.1. -
Page 4: Section 1. General Information
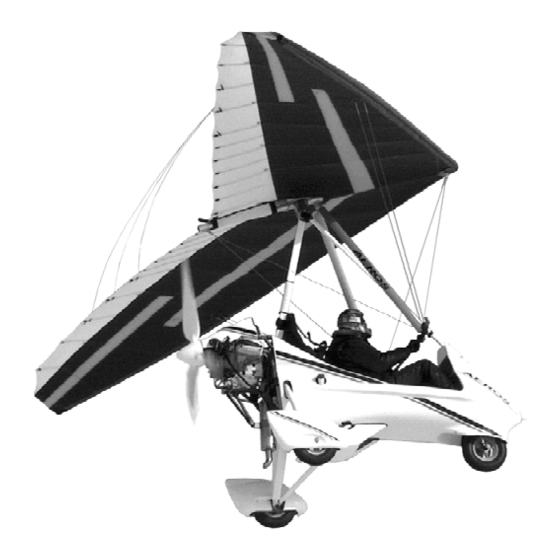
Thank you for purchasing an Aeros wing. The Profi is the wing for two-seater trikes - is a product of Aeros Ltd. It is the result of an extensive design and development program aimed at optimizing your level of safety and satisfaction as a pilot, through their high performance and strength of construction. -
Page 5: Section 2. Set Up Procedure
Section 2. SET UP PROCEDURE 2.1. SET UP PROCEDURE FROM THE PACKAGE 4 METRES LONG Having used the specific techniques described in this manual you will perform the set up and break down procedures without any difficulties. However, the following procedural descriptions are not intended to be a substitute for the familiarization procedure of your dealer at the time the wing is delivered. - Page 6 But you can feel free to install them the other way around, i.e. red marked battens go to the right and green marked battens go to the left. This is because Aeros do not tune glider’s turn by changing battens camber, so originally your glider comes with left and right corresponding battens symmetrical between each others.
- Page 7 Fig. 5 Fig. 6 2.1.8. Spread the wings all the way. Pay attention to the nose bottom part of the sail, it has to be located between the keel tube and nose channel! Near the kingpost hole find the shackle of the sweep wire. Pull the shackle out the rear end of the keel pocket, and check that the sweep wire is not wrapped around the keel.
-
Page 8: Set Up Procedure From The Package 6 Meters Long
2.2. SET UP PROCEDURE FROM THE PACKAGE 6 METRES LONG 2.2.1. With the glider in the bag (6 meters long) lay the glider on the ground (Fig. 8). Fig. 8 2.2.2. Undo the zipper. Remove the battens and the control bar from the bag. 2.2.3. - Page 9 2.2.6. Spread the wings so, that the sail is a little loose and the glider is resting flat on the ground (Fig. 11). Fig. 11 2.2.7. Remove the protective bags from the downtubes. Spread the downtubes. Install the control bar according to the marking. Fix the control bar using nuts and safety rings (Fig. 12). Fig.
- Page 10 But you can feel free to install them the other way around, i.e. red marked battens go to the right and green marked battens go to the left. This is because Aeros do not tune glider’s turn by changing battens camber, so originally your glider comes with left and right corresponding battens symmetrical between each others.
- Page 11 Fig. 15 Install the cambered top surface battens in the sail, leaving out the shortest two on each side for now. Insert the battens carefully, so as to minimize stress and wear on the sail. Never insert or remove top surface battens with the crossbar tensioned (except for up to the last two on each side) and never insert or remove battens with heavy wind pressure on the top of the sail or in any condition which causes the battens to slide with great resistance in the pockets.
- Page 12 2.2.11. Check all wires for twisted thimbles or tangs (Fig. 17). Fig. 17 2.2.12. Attach the shackle of the sweep wire to the hook, which is placed on the keel tube (Fig. 18). An in-flight disengagement of this attachment will cause a complete loss of structural support of the glider and a total loss of control.
- Page 13 2.2.14. Install the bottom surface battens. The longest bottom surface batten is inboard batten. Push the battens all way into the pocket until the rear end is secure in the batten pocket. The strings on the rear ends of the bottom surface battens are to facilitate removal of the battens from the sail during breakdown (Fig.
- Page 14 Fig. 21 2.2.16. Install the washout tips; just swing them to the right place underneath the corresponding top surface battens through the access zipper in the bottom surface. 2.2.17. Remove the protective bag from hang detail. 2.2.18. Do a complete preflight inspection of the glider, Section 3.
-
Page 15: Section 3. Preflight Inspection Of The Glider
Section 3. PREFLIGHT INSPECTION OF THE GLIDER Conduct a complete preflight inspection of the glider, checking all assemblies, which have not already been checked. Every bolt, nut, pin, safety ring, and fastener of any kind should be checked during every pre-flight. A full pre-flight inspection should precede every flight you make, not just the first flight of the day. -
Page 16: From The Rear Keel
3.4. ALONG THE TRAILING EDGE, LEFT WING Check that there are no tears in the sail material along the trailing edge. Check that all battens are properly secured. Check that the washout tip is properly secured in position supporting the batten, and that the washout tip access zipper is properly closed. -
Page 17: Under The Wing At The Control Bar
3.8. ALONG THE RIGHT LEADING EDGE Same as for the left leading edge. 3.9. UNDER THE WING AT THE CONTROL BAR Check the cables at the control bar corners, Check all bolts, nuts and the safety rings, making sure there are no kinks or twisted which secure the downtubes to the channel. -
Page 18: Section 4. Inspection Of The Wing
(TS) of the wing. The control clouts are incorporated in the cloth piece (designated by letters UV) that is sewed onto the trailing edge close to the keel tube. For sail assessment cut control clout in the drawing and forward it to your Aeros dealer or directly to Aeros. -
Page 19: Checking The Tubings
Some degree of fatigue due to repeated bending of cables is almost unavoidable in an aircraft that is assembled and disassembled with every flight. Bottom side wires are subject to the highest loads in flight, and are therefore the most critical. 4.3. -
Page 20: Section 5. Maintenance
Section 5. MAINTENANCE 5.1. WING TUNING The Profi wing should fly straight and level without any pilot input with a cruising speed of between 75 kph and 90 kph. Before making any adjustments to the wing, first check that the wing is in the standard condition and that the battens all conform to the Profi batten profile. -
Page 21: Maintenance
5.2. MAINTENANCE With correct maintenance your wing will retain its good condition for many years. We recommend that do you not expose your wing to any more direct sunlight than necessary. Do not leave it standing in the sun for long periods of time when you are not flying it. -
Page 22: Sail Removal
5.5. SAIL REMOVAL You will need an unobstructed area 2 m by 9 m. Make sure the surface is clean. If it is abrasive, you should either put down a protective tarp or be extremely careful not to scrape your sail. 5.5.1Unzip and remove the glider bag, all protective bags and pads. - Page 23 5.5.5.Undo the Velcro that tethers the sail to the keel tube. Remove the bolts from the rings that fix the U-bracket in place. 5.5.6.Unbolt the sweep wire shackle assembly.
- Page 24 5.5.7.Unbolt and remove the bottom rear wires and dismount the sweep wire hook. 5.5.8.Remove top and bottom side wires. 5.5.9.Unzip the main under surface zipper completely.
-
Page 25: Reinstalling The Sail On The Frame
5.5.10.Remove the reflex bridles with the carbines from the sail. Reassemble the hardware removed from the bolts in the original order so it doesn’t get lost. All disassembled assemblies on the wing must be reassembled in the proper order and orientation. 5.5.11.Slide the sail out from the frame through the open center zipper. -
Page 26: In Closing - A Few Final Words On Your Safety
If you are in doubt about any aspect of your wing you should consult your dealer or Aeros for advice. Only fly after having attended a good school. Fly a wing suited to your level of ability. A new risk may arise when you first fly a new type of the wing. -
Page 27: Log Book
LOG BOOK TABLE OF FLIGHT HOURS DATE NUMBER OF FLIGHT TOTAL HOURS BY WHOM...
Need help?
Do you have a question about the PROFI and is the answer not in the manual?
Questions and answers