Table of Contents
Advertisement
Quick Links
COMBAT-09
OWNER / SERVICE
Tel: (380 44) 455 41 18
E-mail: aerosint@aerosint.kiev.ua,
HANG GLIDER
MANUAL
Size:__________________
Date of production:
___________________
Serial number:
___________________
Manufactured by:
AEROS Ltd.,
Post-Volynskaya St. 5.,
Kiev, 03061,
UKRAINE
Fax: (380 44) 455 41 16
http://www.aeros.com.ua
0
Advertisement
Table of Contents

Related Manuals for Aeros COMBAT-09


Summary of Contents for Aeros COMBAT-09
- Page 1 HANG GLIDER COMBAT-09 MANUAL OWNER / SERVICE Size:__________________ Date of production: ___________________ Serial number: ___________________ Manufactured by: AEROS Ltd., Post-Volynskaya St. 5., Kiev, 03061, UKRAINE Tel: (380 44) 455 41 18 Fax: (380 44) 455 41 16 E-mail: aerosint@aerosint.kiev.ua, http://www.aeros.com.ua...
-
Page 3: Table Of Contents
Combat Owner / Service Manual Table of Contens Introduction..…………………………………………..………….…..………………… 3 Technical information and operating limitations …....…..…………….. Combat reassembly after shipping procedure ...…....…..……………..… Combat breakdown procedure ......….…...…...…...…..…. Combat set-up procedure ......…..…....……....…….…. Preflight procedure…………………………….………….………….…………….……. 11 Laying the glider down flat……………..……….….……………………….….……... 12 Launching and flying the Combat ....…........……..13 Aerotowing ..………………………………………….…………………………………. -
Page 4: Introduction
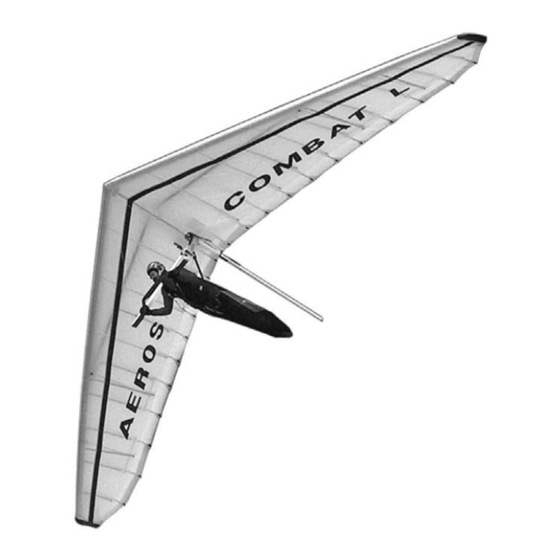
Thank you for purchasing an Aeros glider. The Combat L 09 (hereinafter Combat) hang glider is an advanced product of Aeros Ltd. It is aimed at improvement of the modern competitive glider with very high performance combined with maximum safety and comfort. -
Page 5: Technical Information And Operating Limitations
(243) (231) Aeros recommends that no attempt should ever be made to deliberately spin the glider. The stability, controllability, and structural strength of a properly maintained Combat have been determined to be adequate for safe operation when the glider is operated within the entire manufacturer specified limitations. No warranty of adequate stability, controllability, or structural strength is made or implied for operation outside of these limitations. -
Page 6: Combat Reassembly After Shipping Procedure
COMBAT REASSEMBLY AFTER SHIPPING PROCEDURE 1. With the glider in the bag (4 meters long) lay the glider on the ground. 2. Unzip the bag. Undo the velcro straps. Remove the batten bag, the speedbar, the rear leading edge tubes # 3 and winglets from the bag. -
Page 7: Combat Breakdown Procedure
COMBAT BREAKDOWN FOR SHIPPING PROCEDURE This process will basically be the reverse of reassembling after breakdown for shipping. Before beginning, read through the section above on how to re-install the rear leading edges. While following the instructions below, refer to the photos in the section above for reference, if necessary. - Page 8 3mm (1/8’’) from one batten to the other along the full length of the battens. Aeros convention is that green (blue) marked battens go in the right wing and red marked battens in the left. Battens are numbered from the center outwards, and the longest batten in a Combat is designated as the "# 1"...
- Page 9 To open or close the batten tip lever press firmly on the undersurface of the tip lever to disengage or engage it (Fig.10). Fig. 10 a Fig. 10 b Insert the battens carefully so as to minimize stress and wear on the sail ( Fig.11).
- Page 10 11. Install the tip battens (Fig.13) bend the tip batten with the angle approx. 60 degrees; install the batten into the sail with the bend directed to the wing tip; install the flat end of the batten into the angle of the sail tip; straighten the batten little bit and guide another end of the batten onto the leading edge batten hook;...
- Page 11 Fully close the sprog access zipper and this will secure the sprog in the proper position underneath the transverse batten and capture it in position (Fig.16) Fig. 16 14. Install the nosecone taking care to align it so that it lies flat on the top and bottom of the sail (Fig.17) Don’t fly without the nosecone!
-
Page 12: Preflight Procedure
PREFLIGHT PROCEDURE Conduct a complete preflight inspection of the glider, checking all assemblies, which have not already been checked. Every bolt, nut, pin, safety ring, and fastener of any kind should be checked during every pre-flight. A full pre-flight inspection should precede every flight you make, not just the first flight of the day. Carefully check the entire length of the leading edge pocket to insure that the mylar insert is lying flat in the pocket. -
Page 13: Laying The Glider Down Flat
At the right tip: Same as for the left tip. Along the right leading edge: Same as for the left leading edge. Under the glider at the control bar: Sight down the down tubes, making sure that they are straight. Do not fly with bent down tubes! Check the cables at the control bar corners, making sure there are no kinks or twisted thimbles. -
Page 14: Launching And Flying The Combat
LAUNCHING AND FLYING THE COMBAT Before launching, hook in to the glider and do a careful hang check. We recommend that you hang as close to the base tube as possible - this will give you lighter control pressures and better control in both roll and pitch. 1. -
Page 15: Using The Vg System
USING THE VG SYSTEM The Combat VG system uses a reduction system of pulleys between the central part of the crossbar and the hang point tower channel to enable a wide VG range. The change in airframe nose angle from VG loose to tight is over 2 degrees. -
Page 16: Safety In Turbulance
SAFETY IN TURBULANCE A hang glider is a tailless aircraft and therefore its pitch stability is limited compare to the conventional aircraft. One of the main design goals of the Combat 09 was to maximize pitch stability with a strong rigid sprog and dive sticks system and compensated sprog system. - Page 17 8. Fold the wings all the way in to the keel pulling the sail over the top of the leading edges. At each wingtip, remove the tip cover bag. At this time you should be able to dismount the front ends of the root battens from the keel tube. Install the protective pad and sock over the rear wire junction pin and the rear end of the keel.
-
Page 18: Removing The Sail From The Airframe And Re-Installing
EMOVING THE SAIL FROM TH E AIRFRAME AND RE-INSTALLING Many maintenance and repair procedures will require the removal of the sail from the frame. Please follow these instructions when removing and reinstalli ng the sail. Please read all the instruct ions for each operation before beginning. -
Page 19: Combat Stability Systems
. Continue to slide the frame into the sail until you will be able to get the nose of the frame o ut trough the nose hole of t he sail. . Mount the sail mount webbing straps on the plastic caps of the rear leading edge tubes and secure them with the sail mount webbing v elcro. - Page 20 If you have a question about the need to rep air or replace some part of your glider, feel e to contact your dealer or Aeros directly. It is not always obvious which i tems require attention and which may not.
-
Page 21: Maintenance
Conclusion about further possibility to use the crossbeam can be made only after loading the crossbeam and can be done by a representative of Aeros Lt d or by the manufacture of the crossbeam only. A NOTE ABOUT CABLES AND CABLE MAINTENANCE The cables which support the glider’s airframe are critical components of the glider’s structure, and must be... -
Page 22: Glider Tuning
GLIDER TUNING TRIMMING YOUR GLIDER IN PITCH CG ADJUSTMENT You will find that the pitch trim of the Combat, as well as the basetube position at trim, changes with VG setting. At VG loose, the Combat will normally be trimmed very close to stall. The bar position at trim at VG loose will be relatively far out. - Page 23 Fig. 29 Fig. 28 3. Place the worktop of the Pelicciometer under middle part of the sprog and press the instrument firmly towards the sprog through the double surface of the glider, so that the entire work top surface of the Pelicciometer touches the sprog. The plumb line of the Pelicciometer will show the sprog angle (Fig.29).
- Page 24 To adjust the main sprog height: 1. Fully unzip the access zipper to gain access to the crossbar-LE junction ( Fig.31). 2. Remove the pin from the sprog threaded adjuster at the front of the sprog. To raise the sprog, turn the end of the sprog threaded adjuster counter clockwise .To lower the sprog, turn it clockwise.
- Page 25 AIRFRAME Check the leading edges for possible bent tubes. Check that the keel is not bent to one side. Check that the crossbar neither cracks nor any visible damage. BATTENS Check the battens for symmetrical shape. BATTEN TENSION All battens on the Combat are tensioned by lever batten tips.
-
Page 26: In Closing - A Few Final Words On Your Safety
If you are in d oubt about any aspect of your glider, you should consult your dealer or Aeros for advice. Only fly after having attended a good school, re cognized by your hang gliding federation. Fly a glider suited to your level of ability. A new risk may arise when you first fly a new type of the glider. - Page 35 Washer M6 (DIN 125) Safety Ring SBR1011 Nut M6, self-locking (DIN 985) CBT09..040.000.AD Лит. Масса Масштаб Изм. Лист № докум. Подп. Дата Zone E Разраб. 10.02.10 Пров. Т.контр. Лист 1 Листов 1 Нач. КБ "AEROS" Combat09-12.8/13.2/13.7/14.2/14.9 Н.контр. Утв. корпус E Копировал Формат А4...
- Page 37 CBT09..110.002.AD- Tube №2 Assembled Left - mirror reflection. CBT09..110.001.AD Лит. Масса Масштаб Изм. Лист № докум. Подп. Дата Tube №2 Assembled Right (Труба №2 СБ пр.) Разраб. 1.815 10.02.10 Пров. Т.контр. Лист 1 Листов 1 Нач. КБ "AEROS" Combat 09-12.8/13.2/13.7/14.2/14.9 Н.контр. Утв. труба 2 Копировал Формат А3...
- Page 39 CBT2.13.204.000 Safety Ring SBR1011 CBTL.13.143.000 STL.169.000.AD CBT07..140.000.AD Лит. Масса Масштаб Изм. Лист № докум. Подп. Дата Sprog Outboard (Концевой АПУ) Разраб. 0.255 10.02.10 Пров. Т.контр. Лист 1 Листов 1 Нач. КБ "AEROS" Combat09-12.8/13.2/13.7/14.2/14.9 Н.контр. Утв. концевой АПУ Копировал Формат А3...
- Page 40 Safety Ring SBR1011 CBTL.13.164.000 STL.169.000.AD CBT07..160.000.AD Лит. Масса Масштаб Изм. Лист № докум. Подп. Дата Sprog Internal (АПУ корневое) 1:2.5 Разраб. 0.444 10.02.10 Пров. Т.контр. Лист 1 Листов 1 Нач. КБ "AEROS" Combat09-12.8/13.2/13.7/14.2/14.9 Н.контр. Утв. корневое АПУ Копировал Формат А3...
- Page 41 STL.101.005 CBT09.13.189.003.WD CBT09..191.000.AD DSC14B.193.000.AD CBT09..190.000.AD CBT09..189.000.AD Лит. Масса Масштаб Изм. Лист № докум. Подп. Дата Keel Tube Assembled (Килевая труба СБ) Разраб. 2.40 10.02.10 Пров. Т.контр. Лист 1 Листов 1 Нач. КБ "AEROS" Combat09-12.8/13.2/13.7/14.2/14.9 Н.контр. Утв. килевая Копировал Формат А3...
Need help?
Do you have a question about the COMBAT-09 and is the answer not in the manual?
Questions and answers