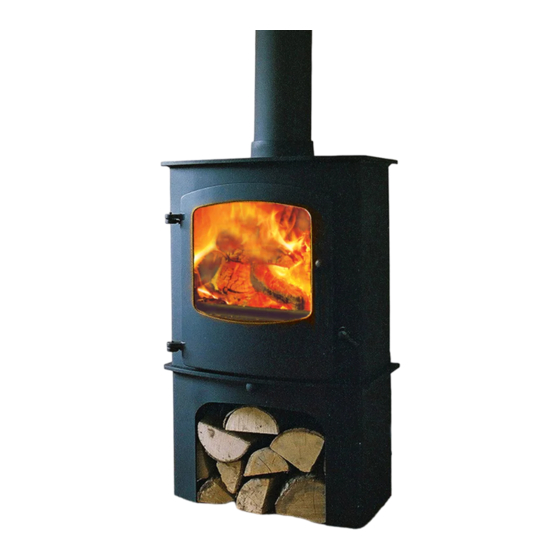
Charnwood COVE 2 Operating & Installation Instructions Manual
Hide thumbs
Also See for COVE 2:
- Operating & installation instructions manual (20 pages) ,
- Installation insrtuctions (20 pages) ,
- Operating & installation instructions manual (20 pages)
Table of Contents
Advertisement
Quick Links
Advertisement
Table of Contents

Related Manuals for Charnwood COVE 2


Summary of Contents for Charnwood COVE 2
- Page 1 ® charnwood Operating & Installation Instructions for Canada and USA...
- Page 2 PLEASE SAVE THESE INSTRUCTIONS FOR FUTURE USE SAFETY NOTICE PLEASE READ THIS ENTIRE MANUAL BEFORE YOU INSTALL AND USE YOUR NEW ROOM HEATER. FAILURE TO FOLLOW INSTRUCTIONS MAY RESULT IN PROPERTY DAMAGE, BODILY INJURY OR EVEN DEATH. IF THIS ROOM HEATER IS NOT PROPERLY INSTALLED, OPERATED AND MAINTAINED, A HOUSE FIRE MAY RESULT. TO REDUCE THE RISK OF FIRE, FOLLOW THE INSTALLATION INSTRUCTIONS.
-
Page 3: Table Of Contents
C O N T E N T S O P E R AT I N G I N S T R U C T I O N S Fuel Door Operation Multi Grate Lighting Controlling The Fire Riddling Refuelling Ash Clearance & Disposal Maintenance Creosote –... -
Page 4: Operating Instructions
MULTI GRATE required for fuel charging and ash removal. Your Charnwood Cove is fitted with a multi grate to enable wood to be burned and ash to be cleared. The grate has two positions:- PETROLEUM COKE IS NOT SUITABLE FOR USE ON THIS 1) In the open position the grate bars are vertical with gaps in APPLIANCE. -
Page 5: Lighting
OPERATING INSTRUCTIONS ® LIGHTING Fig. 2. Multi Grate The stove may be lit using dry kindling wood and paper or fire lighters. Set the grate into the closed position. Place the paper, or fire lighters, and kindling on the grate and cover with a few small dry logs. -
Page 6: Maintenance
Charnwood ash carrier . This may be purchased from your supplier or, in case of difficulty, from Charnwood. After long periods where the fire has been out of use, the chimney and appliance flueways should be cleaned before lighting. -
Page 7: Creosote - Formation & Removal
OPERATING INSTRUCTIONS ® DO NOT USE SUBSTITUTE MATERIALS. then the chimney should be swept one month after installation to clear any soot falls which may have occurred due to the difference in CREOSOTE – FORMATION AND NEED combustion between the stove and the open fire. -
Page 8: If You Need Further Help
IF YOU NEED FURTHER HELP It is also important that the chimney draw is sufficient and is not If you need further help with your Charnwood Cove then your Installer affected by down-draft. W hen the chimney is warm a draft reading of will be able to provide the answers to most questions. -
Page 10: Installation Instructions
If an existing chimney is to be used it must be swept and checked, it be sufficient fresh air supply to provide for both stove and fan and COVE 2 SPECIFICATION must be in good condition, free from cracks and blockages, and should not have an excessive cross sectional area. -
Page 11: Hearth & Fire Surround
INSTALLATION INSTRUCTIONS ® Fig. 7. Clearances from Combustible Materials HEARTH AND FIRE SURROUND Fig. 5. Floor Protector - USA CORNER INSTALLATION BACK WALL / SIDE WALL (152mm) (152mm) (1016mm) (406mm) DIMS Single 19" 17" 23" 15" 12" 24" (864mm) -
Page 12: Chimney Connections
INSTALLATION INSTRUCTIONS ® Fig.9. Clearances from Wooden Fire Surrounds Fig.10. Connection through a combustible wall Non Combustible wall with non Minimum chimney clearance to brick combustible supports and combustibles 2 in. (51 mm) 10" Maximum Soot Minimum clearance overhang Door 12 in. -
Page 13: Commissioning
INSTALLATION INSTRUCTIONS ® Fig. 12. Chimney Connection above the Fireplace Fig. 16. Flue Blanking Plate. Masonry Chimney Back of Stove Thimble Blanking Plate Clamping Plate M8 Nut Glass Fibre Webbing Metal Closure Blanking Plate Plate With Soot Door Clamping plate finishes flush with inside face of firebox top and bottom. -
Page 14: Dimensions
INSTALLATION INSTRUCTIONS ® appliance up the chimney and emitted safely. Also check all joints and seals. On completion of the installation and commissioning please leave the operating instructions with the customer and advise them on the use of the appliance. -
Page 15: Parts Lists
# Please specify colour when ordering.” This drawing is for identification purposes only. charnwood charnwood BISHOPS WAY, NEWPORT, ISLE OF WIGHT PO30 5WS, UNITED KINGDOM T:+4 4 (0)1983 537799 • F:+4 4 (0)1983 537788 • SPARES@CHARNWOOD.COM • WWW.CHARNWOOD.COM ®... - Page 16 BISHOPS WAY, NEWPORT, ISLE OF WIGHT PO30 5WS, UNITED KINGDOM T : + 4 4 ( 0 ) 1 9 8 3 5 3 7 7 7 7 • F : + 4 4 ( 0 ) 1 9 8 3 5 3 7 7 8 8 • C O N T A C T U S A T W W W . C H A R N W O O D . C O M ®...