Table of Contents
Advertisement
Quick Links
Advertisement
Table of Contents

Related Manuals for Charnwood BAY 5


Summary of Contents for Charnwood BAY 5
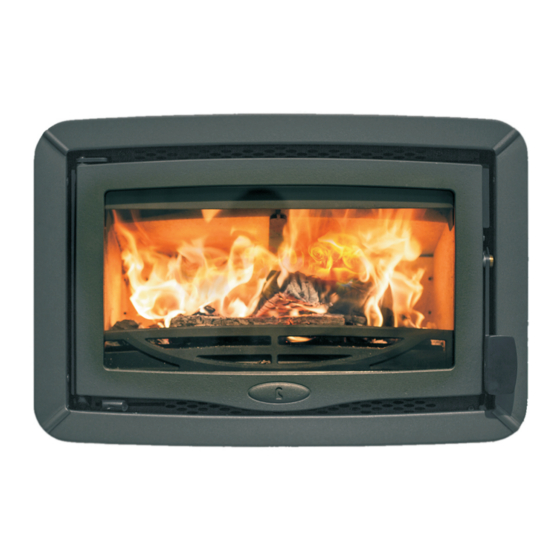
- Page 1 ® charnwood BAY 5 Operating & Installation Instructions...
-
Page 3: Table Of Contents
Health and Safety Precautions Air Supply CO Alarms Chimney Specification Hearth and Fire Surround Preparation of Fireplace Fitting the Stove and Flue Pipe 12-14 Pre-lighting Check Commissioning CAA and Smoke Control Dimensions Parts Lists Certification Ref. BAY 5 v3 1.14... -
Page 4: Quick Guide
QUICK GUIDE Your Charnwood at a glance ® Throat plate Improves efficiency of stove by slowing down flue gases. See page 8 for how to remove Door Keep closed while stove is in use Door handle Pull up to open... -
Page 5: General
This stove is not designed to burn household waste. For advice on CONTROLLING THE FIRE other fuels, please contact Charnwood. The rate of burning and hence the output is controlled by the air This appliance has been approved by HETAS as an intermittent control (see Fig. -
Page 6: Lighting
OPERATING INSTRUCTIONS ® Fig. 5 Adding larger logs LIGHTING On initial lighting, the stove may smoke and give off an odour as the silicon paint with which the firebox is painted reacts to the heat. This is normal and will cease after a short time, but meanwhile the room should be kept well ventilated. -
Page 7: Refuelling
Let the fire out and ensure it is cold before carrying out these operations. If Cleaning the Glass necessary, wear your Charnwood gloves to prevent irritation from The glass in the door is a special ceramic glass which is able to soot deposits. -
Page 8: Chimney Sweeping
OPERATING INSTRUCTIONS ® Fig. 7 Throat plate position and lowering towards the topmost corner of the stove, and lower down diagonally (see Fig. 7). Any sooty deposits should then be swept from the plate Push upwards and into the fire. -
Page 9: Troubleshooting
If blackening of the glass still occurs check that all flue connections If you need further help with your Charnwood then your Installer will and the blanking plate are well sealed. It is also important that the be able to provide the answers to most questions. -
Page 10: Installation Instructions
INSTALLATION INSTRUCTIONS ® HEALTH AND SAFET Y PRECAUTIONS CO ALARMS Please take care when installing the stove that the requirements of Building regulations require that whenever a new or replacement the Health and Safety at Work Act 1974 are met. -
Page 11: Hearth And Fire Surround
INSTALLATION INSTRUCTIONS ® Fig. 8 Minimum Distances from Combustibles Fig. 10 Limiting Dimensions of Surround and Opening Mantelpiece 700mm Dimension A: 190mm Dimension B: 300mm Dimension C: 900mm 600mm Dimension D: 350mm From centre of glass into room Hearth... -
Page 12: Fitting The Stove And Flue Pipe
INSTALLATION INSTRUCTIONS ® 1. Attach flue collar to length of flexible flue liner FITTING THE CONVECTION CASING, STOVE AND FLUE PIPE Upper flue collar Flexible flue liner It is recommended to have a layer of insulation between the casing... - Page 13 INSTALLATION INSTRUCTIONS ® 4. SECURE THE CASING TO THE WALL Secure the casing in the opening by inserting screws, as shown on the diagram. The stove can be screwed down through the base or through the sides as required.
- Page 14 INSTALLATION INSTRUCTIONS ® 8. SECURE THE FLUE ADAPTORS Flue pipe Working through the stove, line up the inner flue collar to meet the upper flue collar, carefully easing the ends of the coach bolts Convection casing through the holes. Fit the nuts onto the ends of the coach bolts and Upper flue collar tighten.
-
Page 15: Pre-Lighting Check
INSTALLATION INSTRUCTIONS ® 3. Check that the front fence is fitted correctly and that the door Fig. 12 Fitting the optional base assembly closes properly. Top Trim Piece Convection Casing COMMISSIONING Side Trim Piece On completion of the installation allow a suitable period of time for the fire cement and mortar to dry out before lighting the fire. -
Page 16: Dimensions
Bay 5 DIMENSIONS (mm) ® FRONT VIEW BACK VIEW ø158 (for a 6" flue) ø100 PLAN VIEW SIDE VIEW NB: Door extends a maximum of 573mm from front of stove when open. FRONT VIEW WITH FIREPLACE TRIM... -
Page 17: Parts Lists
Model, Part No. and Description. In case of difficulty contact the manufacturer at the address shown. charnwood BISHOPS WAY, NEWPORT, ISLE OF WIGHT PO30 5WS, UNITED KINGDOM T:+4 4 (0)1983 537799 • F:+4 4 (0)1983 537788 • SPARES@CHARNWOOD.COM • WWW.CHARNWOOD.COM ®... -
Page 18: Certification
A.J WELLS & SONS LTD A.J WELLS & SONS LTD Bishops Way, Newport, Isle of Wight PO30 5WS, United Kingdom A Division of A.J.Wells & Sons Limited Registered in England No. 03809371 EN13229:2001/A2:2004/AC:2007 INSET APPLIANCES INCLUDING OPEN FIRES FIRED BY SOLID FUEL EC certificate of conformity no: XR-CPD-2014... - Page 20 BISHOPS WAY, NEWPORT, ISLE OF WIGHT PO30 5WS, UNITED KINGDOM T:+44 (0)1983 537777 • F:+44 (0)1983 537788 • CHARNWOOD@AJWELLS.CO.UK • WWW.CHARNWOOD.COM ® A D i v i s i o n o f A . J . W e l l s & S o n s L i m i t e d R e g i s t e r e d i n E n g l a n d N o . 0 3 8 0 9 3 7 1...
Need help?
Do you have a question about the BAY 5 and is the answer not in the manual?
Questions and answers